Lychgate

Lychgate wiki history, and some real world examples

I chose a rather fancy version largely to experiment with finding a way to do gothic tracery.
While it is strongly based on an original at Whiston it is not attempting to be an exact replica. Not least for the lack of ideal photos or dimensions, measurements. But further such that it could reasonably be included in any future early medieval and later scenes. Nothing in the construction of wood and stone, clay tiles, is outside that era capability. While much gothic style is later reproduction, it was a long past real style.


Loads still do, but core modeling is mostly done. Lots of work on the texturing and foreground filling, grass, plants, etc. to cover the ‘joins’.

12 Likes

So as the screenshot shows up, the church is a model too. However, just photogrammetry created. A local church with a Tudor era tower. I first (this week) went up and took an equilateral (HDRI style) image to use as the background. That failed to be possible to make distant enough, so the model could all be in render shot. The hdri thing world does not actually seem to be very adjustable without distortion.

So back up there and try from further away. That too did not work. Additional problems being the big trees on either side of the approach. A head on view rather limits the model presentation. Rethink required!

Back again and take photogrammetry usable photos of the front and slight side of the tower, entrance door, path. Hang about waiting for the sun to go behind clouds, for non shadowed images best for the process. :roll_eyes:

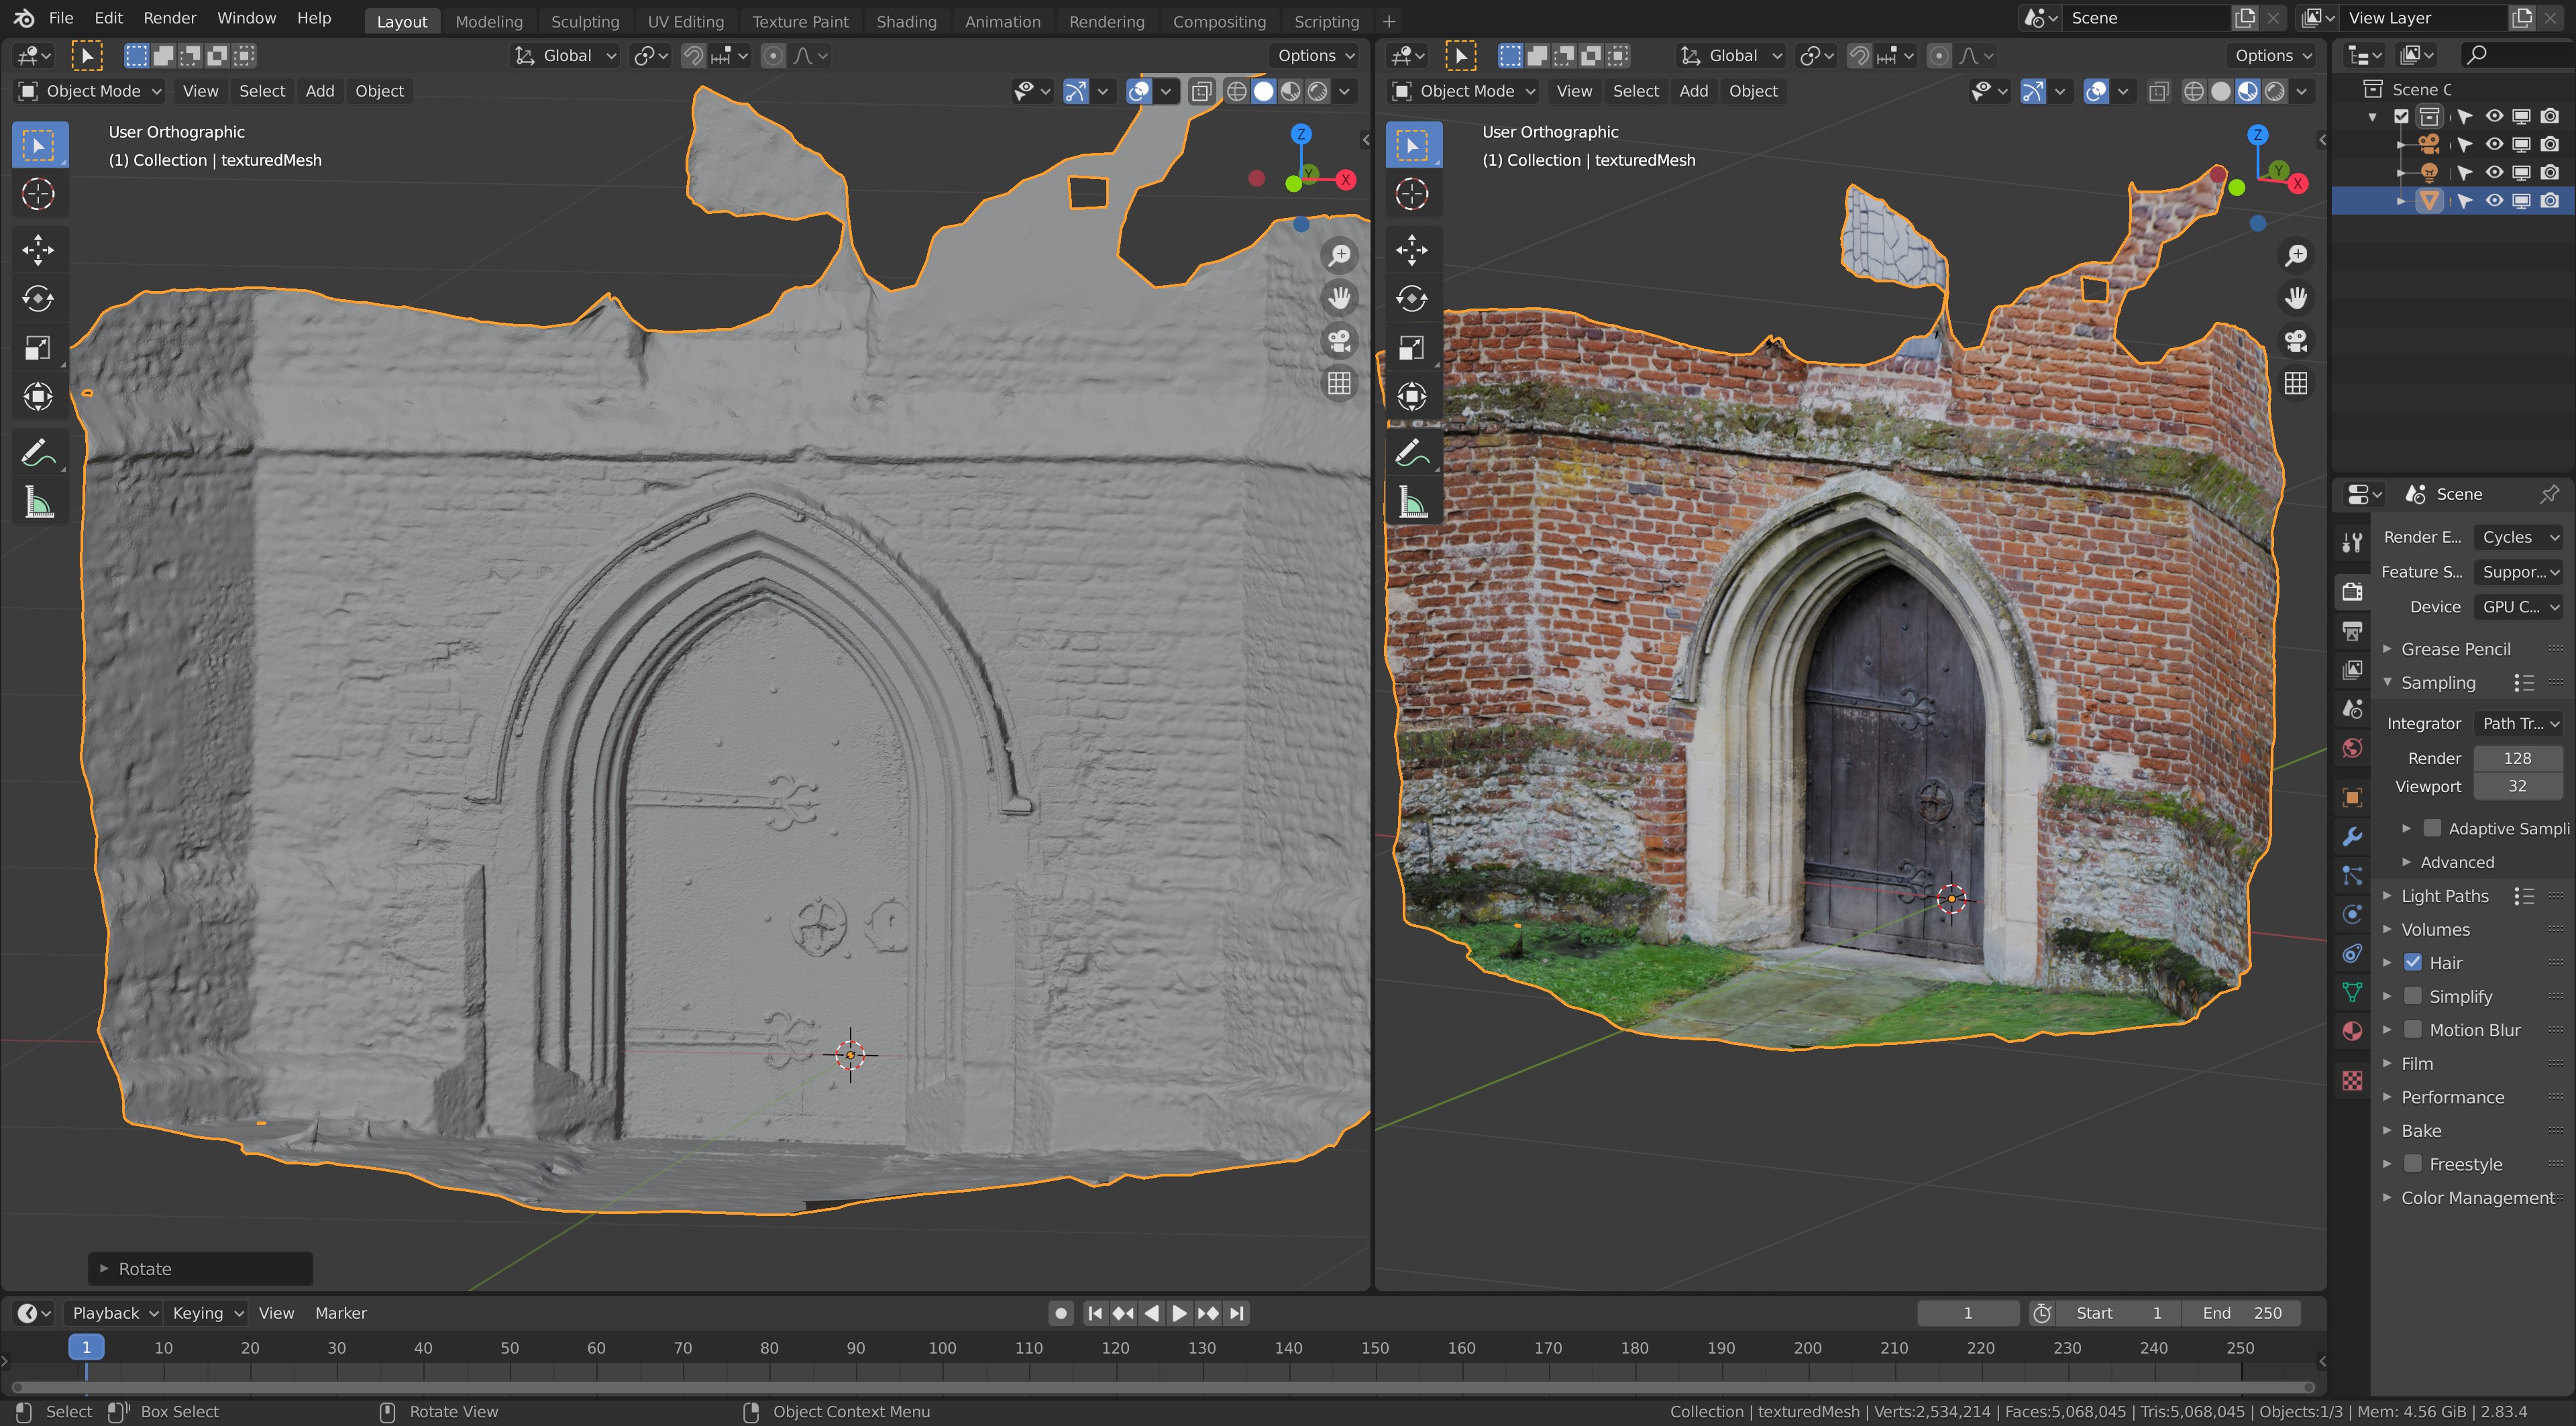
So throw the images into Meshroom. Leave it to chunter for many hours. Get the mesh out and tidy up all the rubbish bits only half calculated off to sides and in the distance. However, the big advantage is I also deleted the closer big tree trunks! To the right of the tower door, behind the fence, you can at the moment make out one ‘stump’. Hugely decimate the over a million vert mesh too.

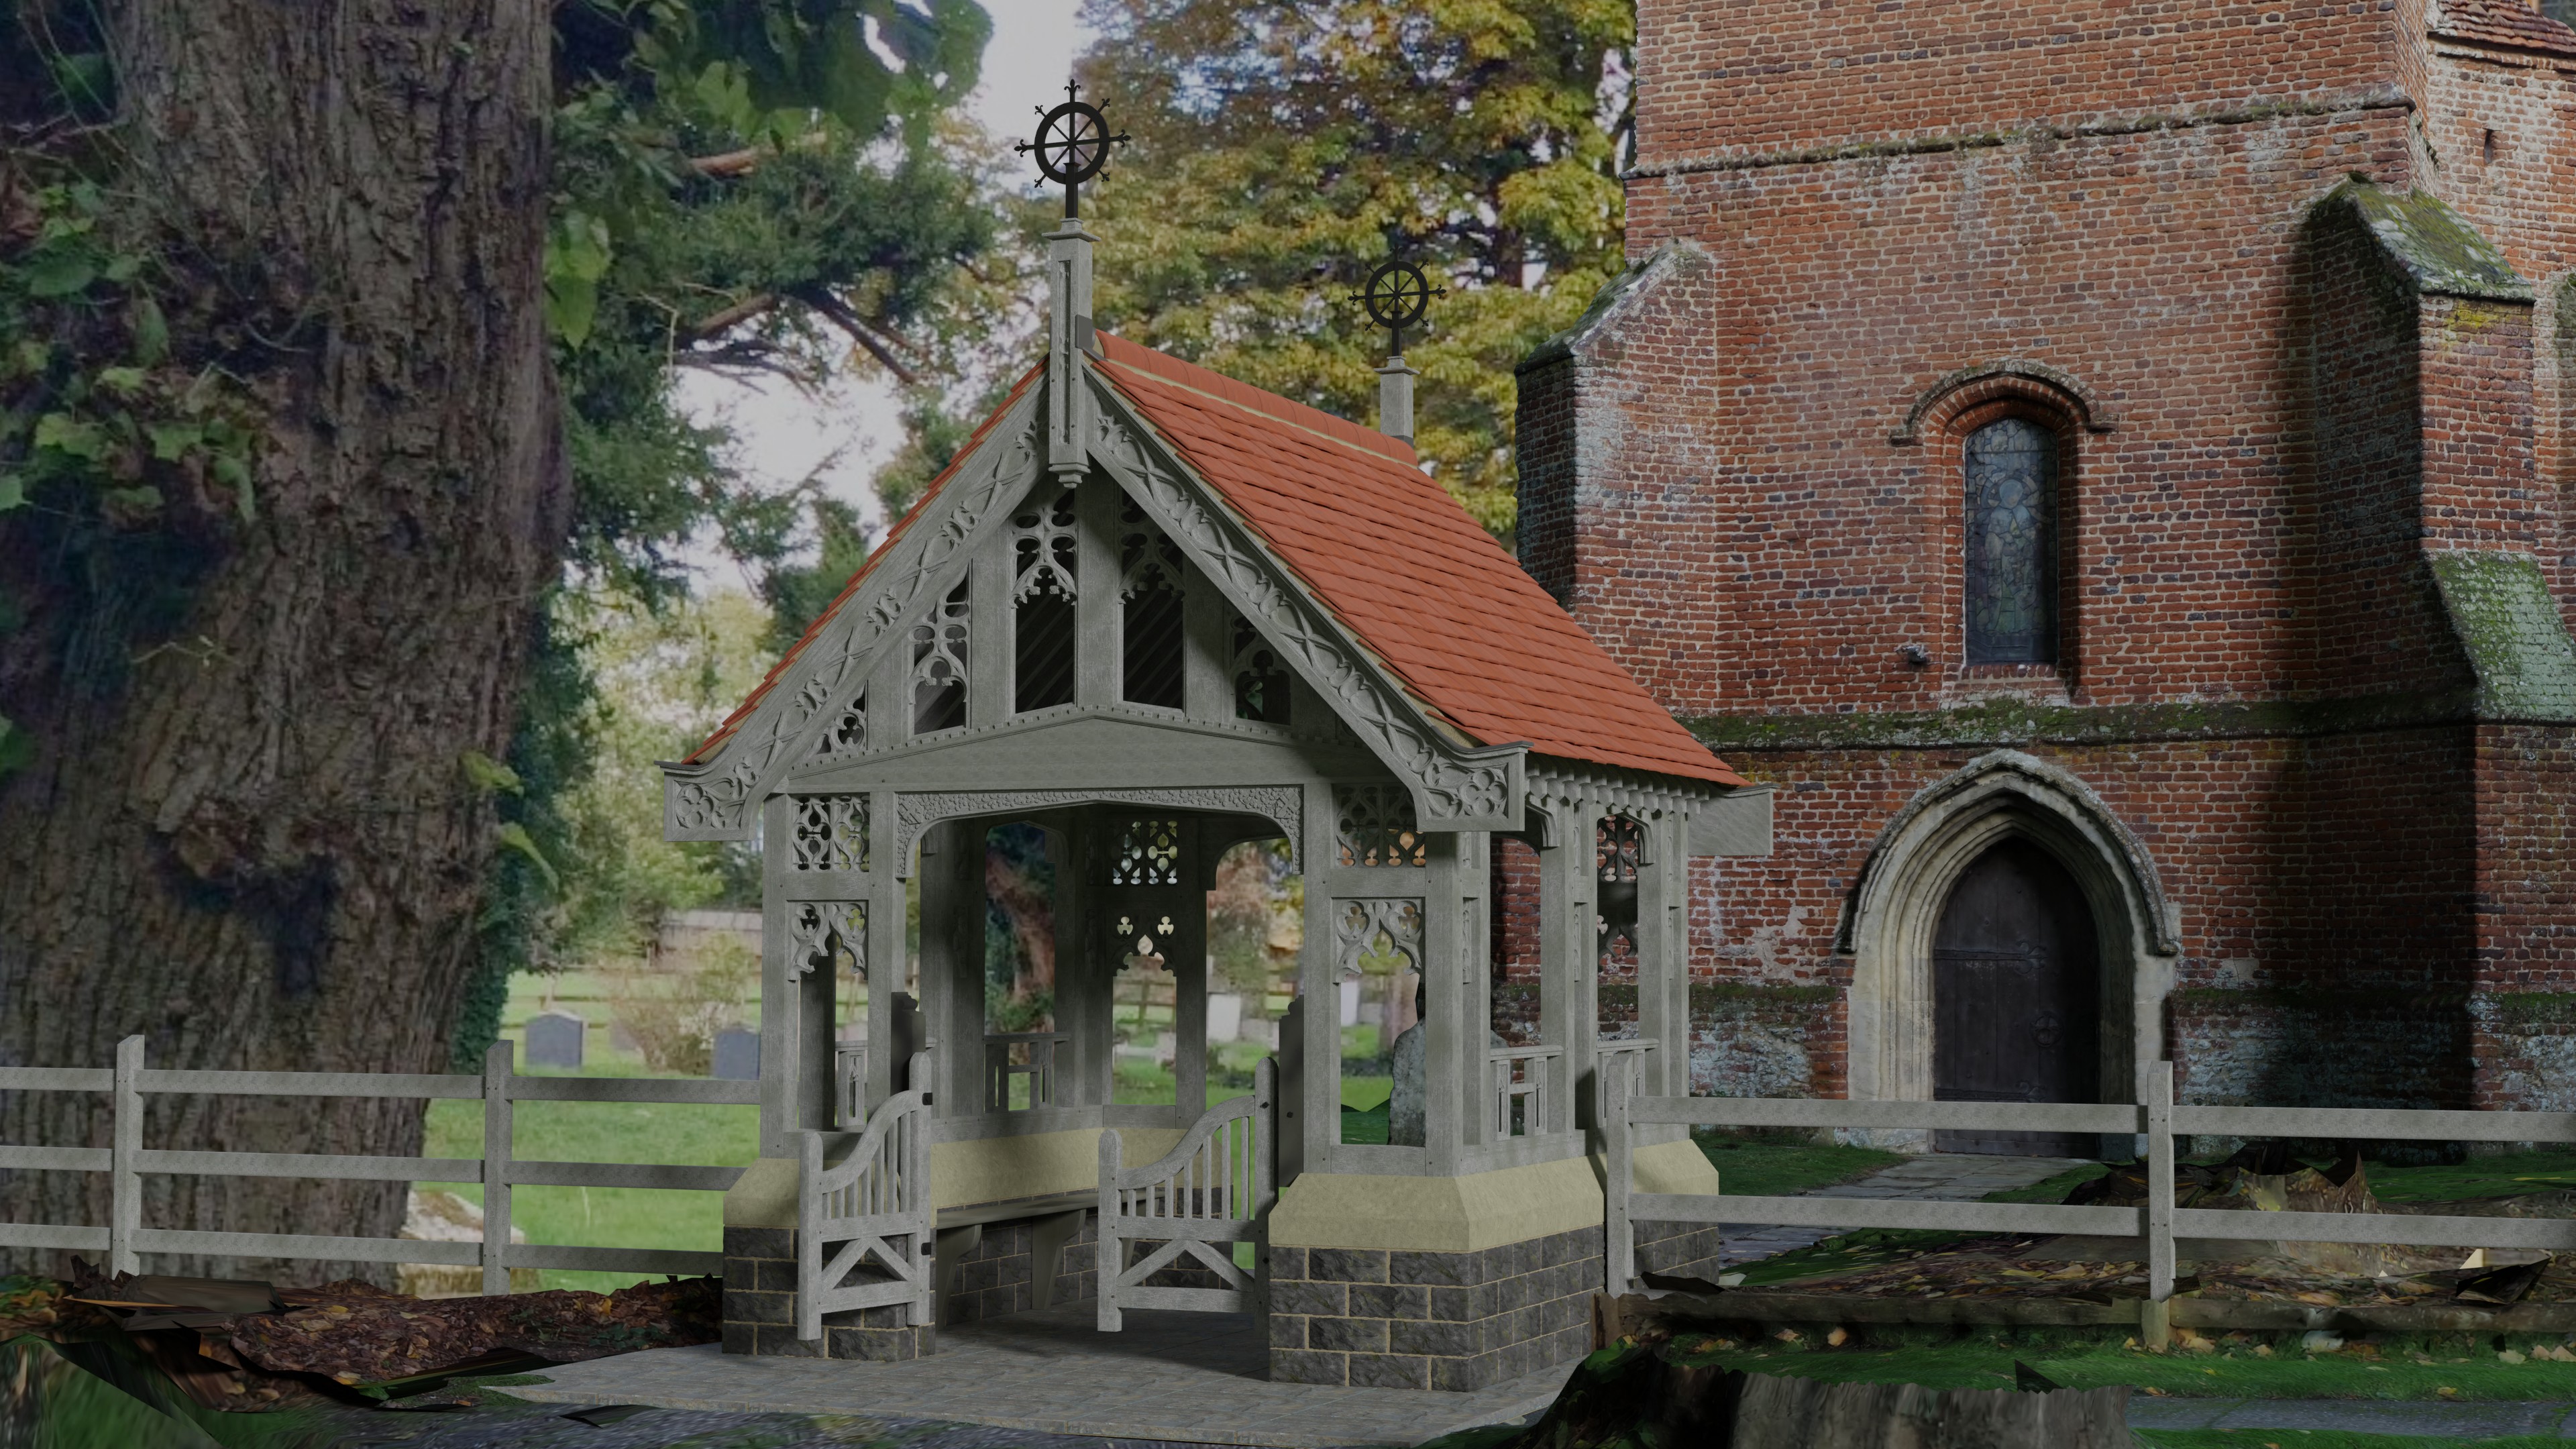
Fit and scale it all to fit my scene with my gate on the site of the actual totally ordinary fence like gate of real life. Again currently on the right, I have left some photogrammetry mesh of the real fence base area. Then add back the ‘HRDI’ I took as fill for the rest of the background, distorting it a bit to keep the tower hidden behind the new mesh of it.

Part Of the ‘hrdi’ problem is shown by that left side tree trunk, it is on the 'hdri.

(Any comment or critique, advice welcome)

2 Likes

Amazing project! Totally a different ball game! Great subject, read some wiki articles about these gates.
I totally forgot about ‘photogrammetry’. I think it was shortly discussed in the old course. Last chapter VFX.

In the rendered picture I saw some artefacts thinking of some kind of low details (church door archway), while it looks like high resolution. Then interpreting the mesh, it looked like a scan or generated. Like using a laser from a fixed point. It puzzled me a bit. But then I read about your project and everything became clearer to me. A massive (vertex count) project and a totally different ball game.
Looking at the generated mesh, all dents and crevices are softly generated, smoothed out. Exactly what I saw in the church door archway. It lacks some hard edges like in some form of roughness.

I love the high details and lifelike modelling. But photogrammetry also introduces some technical difficulties. I would even say, You’ve got a highly sculpted model. It’s now time to do retopology. Not sure if that’s your intention?

I like the church brickwork, love the mesh structure. But the photogrammetry wasn’t capable of showing details as stone mortar. I think some tricks in manipulating photo textures are also needed to upgrade the level of details.
As you mentioned by yourself, there is still a lot of work to be done. Especially if you are looking for near realism. That said, I think you are on the right track. Great achievement already!
For me personally a winner of the Week 40 competition.

1 Like

I only intend the church really as a setting, backdrop, to the modeled gate. As my photographic plane type easy options were not working. Hence not having made it better modeling wise. Come to that I could photogrammetry it much better. I did a version of just the door several months ago when I first started playing with the system. More photos, in more detail, better results. This was the first time I tried a whole, and tall, facade of a building, and path. Plus I was hurrying, lol. The day was sunny and you need not sunlit, but light conditions for it to work best. Or it ‘bakes’ in the lighting as it is when you take the pictures. The cloud cover was not long lasting, five mins probably.

I can always blur the church with depth of field a bit. Alternatively, Do a better scan, before modeling the building as close a fit as possible and just baking the textures to it just like any sculpt to lower res. For now I want to concentrate on the lychgate and its textures. I just noticed :man_facepalming:t3: 
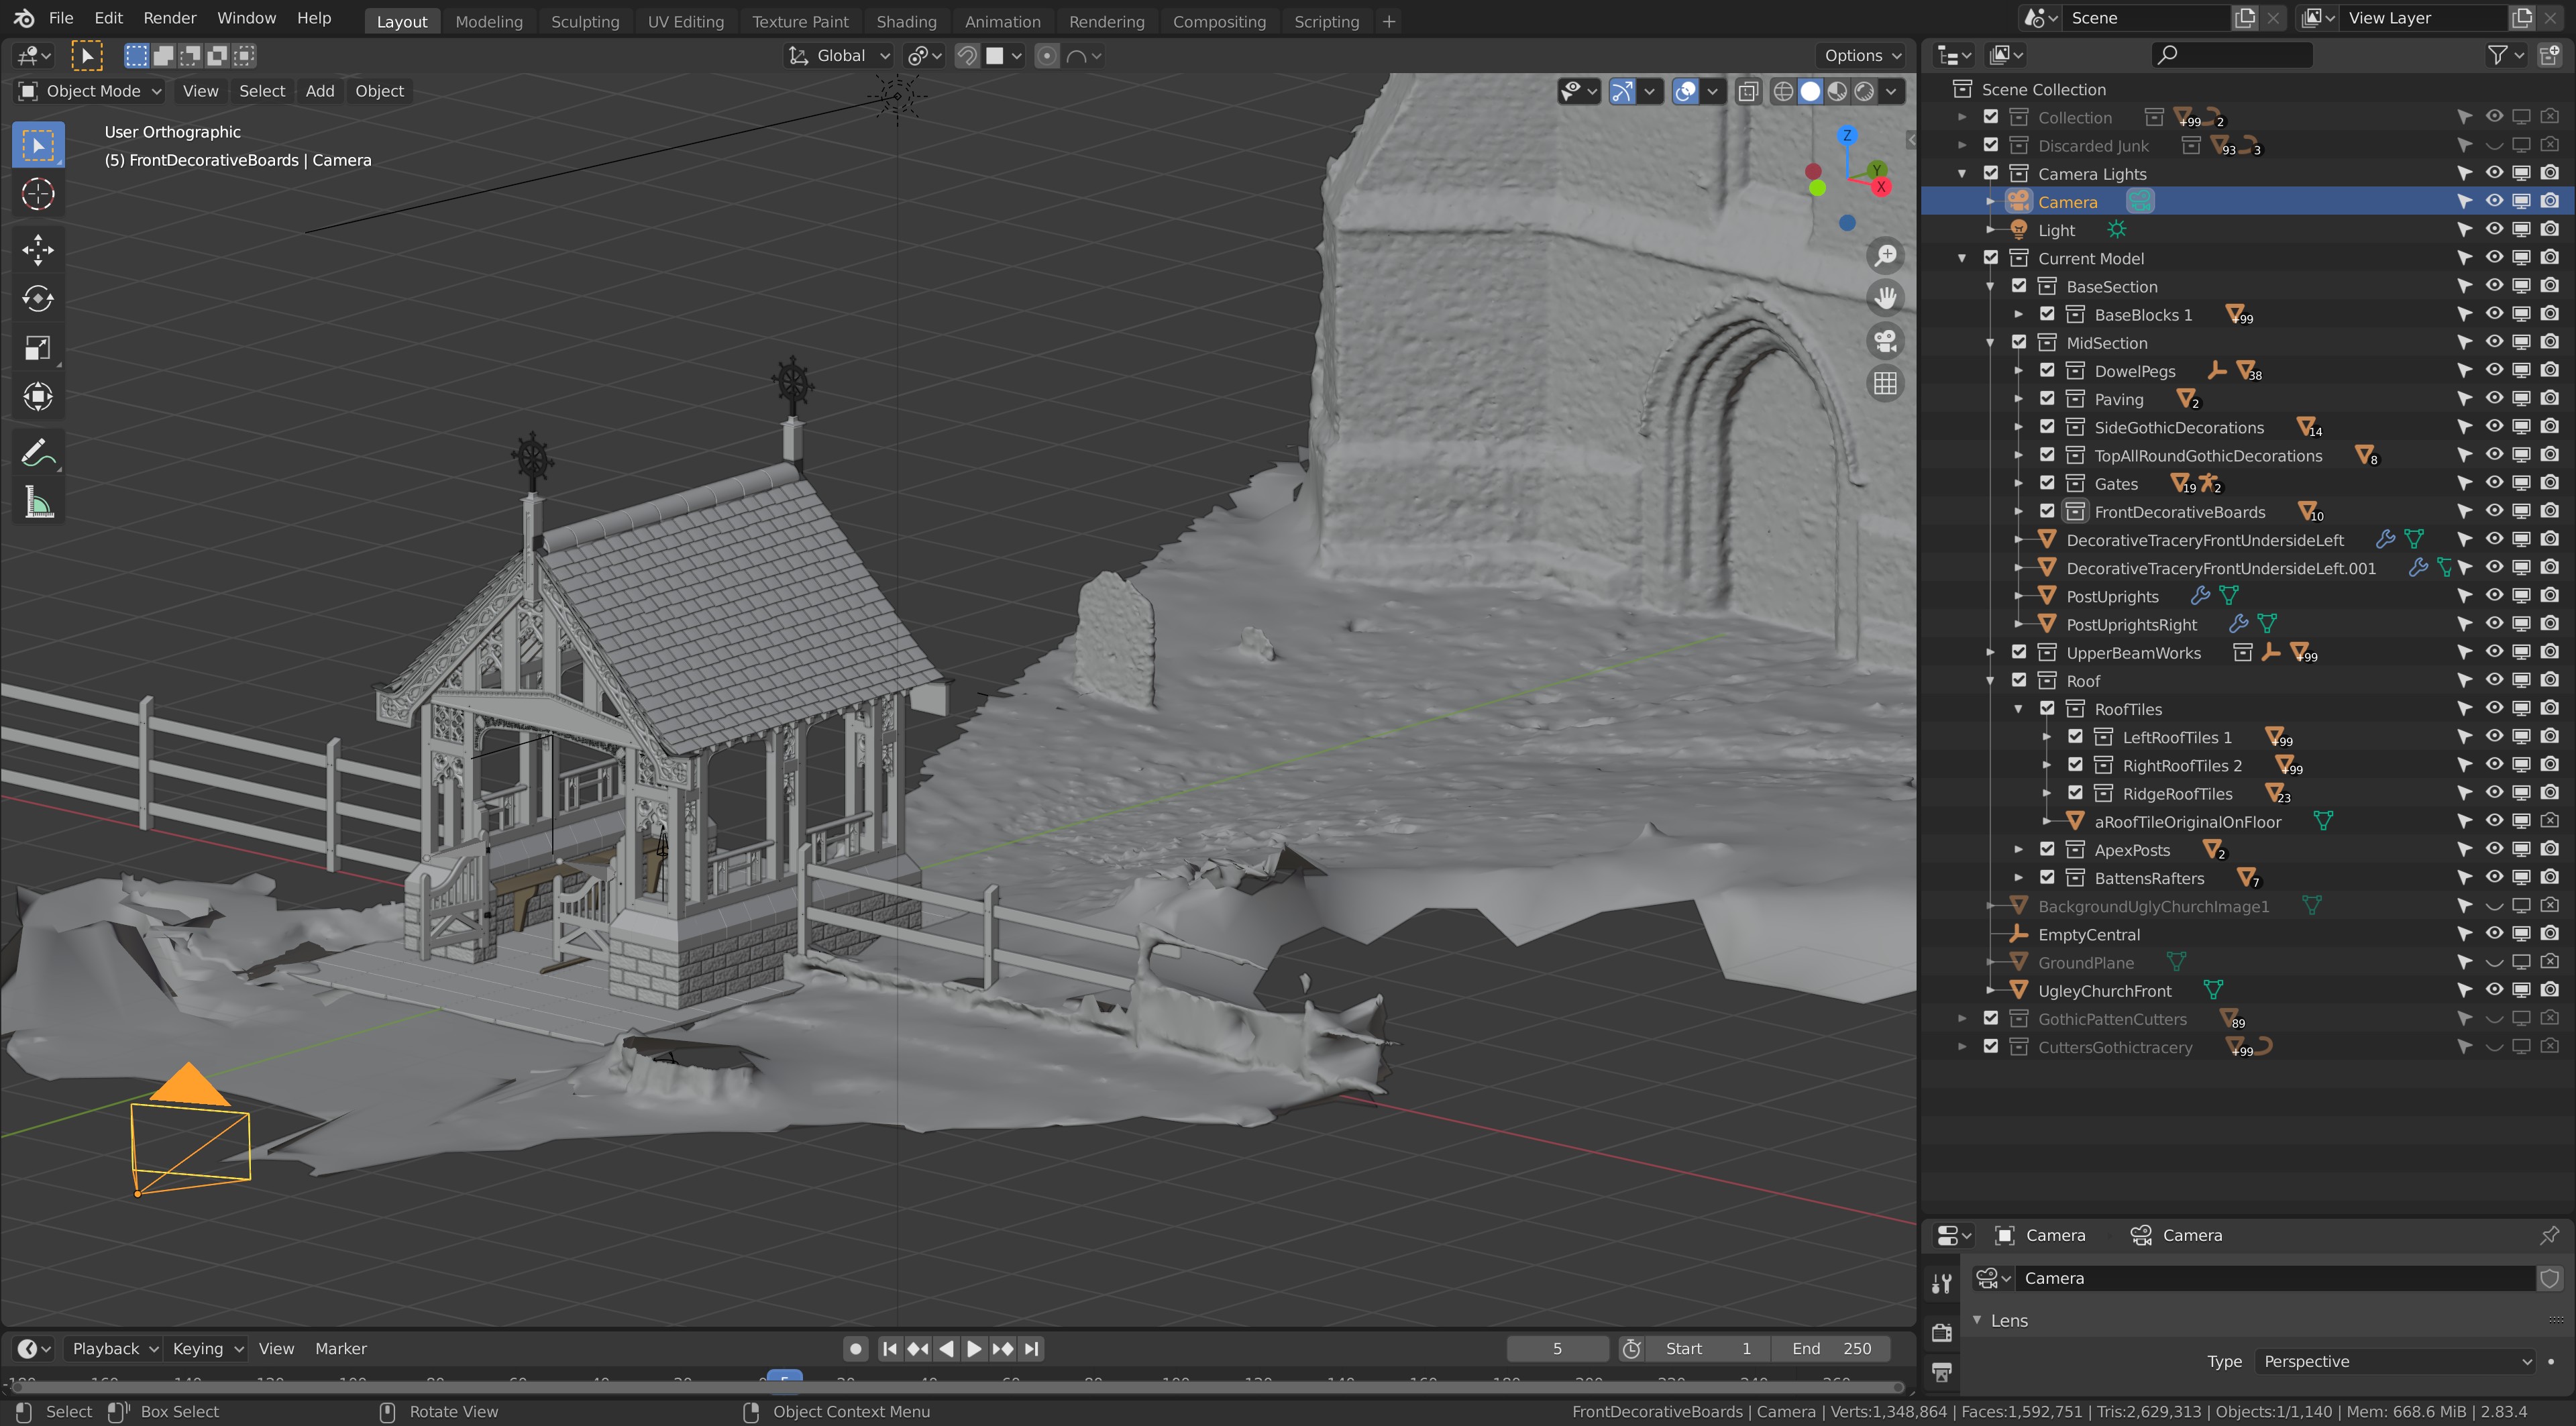
the posts that hold the little gates are using the wrong uv map, so are dark, bad, etc.

The current wood texture on the gate is one I made myself from a close up photo of the real fence, then cut square, evened out the variations in tone as best as I could, then tiled it, faked, cloned better, the moved edges joins, etc. Then spent an evening altering all the items UVs using it. The various on line ready made textures just never seemed to be suitable or intended to be outside constructional, what I assume is oak.

Here is a quick screenshot of the closer door only scan I did for comparison.

1 Like

I didn’t know you collected so much more data. Which makes the project even more bigger.
The archway, in detail, is now much better! Maybe build from this normal maps and project them on the big model. You can do the same for the gravestone.
You made me enthusiastic about this kind of 3D work. But also a difficult goal, realism. It is also amazing for me, to spends months on the same project. Than again the high quality is paying off.

Privacy & Terms