
After some struggle, I finally managed to render the scenes as I hoped. I also included some things after the videos that I think would benefit others. 
Left Side View:
Close Up:
Right Side View:
So, there were some things that I struggled with, and I thought it would be benefit others if I shared some of the lessons I learned through this experience:
Lesson 1: Do NOT use Booleans to create holes. You’ll get all sorts of a mess with geometry, and you’ll be pulling your hair out especially when you realize subdivision doesn’t work like it is supposed to. I followed a YouTube tutorial by Josh Gambrell that shows a much better process:
Result:
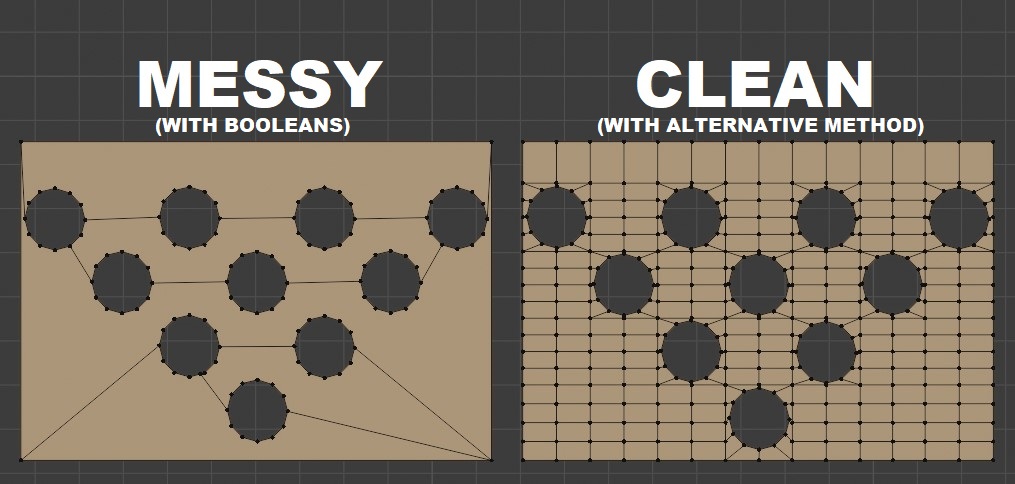
Remember: QUADS are your friend here.
Lesson 2: Render your first animations in the smallest, visible format possible, and check if your animation is going through properly. You’ll save a lot of time in the long run. My first render was in 1080p, took about 40 minutes, and when I watched it, I realized half the animations I worked on weren’t showing up in the videos, which brings me to the final lesson.
Lesson 3: Let your animations play out, and set up your Frame Start properly BEFORE rendering the animation. If you have frames that start at 0, make sure you Frame Start is at 0. It took me a few hours to realize that because I had objects with frame 0, they weren’t rendering properly in the video, and I ended up getting a scene like this:
Hope this helps some of you, and here is an extra scene of some stuff you cant see below the floor boards 

Edit:
Bonus Lesson: Your animations will break… a LOT. Don’t get discouraged. Just keep at it, tweak the settings as you see them in the lessons, and eventually you’ll get it. There are a good amount of animated segments in these videos, and it didn’t really click for me until I was almost done with this project. Don’t give up and persevere!

