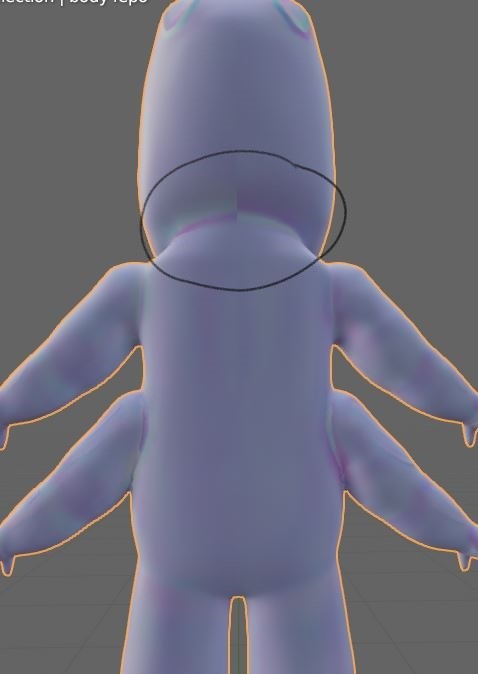
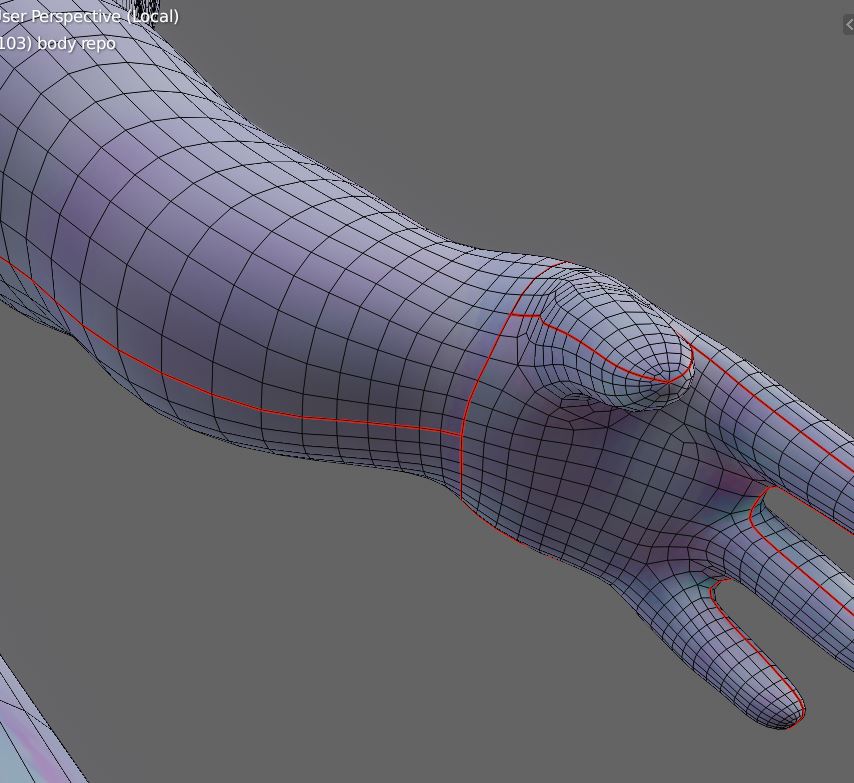
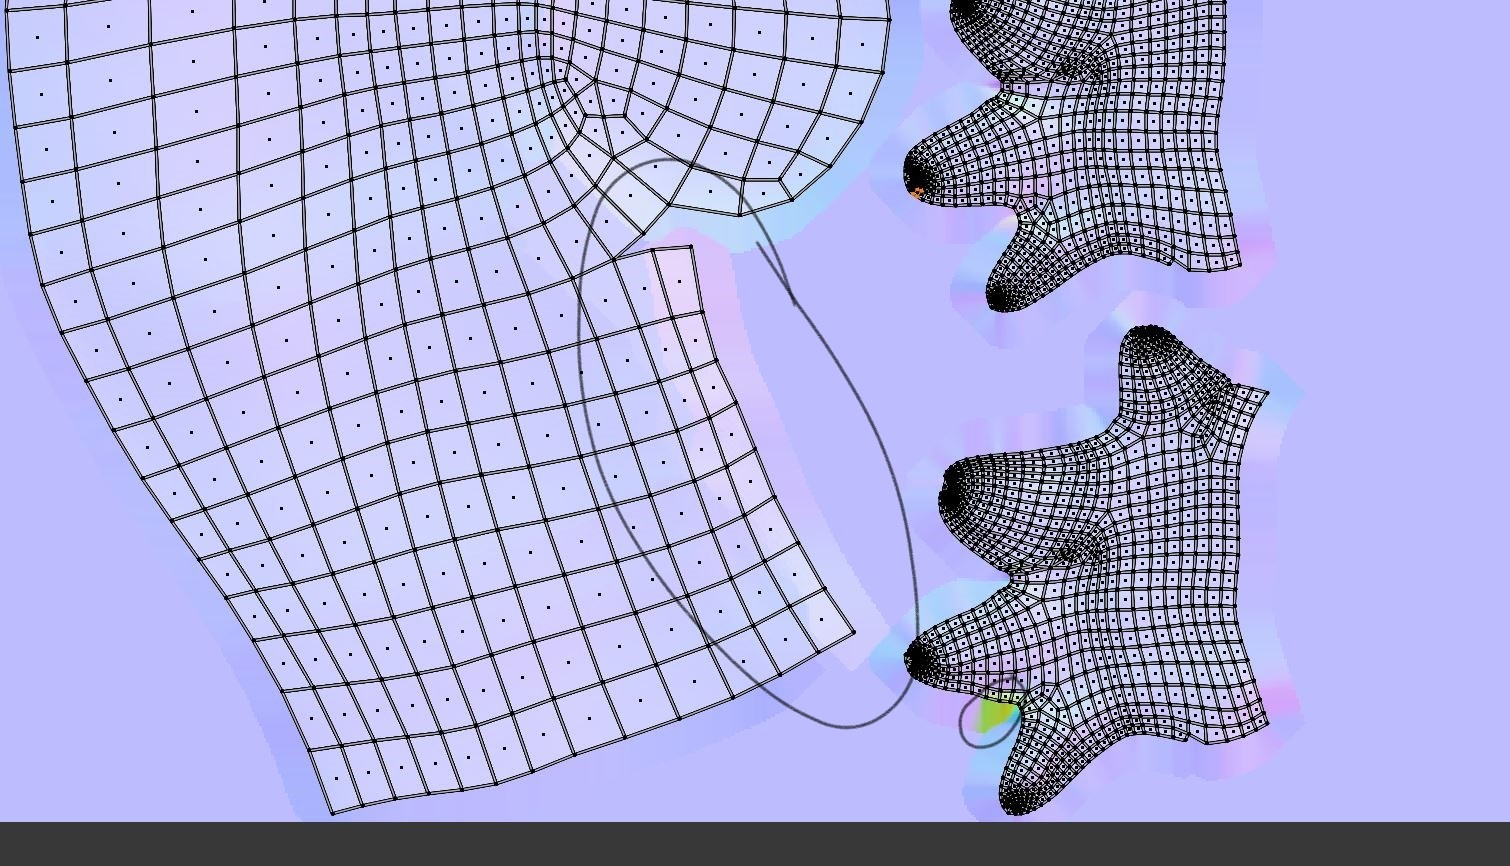
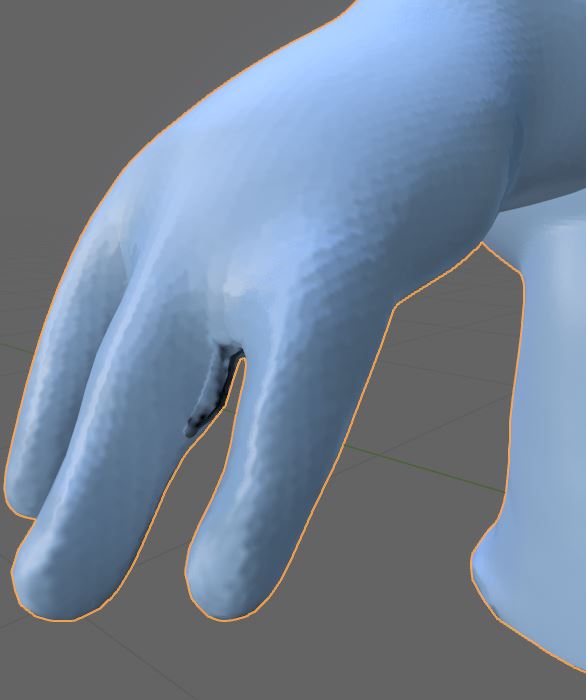
Hi guys, I tried different numbers for ray distance and extrusions but I couldn’t fix the normal map, is this a glitch that has to be fixed in photoshop, or is this a problem caused by mark seams?
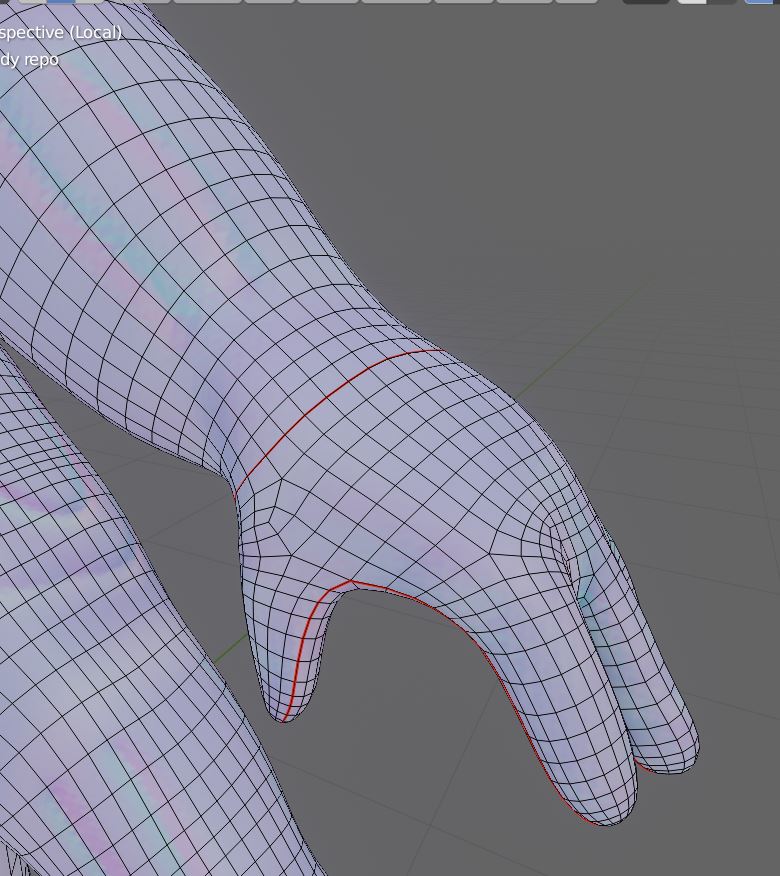
The margin in baking is 16, it works fine with other islands, only happens with the feet in the photo.
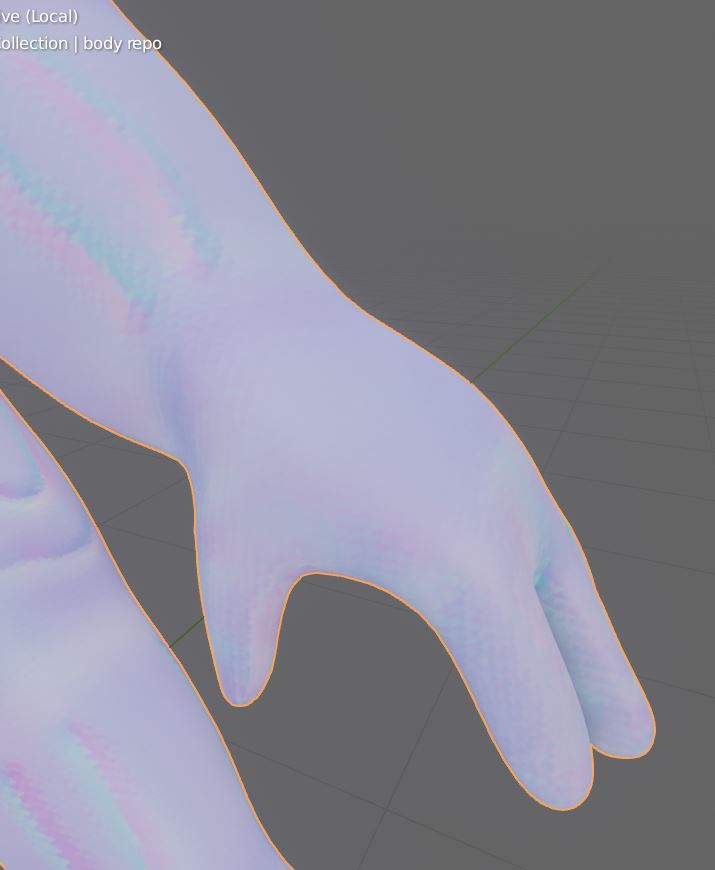
For flipped normals, do you mean face orientation? It’s all blue.
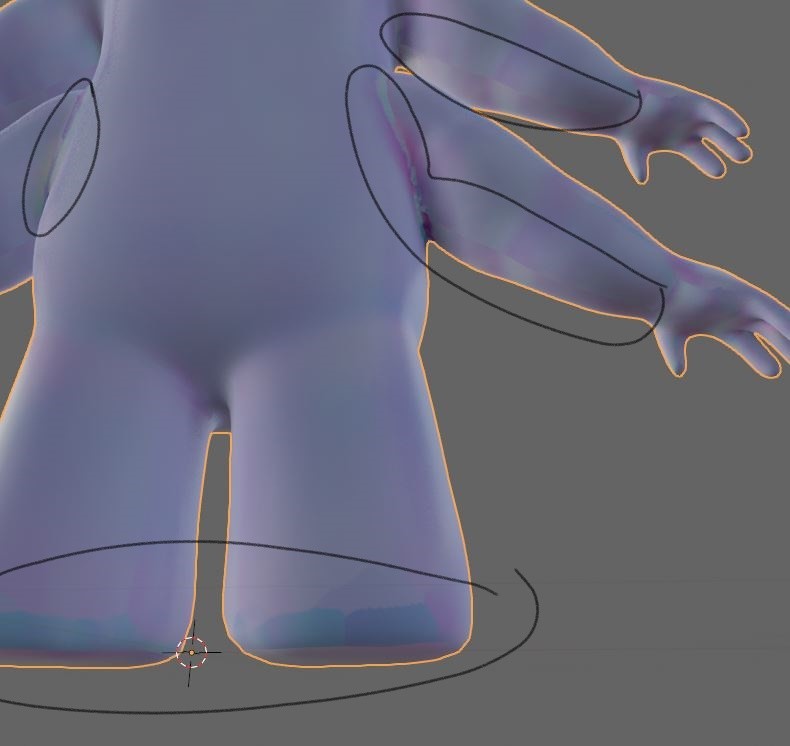
It is the seam glitching I think. I fixed the seams and the problems always occur with seams, most textures on the normal map don’t connect for some reason.
Could you show me how to point and check normal outside?
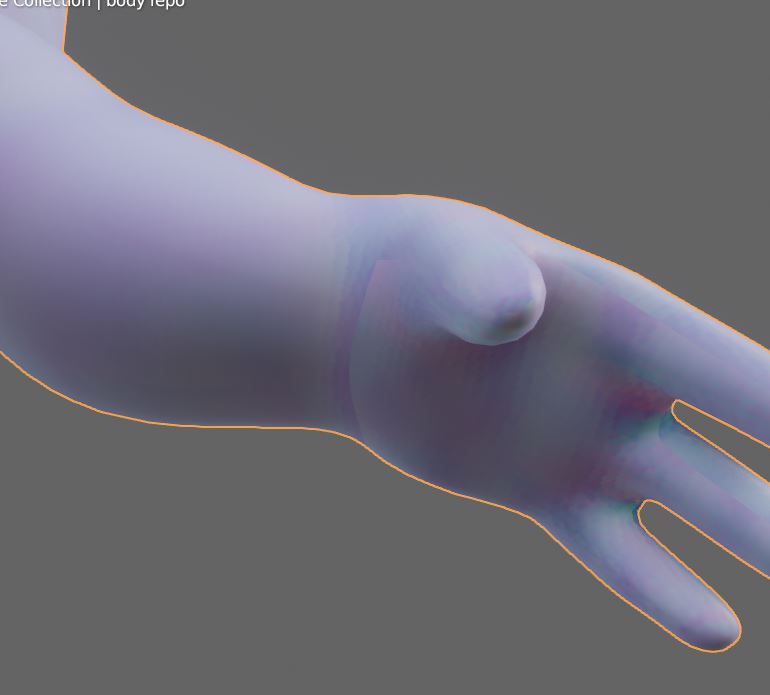
The parts that got glitches are the back of the foot, I also used mirror before mark seams and unwrap, I don’t follow you about the eyes, could you explain a bit clearer?
FIRST I would check if the normal map is actually working correctly.
This post on stack exchange gives a good visualization of how normal maps look when viewing the color data as if it were a color map. This can be misleading.
So, if you add a solid colour to the model and check how the light behaves on its surface (instead of looking at the normal map) can you still see a seam?
Most normal maps in any program look this way and perform perfectly fine when not looking at the normal map colour.
The reason for this is because the normal map is 2D and so the information is translated from 2D to 3D.
SECOND (if the problem persists)
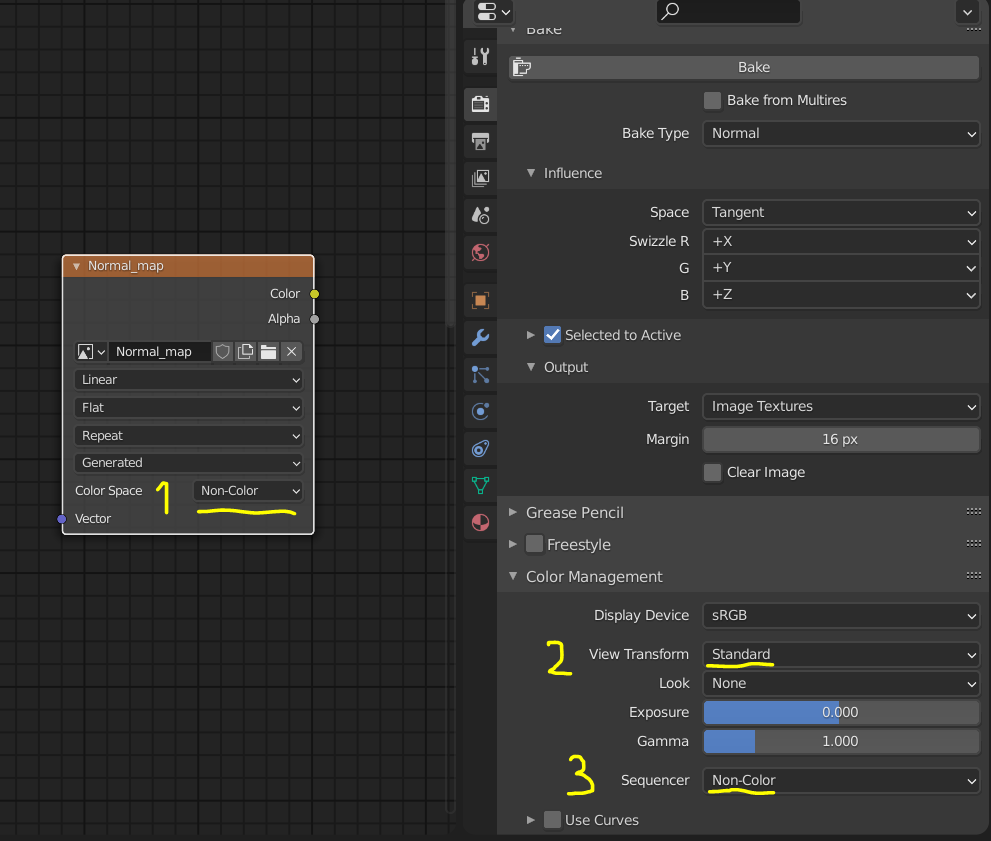
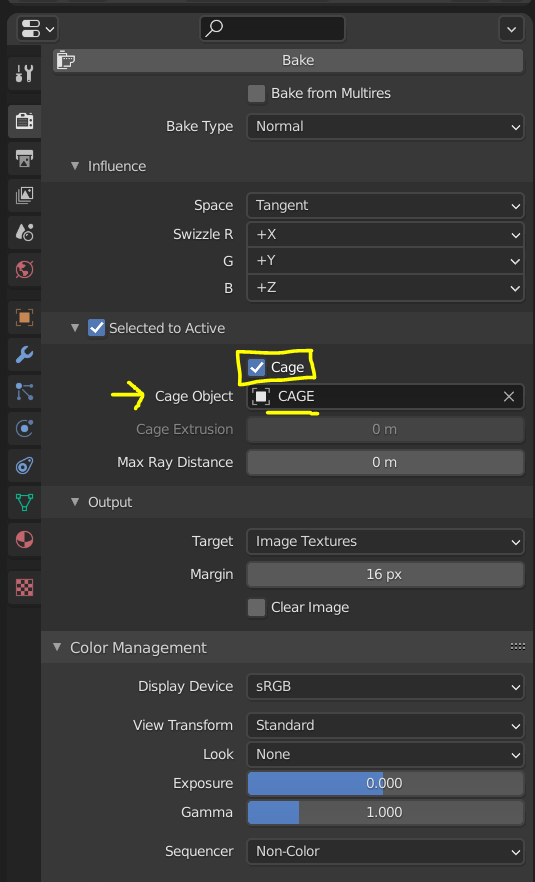
However, just to be safe check these settings here before baking:
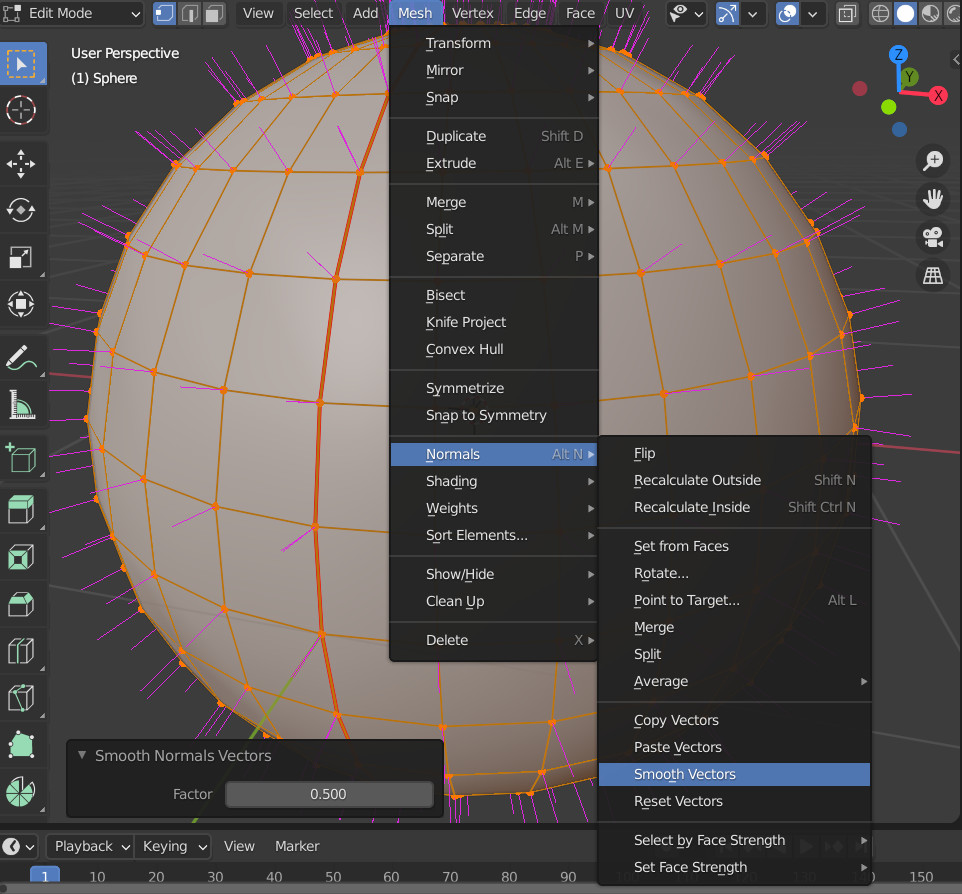
Smoothing the vectors of the normals will average out the normals of the vertices based on the closest vertex. Sometimes UV seams can cause edges to become hard so this can help sometimes.
I hope that sheds some light on the issue and I hope you find a solution if there’s a genuine problem.
Normal maps are not colour maps but data maps so there’s data there that you corrupt when you try to paint it. They can be painted, it does “fix” issues but there’s usually a better way. Painting it is never 100% accurate and it takes longer.
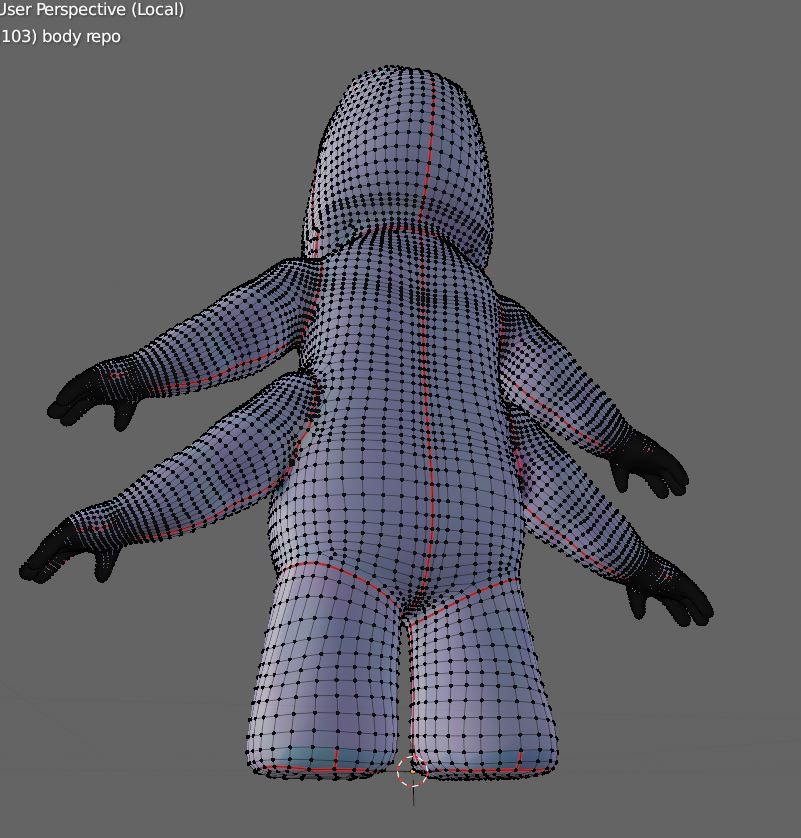
To get the best normal map, I’ve found that using a cage gets the best results in almost every circumstance.
To make a cage, simply duplicate the retopologized character mesh. -> “Shift+D”
Rename it to something like “CAGE” -> “F2” This opens the renaming dialogue box in the viewport.
Go into the cage’s Edit Mode and press “Alt+S” to scale it along the normals. This needs to just be big enough to completely cover all parts of the high polygon model/sculpt. Be mindful not to change anything of the geometry or the cage will be invalid (no adding or deleting faces).
Then under the bake settings, turn on the cage checkbox and select the new duplicate.
The Max Ray Distance is now not necessary so it can be set to 0 if you like.
So the instructions again for creating the cage but simplified.
֍ Select the retopologized mesh.
֍ Shift+D              (Duplicate it)
֍ F2,                  (Rename it)
֍ Tab to Edit Mode
֍ A                    (Select everything)
֍ Shift+A              (Scale until it covers every bit of the high poly).
֍ Exit back into Object mode.
Thank you very much, this helps a ton.
I have heard of cage but seeing most people use non cage so I just go with it, didn’t know cage would be this great!