Hi there,
Things work fine. However, the gradient for the “flat lands” vs “mountain range” differs a lot.
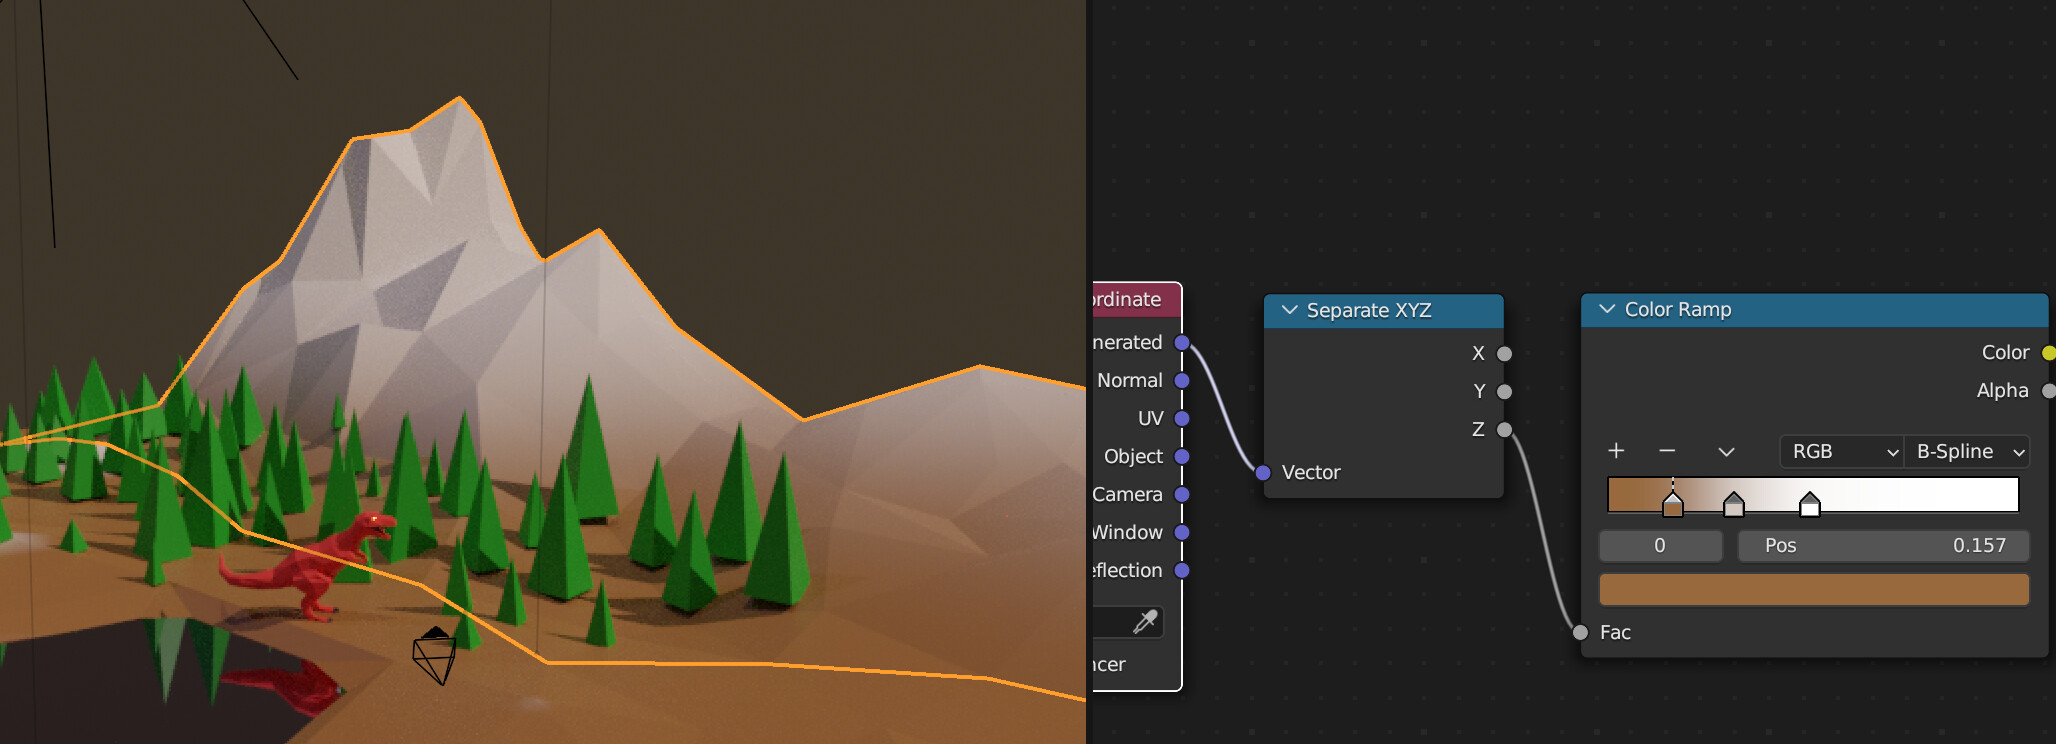
Gradient settings for the mountains,
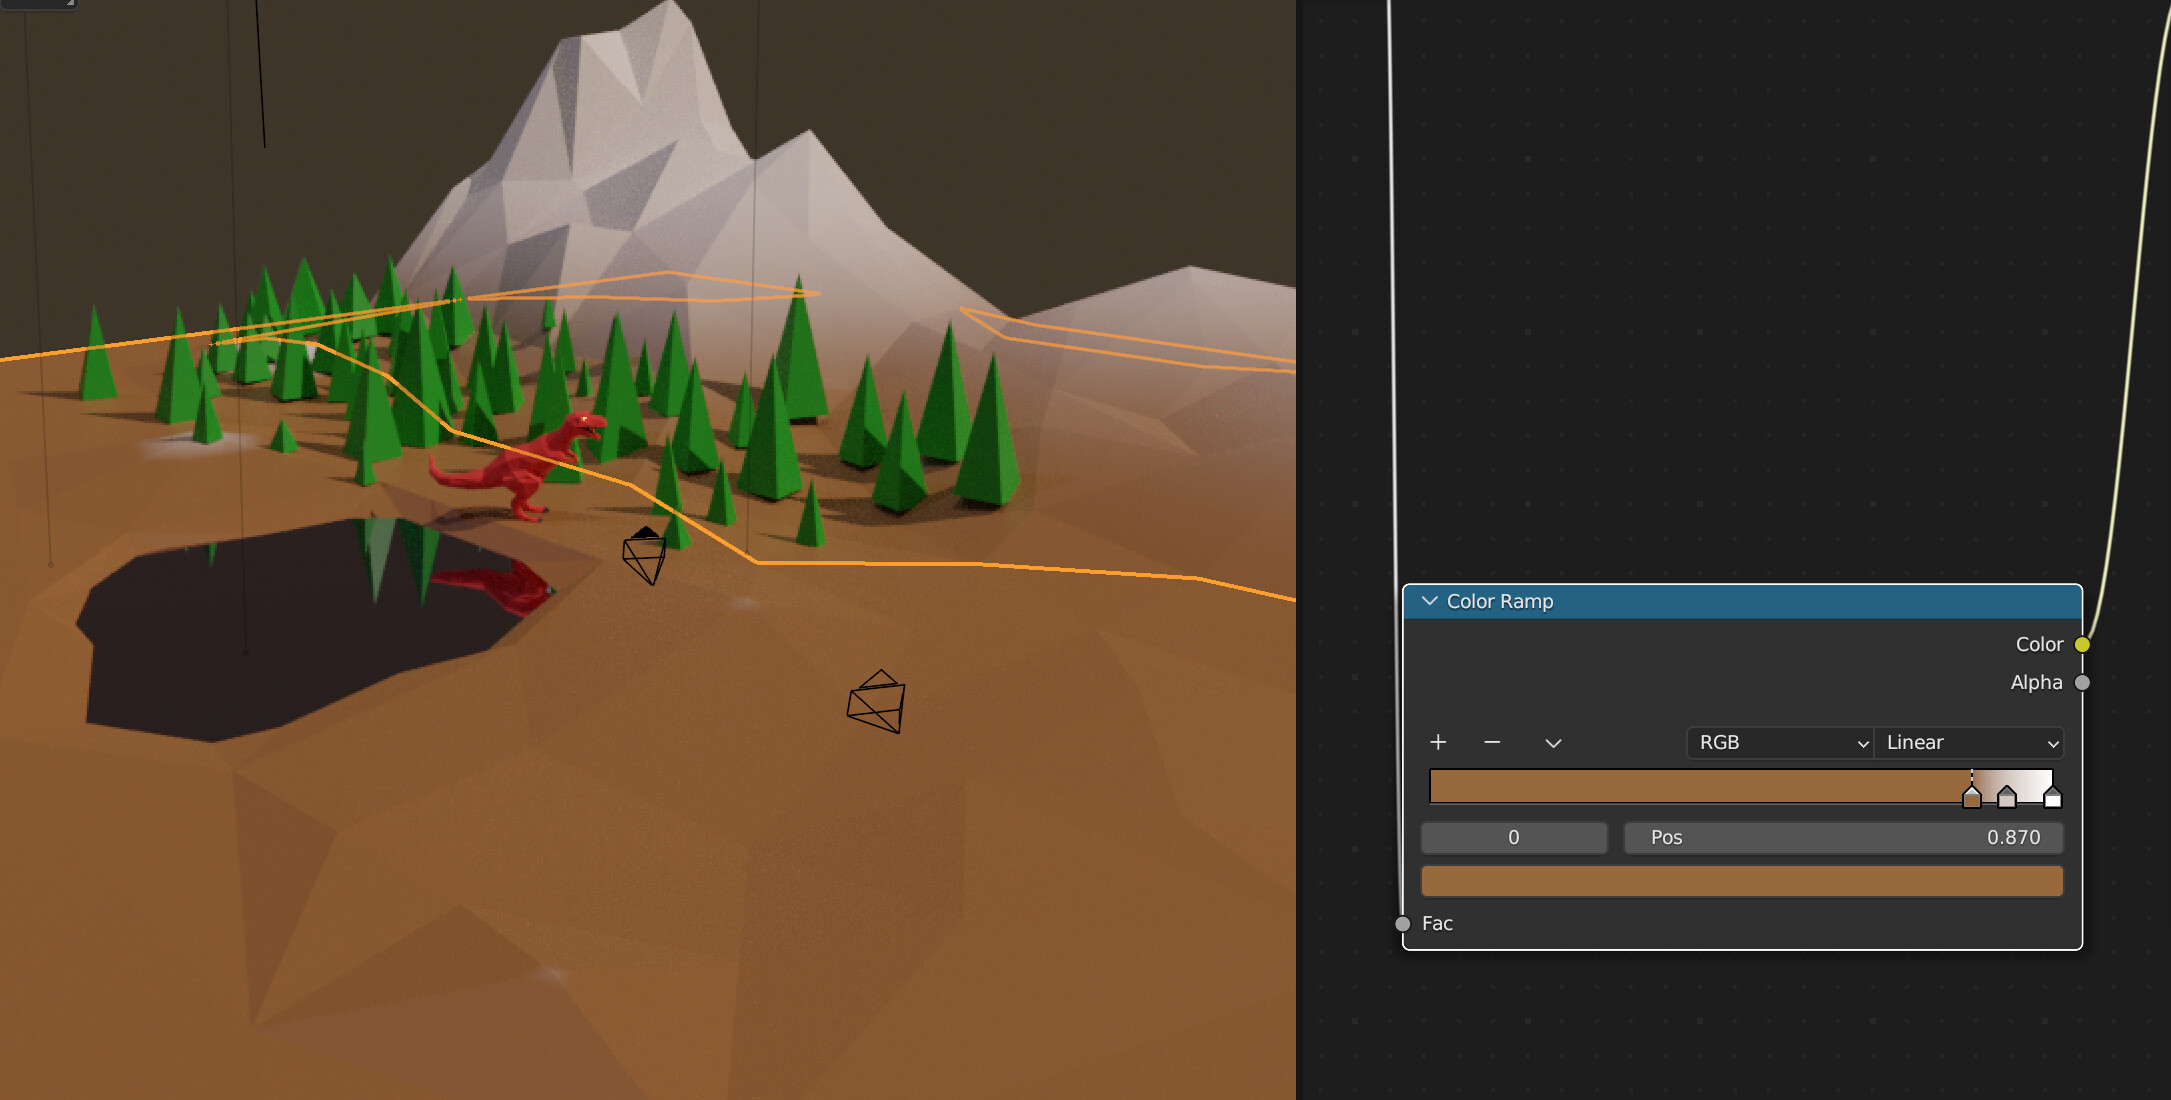
Settings for the flat lands. There is a negative geometry below the lake. Changing the lake’s depth didn’t make a significant difference. Also not between object or generated .
I assume the black to white gradient is based on an object’s dimension, width or height. To avoid seams between the two objects, can I use another object as reference height, for both landscapes? Or another node?
Hope this makes sense.
1 Like
This might partially answer my question
Change Linear to Ease in the colour ramp I find helps a bit.
Also try Generated rather than Object in the Mapping node.
When you use ‘Object’, the origin position affects the gradient position too.
In Layout, top right ‘Options’ dropdown. Tick Origins. So only the origin moves with the mouse. Move it up and down and you can see and adjust, if wanted, the position of the gradient on the object.
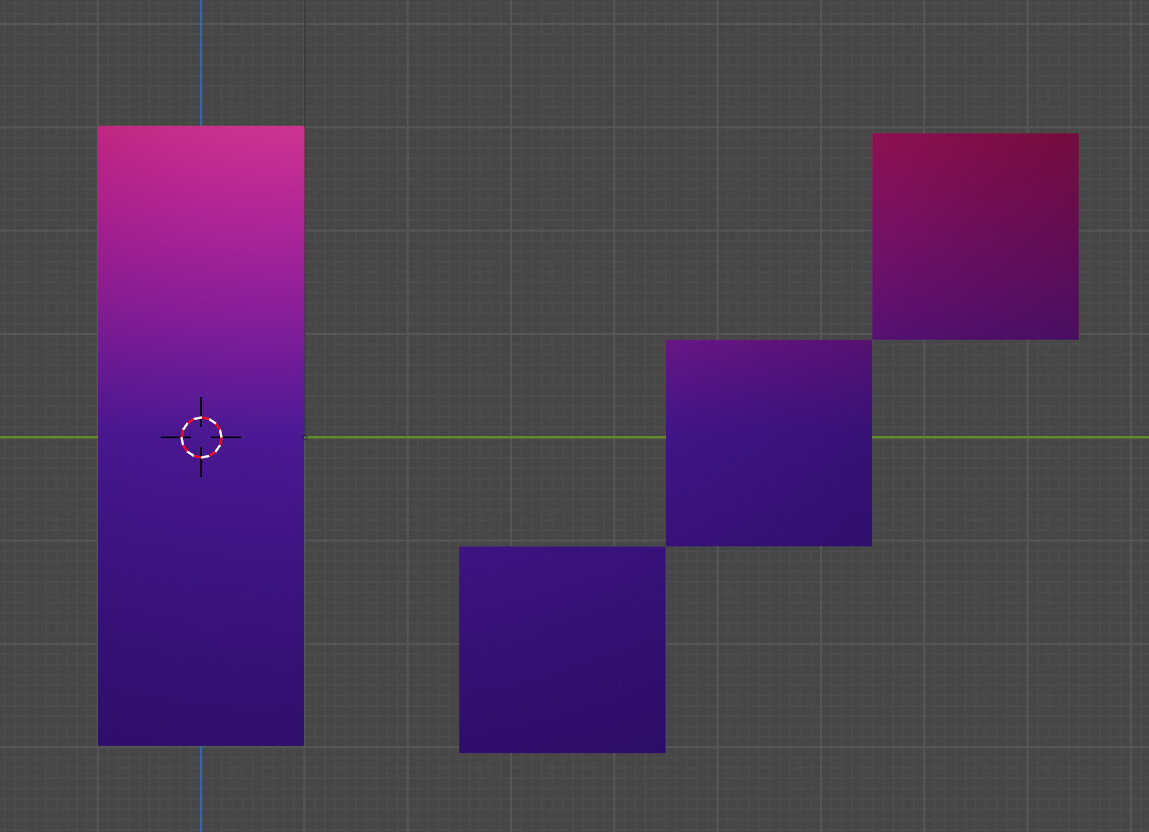
Examples below if that helps. Note the three different origin position’s effect on Object.
Object…
2 Likes
After fiddling around with the nodes, the answer to my original questions seems to be Yes.
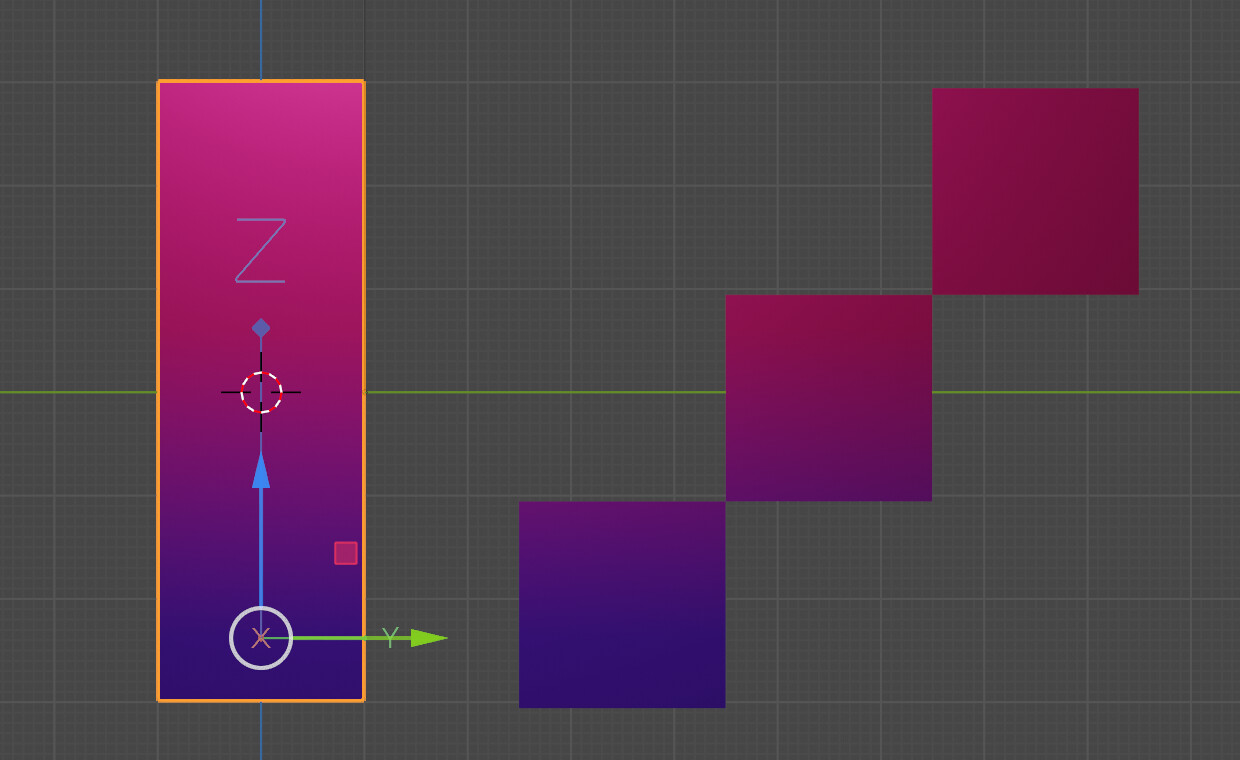
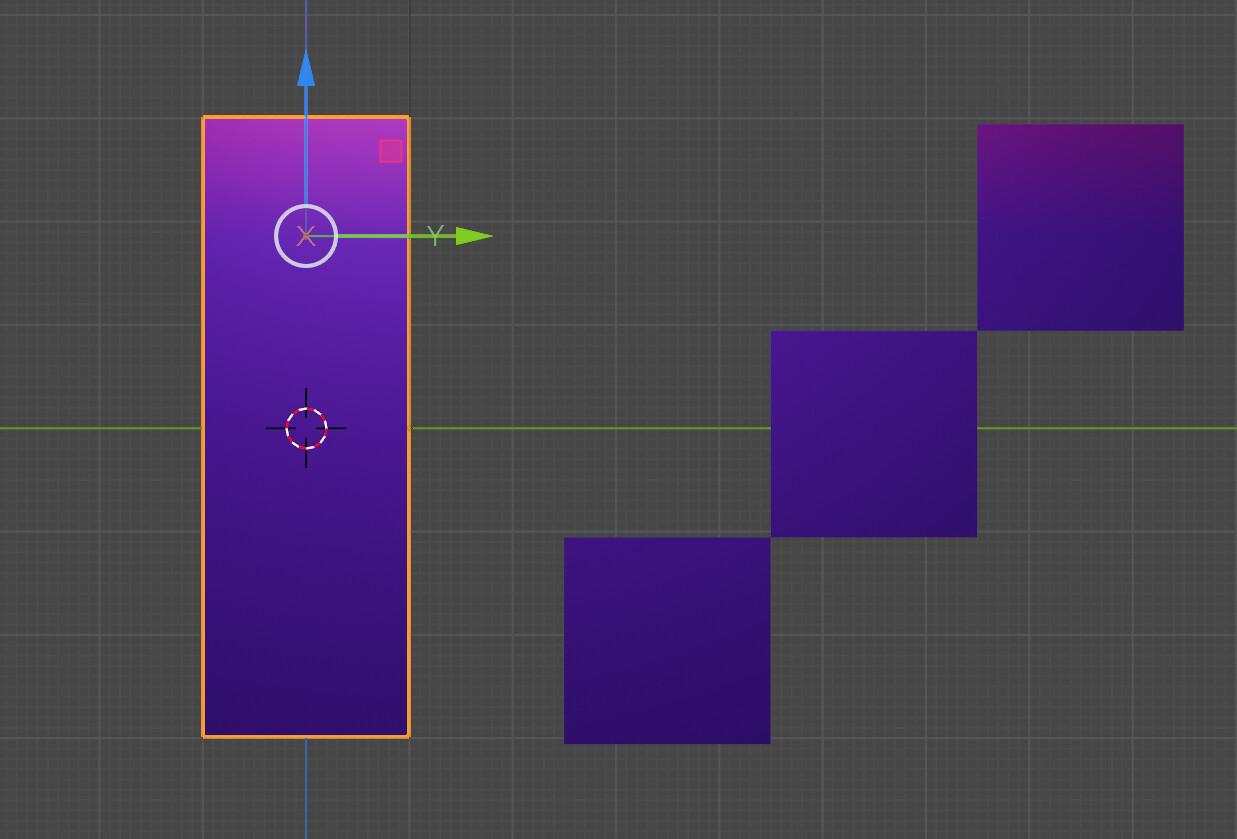
The key is the location of the center point of the reference object - here the rectangle. (Thx, @NP5 for the post)
Center at z = 0
Moving the center point in the rectangle down impacts the other objects.
Moving the center point up
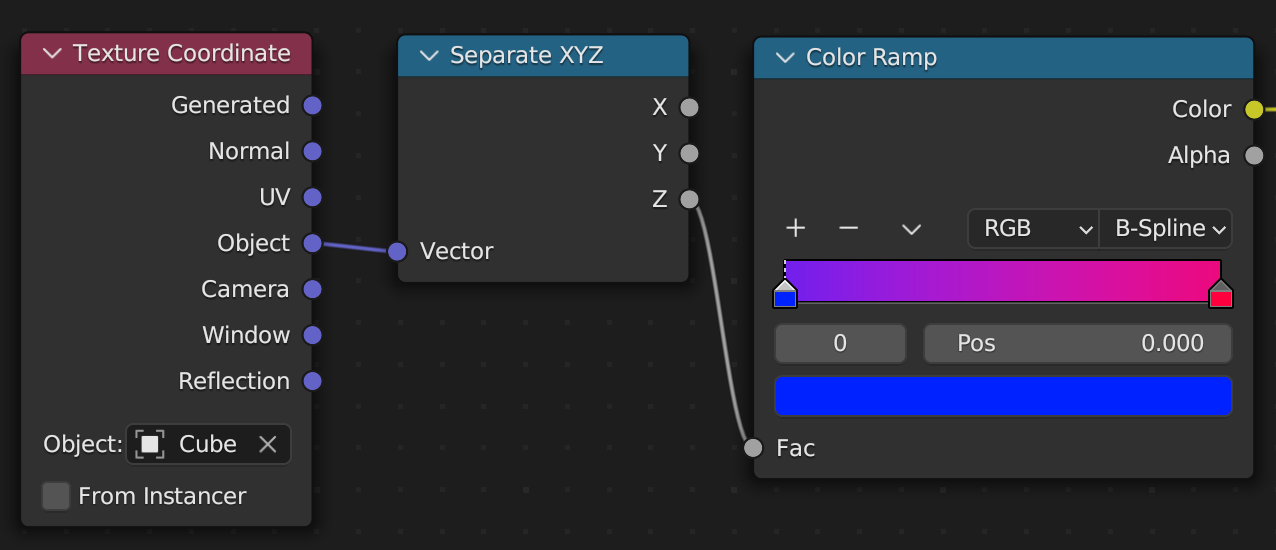
Nodes - Object is the reference geometry. Use Object as vector node.
Hope this helps.
4 Likes
system
October 17, 2023, 7:46am
4
This topic was automatically closed 24 hours after the last reply. New replies are no longer allowed.