Hi and welcome to the community.
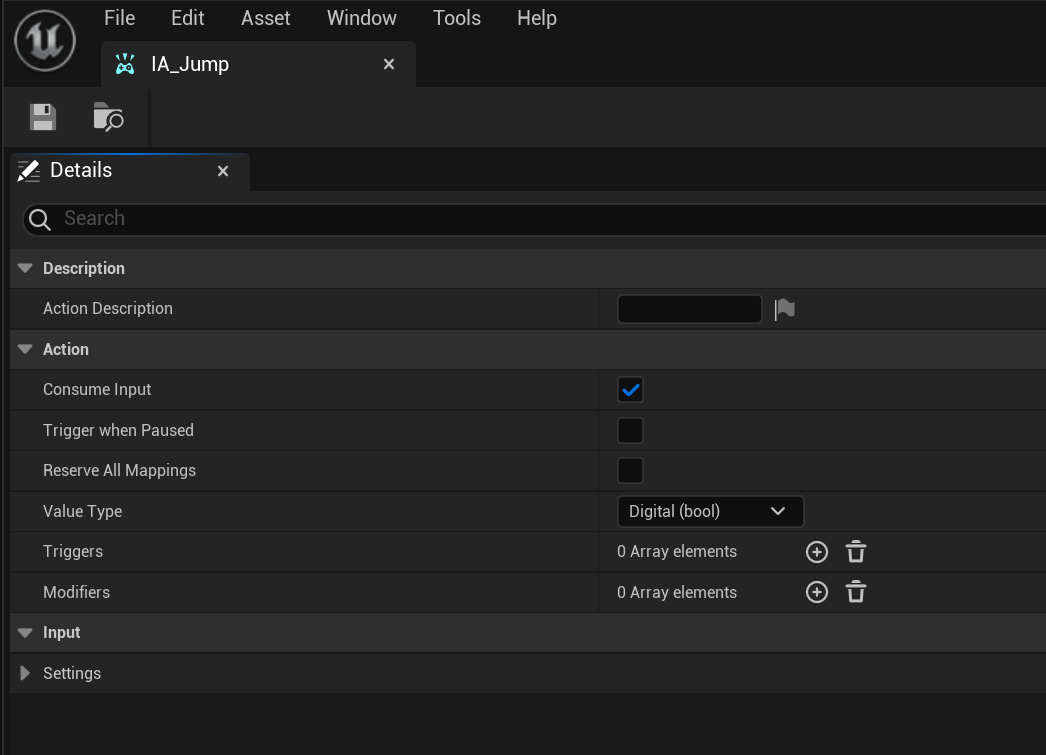
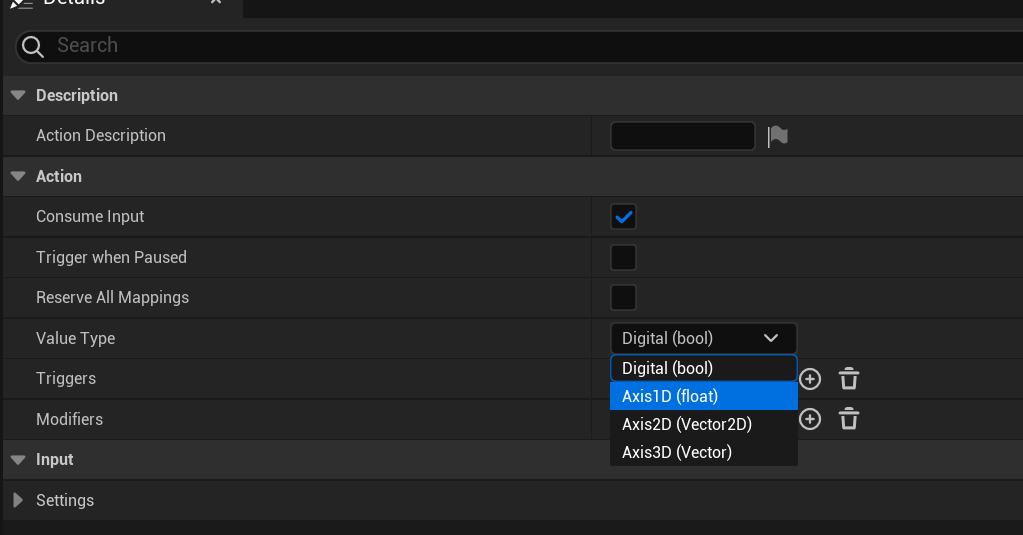
The input actions define the inputs so that would be a boolean input for the equvalent of the old input action mappings. For the Axis Inputs, you can define 1D and 2D so they return either a float or a vector2.
This is an example of something that might define a jump
The various types are here. The 1D ones are like the old Axis mappings
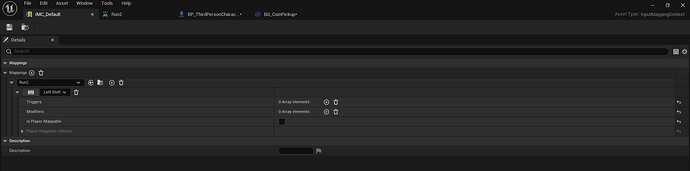
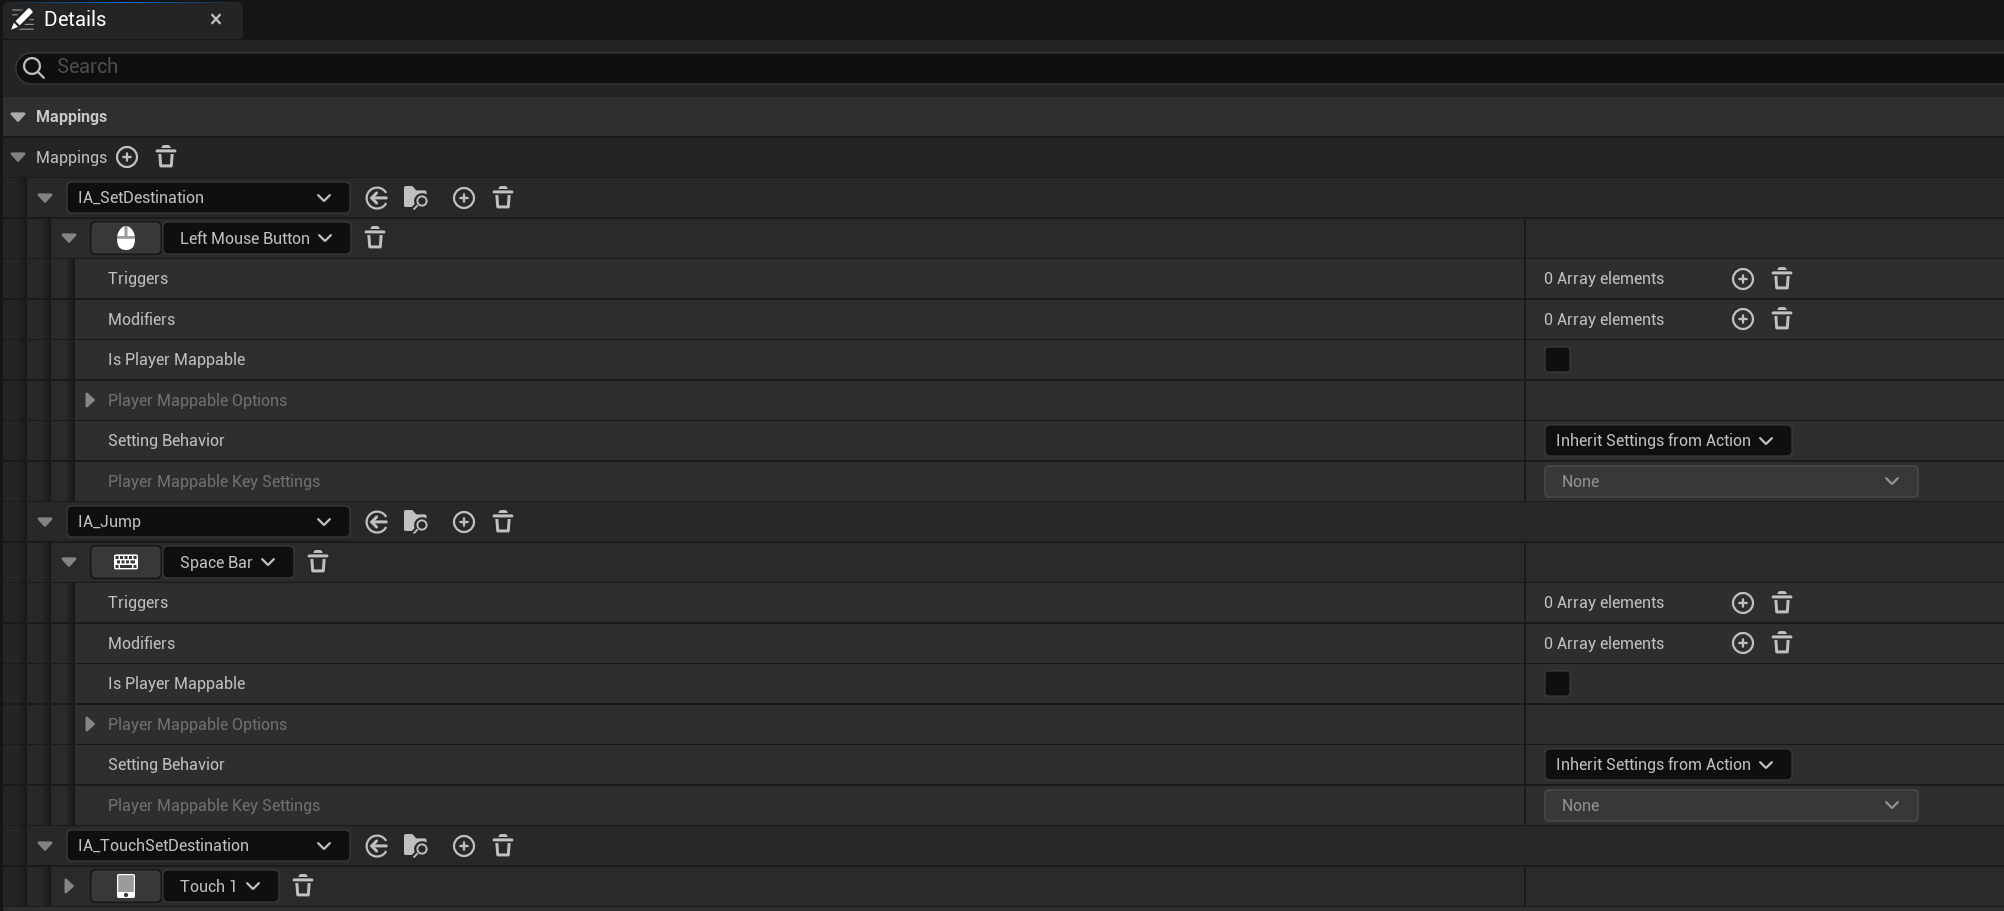
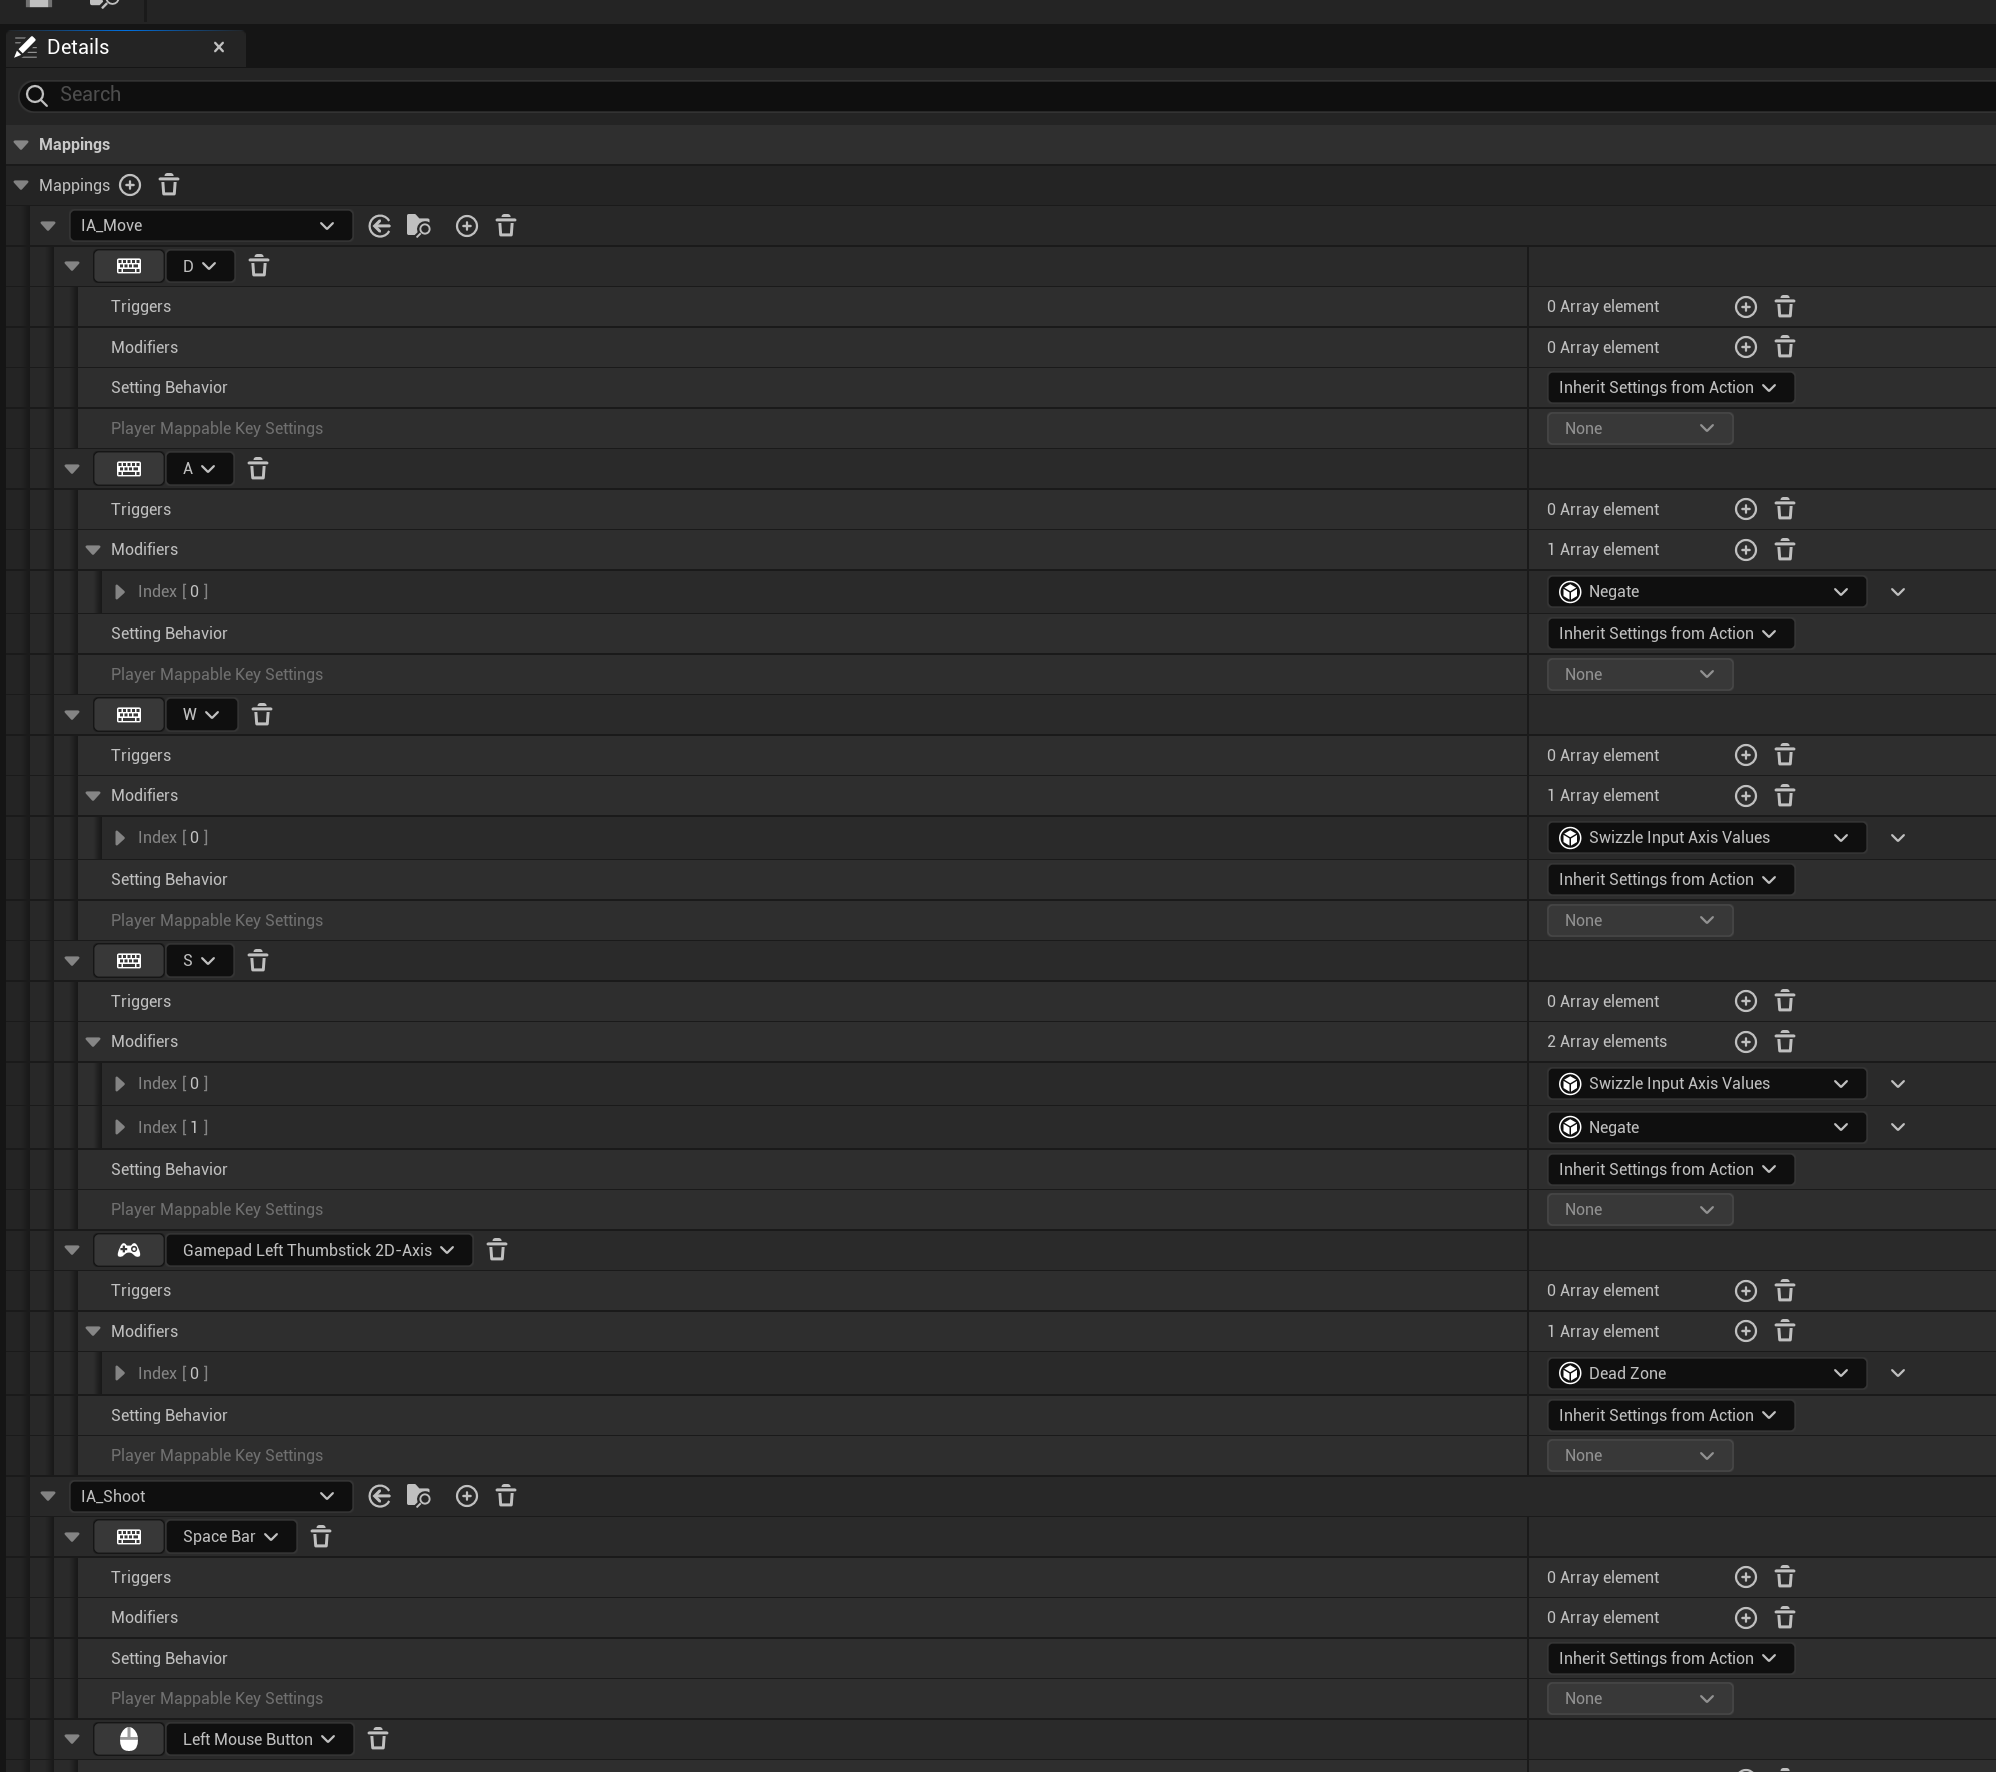
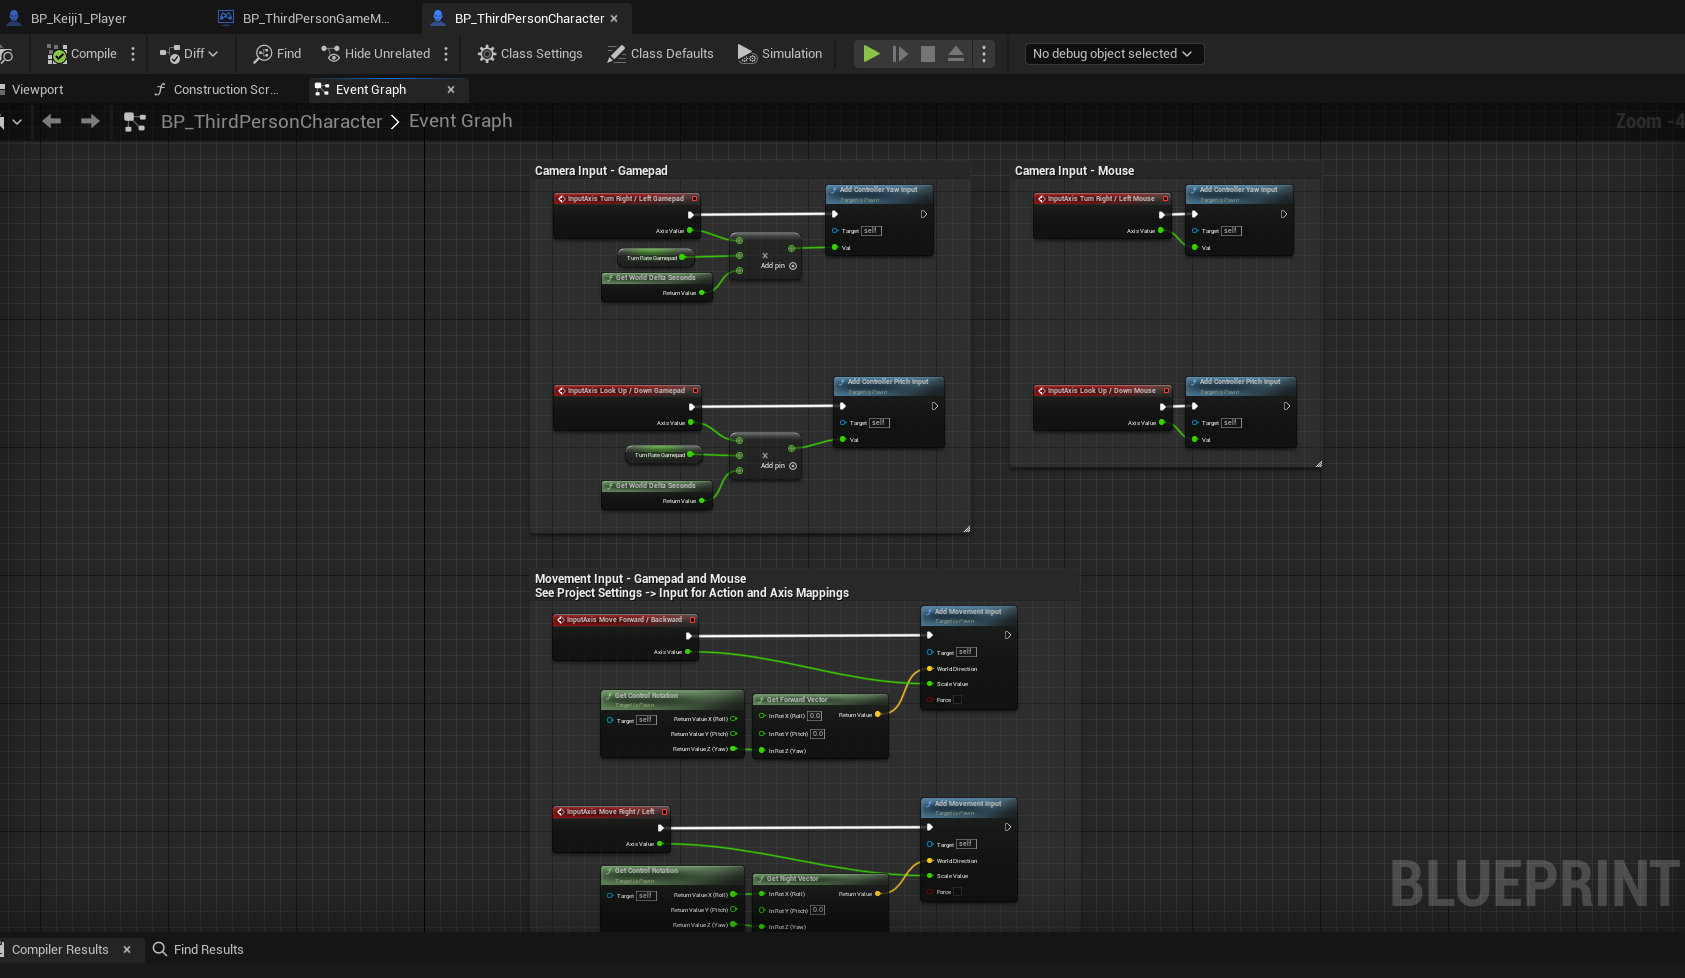
Next, you have to create an input mapping context. This is very similar to the old inputs. They are incredibly powerful. You add an Input Action and then you can add the inputs you want to use. There are then modifiers to alter the inputs (such as deadzone for gamepads or invert)
I’ve pasted examples from 2 different projects. note the first even handles touch input. The second uses something called swizzle which is used for 2D axis to swtich the input to output from X to Y when using keyboard input.
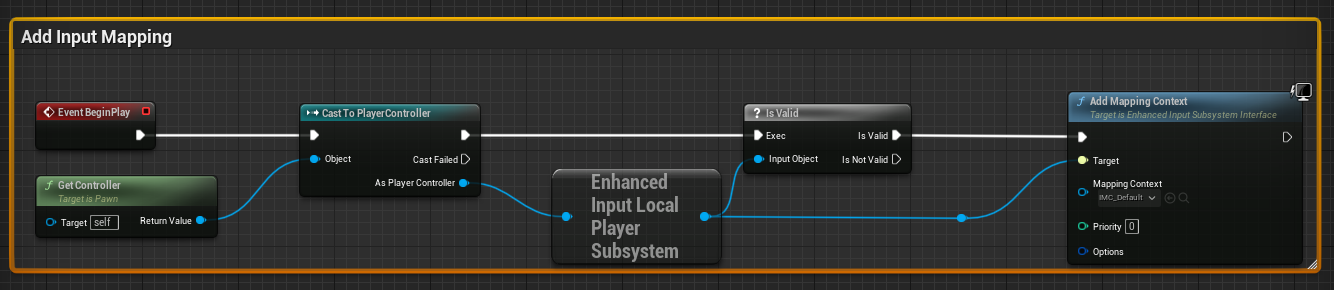
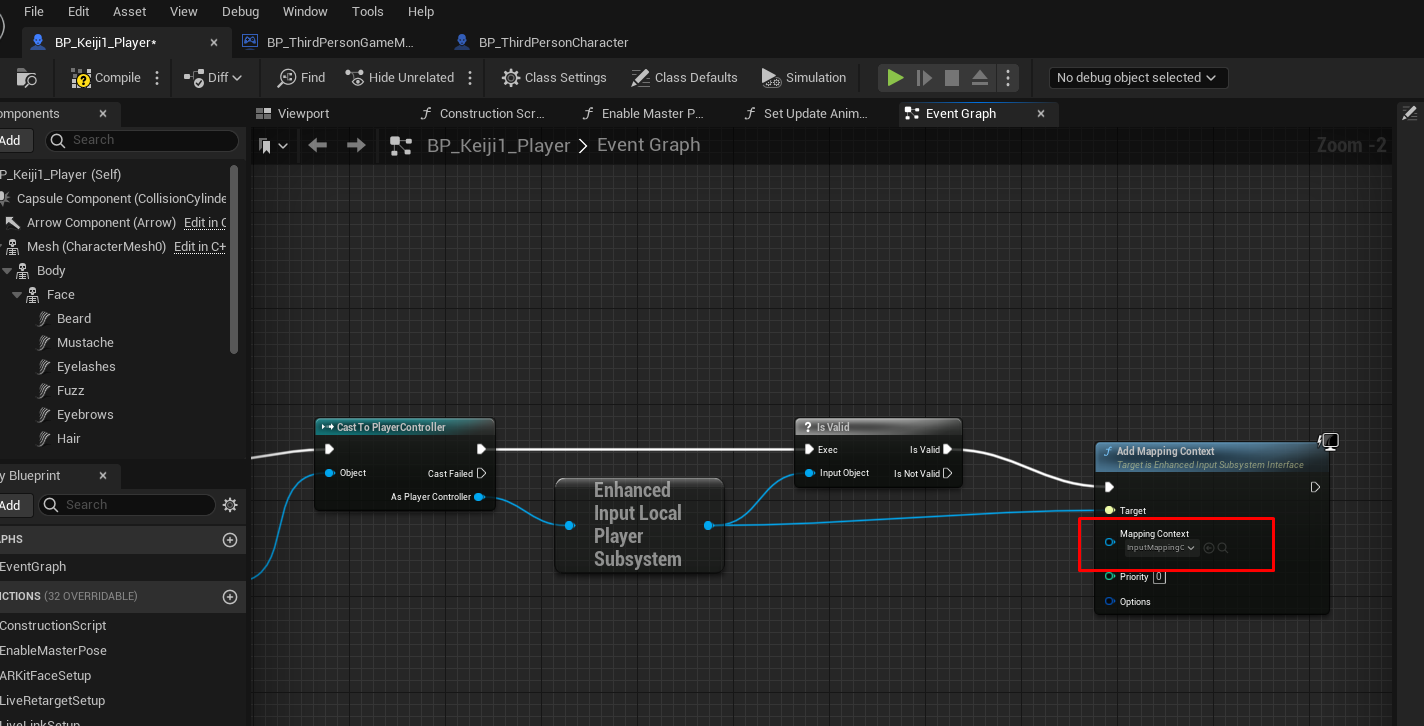
The last part is you need to bind your Input mapping context and this can be done in either C++ or Blueprint.
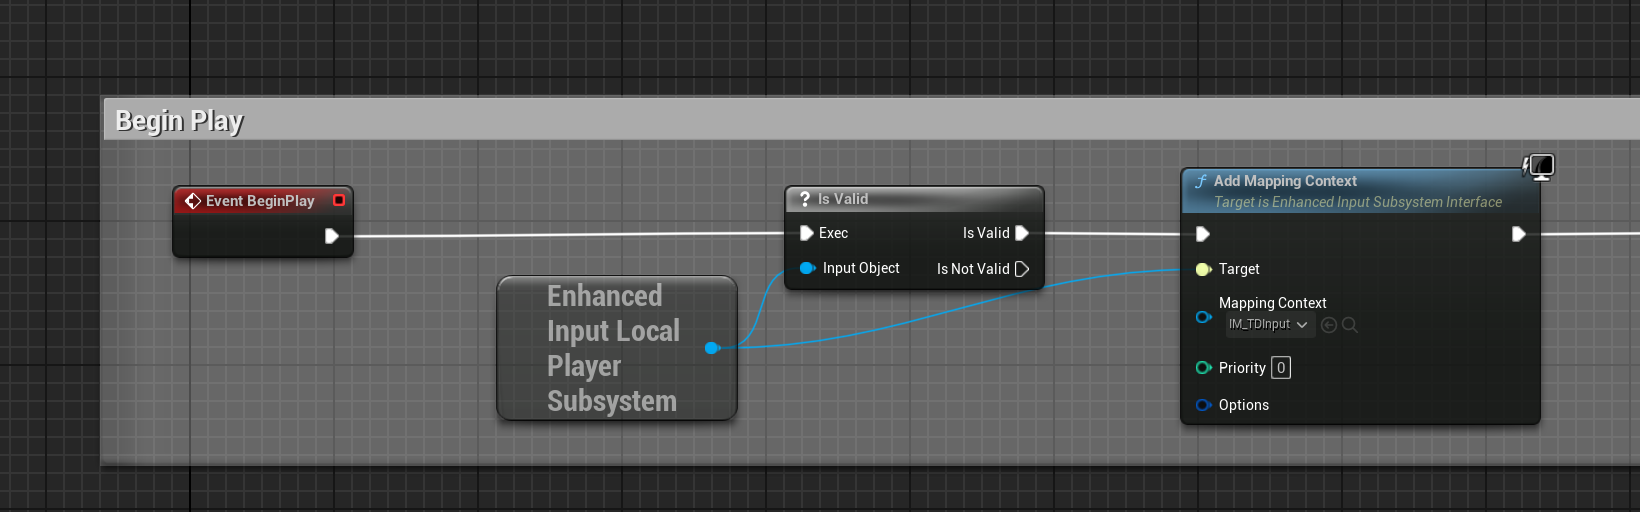
C++ first This would go either in the PlayerController or Player Character class in BeginPlay. You’d typically add a UPROPERTY to specify the context which was done in this case and then the following binds the context to the player
	auto const Subsystem{
		ULocalPlayer::GetSubsystem<UEnhancedInputLocalPlayerSubsystem>(PlayerController->GetLocalPlayer())
	};
	if (!Subsystem) return;

	Subsystem->AddMappingContext(InputMappingContext, 0);
And the blueprint:
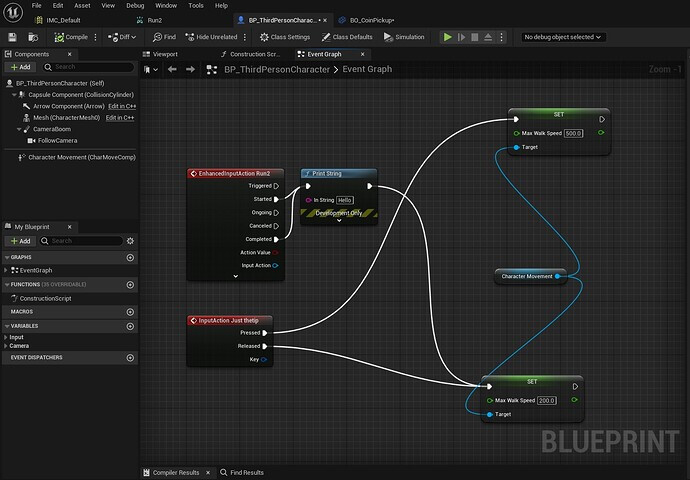
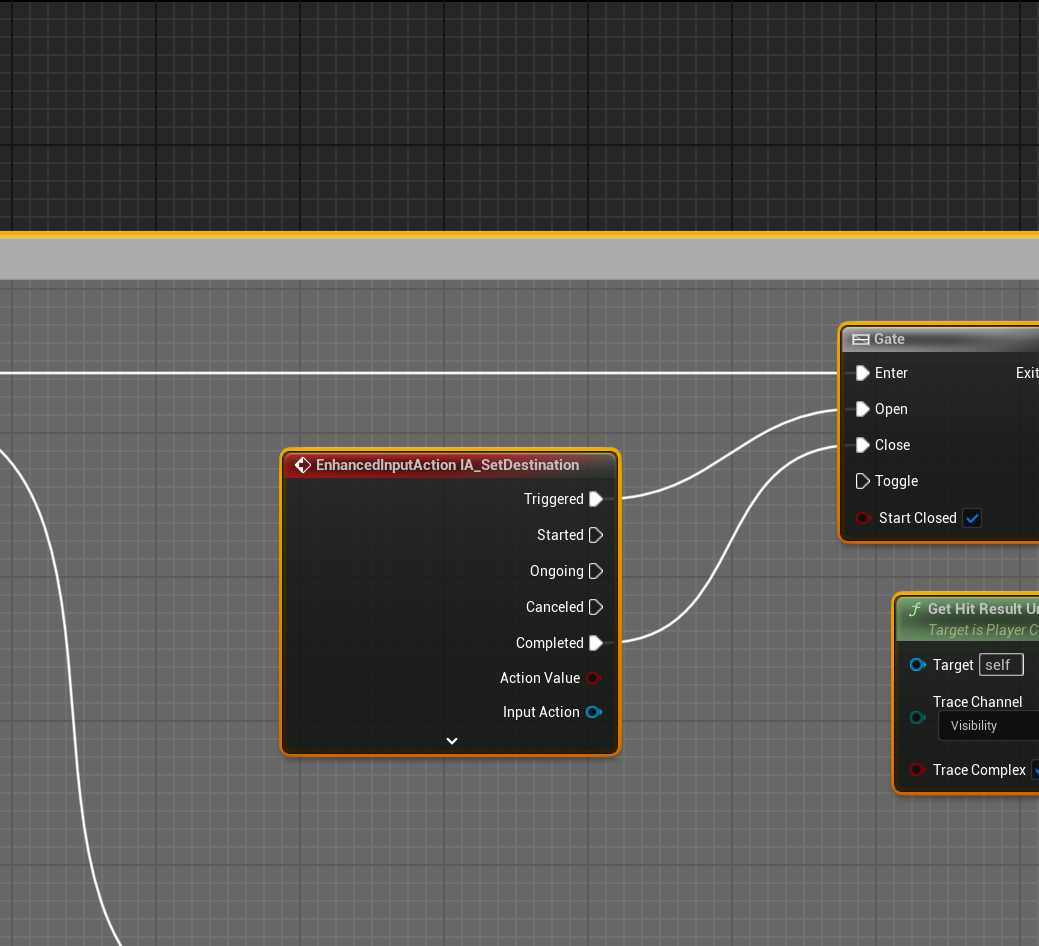
Once you have these - binding events. In a lot of ways, Blueprint is easier so I’ll start there.
Trigger is like sending it continuously which is what you’d typically use for movement (up/down etc) where as started and completed is like pressed and unpressed
For C++, it’s actually similar to the old system albeit parameters are different. Like the context, the various inputs were defined in the headers as UPROPERTY and mapped via a blueprint based on the C++.
void ATopDownCharacter::SetupPlayerInputComponent(UInputComponent* PlayerInputComponent)
{
	Super::SetupPlayerInputComponent(PlayerInputComponent);
	const auto EnhancedInputComponent{Cast<UEnhancedInputComponent>(PlayerInputComponent)};
	if (EnhancedInputComponent)
	{
		EnhancedInputComponent->BindAction(MoveAction, ETriggerEvent::Triggered, this,
		                                   &ATopDownCharacter::MoveTriggered);
		EnhancedInputComponent->BindAction(MoveAction, ETriggerEvent::Completed, this,
		                                   &ATopDownCharacter::MoveCompleted);
		EnhancedInputComponent->BindAction(MoveAction, ETriggerEvent::Canceled, this,
		                                   &ATopDownCharacter::MoveCompleted);

		EnhancedInputComponent->BindAction(ShootAction, ETriggerEvent::Started, this, &ATopDownCharacter::MouseShoot);
		EnhancedInputComponent->BindAction(ShootAction, ETriggerEvent::Triggered, this, &ATopDownCharacter::MouseShoot);

		EnhancedInputComponent->BindAction(StickAimAction, ETriggerEvent::Triggered, this,
		                                   &ATopDownCharacter::StickAimTriggered);

		EnhancedInputComponent->BindAction(GamepadShootAction, ETriggerEvent::Started, this,
		                                   &ATopDownCharacter::GamepadShoot);
		EnhancedInputComponent->BindAction(GamepadShootAction, ETriggerEvent::Triggered, this,
		                                   &ATopDownCharacter::GamepadShoot);
	}
}
The last thing I’ll add is the handlers. All these handlers follow the same signature. They all take an FInputActionValue and this has a Get. The Get then specifies the desired return type so, for a button as example, InputActionValue.Get<bool>(); returns true/false. The example below returns a Vector2d and for this game, a little like a twin-stick shooter the right stick I used to aim.
void ATopDownCharacter::StickAimTriggered(const FInputActionValue& InputActionValue)
{
	if (!CanMove || !IsAlive) return;
	if (!UseGamepad)
	{
		SetMouseShow(false);
		UseGamepad = true;
	}

	auto AimDirection = InputActionValue.Get<FVector2d>().GetSafeNormal();
	AimDirection.Y = -AimDirection.Y;

	const auto RotateTo{
		UKismetMathLibrary::FindLookAtRotation(FVector::ZeroVector, FVector(AimDirection.X, 0.f, AimDirection.Y))
	};
	GunParent->SetRelativeRotation(RotateTo);
}
I know this is a lot of information but this is the basics of the new input. If you want to make things easier for following the older code, use an Axis 1D for up/down and another for left/right. For keys you negate the input for 1 as when pressing a key it always returns a value of 1, so if you used WSAD keys, A for example would need to be negated.
I hope this helps