How to use Texture Slots?

According to the Blender Manual:

Texture Slots: The combination of images associated with UV maps is called “slots”.

So I’m supposing that, for a given object, I can somehow save combinations of a uv map and an image to a texture slot. Then, somehow see a list of those slots for the object and maybe edit them, change the uv map, the image or give the slot a name.

If such capability does exist, I can’t see how the Blender ui provides it.

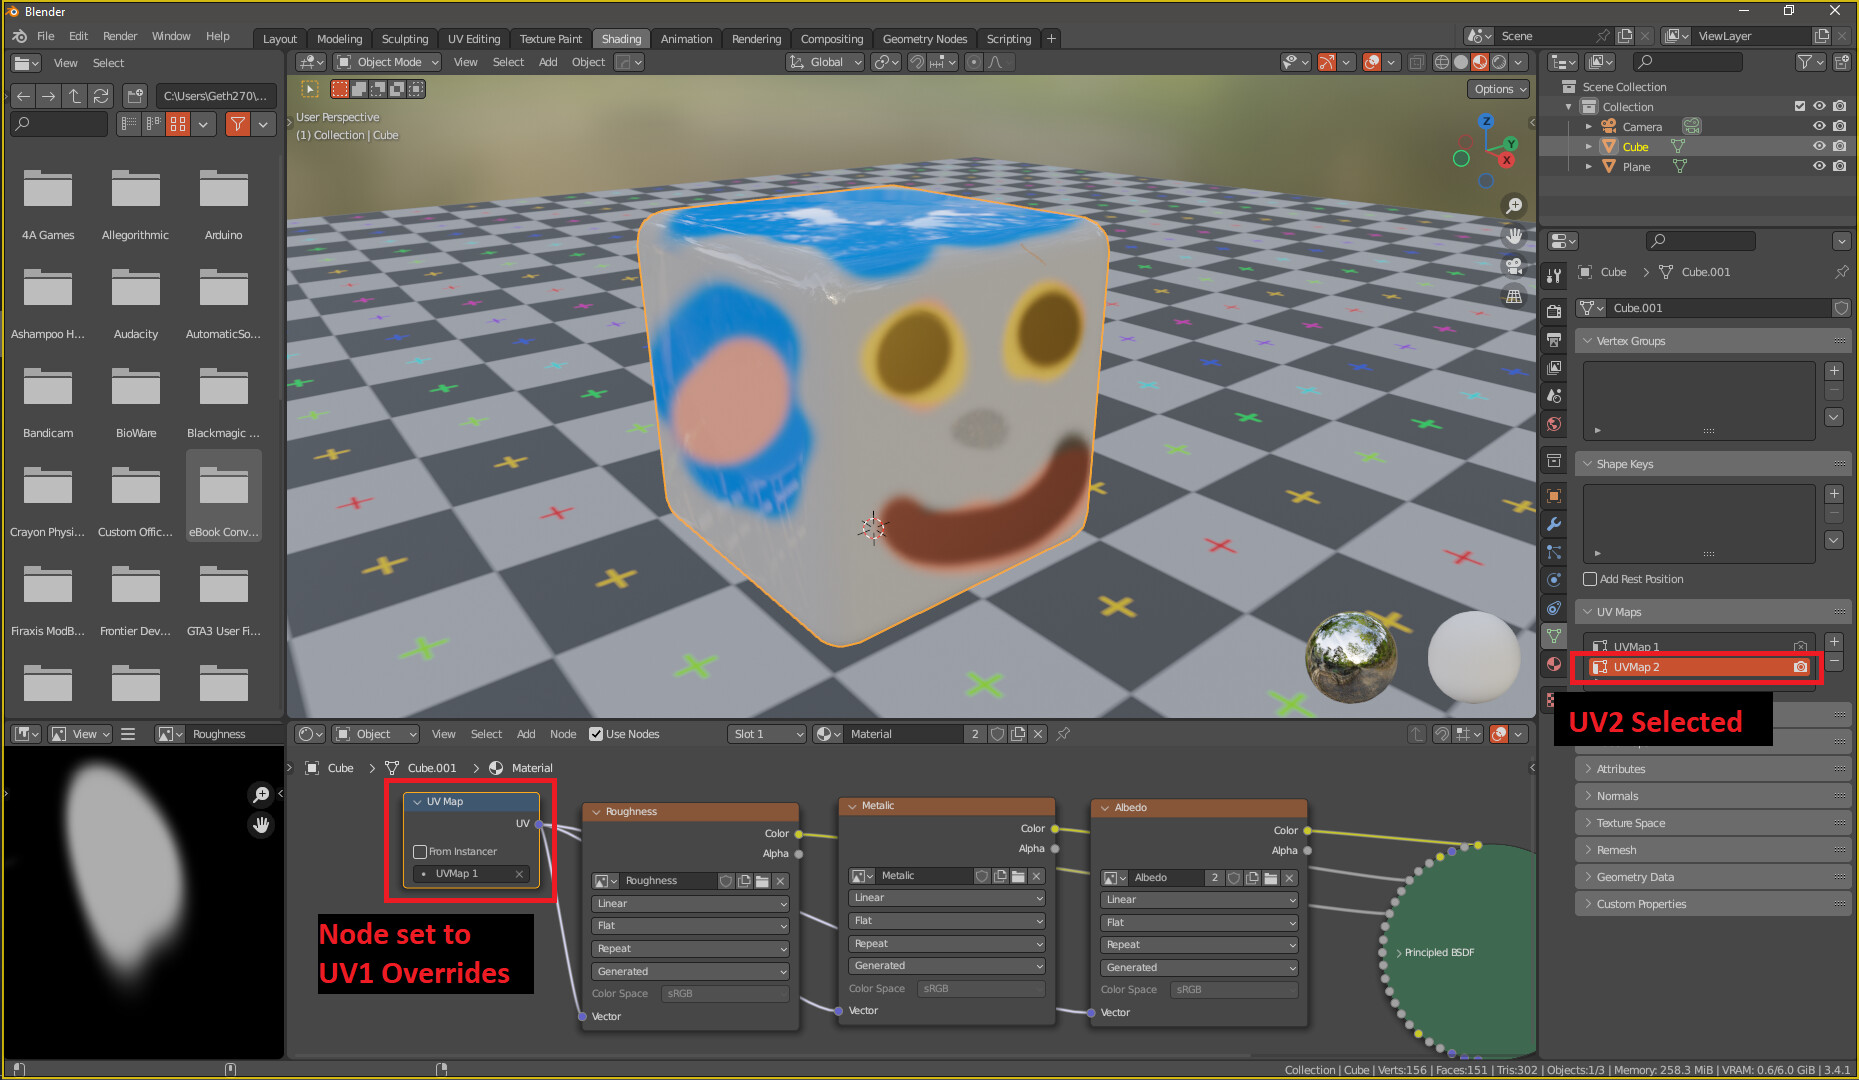
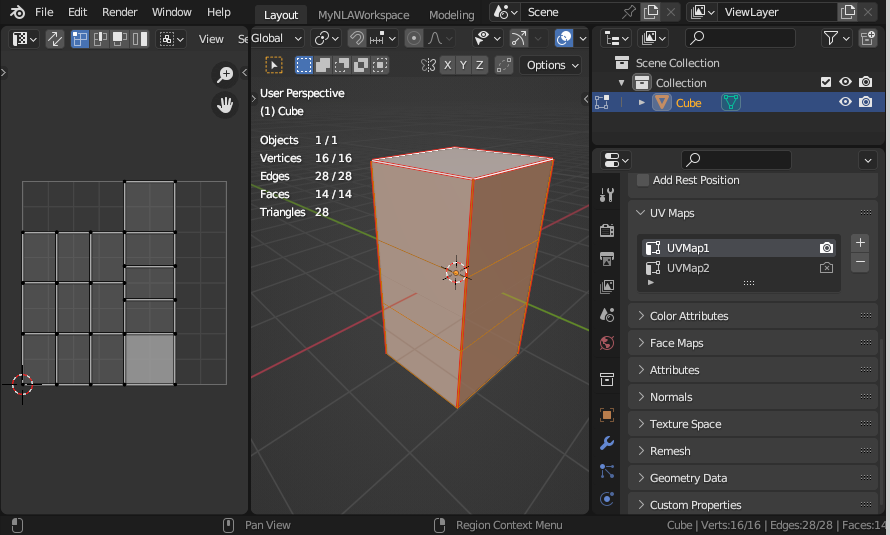
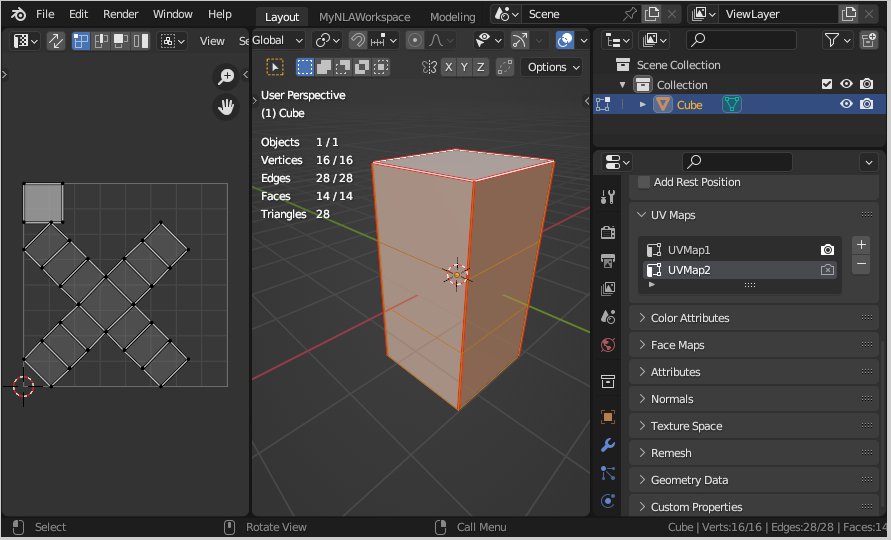
Firstly, the uv maps. In Properties Editor>Object Data Properties>UV Maps I can create 2 maps. If I highlight them one at a time, define different seams and unwrap and object, I can produce 2 different uv maps.

But how to then associate each map with an image so as to create a ‘texture slot’?

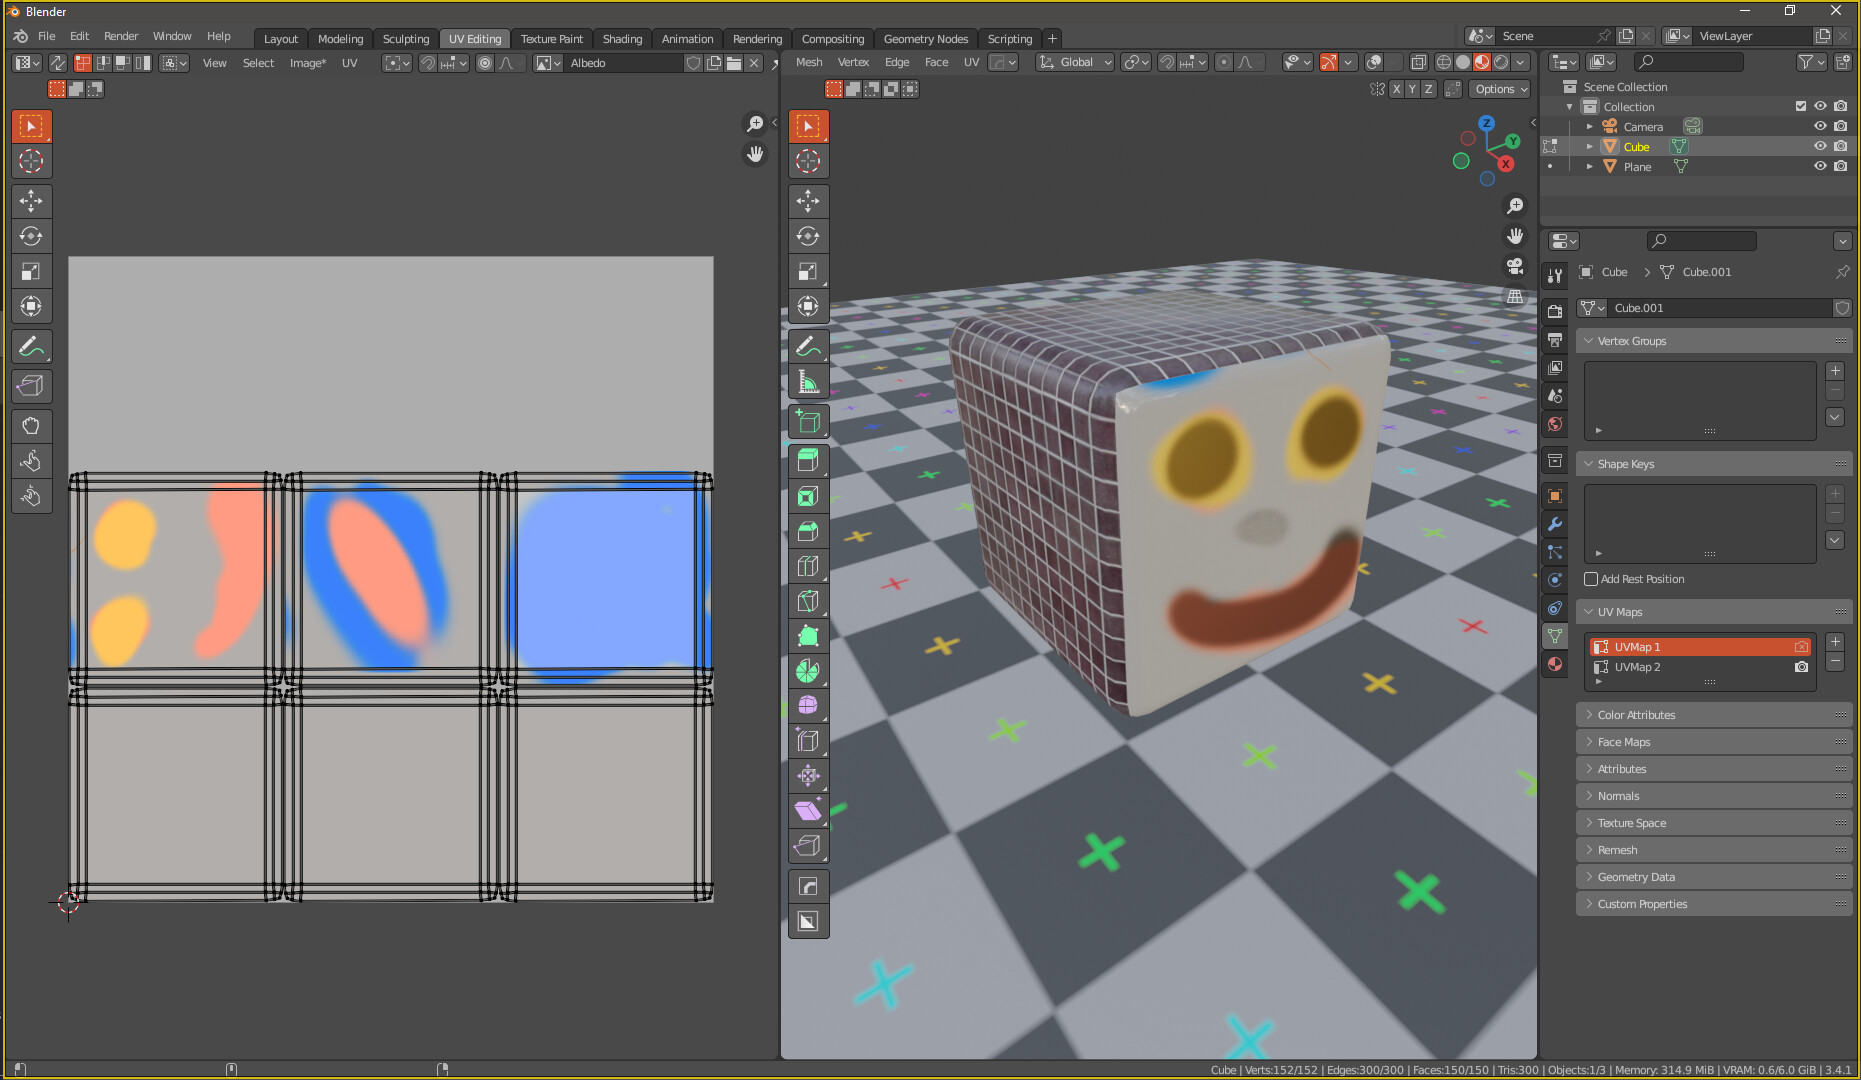
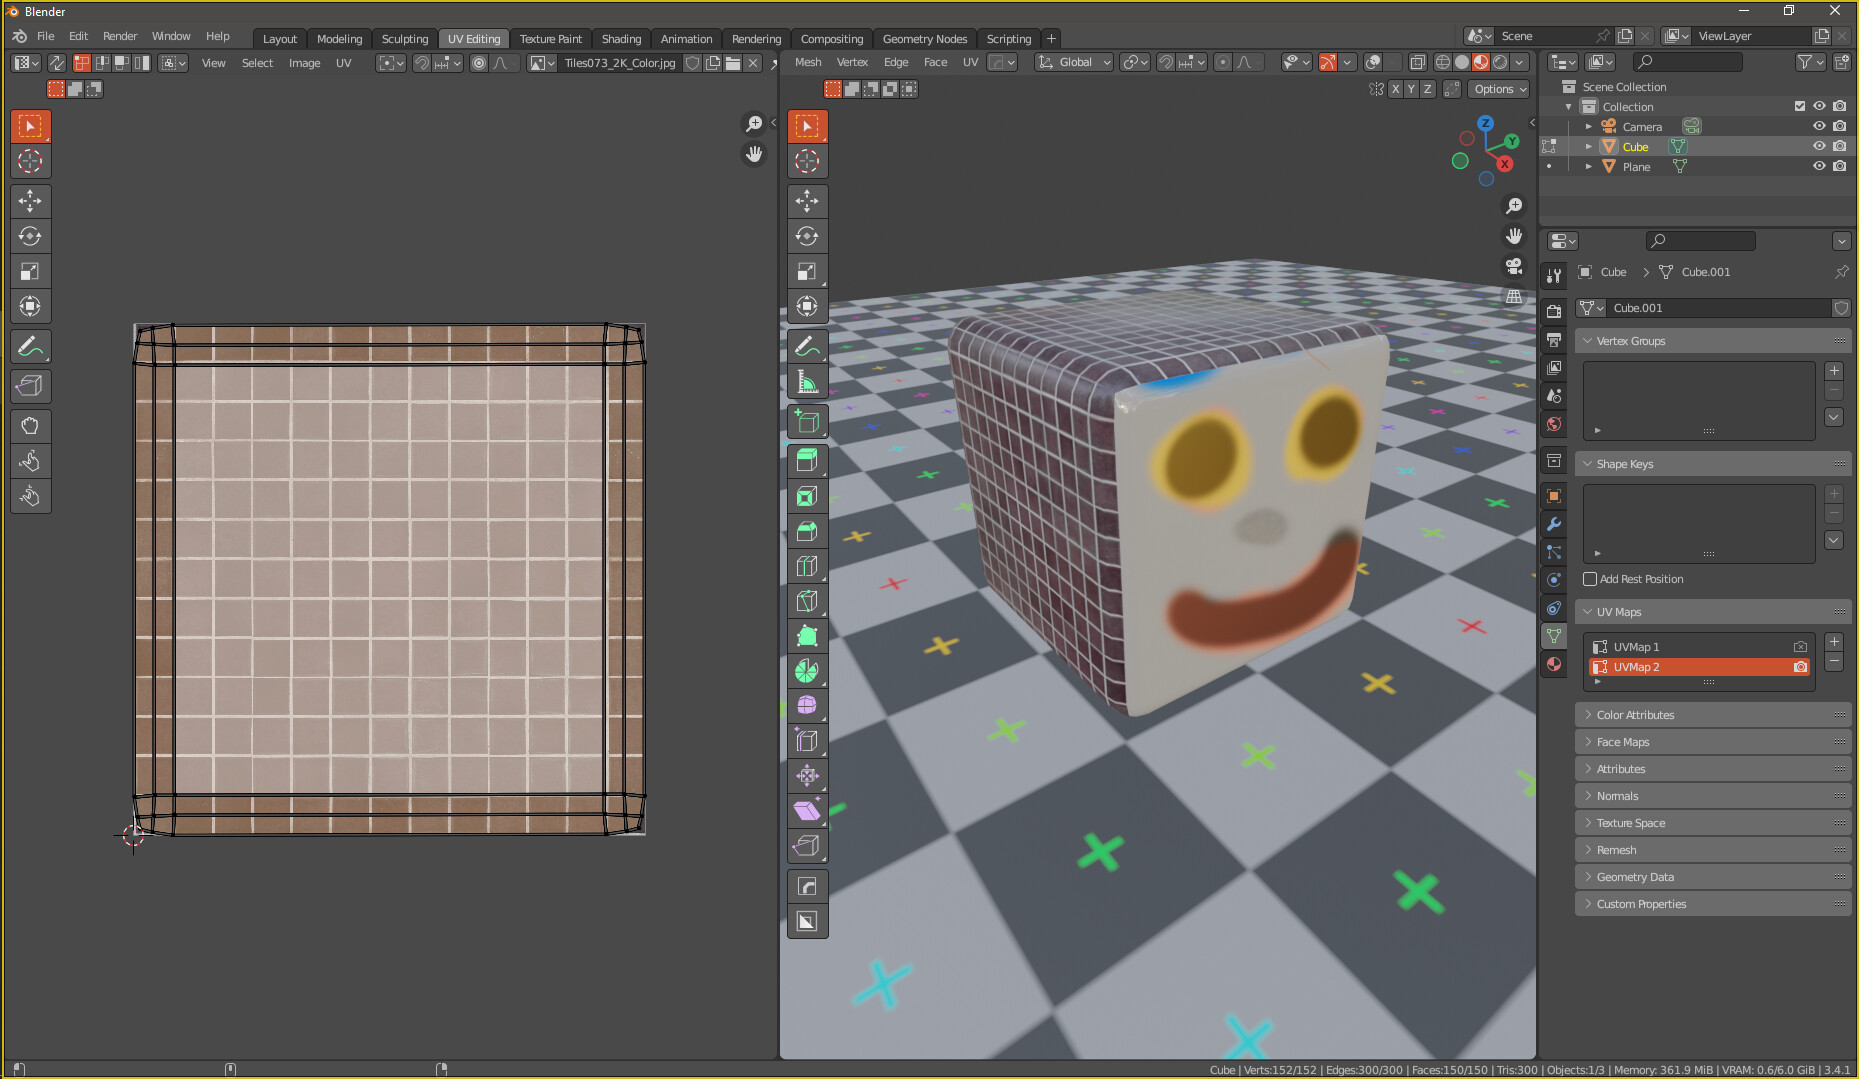
I have 2 different images, red-stripes.jpeg and blue-stripes.jpeg. I can cover my object with either one by adding an Image Texture node to the object’s material and setting its file property. How the red or blue stripes cover the object just depends on what uv map I have selected in Properties Editor>Object Data Properties>UV Maps.

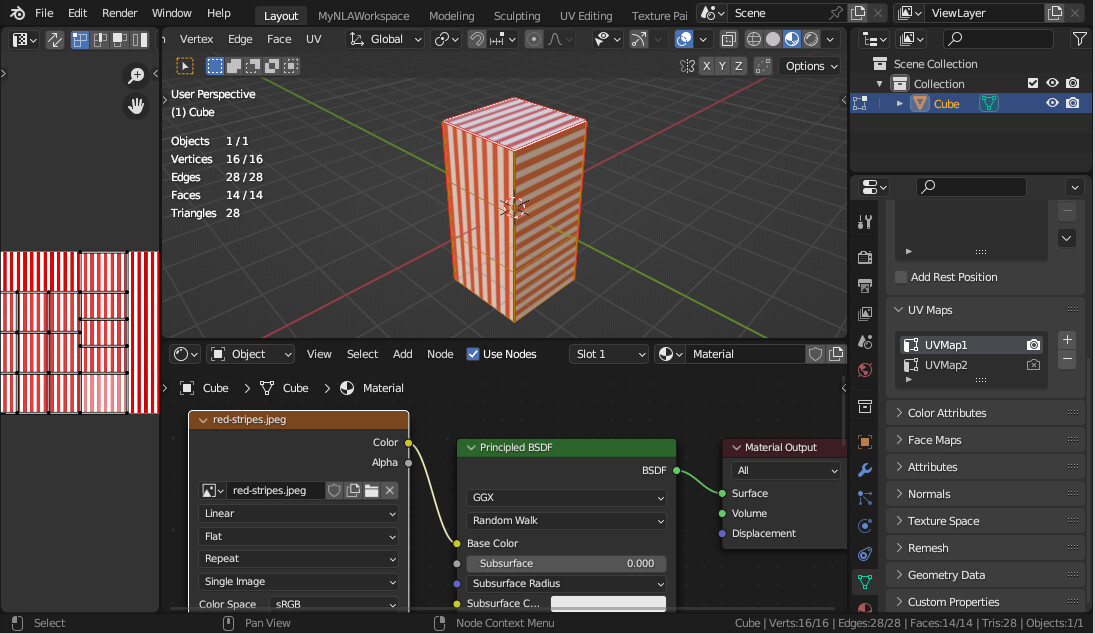
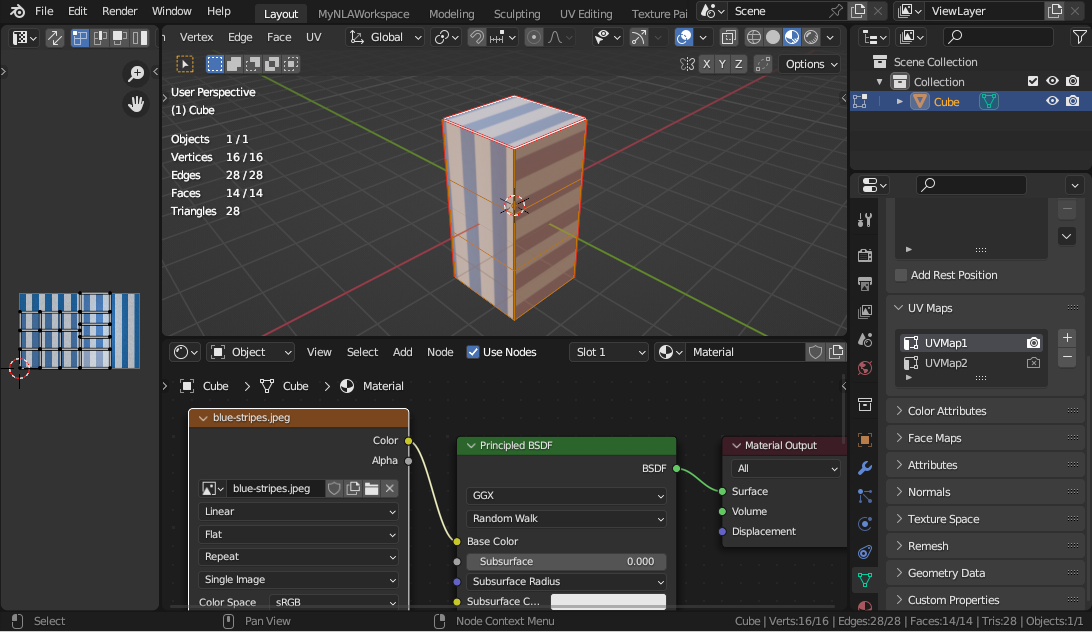
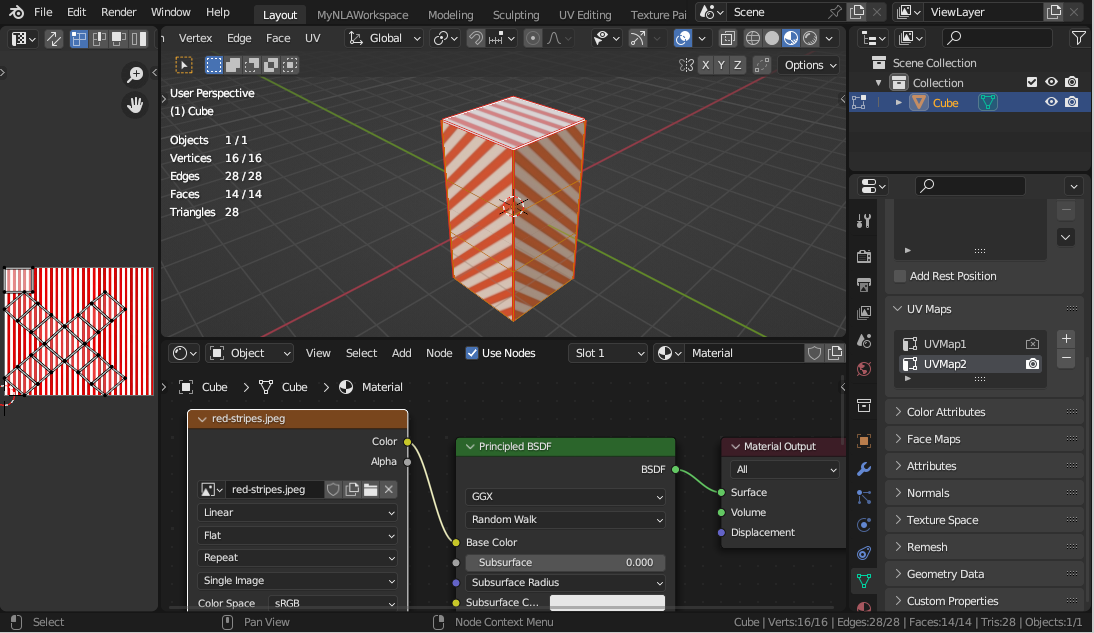
I don’t seem to have defined any association between the the uv maps and the images.

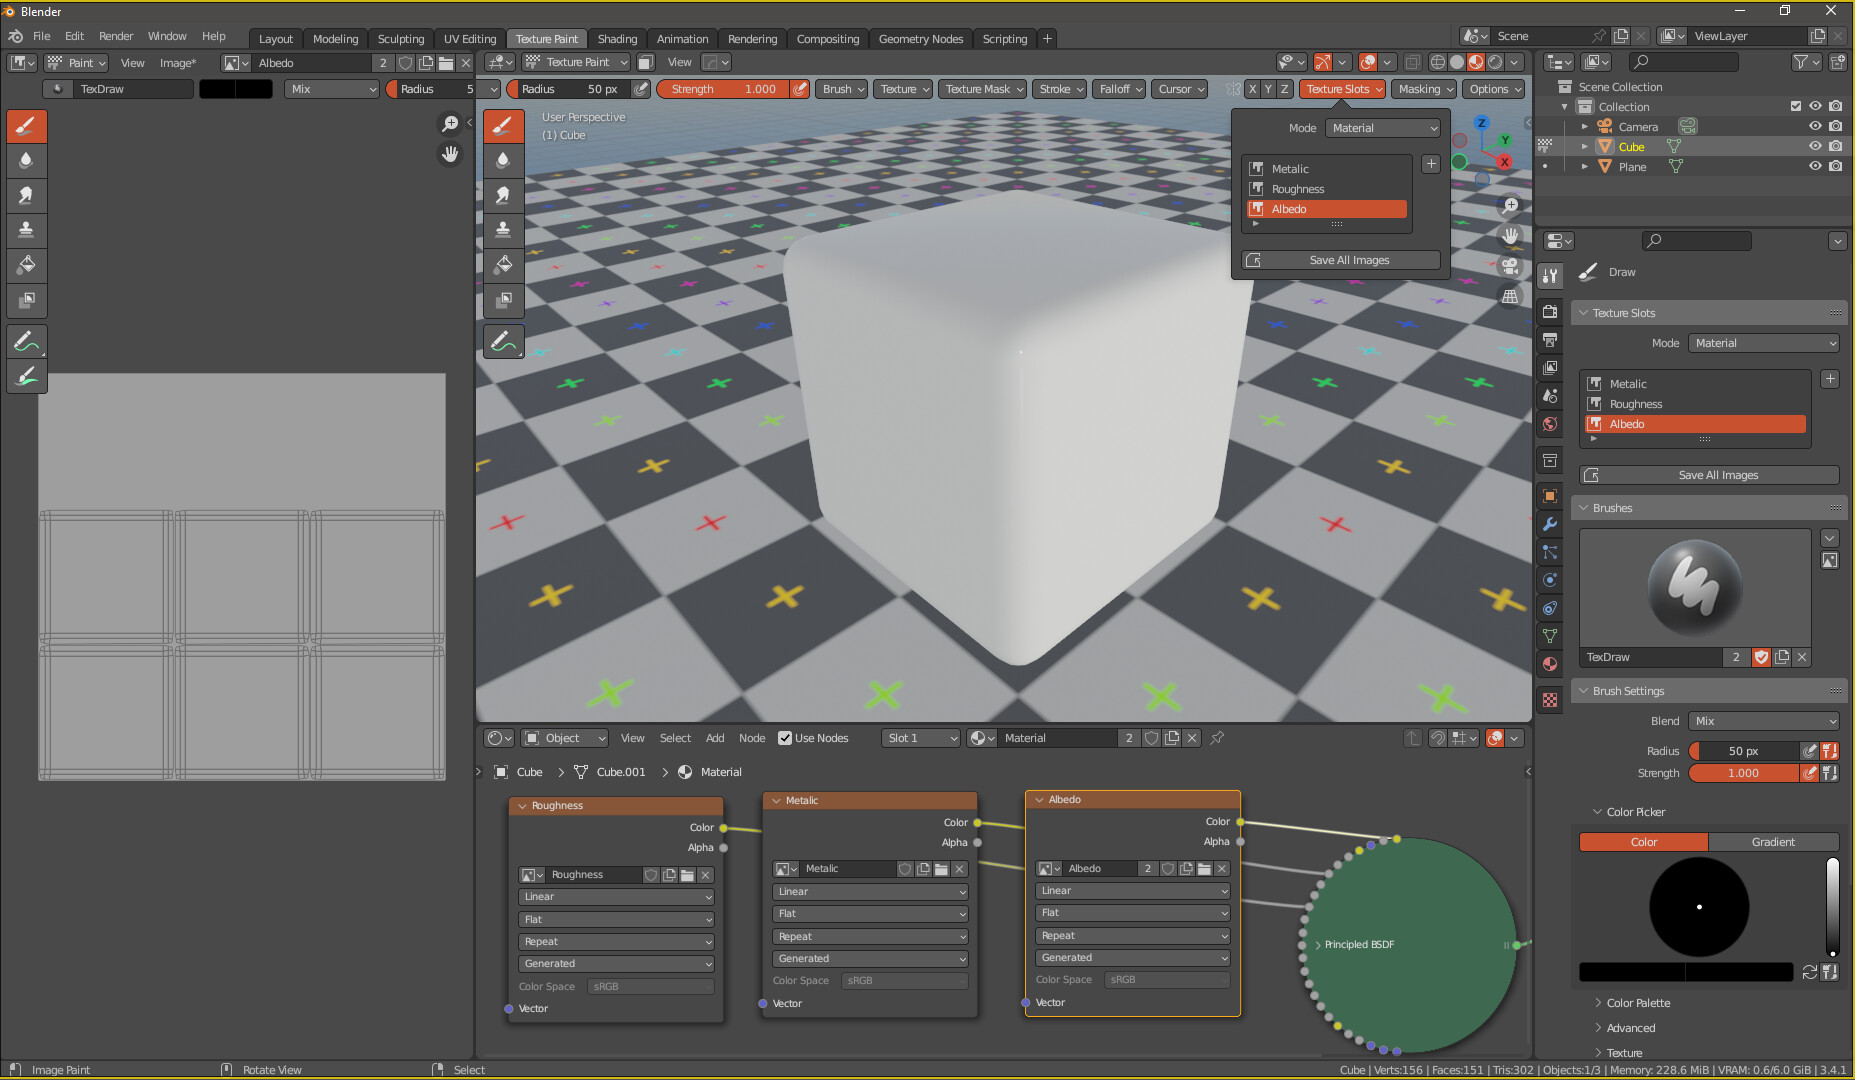
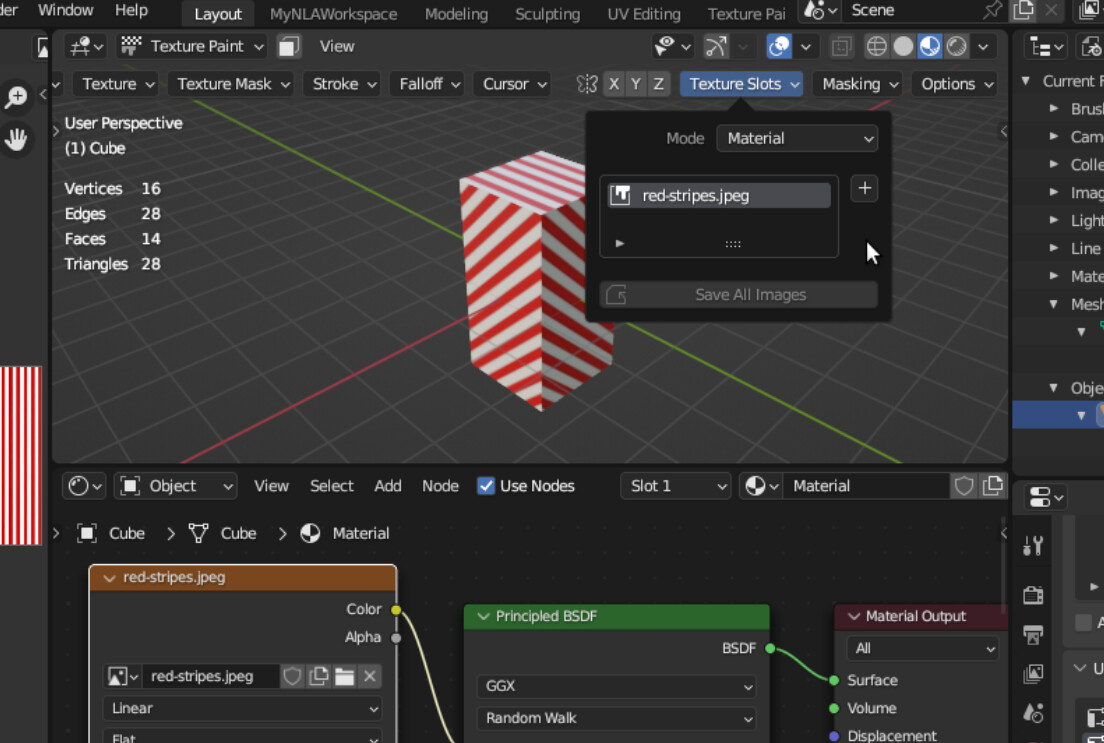
To add to my confusion, if I set the 3D Viewport to Texture Paint, its toolbar has a Texture Slots item, which just shows the name of the currently selected image in the Shader Editor node. In my case, despite the steps above, I seem to have just the one slot.

Could anyone offer or direct me to clarification on this? It may be lurking somewhere but I can find no explanation in the ‘Complete Blender Creator’ tutorial I’m following, either the current one or the archived 2.7 version.

Huge parts of Blender’s complicated ui continue to baffle me.

1 Like

Texture Slots are simply associated with textures in your material. I can see how the wording is confusing but they have no direct link to different UV unwraps of your object, just the currently active one. I suppose the better way to put it is they interact with the UV islands of the currently assigned UV map.


The reason you have only one showing up in the dropdown is that you have only one image texture in your material. Should you add more image textures they will get automatically detected and added to the dropdown, you can then paint on them by selecting each one.
Here is an example:

Example


ezgif.com-optimize

In this case, I made three textures, one for a different slot in my Principled BSDF (Albedo, Metallic & Roughness). I can switch between each one by either selecting them from the workspace settings on the right, the dropdown menu up top or by simply clicking on them in the shader editor window.
Of course, you could also have multiple albedo textures in your material, mix and paint them however you want, all that really matters is that they’re Image Texture nodes.


Switching between different UV maps will simply display those same textures, just map them differently to the geometry based on the unwrap:

Example

ezgif.com-resize

By default your object will use the UVs that have the render icon enabled.
If you want your texture or texture set to always use a specific unwrap you need to use the UV node in the material editor:

Example

You can combine it with different material slots to have different parts of your object using different UV maps. To do that add a new material slot and select or create a material, select the geometry on your model that you want the material to cover, then press “assign”:

Example

ezgif.com-optimize(1)


Make sure your materials have UV Map nodes connected to the textures with desired UV unwraps selected.
The result here is that I’m using the UVMap 1 for the “Face” texture and UVMap 2 for the Tiles texture.


Hope this clears things up. If you got any questions then ask away.

4 Likes

That’s really informative, thank you @VVruba. I’ve replicated those steps and understand it now.

1 Like

This topic was automatically closed 24 hours after the last reply. New replies are no longer allowed.

Privacy & Terms