Hi guys! I had a few requests for this, so I decided that I would upload a brief mini-tutorial on how to hand-paint models in Blender. I wrote this up for my 3D Modelling Class that I teach at work, so there’s likely to be a few spelling mistakes because we haven’t actually covered it yet.
‘Hand painting’; using the brush tools to draw our own textures on
Using a Microsoft-paint-like interface, Blender has its own in-built texture editing software inside the UV editor. Today we are going to experiment doing this with the basic cube.
Open up the image editor, and use seams to unwrap our cube in a reasonable pattern (I would advise a traditional cube construction shape.)
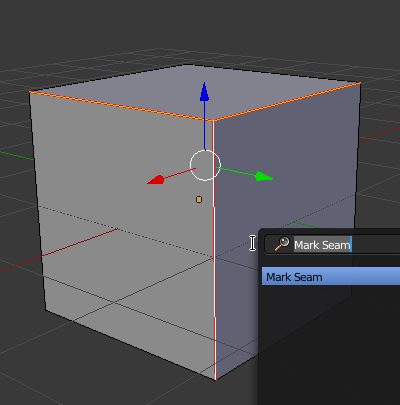
To mark a seam, use the edge selector, select any number of seams, and press Spacebar. Now type “Mark”, and select “Mark seam”. Repeat this until you have the following shape!

Open the UV/Image editor.
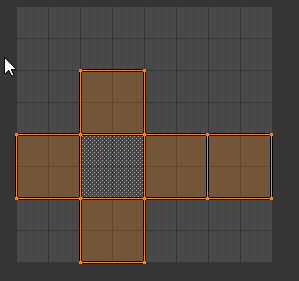
Now, in edit mode in the 3D view window, select all (by pressing A twice), press the U key, and select “Unwrap”. If you did it correctly, you will see the shape below.
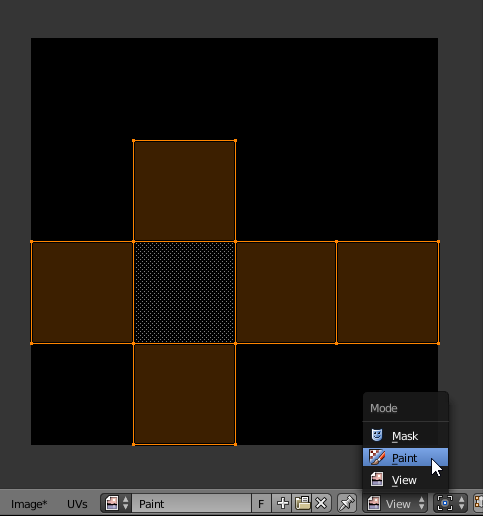
Now that we have our shape, we can start painting the cube. In the UV/Image editor, hit the +new button. Name it something obvious, like “paint” or whatever you like. Now we have a black image behind our unwrapped geometry. In order to be able to edit this, we need to change from View mode to Paint mode.
Now, just like we do in the 3D view, press T to get the tool panel. We can paint the object inside here, now, and by setting that as the texture, whatever we draw in here will show up on the model, provided we did it correctly.
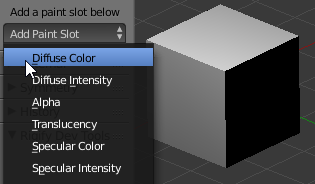
Second of all, after unwrapping, we can use the texture painter to paint directly on the model rather than needing to use the UV/Image editor. Click the edit mode/object mode button, and select “Texture paint”

Up the top left on the new tool panel, press the button to create a new brush. After selecting a colour, we can paint directly on the model.
You can even open this directly on the UV/Image editor by selecting the drop down as shown below. The image below was painted by drawing directly over the cube, not using the UV/Image editor. But the way we have set it up in both windows, you can use either; or both!

As you can see, the image button has a star next to it (Image*). This is Blender trying to remind you to save your image. Please remember that if you ever try to handpaint something, you will need to save your work by clicking the image button before you quit Blender, otherwise you will lose the changes. Just saving the Blender file naturally will not save the changes made to the image!
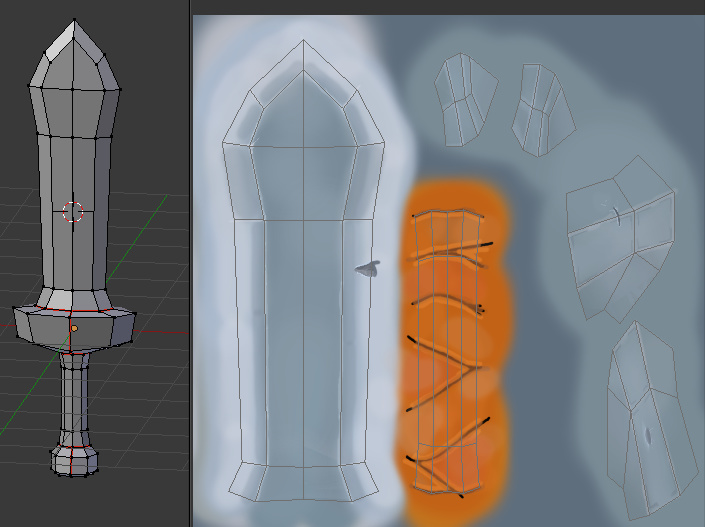
I hope you guys learned something from my tutorial. Please feel free to ask any questions or discuss techniques. For reference, to show you what hand-painted textures can look like, here is my sword model again.
EDIT: I have got the UV image now, and I’m going to upload that here. That way you get kind of an idea as to how it works! And what you need to do in order to get that style working.
For more information on the actual flow and method of the painting process, please enjoy this amazing video!

Upload what you create here in this thread! We’re all learning this, so let’s progress together!

 It’s basically just like viewing something from the other side, like a window or a piece of glass)