
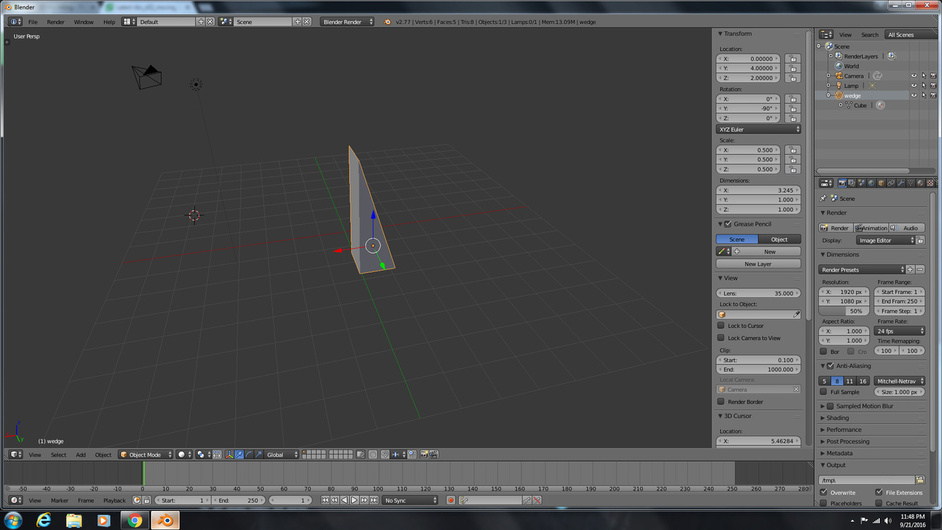
Here is my wedge. Quite like all the other wedges! One thing I did a bit different when making the wedge however; I simply selected the vertices and merged them. It took two steps.
Here I was multiple selecting tools trying to create this wedge, but to no avail I wasn’t getting the door stop shape. So instead i finally decided to deselect all the edges and just translate/pull it foward and down and what do you know? Instant wedge! I was making it harder than it was. 
2 Likes
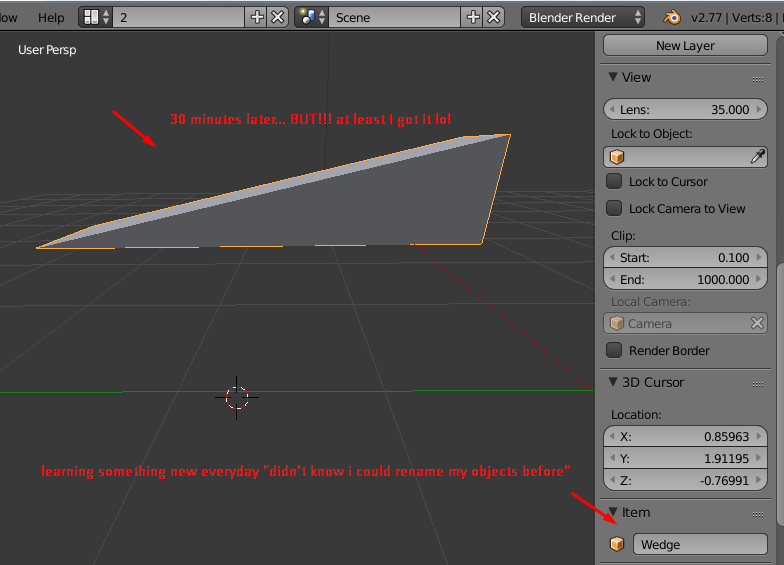
The problem you are going to run into though is that your vertice count is still 8. While you appear to have achieved the shape, in practice you would want to eliminate extra edges, faces and vertices. Just hiding them will give you some undesirable results when texture mapping or using mesh smooth modifiers. You can select two vertices and merge them. I made the wedge in two steps using that method but I believe our instructor was demonstrating a basic principal for poly modeling; manipulating vertices, faces and edges.
The good thing is that you are looking for ways to solve the problem! I have been working with other modeling packages. I use lightwave3D now and actually gravitated toward that as it was quite similar to blender 1.2 (I’m dating myself here) If you’re re new to blender or 3D modeling in general, you’ll get used to the tool sets and be able to flow with it. You have to practice a lot!
Your wedge is quite door stoppy!  Good work!
Oh okay i see, so for future models would you recommend always deleting extra edges and recreating my figures like the instructor did?
1 Like
also how do i merge two objects in blender? i want to make a room model with a hallway, but i don’t know how to cut out a door lol
1 Like
It’s a good practice to make sure you understand the lesson. They’re the professionals. Beyond that, exploring is good!
1 Like
As for a door, in light wave it is called a Boolean operation. I know blender has a similar operation. Let me explore that and I’ll get back to you!
1 Like
Thank you for the advice  and okay sweet! please do
Ok, the operation is the same. You use two objects: one is your wall, the other is a box you would use for a “cookie cutter”. Just for simplicity, make a box that represents your wall. Make a second box to the size that you want your door.
Now make sure your wall object is selected!
On the far right just below the scene window you will see several small icons in a row. Select the one that is a wrench! There is a “Add modifier” stack. Left click that.
You have four columns of modifiers arranged by class. Under “Generate”’ you will see “Boolean”. Select it.
Where it reads, “Operation”, click on it and select “intersect”.
Next, where it reads “object”, click and select your cutter object from that list. Since you are just making to objects for the sake of practice, choose your other cube. It should be the only object in the list.
Click “Apply”. Now move your cutter object out of the way and you will see a cut out for a door.
When you do this in your actual project, make sure to name your cutter something so it is east to find. You may have other objects later and if they are all named “cube”, it might get confusing.
1 Like
Yay! We both learned something new! 
1 Like
Okay thank you very much  I will try to follow these steps to the best of my ability
1 Like
You can do it!
One more thing, for the Boolean operation to work, the cutter object needs to be overlapping the other object, like they are occupying the same space
Hey I wa thank you for that previous bit of information. I was wondering when you do your exporting do you have to follow a certain hierarchy? and have u ever exported something into Cal3D
1 Like
You are most welcome! As for Cal3D, this is the first I have ever heard of it. I did look for it on line and there is an exporter available.
Here is a link to what I found.
https://wiki.blender.org/index.php/Extensions:2.6/Py/Scripts/Import-Export/Cal3D_File_Format(.cfg)
hope that helps. Is Cal3D part of Poser?
Sorry to be replying so late. I’ve been swinging a hammer since 8:00am.
As for exports, it probably would depend on what you are exporting to. If an object is textured already, you would certainly want to make sure the UV mapping is exported. You just have to check and see what file format your other application likes and along with that, what type of file it prefers for texture mapping. jpegs are generally safe but png files are less cumbersome and also support transparency.
Oh my, my lap top just updated and some messages are coming across my screen like they’re talking to me lol. It’s weird, you’d have to see it. Reminded me of opening credits for a Monty Python movie.
1 Like
Hey thank you so much for even going to look that up. Its fine oooo working hard ay? Lol yea i would have to see it lol and i would have had to see that movie  The Cal3d is for this virtual 3D website i love to play called IMVU. I want to create meshes on it, but for export purposes it only allows cal3d export and i been having trouble just grasping the concept of how to do it all not even the exporting persay, but from unparenting the mesh to adding my own to uv wrapping and unwrapping like its all a blur at the moment. So thats been my misson just trying to learn how to make my own creations so i can put them over into that website as virtual goods.