When I set the gradient for the dino mountain up, using the Object Texture Coordinate, with something looking like the tutorial, almost all the mountains are in the light color:
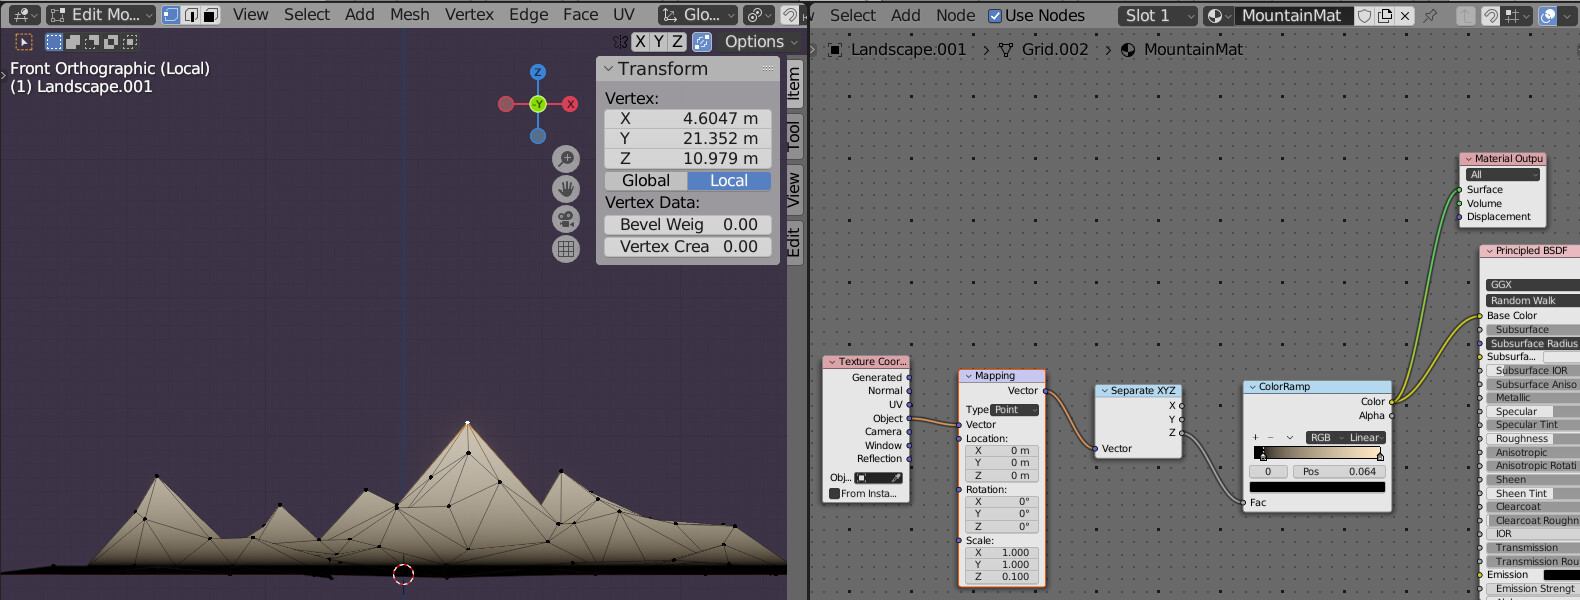
If I look at the top vertex, its z-value is about 11 and when I set a Mapping node with a scaling factor of 0.1 in the z-axis, I get something similar to the tutorial:
I understand it like this: with the Object output, the values are exact coordinates, which would be 11 or so for the z-value of my highest vertex. The ColorRamp uses factors from 0 to 1 and I think anything about 1 is still considered as 1 (clamp) which means that the gradient is only applied to the lowest 10% of my mountain. with the Generated output, the values are remapped to the 0-1 range, 0 for the lowest point to 1 for the highest.
Am I right? And if so, why is it different in the tutorial? In case of relevance, I use Blender 3.3.1.
One thing to check though is the origin point. It needs to be at the base of the object/landscape.
I also have always found the gradient nothing like what I expect and want. I suspect it is me and the gradient is some mathematical pure calculation.
Adding a mid tone extra slider on the colour ramp I find helps most.
There really ought to be a more what the user expects, gradient tool. A simple transition from one to another feels liek it needs more ‘middle’ than we get given.
That sounds right to me. The only thing I would add is, that object coordinates are calculated before applying the scale of the object (as if the scale was set to one).
My guess is that the instructor didn’t apply his scale, if he made it the same size as your mountain.
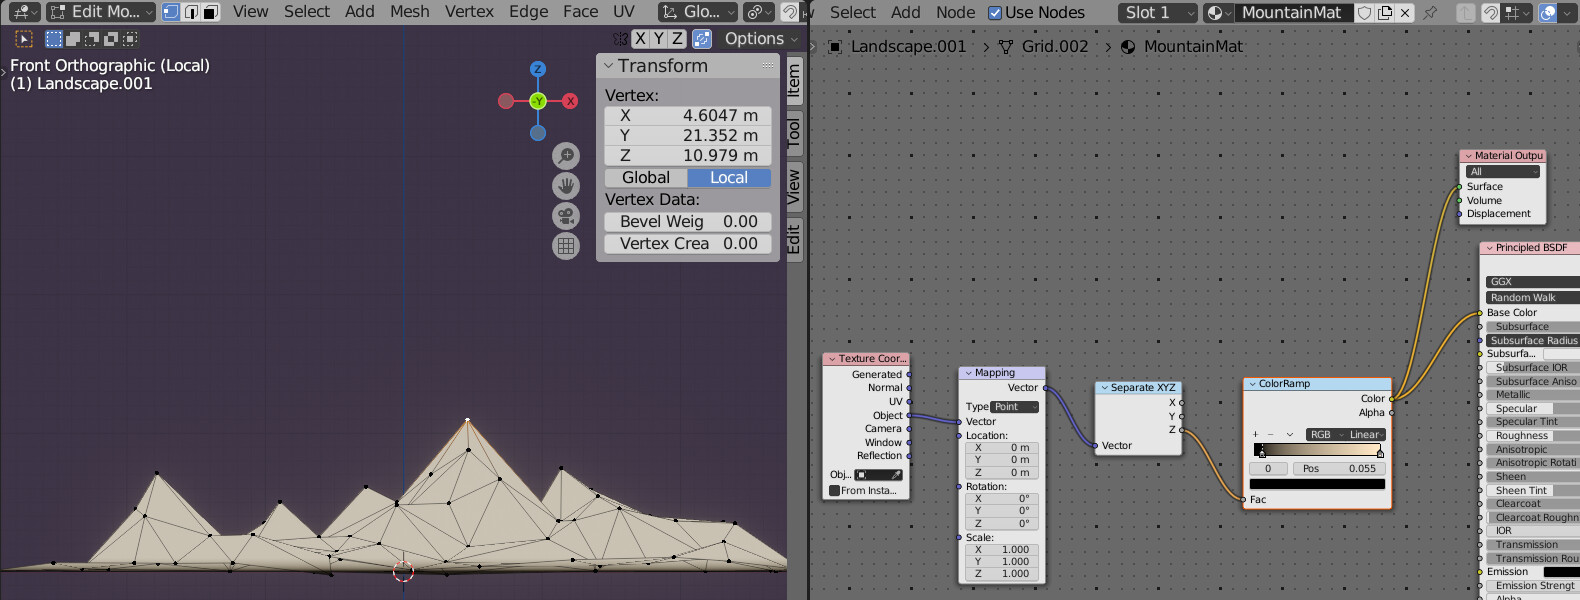

 with the Object output, the values are exact coordinates, which would be 11 or so for the z-value of my highest vertex. The ColorRamp uses factors from 0 to 1 and I think anything about 1 is still considered as 1 (clamp) which means that the gradient is only applied to the lowest 10% of my mountain.