General Discussion Topic--What do you consider low poly to mean?

There is not really a good place to put this topic here in the Blender area so an going to post here in the Showcase area.

Okay, I think I have a good idea what low poly is based upon things I create for a venue I am involved with called Second Life. Their limit is about 65K in vertices per mesh upload of a mesh object; however, that is not really considered low poly in that venue. What I am curious about and want to toss out to Everyone here is what do you consider low poly when you are modeling? If you search the web, there doesn’t seem to be a particular set of numbers or, a standard that I can find. Not even a general idea of what is considered ideal for low, medium, or high poly mesh. I am sure it will depend on clients and venues you provide mesh for but, I am curious what others think or have experienced.

Do you have set limits or constraints you try to stick to when modeling? Are there specific limits in whatever venue you may be uploading your mesh to/for? Are you limited in the number of materials you can assign to your meshes?

Feel free to post your thoughts, specific venues and limits, references, resources, etc.

Thanks!

1 Like

What I’ve generally noticed of ‘low poly’ is that there really is no style that’s plainly referred to as “High Poly”, and by that I mean, there’s not a universal number of faces that changes the style. However, using sculpt mode to build something rarely ever results in something that is low poly, and tools like ZBrush can create really smooth and detailed characters that often results in a high vert count.

After all, 1000 tri’s might be a small number for a character, but a large number for a weapon or piece of clothing. You have to look at exactly what you’re trying to model, and think of how few vertices you can build it in. There’s no real ‘reference sheet’ of how many verts things should be, just experience and practice.

The typical rule for low poly:
1: Stick to block modeling. You may be tempted to use sculpt mode; and using it for subtle movements is fine, but using it to draw on your model will quickly overload your vert count!
2: Don’t add a whole loop cut around an object if you only need one vert out of place (like, for an ankle!) Cleverly cut and build your model so that you only end up using one extra vert, and make sure it doesn’t result in an Ngon.
3: Don’t use geometry to add detail unless necessary. Your character might need a belt, say, but if it’s too intricate or doesn’t need to move around at all, you might as well make it part of the texture! With normal mapping, you can simulate depth, so you don’t need real depth. Good texture work makes all the difference; something that seems super advanced might only be 300 verts! Great low poly characters can go sub 1000, but perhaps that’s a few too few for Second Life.

Low poly is about being vert-economic! I tend to get sloppy when I’m rushing, and add in say, 4 loop cuts to make the walls for a room, but if you didn’t need that much complexity, you could get away with a single inset.
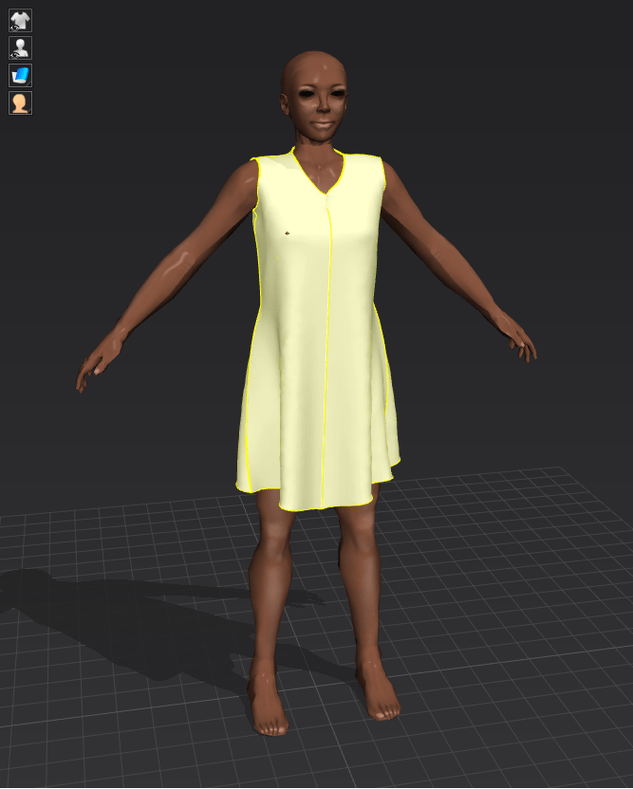
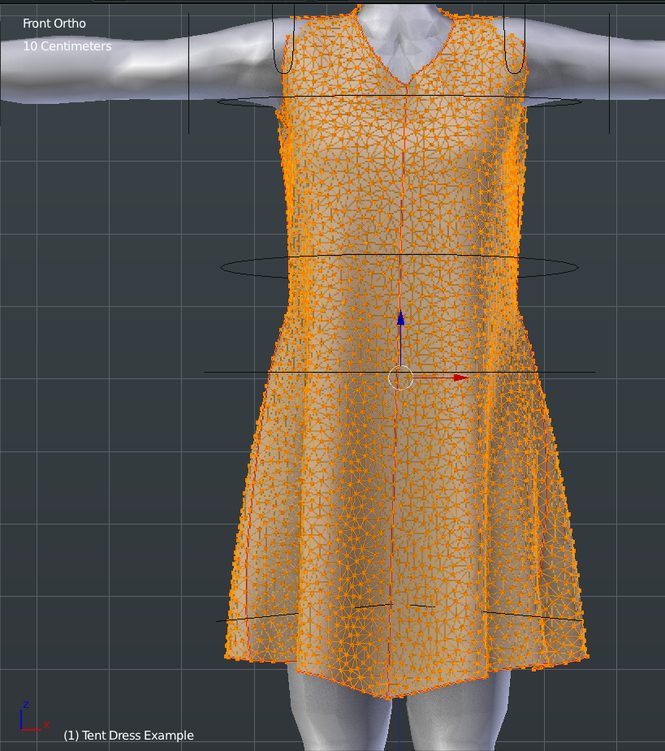
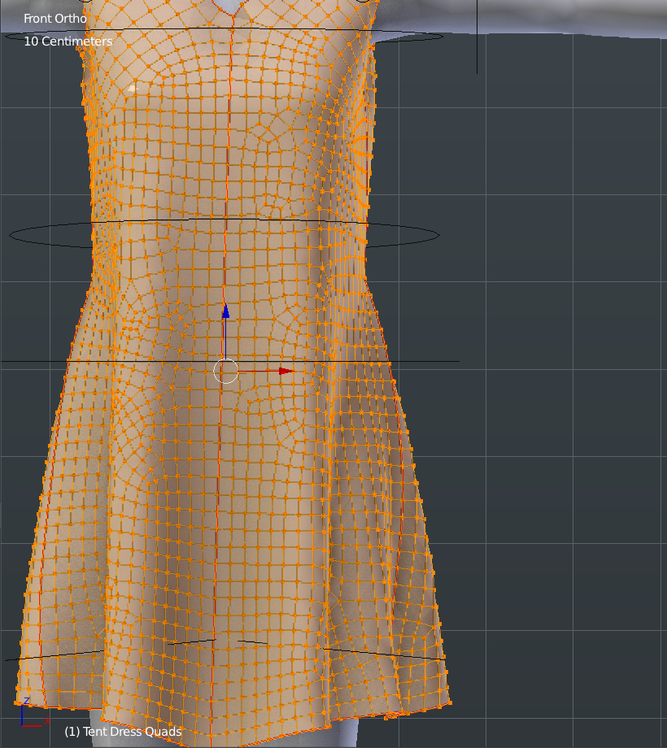
EXAMPLE TIME
A leg has key geometry: The hip, the thigh, the knee, the lower leg, the ankle. Technically, for the lowest of low poly models, you only need 1 loop per each of the key parts. The leg itself only needs to be rounded in shape, so it could be anywhere between 6 and 12 verts around (x5 for the key loop cuts, so about 30 to 60 verts for the WHOLE leg!)

HOWEVER, the knee requires more geometry if you intended a character to walk. Refer to what I said about “Only use as many verts as you need”. In my experience, I split the verts along the front of the leg to create the knee. (Using v, you can tear one vert into 2)

Now we have a leg that’s under 100 verts and will bend well when animated. You’re not going to get flowing flesh or rounded calfs, but for low poly, it’s all you need.

2 Likes

I haven’t messed with creating mesh bodies for SL. The are particular requirements based off the original and I am not that great at rigging and weighting the darn thing. I haven’t been that interested in character modeling to be honest. Whoever created the original character body, should of taken Michael’s class before they started trying to unwrap the darn thing because they did a very poor job of it!

All good suggestions regarding “Typical Rule for Low Poly” in your post. And, I must agree with you, good textures can make or break your models. It’s something I learned long ago even though it was outside of using Blender. Can’t bet a well made texture creatively used and, I am learning Cycles will help enhance those textures. LOL once you figure out how to do use Cycles! :slight_smile:

I am curious if you have a venue you are creating for?

Anyone else want to weigh in with thoughts or ideas?

This is a good question as an article covered in gamesutra talked about why many indy devs used low-poly and the many pictures look quite different: http://www.gamasutra.com/view/news/273904/Why_are_so_many_devs_employing_a_retro_lowpoly_mid1990s_aesthetic.php

I’ve love to do a style like Else Heart.Break() as shown in those pictures.

I have always thought the rule was that it was art that’s not highly detailed unlike, say, Naughty Dog’s “Last of Us” or Ubisoft’s Assassin’s Creed series being realistic and highly detailed characters.

Beyond that I’m not certain. I’m not knowledgeable on these things, but that’s why I’m working on the Blender course to get an idea of how to build thing and build my own assets.

1 Like

Thanks for sharing the article! I found it very interesting reading and gave me things to ponder since my mind set for creating in Blender is not really for games per se. Gives me a some thoughts as to the mind set of others and why they do what the do.

I think Everyone taking this course have different ideas of what they want to do as they learn modeling. It’s nice to see everyone’s different approaches. Sorta why I posted this as a way to learn more about modeling and it’s varying aspects of usage!

1 Like

My reason is quite simply to build assets for my own games, however there are going to be a variety of styles so some games I’ll use Blender and other times I’ll be using Pixel-art. I also may just showcase some interesting items on DeviantArt as it would give me a reason to start using it again :stuck_out_tongue:

It has also something to do with power of number crunching. Computers nowadays are more capable than 10 years ago. And smarter hardware to render stuff (not one but multiple ~ CUDO).

1 Like

I wouldn’t know…I haven’t gotten too far into the Blender course yet.

1 Like

You would be surprised: Assassin’s Creed 2 is deceptively few triangles!


This is considered low poly, when compared with movie-quality renders, as a lot of movies use sculpts (and sculpts get crazy high polygons!) It’s too bad I spend more time researching it than actually making my own :stuck_out_tongue:

And for reference, here are some random high poly models I found.


See the difference now, guys?

1 Like

Mcfuzz…so those assassins creed low poly figures…how the hell do they accomplish that? By first making a very detailed high poly figure and then retopologising it and bake down the detail to normal maps? Im just baffled that such a detailed figure could be low poly …is what i wrote above the secret or how the hell do they do it?

2 Likes

I’m ****** surprised as well…it’s like…how?

1 Like

That’s the secret with low-poly: You only use verts when you need verts. You’ll see with the faces, hands and feet, the models have significantly more detail; because these parts are core to enjoying the animations of the characters in an AC game. And, on top of that, they’re making a GAME, so the less polies used, the better; You shouldn’t use geometry to crease, ruffle, or rip clothing, because then you’ll have too much topological complexity. And a texture can do what you need in this circumstance, allowing to free up some geometry (have a look at the guy in the yellow outfit; his ruffles on his cape are entirely made of textures with no excessive polygons)

To be honest, I don’t know how it’s done. I don’t know enough about retopo or normal mapping, but I am fairly sure that’s how it works. You’d need to look it up to really find that out.

Of course, THIS generation, with your Xbones and PS4’s and what-have-you, topological complexity has a certain amount of room to move because the processing power is much better. But most games, up until last gen, were deceptively low poly!

1 Like

Ssshh, don’t be telling the folks at Marvelous Designer that geometry shouldn’t be creased, ruffled, or ripped they might have fit! :slight_smile: 
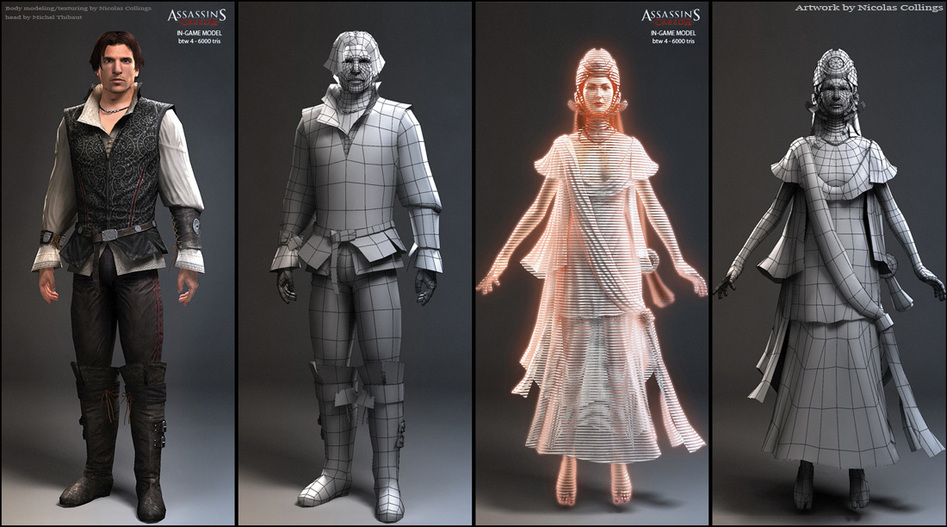
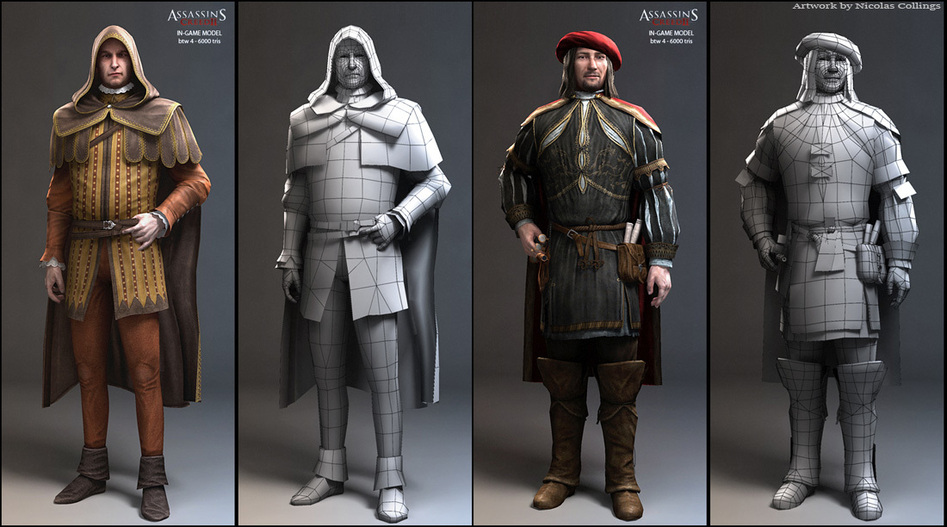
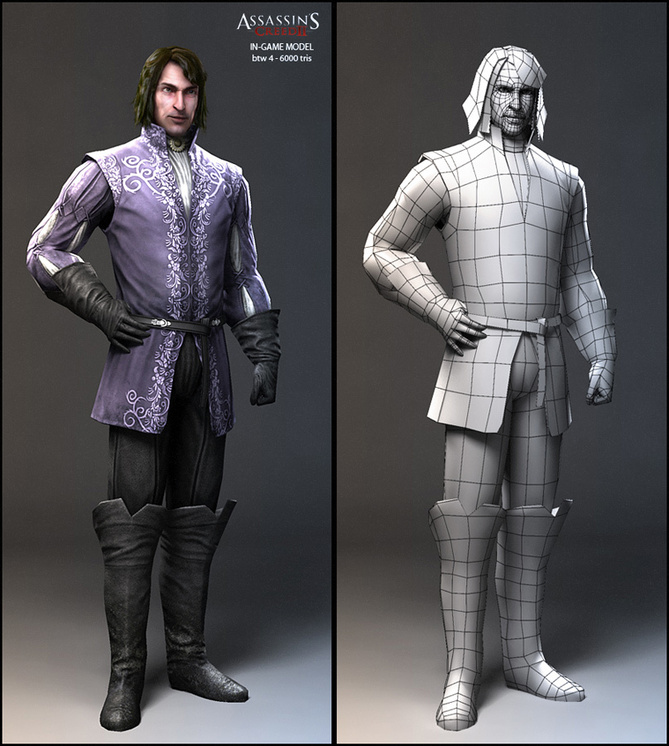
Actually, it looks like maybe Marvelous Designer was used in making Assasin’s Creed. Here is an interview from one of the artists plus there are several more short ones for other games and such. http://www.marvelousdesigner.com/cases/digic

I would say you are right though, the original models were probably high poly then run through a retopology process. I know the clothing had to be retopoed if they used Marvelous Designer to create them. I say this because I have worked with MD for a couple of years and the original clothing is high poly and you definitely you do not get nice quads like you see in the pictures you posted. Before MD added their quads feature, you had to run the finished garment through ZBrush (or was one way to do it) to create nicer quads and new UV maps. Otherwise, it was difficult to rig and weight paint so it would move well with the model. I am pretty certain by just looking at these pictures, very skilled artists had to create those clothing textures so they could enhance all the wrinkles, highlights, color variations and shading.

I did a quick and fast dress in MD to share with everyone so they know a little about MD (yes, you can get a free 15 day trial to check it our yourself at www.marvelousdesigner.com but you still need Blender or other software to rig and alter the mesh) This dress took me exactly 45 second to create the pattern for the dress, position and sew it and another 15 seconds to simulate the cloth on the model. If I had to do this by hand, it would of taken me days or weeks at this point.

I think what gaming modelers/artists save in production time, using something like MD, they can probably retopo it fairly quickly if they are experienced. Also, since this dress is a separate object, they could spend less time in the number of models they would have to create. I think it all probably a time factor but, is just a guess on my part from what I have read.

This next picture image shows the default .obj export imported into Blender, it is 4885 Verts & 9256 faces.

Now here is the dress in Blender Exported as quads, it has 3726 verts and 3477 tris. If you look really close the quads are not that great. I could probably have a friend take this into ZBrush and mess around with it and get it lower in verts/tris and better quads. But, you will lose some of the folds on the skirt of the dress if you are not careful.

2 Likes

Privacy & Terms