Quest: GameDevClicker Quest
Challenge: Uh Oh!
Feel free to share your solutions, ideas and creations below. If you get stuck, you can find some ideas here for completing this challenge.

Quest: GameDevClicker Quest
Challenge: Uh Oh!
Feel free to share your solutions, ideas and creations below. If you get stuck, you can find some ideas here for completing this challenge.
For this challenge I got really confused at first, but after playing the Balloon Clicker by Flash Eddie Rocks I got an idea of what to do.
The issue: " It looks like the progress bar isn’t working when we click on the activation button! See if you can fix the “WorkRoutine” couroutine, so that it incrementally fills up the progress bar over time and credits the award to the player’s bank balance once complete."
My solution: Create a custom timer that the Developer can use to set how long it takes each Clicker to run the WorkRoutine();. Then use this timer to allow the Clicker to show progress and give the Player an award after the work is completed!
How did I do it?:
**Step 1: Open the “IdleClicker” Scene and add a “clicker-item” Prefab to the Scene **
NOTE: If you look around inside of the Clicker Item Prefab, there is an object under the Clicker Item Background known as the Clicker Item Foreground. This object is currently not doing anything and is probably provided to be used as the visual for our progress bar in the beginning. Also, inside of the ClickerItem script, there already created a Image Variable known as “progressForegroundImage” in the SerializedField region for our reference. This is what I used for my Progress Bar.
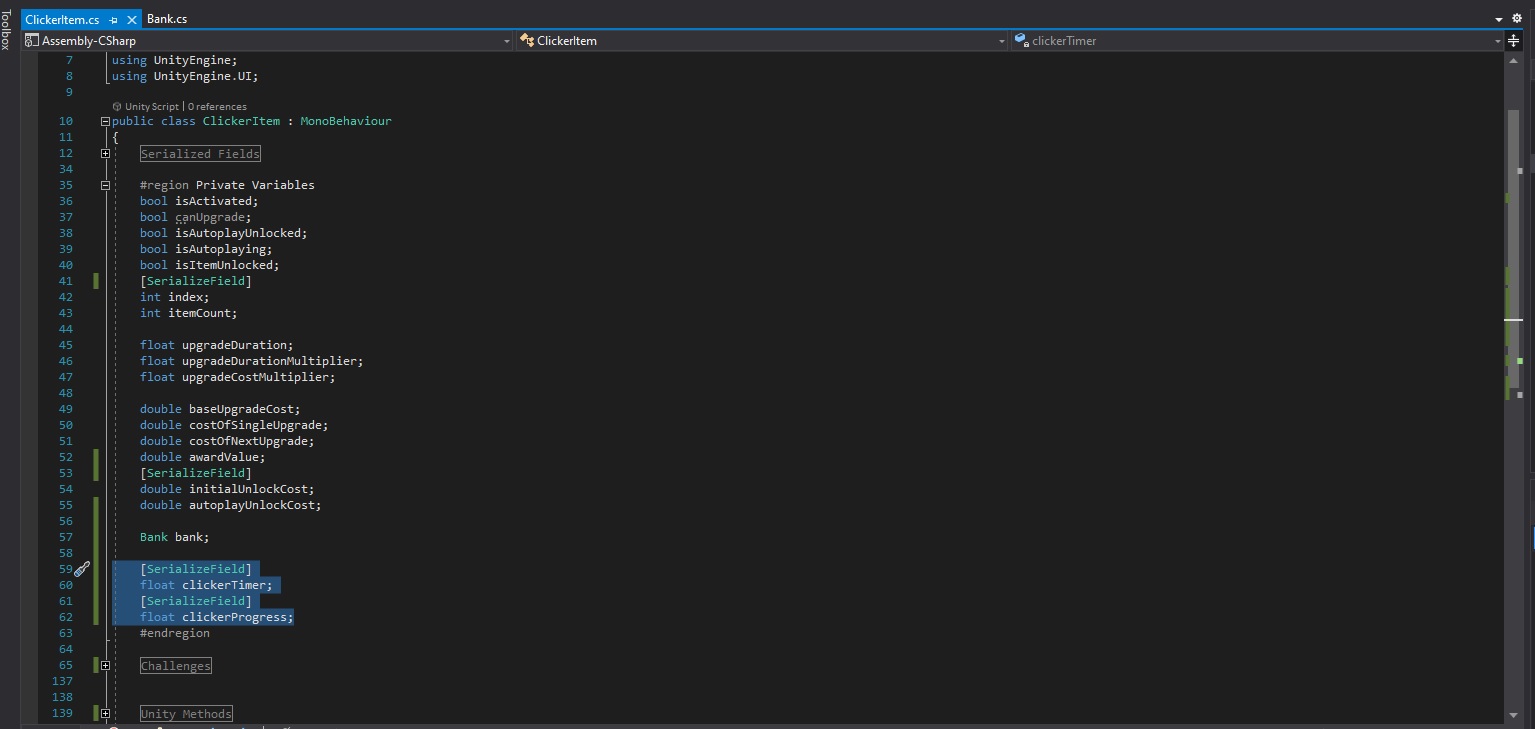
Step 2: Open the “ClickerItem” script and add 2 private floats to the Clicker Item’s Code “Private Variable” Region.
2.1 - One I created to set how long the progress of the Clicker should take before giving the player an award.
(For my project this is known as “clickerTimer”.)
2.2 - One I created to show the script how much Progress has occurred.
(For my project this is known as “clickerProgress”)
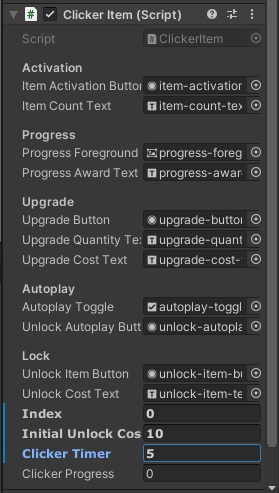
NOTE: I recommend typing [SerializeField] either above or next to these variables so that you will be able to Serialize the Private Variables and see them in Unity. This is useful for being able to set your Timer directly without extra code and you will also be able to see how much Progress has occurred for each timer directly in the Inspector.
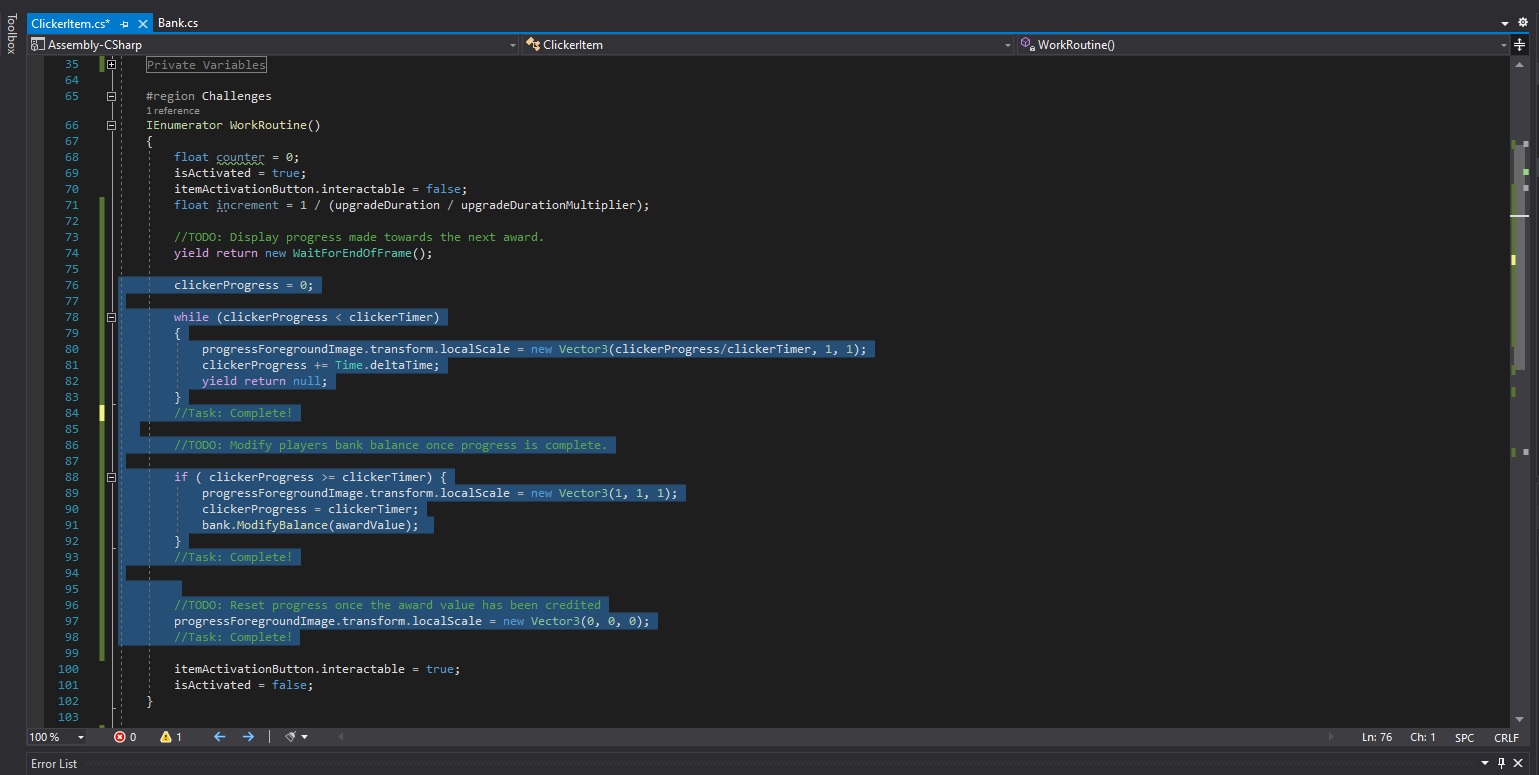
Step 3: “TODO: Display progress made towards the next award.” by creating a Progress Bar using a while Loop code inside of WorkRoutine();
3.1 - After WorkRoutine(); performs the “yield return new WaitEndOfFrame;” line, I added a line of code under it that sets the “clickerProgress” equal to zero. This makes it so whenever the Work script runs, the Progress value always starts off at zero and allows us to use code to compare it to the value it needs to become (which is the Clicker’s Timer Value).
(Example: clickerProgress = 0)
3.2 - Under the “Clicker Progress = 0” line, I created a while Loop that says “while the Clicker’s progress is less than the Clicker’s timer, run some code until that is no longer true.”
(Example: while ( clickerProgress < clickerTimer) { “Run Progress Code” } )
3.2.1 - Inside of the while Loop, I added code to change the size of the Progress Foreground Image’s x scale based on how close the Clicker’s Progress Value is to the Clicker Timers value. This can be done by dividing the “clickerProgress” by the “clickerTimer” and allowed me to simulate a Horizontal Progression.
(Example: progressForegroundImage.transform.localScale = new Vector3(clickerProgress/clickerTimer, 1, 1); )
3.2.2 - After changing the Foreground Image’s “x” scale, I added code to increase the Clicker’s Progress value by Time.deltaTime to simulate the progression occurring in real time seconds.
(Example: clickerProgress += Time.deltaTime; )
3.2.3 - After increasing the Clicker’s Progress, I added a yield return null and this makes it so the process will continue until the Clicker’s Progress is no longer less than the value we set for the Clicker’s Timer.
(Example: yield return null; )
3.3 - Now I have a script that says while the Clicker Progress is less than the Timer’s Value the script should: increase the x of the Foreground image and increase the Progress of the bar every single second until the time has been completed!
(Example:
while (clickerProgress < clickerTimer)
{
progressForegroundImage.transform.localScale = new Vector3(clickerProgress/clickerTimer, 1, 1);
clickerProgress += Time.deltaTime;
yield return null;
} )
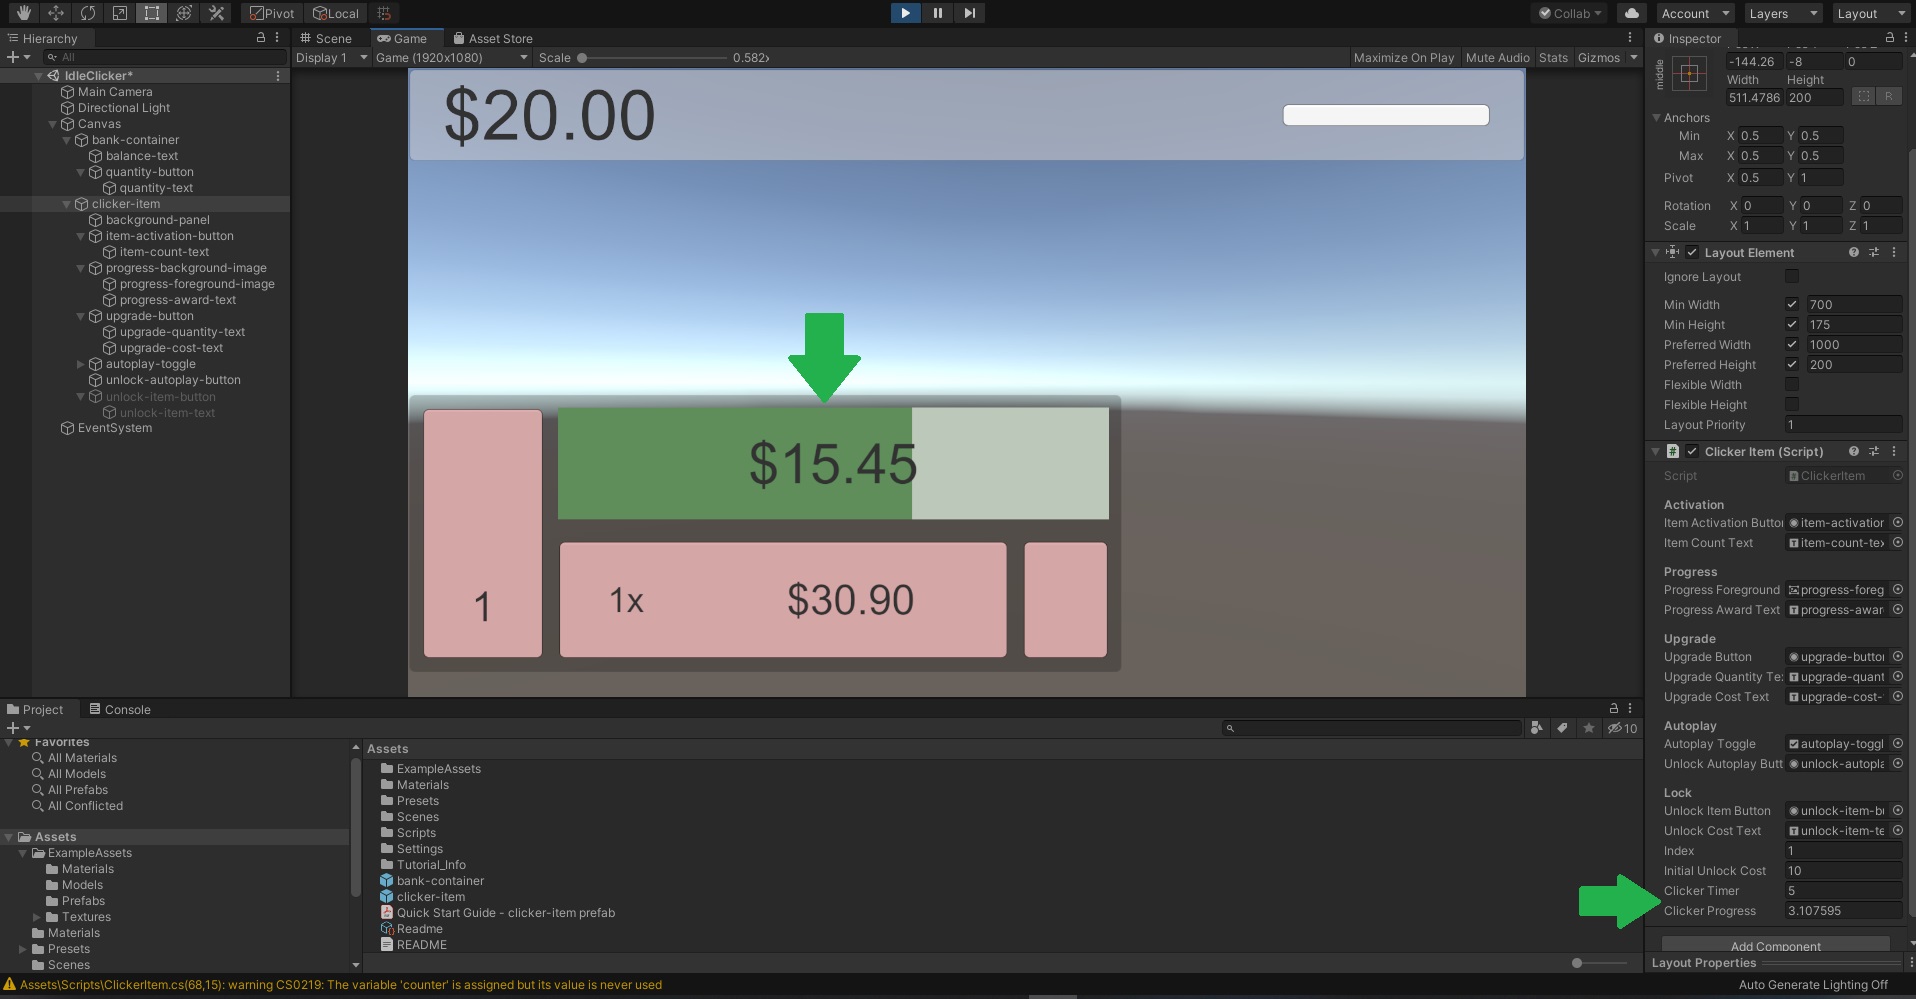
3.4 - I went back to Unity. In the editor, clicked on the “clicker-item” in my scene and set the Clicker Timer under the Clicker Item Script section to any time I liked. I ran the game and made sure my progress bar fills up!
NOTE: My progress bar now fills up, but you may notice that the bar does not fill up fully and the Clicker Progress’ Value goes a bit above the Clicker’s Timer Value. That is because there is nothing telling the code to not increase the Progress time passed the value of the Clicker’s Timer after the final frame checks. The time.DeltaTime increases and wont stop until the yield return null; occurs and finally tells the code run a check for the while loop one last time to make sure that it is no longer true. This also mean that because the two values are not the same, the UI will display the difference. The next steps will provide guidance on how to control the Progress values a bit better, keep the UI Clean, and also reward the player for completing Progress.
Step 4: “TODO: Modify players bank balance once progress is complete.” by using the “Modify Balance” Method in the bank script.
4.1 - I created an if Statement under the while loop that says “if the Clicker’s Progress is greater than or equal to the value of the Clicker’s Timer, run some code to reward the completion of progress”.
(Example: if ( clickerProgress >= clickerTimer) { “Run Reward Code”} )
NOTE: I a using Greater than or Equal to in this if Statement because as stated before, the Clicker Progress and Clicker Time will have a hard time being equal during all the frame passes. This Condition will help reel in any case that Clicker Time and Progress are equal along with if the Clicker Progress has gone above the value of the Timer as well.
4.1.1 - Inside of the if Statement, add code to keep the Progress Foreground Image scale always at (1, 1, 1) to keep the UI clean and never be able to go passed its fully filled visual when the Progress is complete.
(Example: progressForegroundImage.transform.localScale = new Vector3(1, 1, 1); )
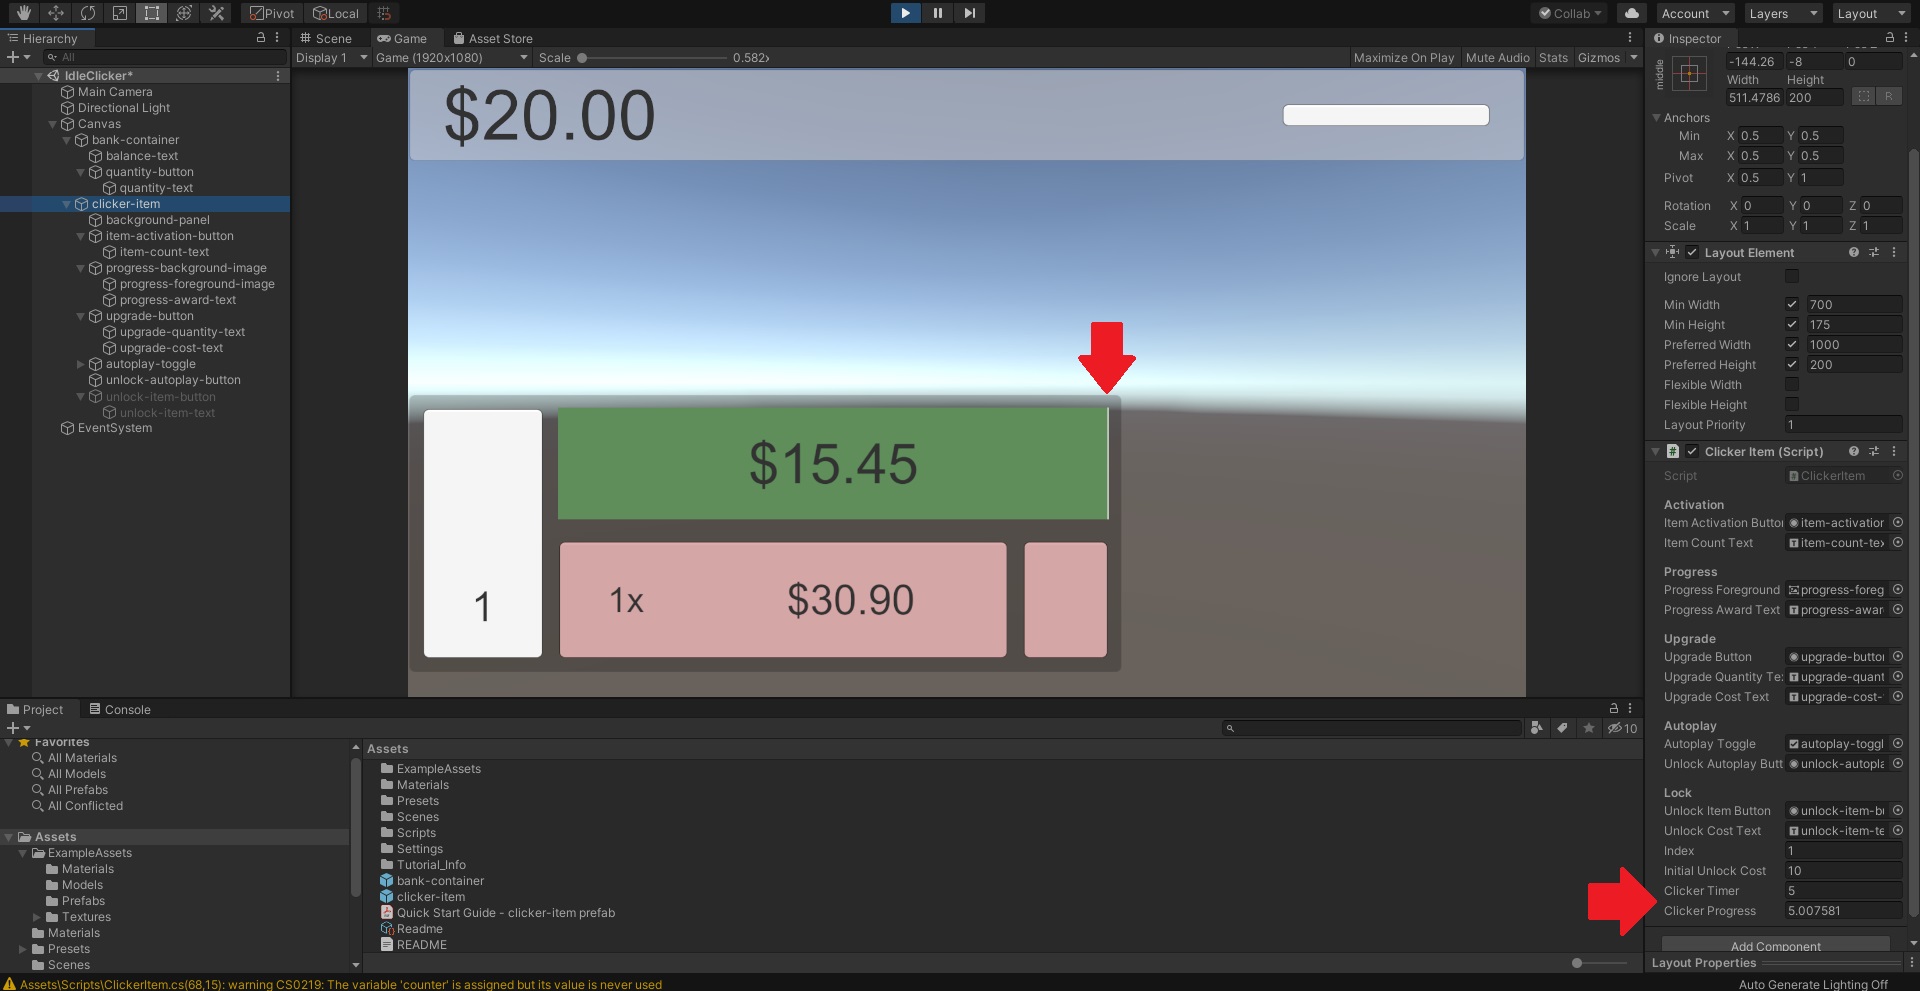
4.1.2 - After setting the Foreground Image to only show a specific completion look, I added code to set the Clicker’s Progress Value equal to the value of the Clicker’s Timer. This allowed me to control my value of the Clicker Progress even more and be able to see directly in the inspector that the Progress has been completed.
(Example: clickerProgress = clickerTimer; )
4.1.3 - After setting the proper progress value, I added some code to give the player a reward for their completion. In this case, the “Bank” script has a “Modify Balance” Method that will allow us to pass in any given value and add it to the Bank. The “ClickerItem” script already has a reference to the Bank script in the Private Variables Region known as “bank”. There is also a reference in the Private Variables Region for how much the player should be awarded after completion of work (along with how to calculate how much the players earns for their work) known as “awardValue”. This is the value I passed in to “Modify Balance” to give the Player money every time they complete work.
(Example: bank.ModifyBalance(awardValue); )
4.2 - Now I have an if statement that says that if the Clicker Progress Value is equal to the Clicker Timer value the script should: set the Progress Foreground Image to a final look, set the Clicker Progress equal to the Clicker Time to show completion, and reward the Player for completing work.
(Example:
if ( clickerProgress >= clickerTimer) {
progressForegroundImage.transform.localScale = new Vector3(1, 1, 1);
clickerProgress = clickerTimer;
bank.ModifyBalance(awardValue);
} )
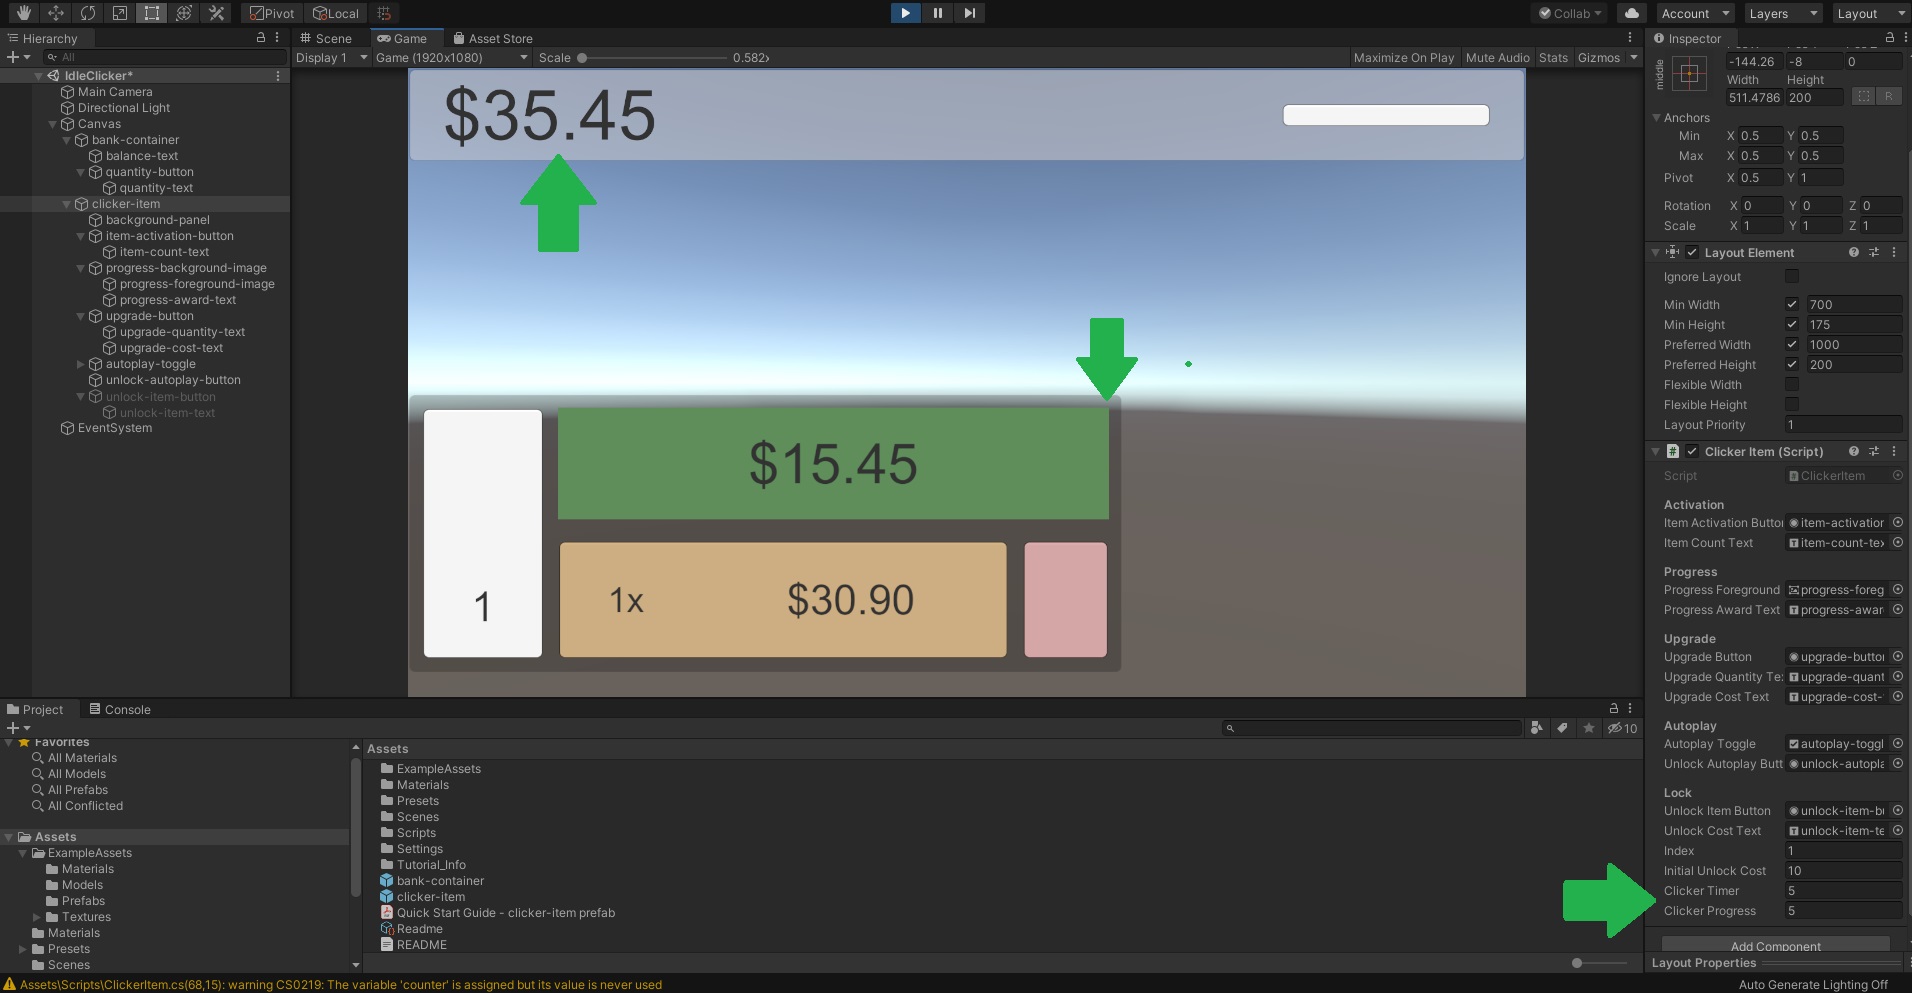
4.3 - I went back to Unity. In the editor, clicked on the “clicker-item” in my scene and set the Clicker Timer under the Clicker Item Script section to any time I liked. I ran the game and made sure my progress bar fills up!
NOTE: I can set your own custom times on each of your Clickers and the Player will be able to earn money once the Work has completed. These final steps will add a finishing touch to the code that will show the player that the Clicker is no longer in use and that they will need to click it again in order to make it perform work (unless it’s in auto).
Step 5: “TODO: Reset progress once the award value has been credited” by setting the Progress Foreground Image Scale to zero.
5.1 - I added some code under the if statement that will set the Foreground Image Scale to zero to give the Player a visual that the Clicker is no longer in use.
(Example: progressForegroundImage.transform.localScale = new Vector3(0, 0, 0); )
NOTE: The reason I did not set the Clicker Progress equal to zero again along with making the Foreground’s Scale equal to Zero is because if you noticed; whenever the Player is able to perform work it automatically set the Clicker Progress to zero in the beginning in order to run the checks. For this type of project we won’t set it back to zero to keep our code D.R.Y (Don’t Repeat Yourself code). In other projects this may need to be tweaked for other types of checks, but for now I’m able to watch each Clicker and make sure your values are set properly and run smoothly. #Debugging+1
That’s how I did it!
Glad that Balloon Clicker helped 
 .
.
I couldnt get my head around the Quest or challenges at all to begin with as I’d not played Clicker games before. I left it and went away but did start to play Cookie Clicker to get an idea what to do (190 days ago and 6.353 sexdecillion cookies since I started according to the stats 

 )
)