
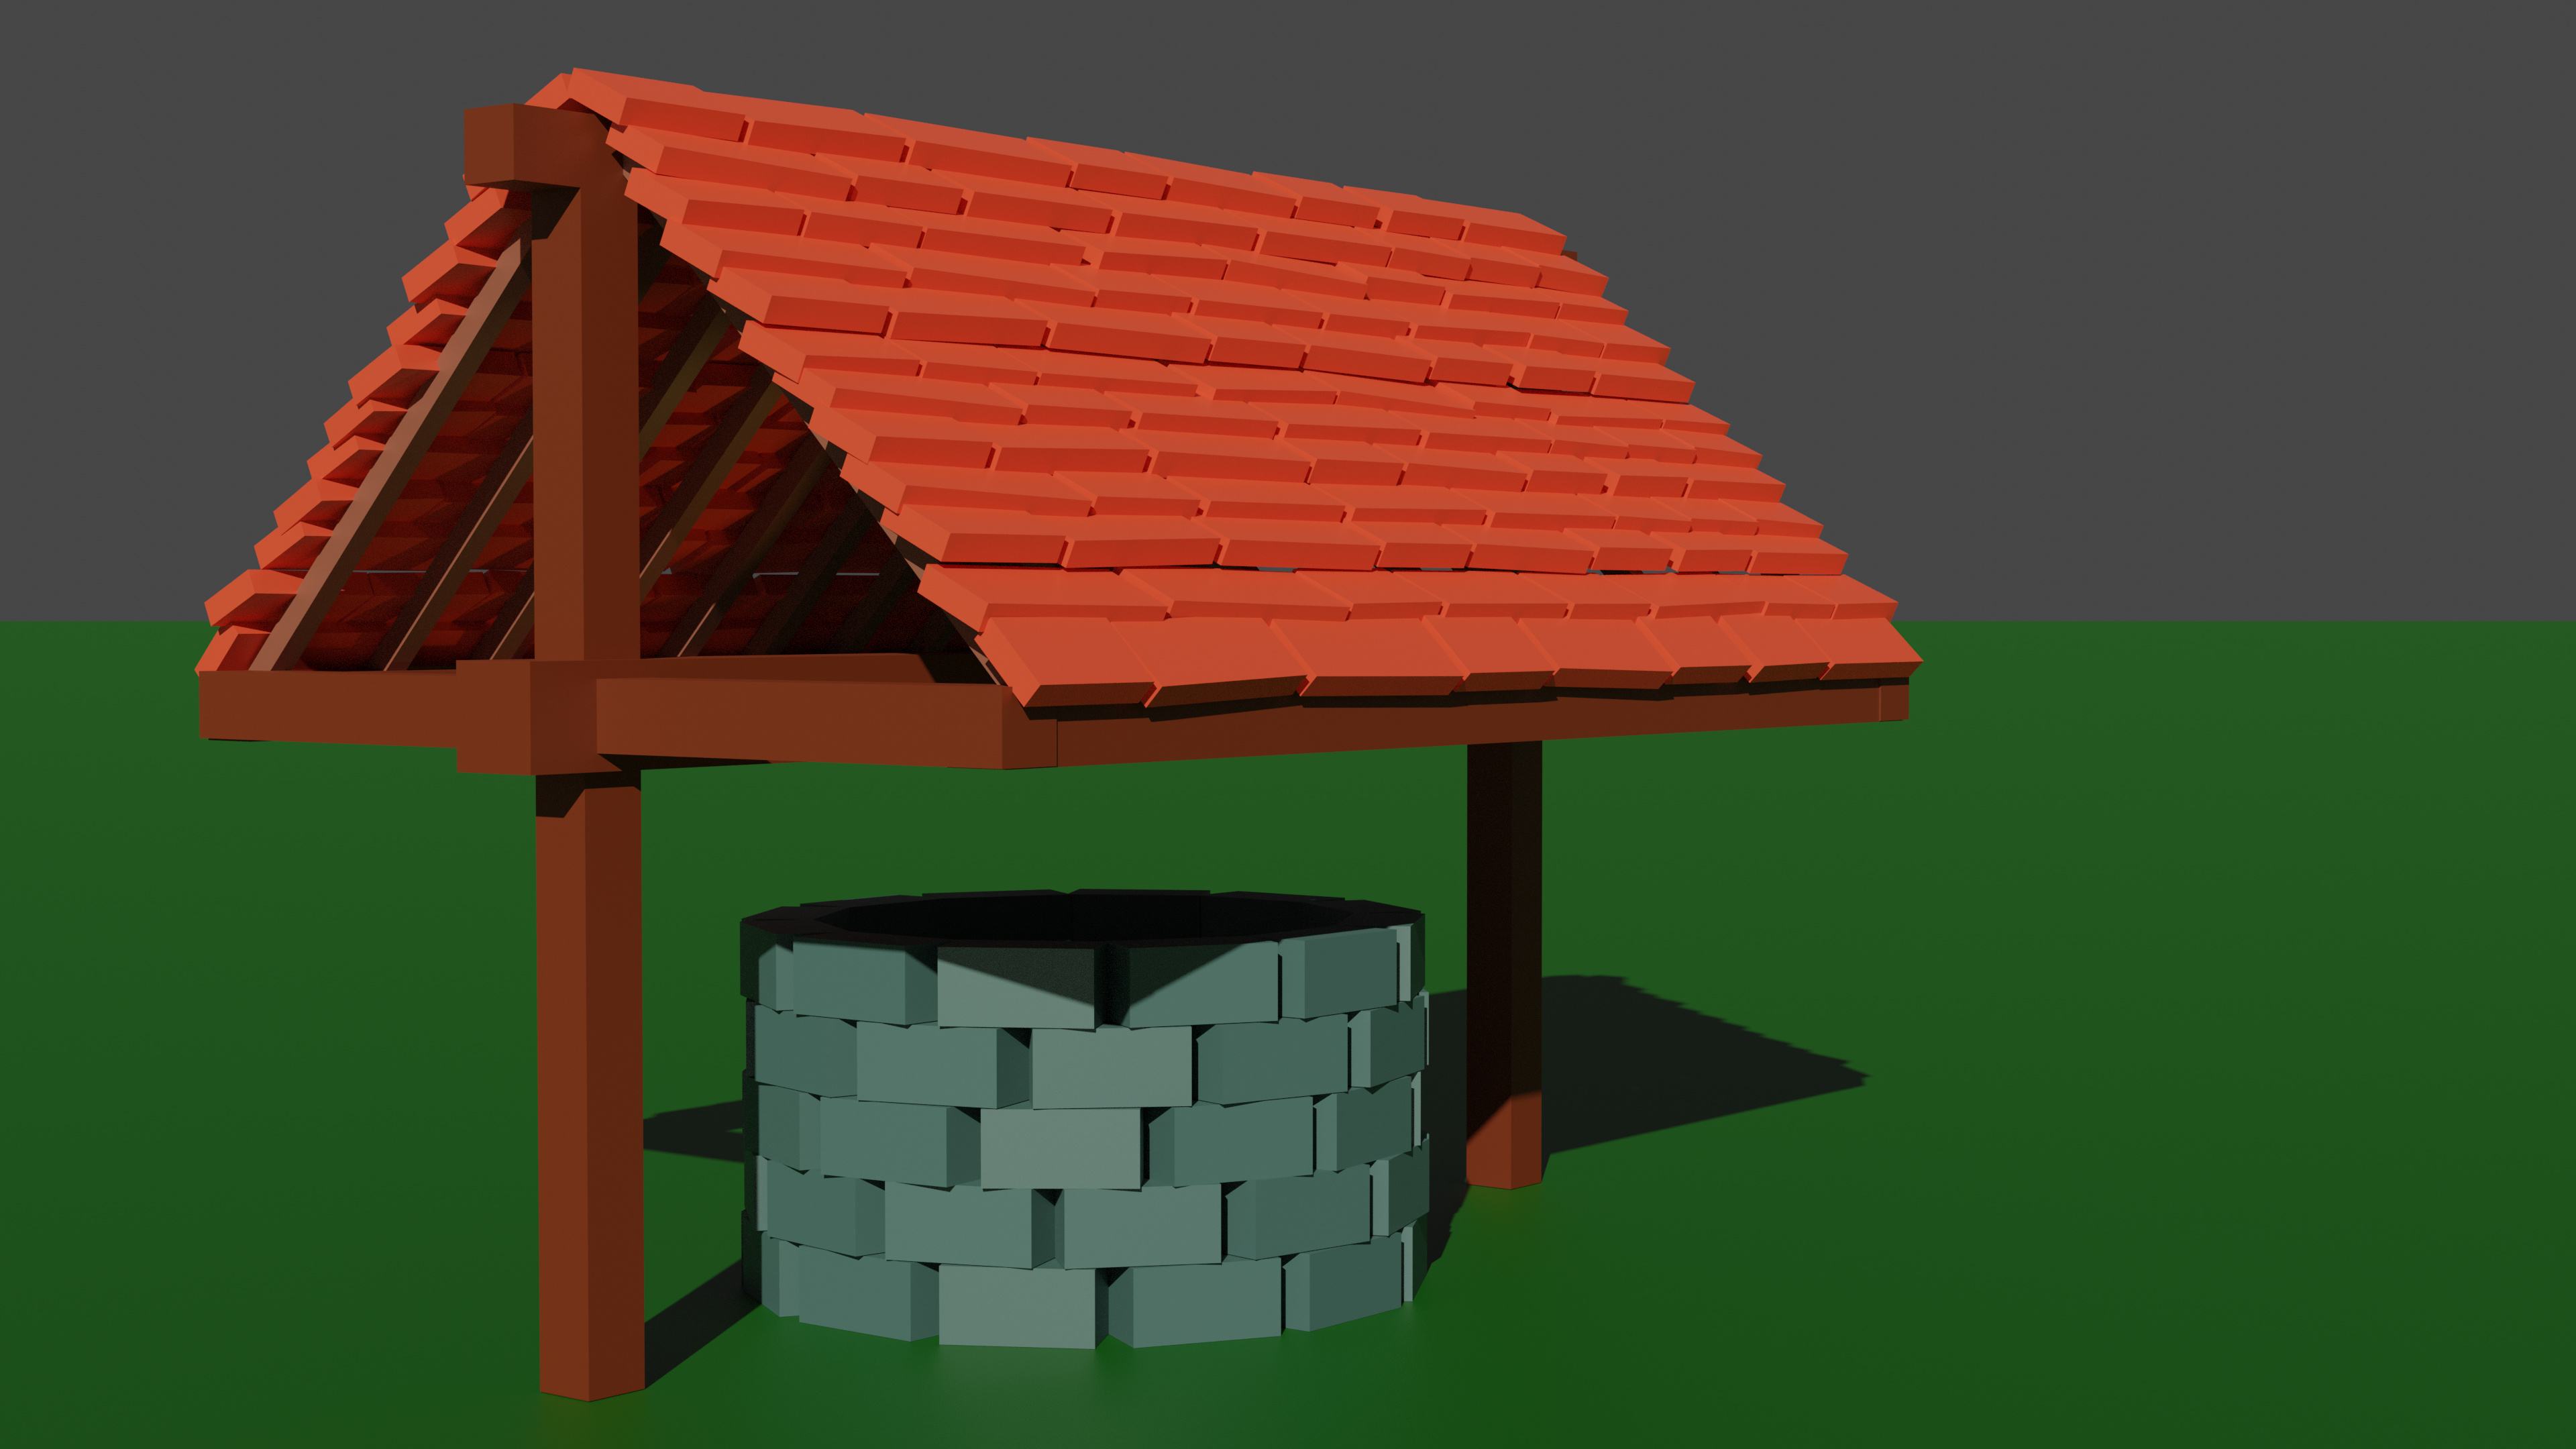
I decided to go for a more realistic sunset light as main source of light and a cone inside the well to show some details of the roof. Hope you like it.

6 Likes
Increase the sun light.
1 Like
I wanted to give it a more sunsetty look but i guess it does look better now. I increased the light and gave it a whiter tone. Thanks for the suggestion.
5 Likes
Great improvement. Playing with light is very difficult.
It has also something the do with the overall texturing of objects.
I see you are rendering in 4K.
There is no need for. Most people will not zoom (enlarge) the image.
You get more render speed at lower resolutions.
2 Likes
Very nice well in many ways. The effect of the tiles is great even if incorrect for real life tiling.
I have recently looked at that section of the course and it is not good, well useless in respect of the issues I will now mention, as wider considerations in modeling. First most obvious one the roof height. A well wall might be somewhere about waist high to a human, they are there to prevent falling in! No human can walk under your roof to get to the well. Tiles rest on battens, not rafters, they would fall through. Relevant when the underside is ever visible. The tiles are much too short and the rain will go straight through between them. Your bricks are a bit better than Mikey’s, but still not properly laid courses halfway over the ‘joins’ of the course below. Mikey makes the good point that things are not absolute geometrically precise in the real world and 3d generated stuff easily looks too perfect. However, he, and many students go in the opposite direction by miles! Sloppy is not a common style of bricklayers down the centuries! Variation from perfection actually needs to be tiny. Your tiles give a better if still exaggerated effect.
Oh, and I do look full size images on a 4k monitor.  Unless better quality makes problems in render times, I also go for the higher resolutions. You will notice the hit in time as your work gets more complex and detailed.
2 Likes
Hi NP5, thanks for your input. I’m enjoying reading your comments and improving the model based on your suggestions. This is what I came up with.

1 Like
Height is better.
Nice slipped tile, lol.
But shows part of the tiling issue yours is square. They are long rectangles in reality.
You have rafters now but tiles sit by hooking the top end over then not the batten resting in the middle of the tile, part of what causes your tiles to lift up their ends into the air.
Here is a work in progress I am playing with currently, with a clay tiled roof. Put a few quick duplicates in the sky to show the length, shape, better. (Ok you have not covered the texturing yet so ignore that mine are not just a plain colour. And the finer detail of the tile ‘hooks’)

Ugh, quick viewport render to show the underside where the battens go across the rafters and the tiles ‘hook’ over.

3 Likes
I really like the details in the window of your model.
I went with that tiling idea because i was imagining the well to be constructed with raw materials (planks specifically for the tiles). Maybe I should have used a different color, but i really like the effect given by the color i used (purely found out of luck, i’m still struggling with the color wheel), even if it suggests terracotta as material used for the tiles.
I also quite like sitting the planks as i did because it suggests a very simple construction process and it creates a nice pattern of shadows on different levels. It also suggests a much weaker resistance to winds (therefore the slid plank) and water leaking through the roof, but still providing some degree of protection.
I admit I’m not an expert on tiling and barely researched it, but i will definitely use your suggestions for a more complex version of the well that I’m definitely going to do in the future.
Thanks for all your suggestions, Looking forward for the next ones!
2 Likes