First Blender Animation! A Strike!

Pretty happy with this :grinning: I’m pretty sure the ball is still hovering slightly when it gets close to the balls…but no amount of tweaking seems to have sorted it!

https://drive.google.com/file/d/1YHQ7rREgj9BmLNcOIfx1DtujNMYAD0jE/view?usp=sharing

I really like the way it looked whilst I was working on it with the world reflections & lighting but as they never seemed to render though I ended up adding more lights to get some more interesting reflections…Is there a way of keeping that for animations that’s easy or is it a much more complicated problem? I’m very good at wanting to run before I can walk!

2 Likes

For the hovering problem you will need to go to the key frame where it begins hovering in place and adjust its position then replace the key frame with the new position. However this may be difficult to do because I’m assuming it’s a rigid body simulation, therefore you would need to reenact the scenario again. To be honest though I didn’t really notice the hovering at all. I also have limited experience with rigid bodies. I have only used it to simulate cloth and use one of the positions of the animation for a static object.

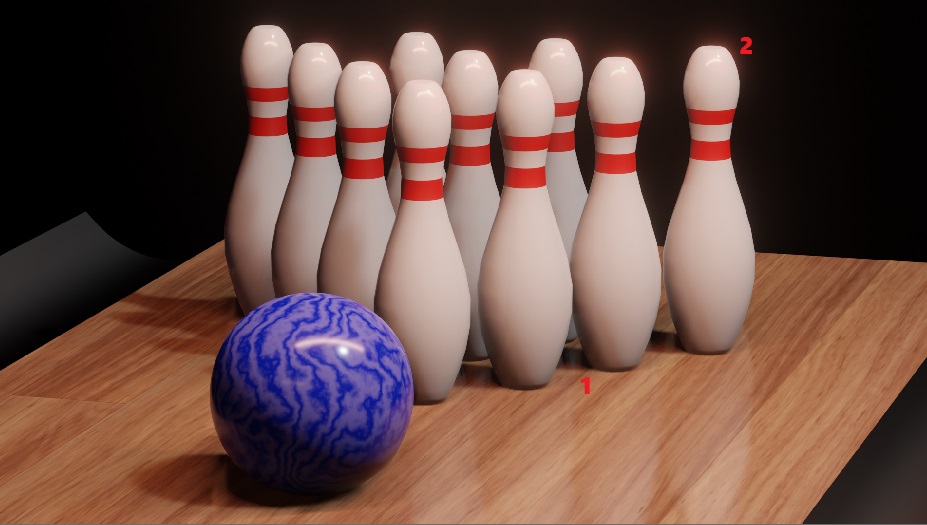
For the lighting, there are a few tips I have. The lamps that you have in the scene have an option for contact shadows (1). This makes sharp shadows to the surfaces near the floor or an other surfaces nearly touching. Select the lamp and light-bulb tab will appear. Click it, then scroll down to shadows and there will be check box for contact shadows.

Replicating real-life proportions also assists in easier lighting. The bigger an object is, the more powerful a light needs to be. Blender has real world units of measure to go by.

Also textures will further boost the appearance of the realism. Scratches, dirt, cracks, and dents help (the more imperfect the condition of an object’s surface is, the more realistic it appears).

Next, when a render is complete, you can go to the compositor tab and add a more noticeable glare to the reflections (2). The compositor is the “fix it in post” effect, letting you make adjustments to the final image (similarly to photoshop, but with nodes). However, it’s more powerful because during an animation it will add these effects to every frame (since every frame is an image). These are some quick ideas to keep in mind. Overall all, I like this animation. I don’t think the lighting needs to changed at all. The only thing it may need are contact shadows. I hope this helps. If you have any questions or would like for me to go further in depth with any of the details mentioned above, let me know. :+1:

3 Likes

When using physics, there will be always a margin between the active and passive objects. If they are exact, then objects don’t interact, and the ball will fall through the floor.

Besides the solutions, 3DE_Study explains.
You can add an extra none physics object, acting as the floor texture. Located at a height where it touches the ball and pin base.

3 Likes

Thank you so much for the feedback :grinning:

The tweaking I did was resetting the key frames for the animated sections. I tried to ensure there was no difference between any of the points on the Z axis before the physics took over. It didn’t seem possible to alter the position once it was out of animation. I figured there had to be a slight angle somewhere to give it lift…just couldn’t find where it was!

It is all rigid bodies & probably only the very basics settings wise. I have played around with it a little but this course is my first experience with this sort of program…so have absolutely no clue what I’m doing! It’s fun playing around though & I’m learning loads!

Thank you for the lighting advice - I will have further plays with that & see what I can achieve!
I’m really looking forward to learning how to add texture/dirt/wear etc. I can see how important that can be & what a huge difference it could make.

I hadn’t even considered being able to make correction post render. That could be interesting to play with too!

Thank you so much.

1 Like

I did have issues with the pins partially falling through or just the edges of the bases falling though…that explains why! I also managed to create Weeble bowling pins at one point - which l now wish I’d rendered as looked hilarious! I may try to recreate it & see if I can figure out how/why that happened!

So adding another plane on-top like a false floor? If I’m understanding that right I can see how that would help.

Thank you :grinning:

This is because the point of gravity (orange origin dot) of the pin was below the pin mesh body. The mesh collision physics forbids passing through the passive mesh. This is not so for the origin point. So your pin body mesh was resting on the passive floor, but the pin gravity point lies below the floor mesh, which causes wiggling.

1 Like

ahhh…that makes sense!
I’m always forgetting to reset the origin after applying transformations…
Next time I have a bit of time I will see if I can recreate it on purpose!

1 Like

Privacy & Terms