Hello GameDev.tv community 

I thought I’d make a write up after completing the environment art course, sharing some tricks I made up while doing the course. I hope it’s useful for anyone else.
Increment Snap
While building the houses, I heavily use snapping to make the parts line up perfectly. Doing this reduces the chance of having to do tiny adjustments later on.
Snapping can be done by holding Ctrl while moving, rotating, or scaling an object.
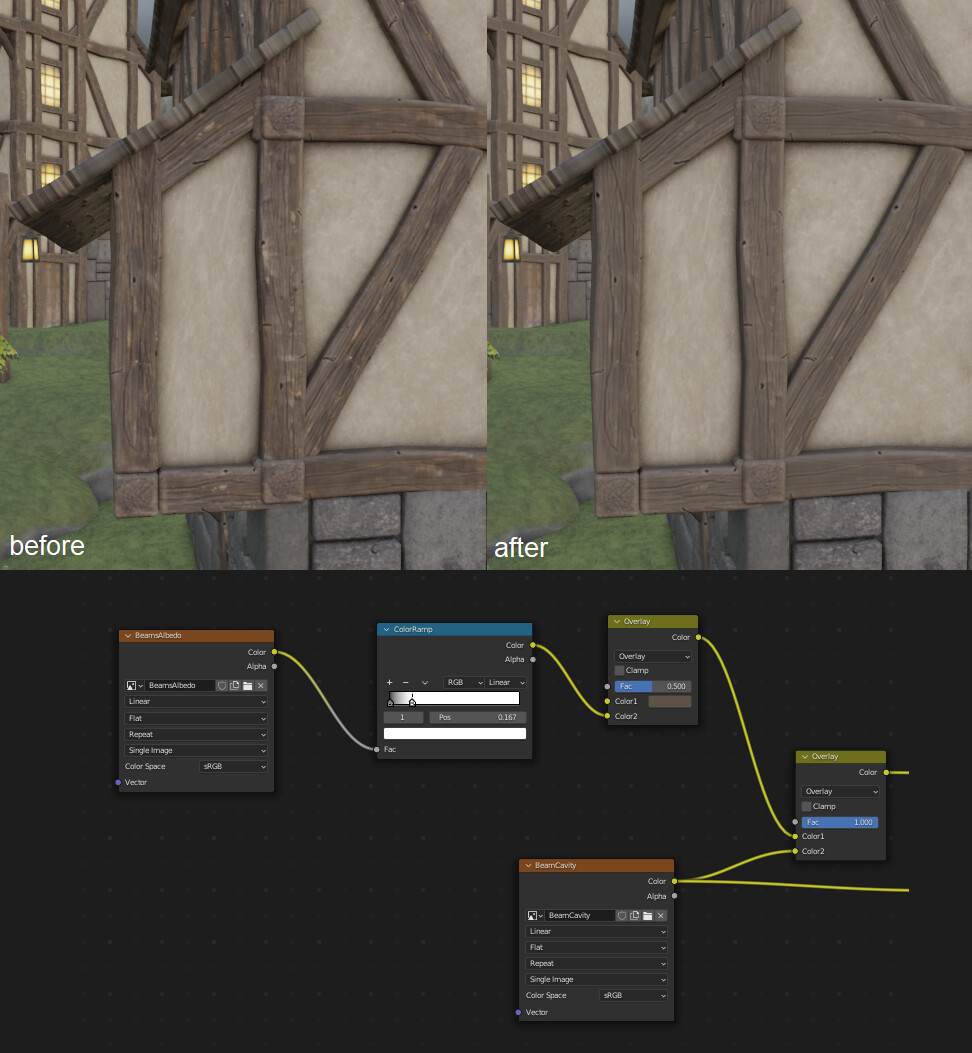
Beam Texturing
I feel like I wanted to make the sculpted detail of the wooden beam more apparent. So, instead of using the actual base color immediately, I made it ran through a color ramp first then another overlay mix. This makes the detail from the actual beam more muted, a bit stylized perhaps.
Stone Wall Subdivision
The low poly stone wall looks too rounded under lighting with high contrast. Using simple subdivision surface (even with 1 level) can make the flat side of the stone flatter.
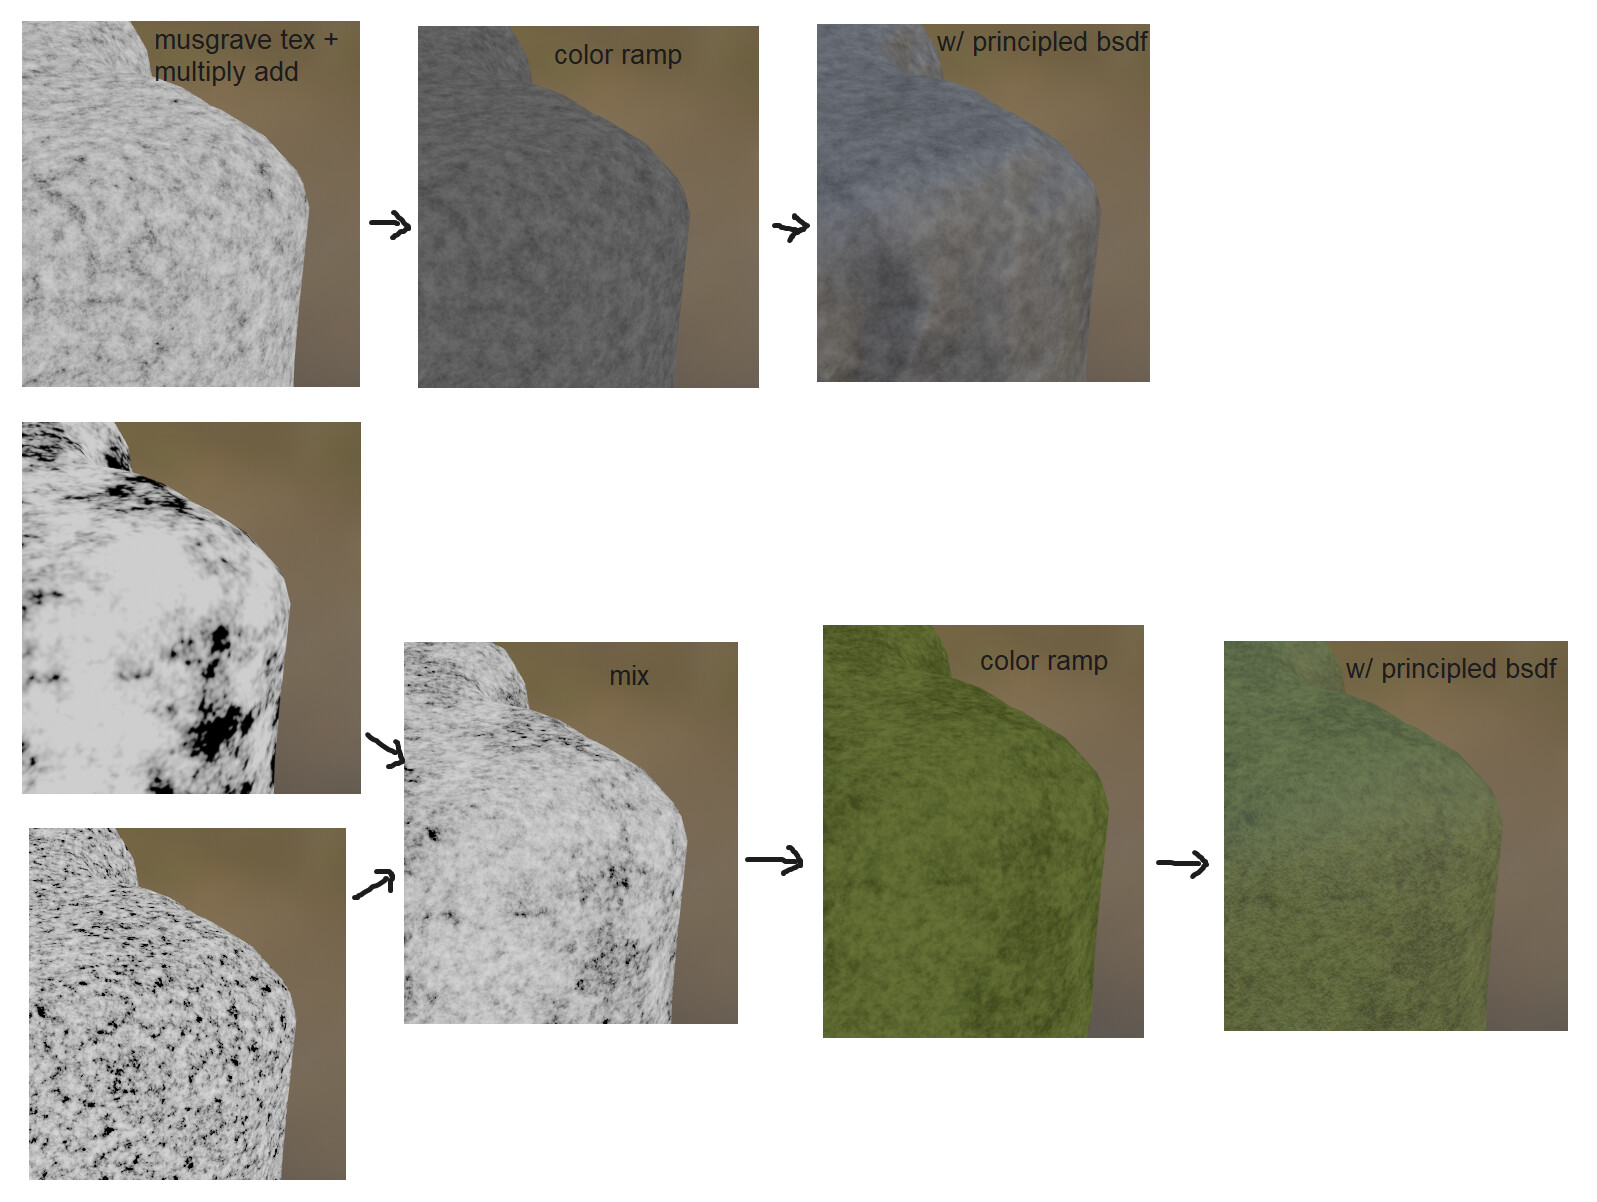
Mossy Stone Texturing
Instead of using PBR textures for big mossy stones, I tried procedural texturing with Musgrave Texture. The result alone is less complex, but I think it’s good enough.
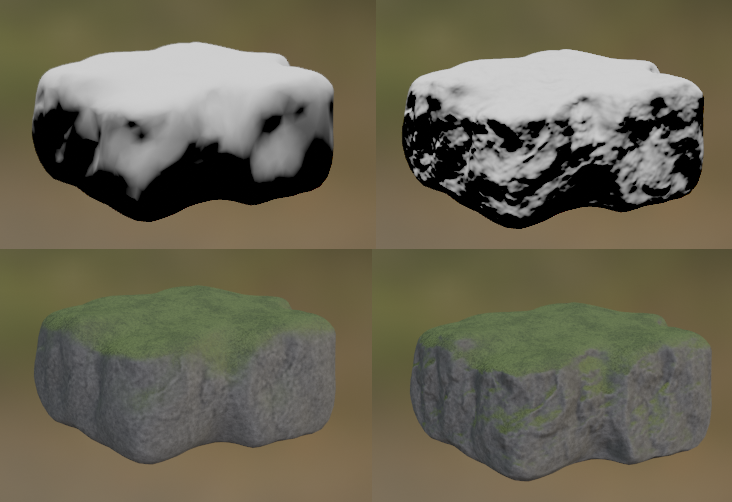
Mossy Stone Blending
The big stone is normal mapped already, so I can take advantage of it by using that for the moss blending. Doing so allows the moss to appear on the sides convincingly.
Window Emission
I painted a grayscale texture for the emission, then used color ramp for the color. It’s a slightly different workflow compared to painting the color directly.

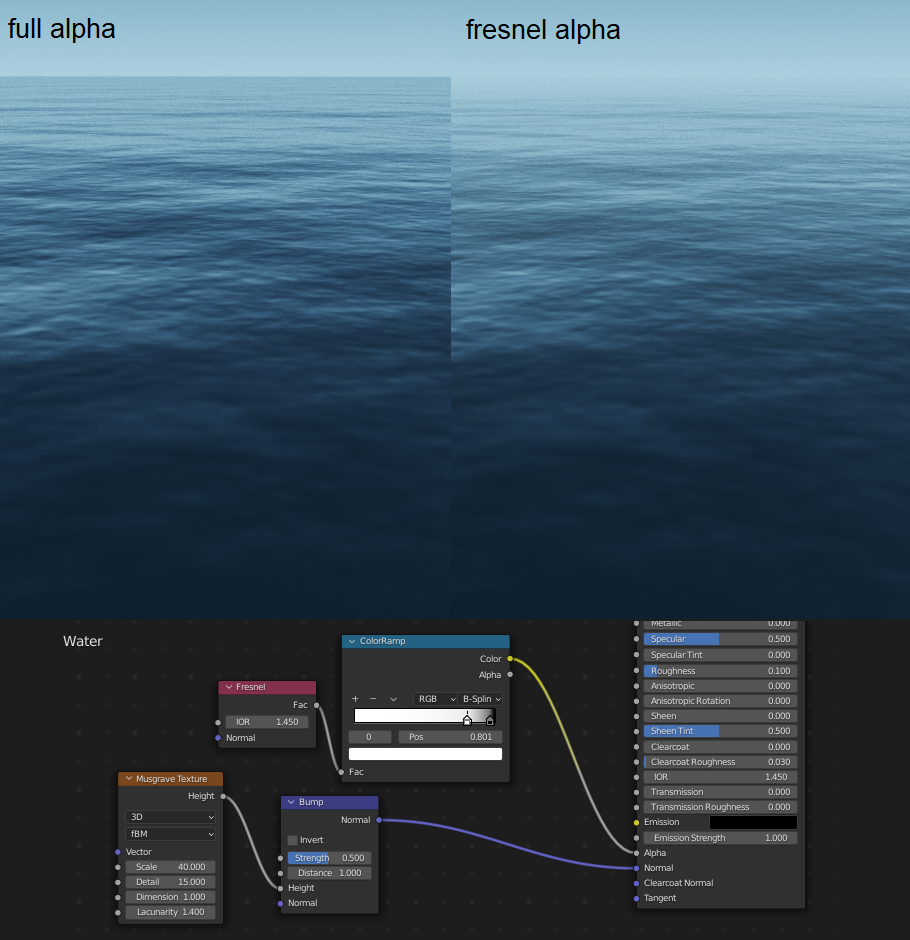
Water
I missed the normals for the water when I posted the result online for the first time, whoops.
Again, I used Musgrave texture for the normals. In addition, I used Fresnel node to fade the water when far away.
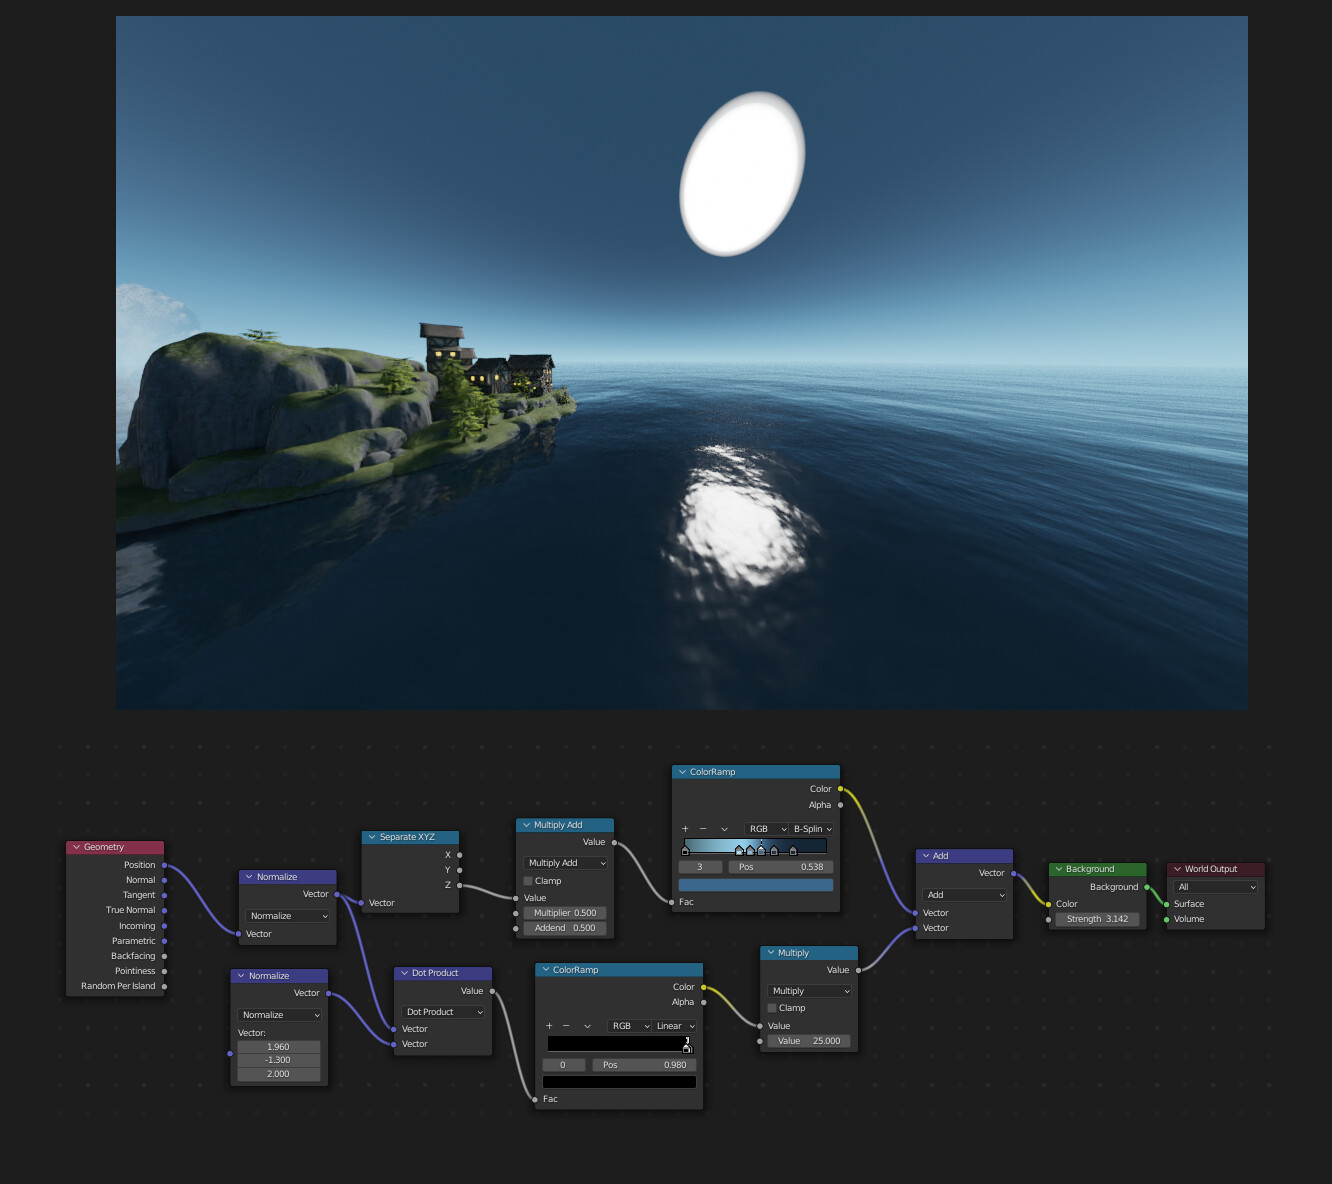
Sky
I thought I’d challenge myself by making a procedural sky. I have a bit of experience somewhere else so why not use it  The sky initially gives too little ambient light, so I increased the sky’s brightness then add a semi-transparent black plane on the black to filter the brightness. The sun is unusually big because I want to have soft shadows instead of a sharp one, the visible size is no big deal since it’s not meant to be shown.

Compositing
I used zero threshold on the Glare node, this makes the render look softer. The mix parameter makes the final image brighter for some reason, so I used a Mix node to do the mixing.
That’s all, once again thank you for Grant and GameDev.tv team for the amazing course.