Eevee's Shadows

Got on Ok with the lighting/shadows to recreate the inspiration image. It’s not quite a bright as I found the balance hard to achieve. My main issue is that some reason the render came out much darker than what I was viewing/working on in Blender. Played around with a few things but can’t work it out…any ideas what’s going on? I thought viewport shading gave the the view of the image you’d get when you rendered?
Thanks

Screen Shot:

Render:

Inspiration Image:

1 Like

Working with Eevee is a high level of simulating light effects, adjusted by a lot of Eevee properties. While Cycles, will calculate everything. That’s why Eevee is fast, but you need to know which properties in Eevee to turn on or improve.

  • Eevee has most properties turned off to gain render speed
  • In Eevee, objects you don’t see in the camera view, are thrown away in the calculation (no reflection or shadow casts).
  • Eevee shadows use a sampling rate (the more samples, the better the shadows). A bit like Cycles, influencing the render speed.
  • Make sure in Eevee you use real dimensions, like the pin about 30cm. Because all Eevee defaults are based on that 1:1 scale.
  • In Eevee turn on: render properties - Ambient inclusion and screen space reflections. And shadow CUBE size 4K (if no sun lamp is used).
  • Eevee can have issues with leaking light in corners, called light bleed.
  • Eevee is good, but totally different then Cycles and you need to learn and tweak Eevee properties. While cycles works out of the box.

Your last image shows mostly world light.

3 Likes

Have you added an hdri? The preview uses one built in, but a render will need you to have added one to use. Seems to be a whole front lighting missing.

1 Like

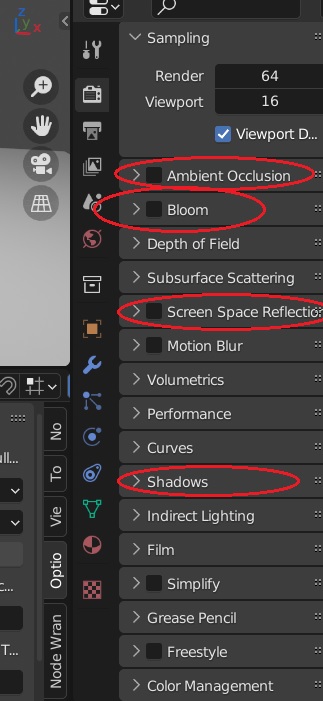
To get better shadows in blender eevee here’s the list of settings I check:

First turn “ambient occlusion” on. Turn up the distance to 1 instead of 0.2 This will make the shadows darker in the crevices thus emphasizing them.

Second, turn “bloom” on. This will cause the areas of reflected light to have an increased illuminated effect. However, the default numbers here are fine, make them too high and it makes the image hazy.

Third, enable “screen space reflections.” This allows light to reflect back on the objects from other surfaces such as the light from the floor to the back of the objects. Under the same category, enable refraction (mostly used for glass).

Fourth, under the “shadows” tab increase the “cube size” from 512 to 1024 px. Below that enable “High Bit Depth.” This reduces the jaggedness of shadows in the eevee render engine.

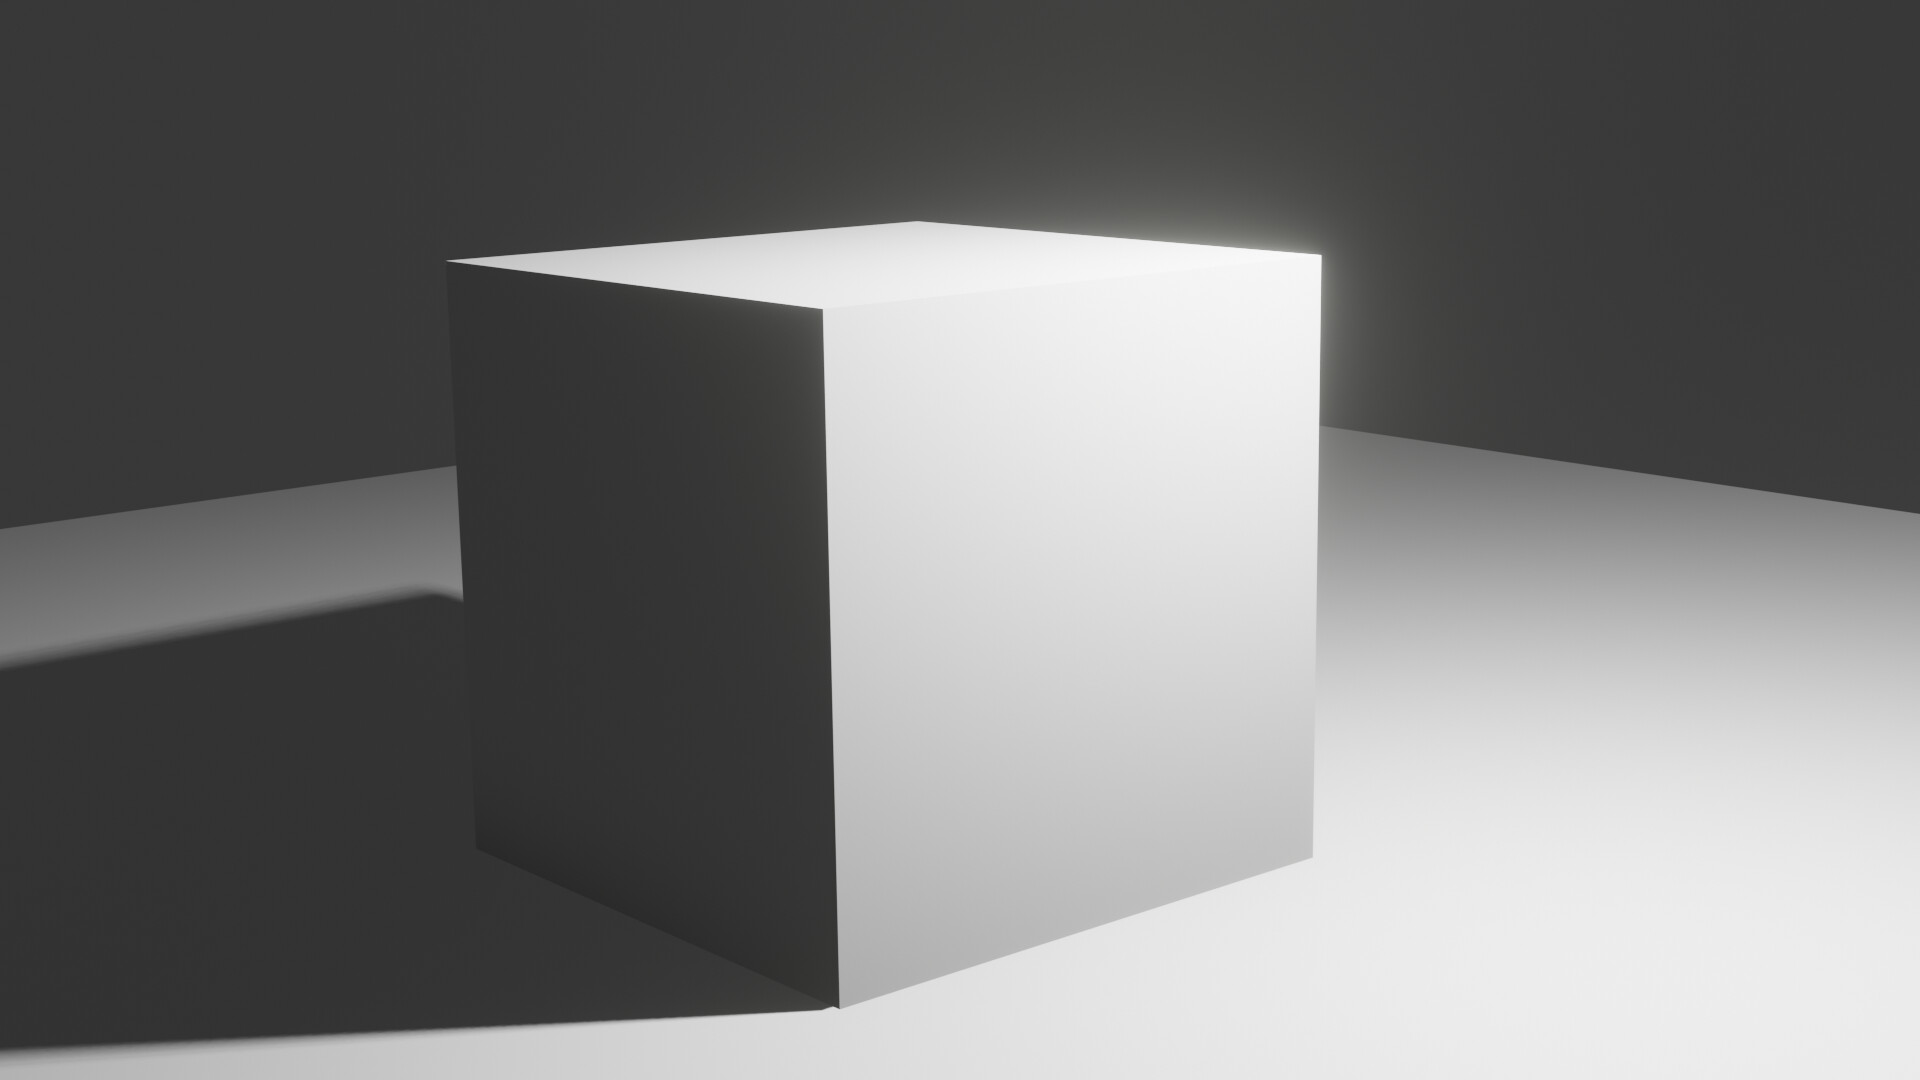
Now for the light sources. If you are using a lamp to illuminate the scene, if the radius of the light source is large: the shadows will be soft / if the radius of the light is small then the shadows will be hard or sharp. It is recommended to have the size of the light source somewhere in the middle (slightly blurry, but distinct in the direction of the light).

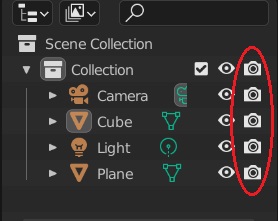
I noticed that in the render it appears that not all of the lights are present in the scene. It could be that you have them in another collection that aren’t enabled for render and/or that the objects themselves don’t have them checked for appearing in the render (see below). Hope this helps. If not, let me know and I’ll think of more solutions. :+1:

render settings blender2

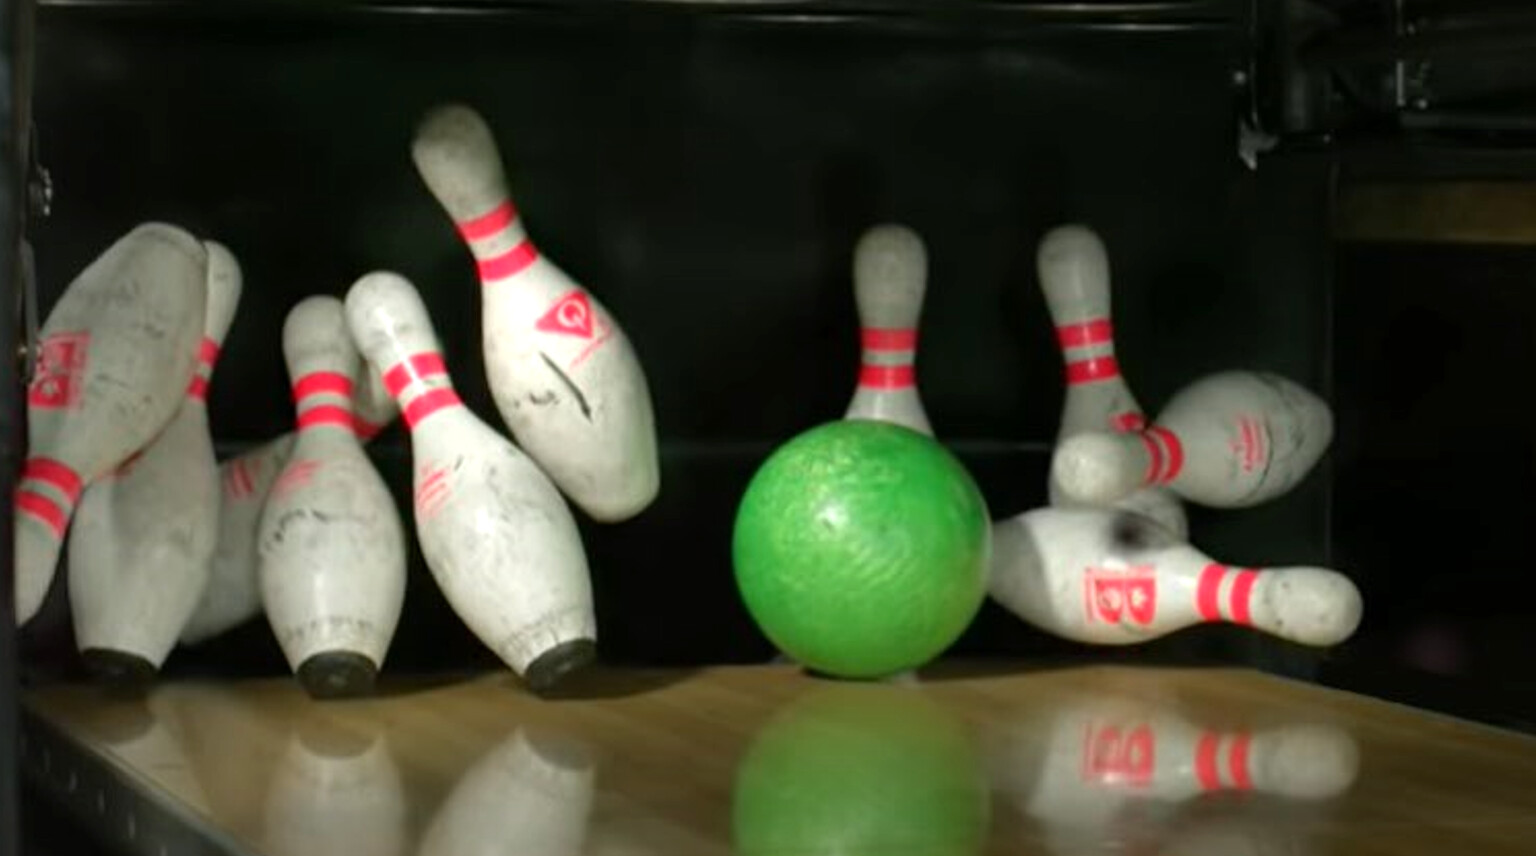
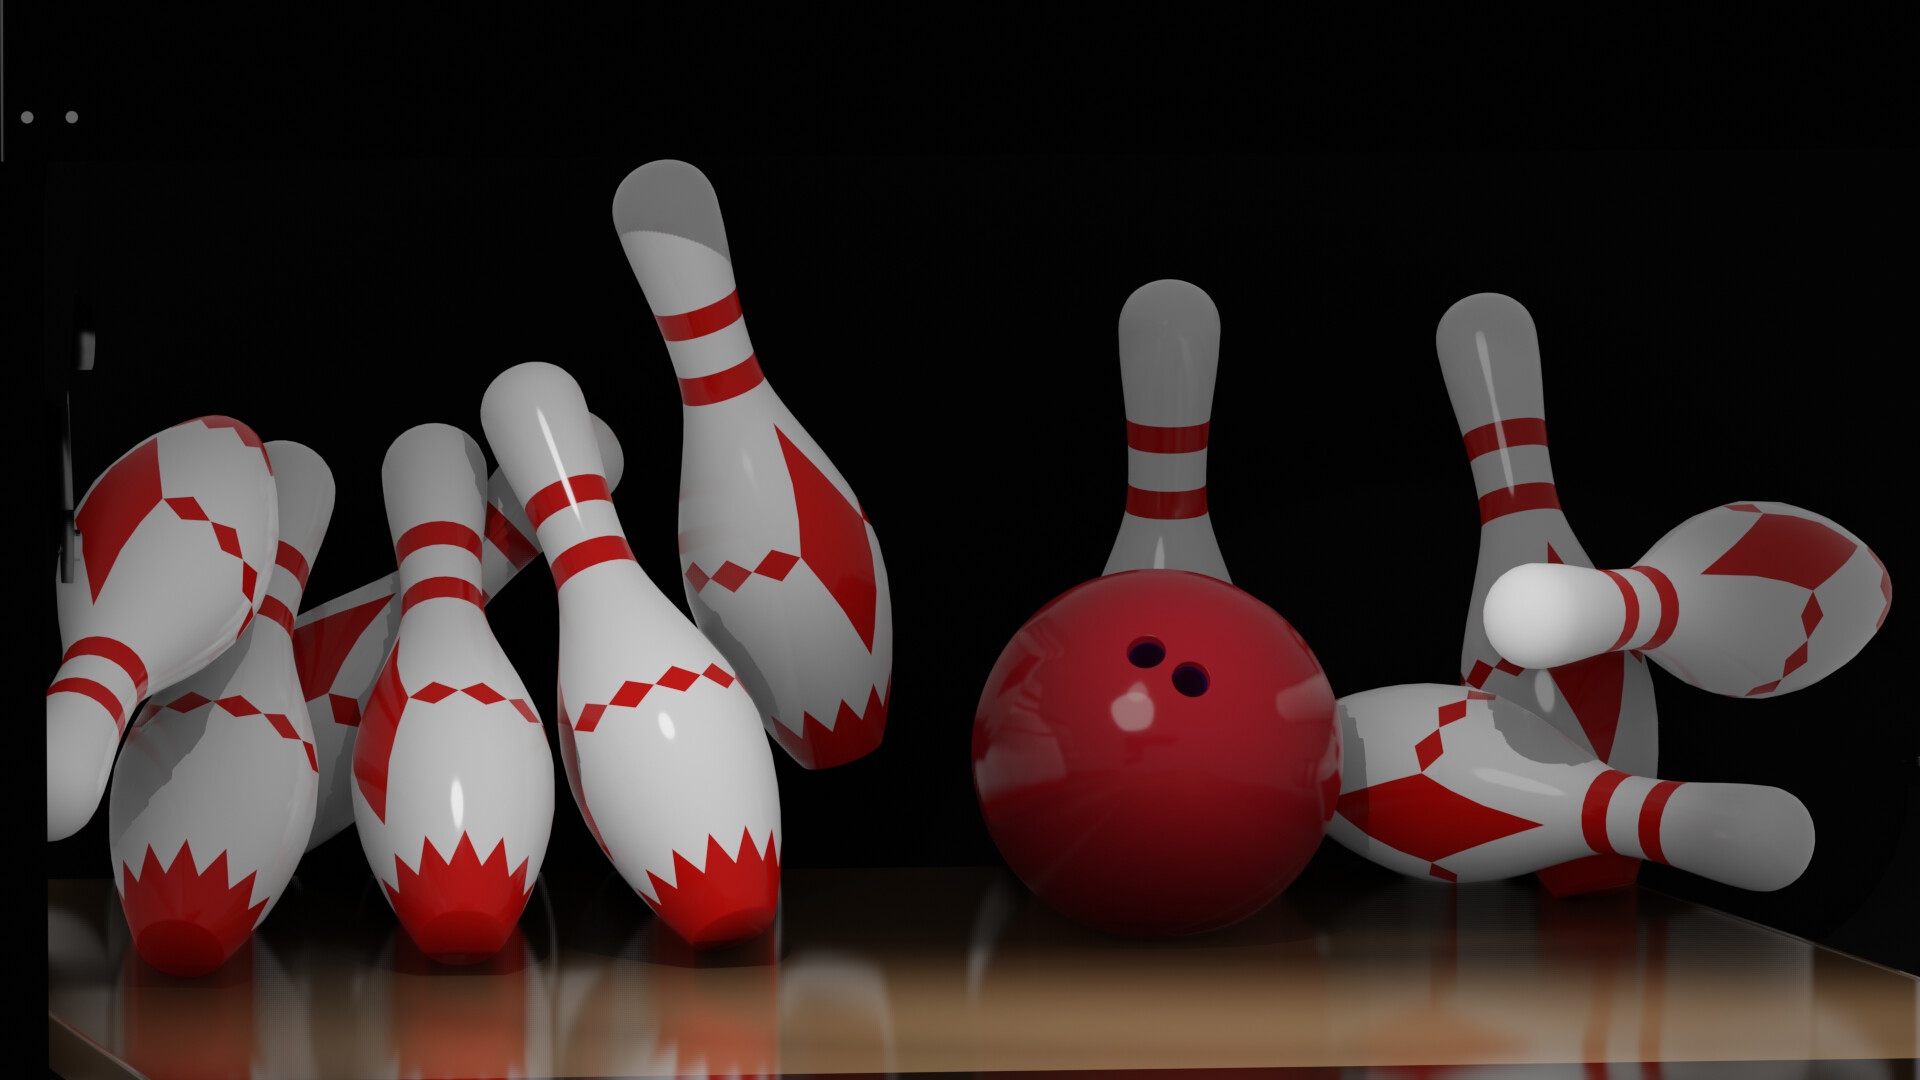
Here’s the render without the settings:
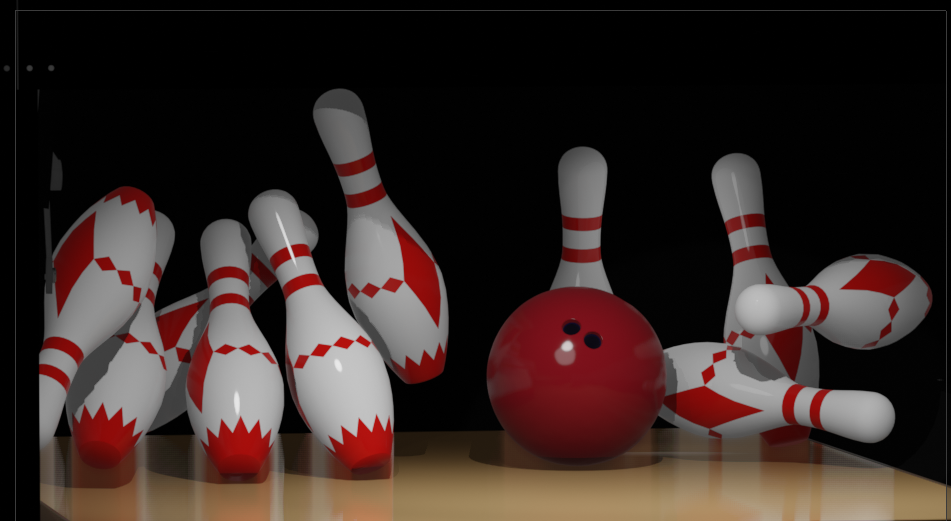
With the settings:

3 Likes

Thank you!
I will have a go!

Thank you, that all makes sense. I will have a go!

1 Like

Had to look that up as still a noob to all this. I think I get it though & will have fun experimenting!

1 Like

Thank you ever so much for all the help.

I’m much happier with this & fairly sure I understand the render settings better now! I ended up playing around with ambient occlusion, shadows & screen space reflections. I also played around with bloom but ended up not using it.

I also learned that I


must remember to check all the basics first! I had managed to ‘disable in render’ one of my main lights which made a rather large difference too!

3 Likes

Looks nice now.

Was on one right track then!

2 Likes

With the first steps of Blender people are quickly experimenting with settings (including me).
But if unknown, or don’t have immediate action. Then it’s better to leave them alone.
It’s easy to get lost in Blender, also with the usage of hotkeys (with no immediate visible feedback).

Just follow the course, and learn Blender in all its assets. Try to learn how Blender works, instead of operating Blender using buttons.

Have fun!

1 Like

This looks great! :+1:

1 Like

This topic was automatically closed 24 hours after the last reply. New replies are no longer allowed.

Privacy & Terms