
I don’t know if this is the best solution, but it’s the one that, in my opinion, is as close as you can get for a low poly bishop.

If this is the bishop he asked us to create, then
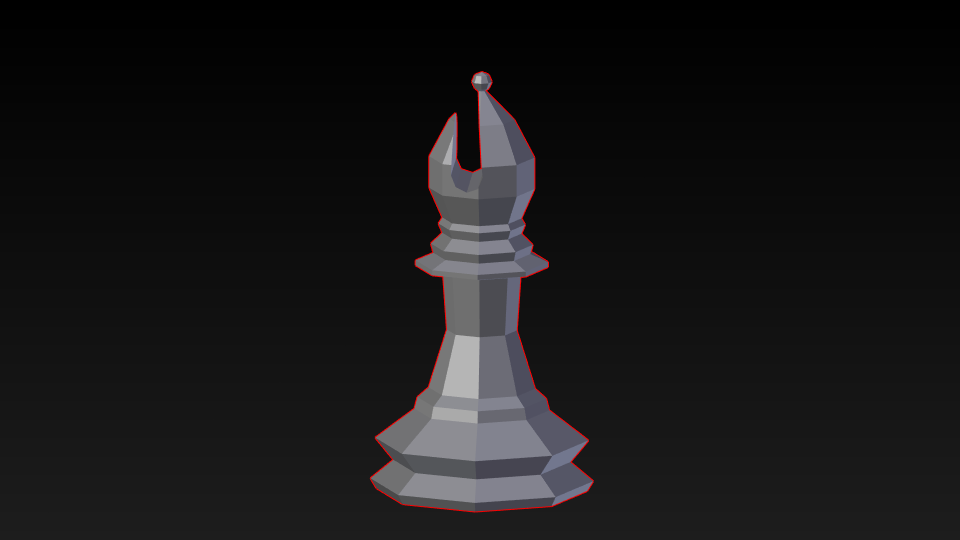
This is mine.
Cute, isn’t he? Okay, so how did I get this close? A pretty simple solution, actually.
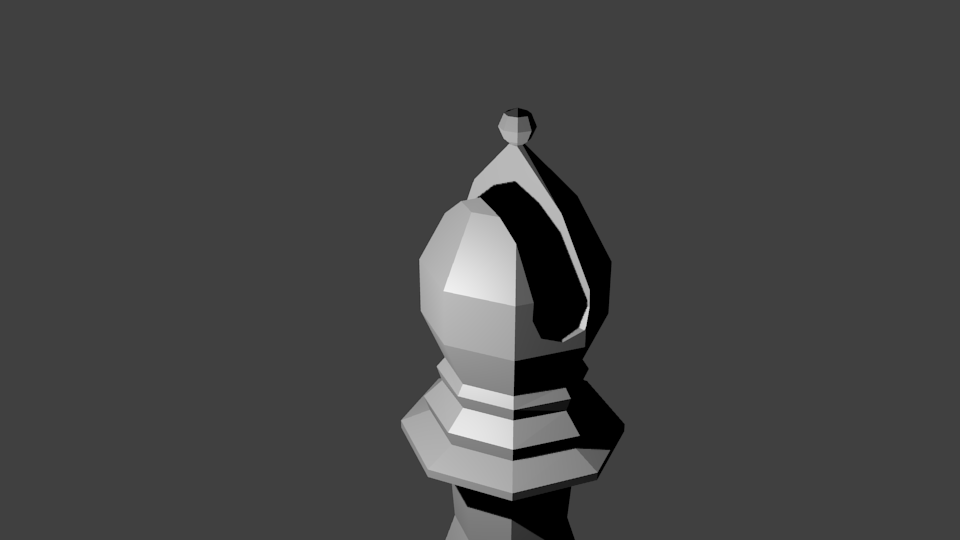
First, I got myself a nice little cylinder, rotated it 90 degrees and scaled it so it fits inside the widest part of the cut (the lowest point)

If you go by the scale of the bishop in the tutorial, these are almost the right specifications (I’ve made this tutorial after the actual cut was made). The important part is the amount of vertices. It can be changed, ofc, based on how low or high poly you want the biiish to be. But beware. For the next part, the solutions may differ.
For the next part, you must change into edit mode, select the top two faces of the now fallen cylinder and get them just as they meet the sphere at the top of the bishop’s head.

The nice part I noticed about this solution is the fact that you now don’t even need to scale the top part. The difference of width between the cylinder model and just two faces make the angle in the transition almost, if not the same as the one in the picture.
You may scale it however you want, of course, but I wanted to share this solution not only for it’s accuracy (which I find quite on point), but also for it’s simplicity. I just had to insert a cylinder into a scene, rotate it and set it’s faces a bit higher. Then boolean modifier and cut! The first time I tried this method it took me about a minute. Now it was about 30 seconds to recreate the model I used to cut.

I hope you enjoyed this solution and that I helped anyone who struggled with the model. Good job for making it this far and happy modeling!