My normal map is grayed out I tried playing with extrusion and max ray
1 Like
Many students with this problem, search in the ask forum.
1 Like
Please tell me what to do I can’t find it anywhere ?
1 Like
@all Run through this. I have just writen it and look to others to help develop this check list we can all then use and post to students with issues, hopefully solving most of them!
Baking checklist.
HP= High poly model baking the details from.
LP= Low Poly model baking details to.
Check normals on Both models are all correctly outward facing.
Check both share the same place for their origin points.
Make your LP a ‘reasonable’ fit to the HP.
UV unwrap the LP
Smooth shade BOTH models.
Select the HP first, then the LP so the LP is the active selection.
Set to Cycles render engine.
Create a new blank image In the Image editor, Name it with an appropriate ending, like norm, diff, ao, rough, etc.
Create a material for your LP object. (if it has not already)
Open that new blank image in an image texture Node of the LP material.
The Image texture Node does NOT need to be connected.
The Image texture Node MUST be selected.
In the Render Properties tab. Scroll down to the BAKE dropdown.
Change the Bake Type to the one you wish to do.
In the Influence dropdown, untick Lighting Direct and Indirect.
TICK the Selected to Active Box and open the dropdown.
The Messing about part.
Set extrusion to 0.002 As a first test, these numbers will vary by model and HP/LP fit.
Set Max Ray Distance, you can probably leave it at zero. But again it is a number that may need adjusting to your use case.
Play with these numbers until you get a good result. This bit is not a matter of using X and Y numbers as every model varies. It often needs several tries to find a good pair of values.
Output, will be Image Textures.
Tick the Clear image box to bake over anything on the new image file, like a previous try that did not work quite as wanted. (Untick it if baking multiple objects to one map, otherwise, it will clear away previous baked info on the image.)
Margin size, 20px should cover most likely eventualities
You are set. Make sure the models are selected in the right order, and that the image node being baked to is actively selected.
Click Bake! Wait.
1 Like
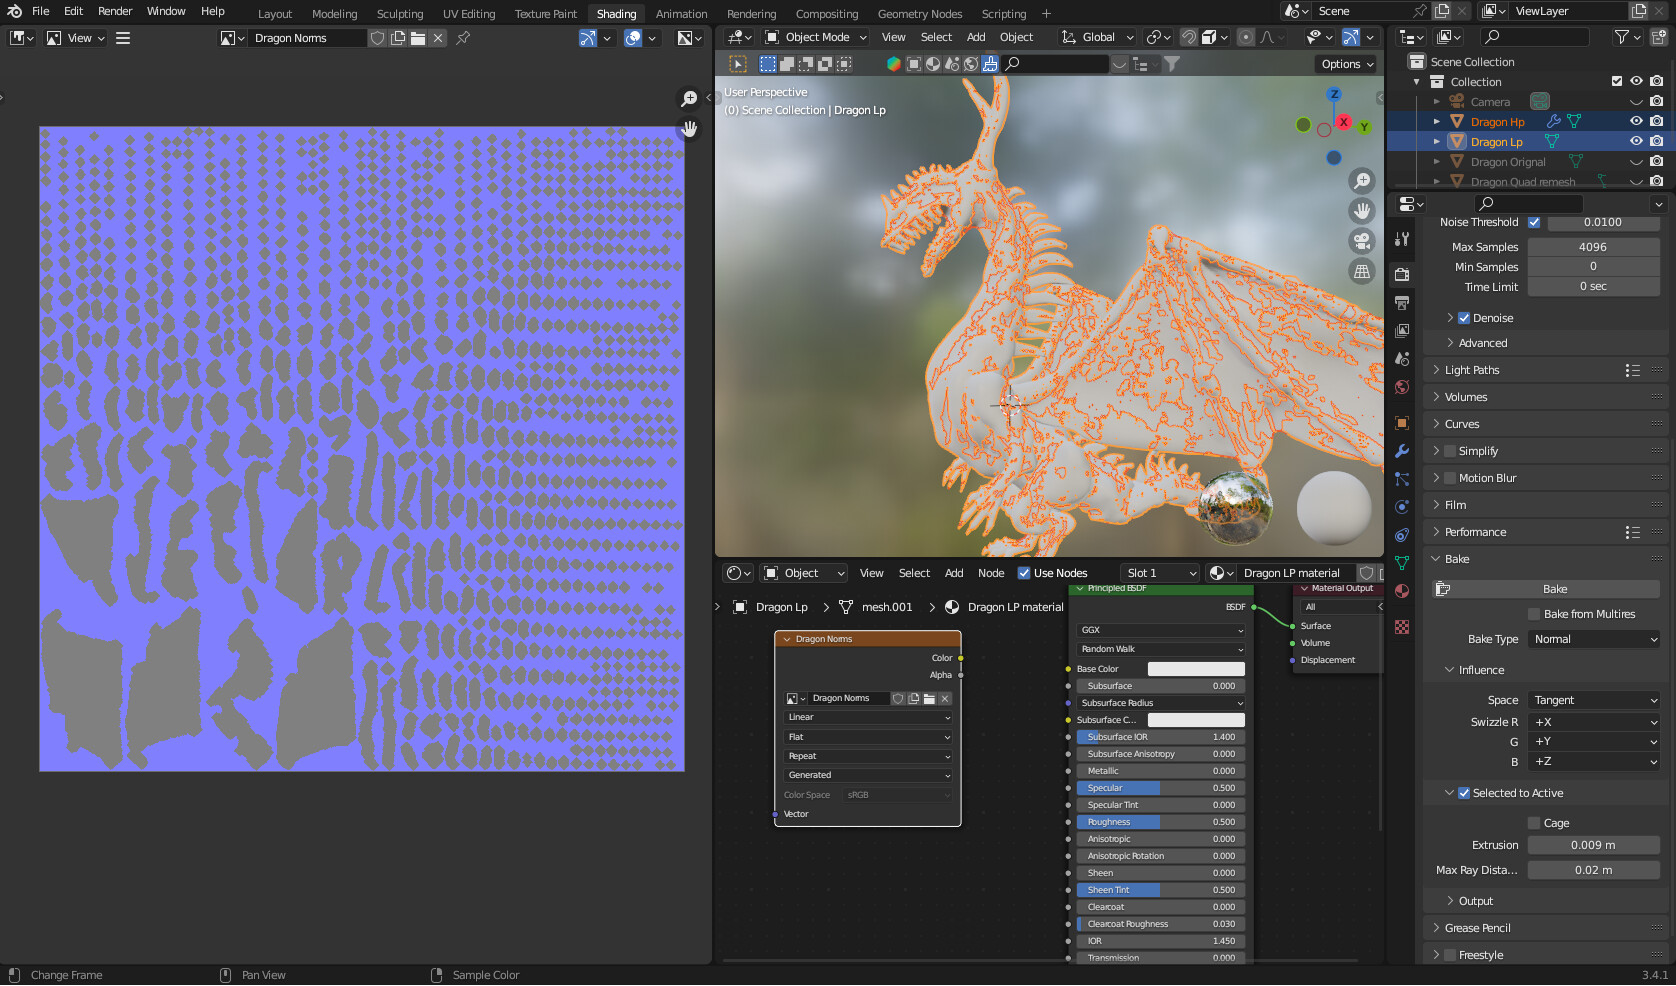
Hmm, I’ve seen this kind of thing before. Someone had this problem with a donut but when they sent me the mesh it turned out that everything was actually working properly.
What was happening is that the mesh was so dense that the UV unwrap looked like this uniform gray blob, and because it’s always projected over the texture it made it seem like no matter what they did there was always this gray patch instead of the proper texture.
Now, I don’t know that we’ll ever find out that this is what’s going on here but I’m 90% sure if we could zoom on that texture we’d see a really dense UV on top of it, and the bake underneath.
Even if a bake is bad it usually has some color to it, I’m not sure that you even can end up with gray in a normal texture.
2 Likes
For this to check, it will be handy to switch on all options, when right-clicked on the version number bottom left of Blender UI.
1 Like