How’d you go with making a follow camera using Cinemachine?
I think you may have got a post confused as this is for the RPG course.
Thanks for the feedback but tilevania is in the 2D course 
sorry about that
Point to note if using 2019 unity.
You may find that you do not have the blue borders in the game view using this version.
You need to go to the “Follow Camera” and on the Cinemachine Virtual Camera make sure that the Game Window Guides check box is on.
It is now off by default
Hi Rick,
Whilst I was able to make the follow camera without a problem, the issue I am finding is that the camera is often being cut off by objects in the world or it is only showing one side of the scene.
Building a world that accommodates the camera is a little annoying and I feel it could limit the story or gameplay that I would like to create. Not to mention the assets that I would like to use.
So I have gone down a bit of a four day rabbit hole of researching and trying out pretty much every camera in cinemachine and it have been a great learning exercise, however I feel that I am not really getting anywhere.
I have tried Cinemachine Free Look camera, but that gets quite confusing as the player moves around and there are other issues when trying to attack. Although I do like the effect of being able to look around corners. I think to make this work I will need to change how the player is controlled from the current system with mouse clicks, to something more similar to the 3rd person controller that Unity has, which uses keyboard/joystick inputs. I am not sure I want to go down that path just yet.
The Dolly and track camera is pretty awesome and helps resolve some issues of objects blocking the camera.
The best solution I have come up with is a state driven camera, with a bunch of colliders to set up zones. Each zone is connected to a dolly camera or virtual camera and as the player enters the each zone it sets off a trigger and the camera is activated. Whilst this is good and makes for some really awesome cinematic scenes in gameplay, its very complicated and time consuming to set up. It also has gameplay issues as the cameras change blend from one to another whilst the player is moving/attacking.
Do you have any advice or guidance before I lose my mind over cameras?
Cheers
James
Wow, you’ve really dug into this.
The Cinemachine is a fairly complicated mechanism, and we definitely barely scratch the surface of it in the coursework.
I wish I had more advice on the best way to work with Cinemachine, but you’ve actually gone far further than I have.
The one piece of advice I can give is to keep it simple. While I recommend finding a solution that would allow the player to turn the camera, or to scroll in and out, automatic adjustments to the camera can be very distracting. That being said, one effective mechanism is to Raycast from the player to the camera. If any building or terrain is blocking the camera, then you could either move the camera (Framing Transposer - Camera Distance), or you could make the building semi-transparent (this would require adjusting the material, perhaps swapping it out temporarily until the building is no longer in the way).
Thanks for the quick reply Brian. I think it is something I am going to have to keep working on down the track.
But you are right in that camera changes whilst playing can be really annoying. I will put it aside for the moment and let you know how I get on, I have just done the lecture about changing cursors which has already really help make things clearer for the player.
In the end I think it is going to come down to what sort of game play do I want, either slower game play with better cinematic effect or higher action game play with a more predictable camera arrangement. I also am starting to think that scene design is important too, in order to accomodate the camera.
I have the Cinemachine downloaded from previous, so should be able to do this.
But could see if I go to the asset store to see if there was a newer version, I got this page.
https://assetstore.unity.com/packages/essentials/cinemachine-79898
I guess that could be a problem for completly new ppl?
Unity sure doesn’t do a good job when it comes to communications sometimes…
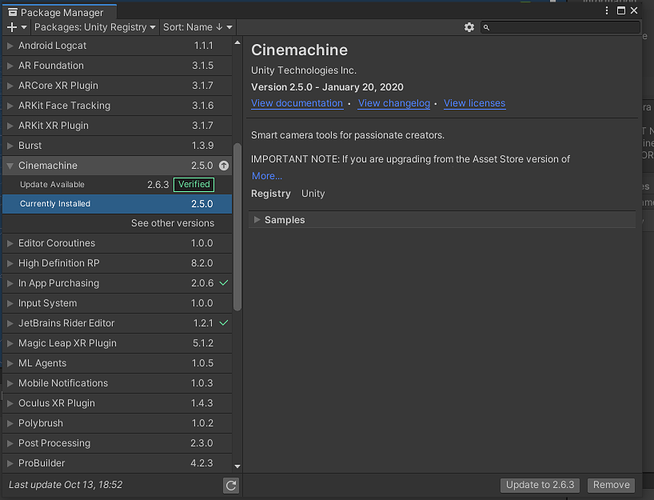
The reason it’s no longer available in the Assets store is because it’s now shipped directly with Unity and install through their Package Manager.
In fact, if you’re using the version of Cinemachine you go through the Asset Store, you need to uninstall it before installing through the Package Manager…
To Install Cinemachine in any post 2018 or newer version of Unity:
First, open Window, Package Manager
In the Package Manager Window, there is a drop down that usually starts by saying “Installed”… change that drop down to “Unity Registry”
select Cinemachine from the list of packages and install.
İs there any problem with 63-64-65th lectures.İ cant get access those 3 lectures, where is explained about Cinemachine…
Edit: Problem solved by itself.İ dont know what happened.
If you install Cinemachine 2.7.1 or later, you add cameras from under the “GameObject” menu, not the “Cinemachine” menu - I gather Unity relocated it when they incorporated into their standard add-ons and out of the Asset Store.
A far simpler solution that doesn’t require changing materials or doing some shaders might be to simply disable the mesh renderer of obstructing objects…
But what would be a good way for when it’s the terrain that gets in the way of the camera?
