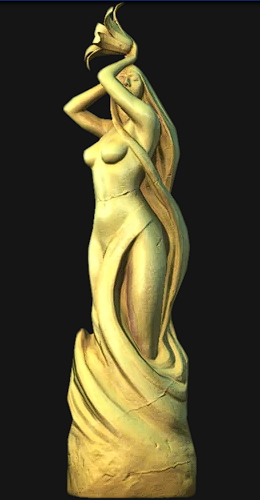
This is my take on the statue of Dibella from Skyrim. I am not trying to make a copy of it. It’s more of an inspiration for my project. I am going to experiment with some of the things so I am not entirely confident it will be successful… lol
My plan:
Sculpt symmetrical body parts
Pose the sculpt
Make hair with curves
Sculpt a flower
Retopologise
Add micro details in multires
Texture the model
Set up the scene
P.S. Since I wasn’t able to participate in the previous collab I’ll try to make a low poly game ready asset out of it.
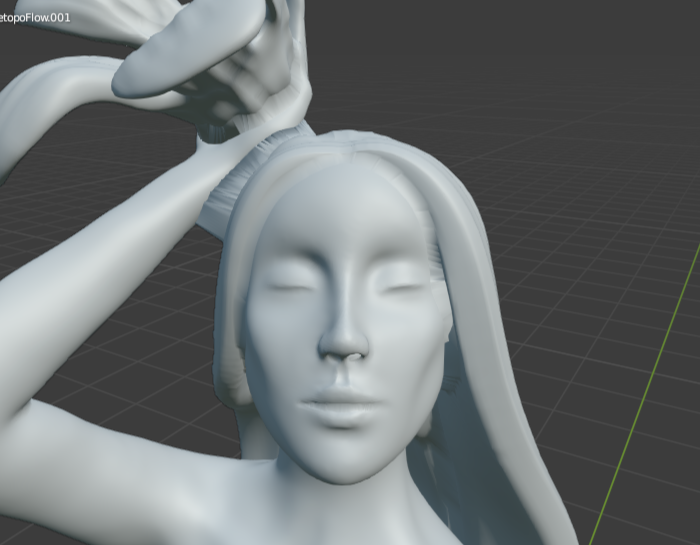
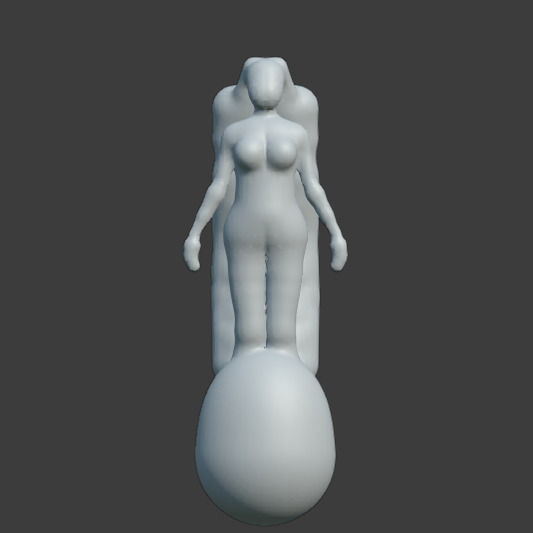
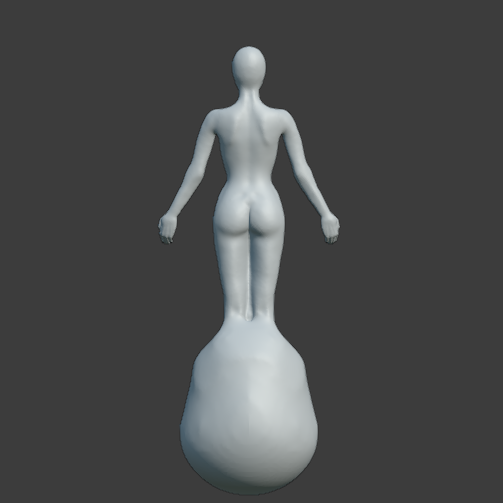
I ended up removing the hair base as it was difficult to move it around while posing my model. Additionally, I decided to make her hair out of curves to save time. Here’s my initial sculpt:
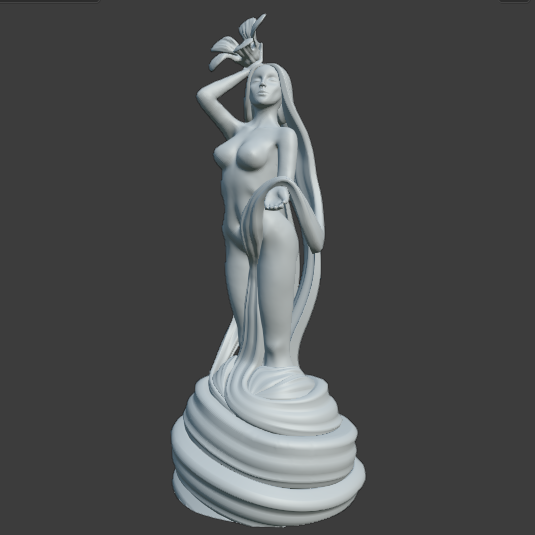
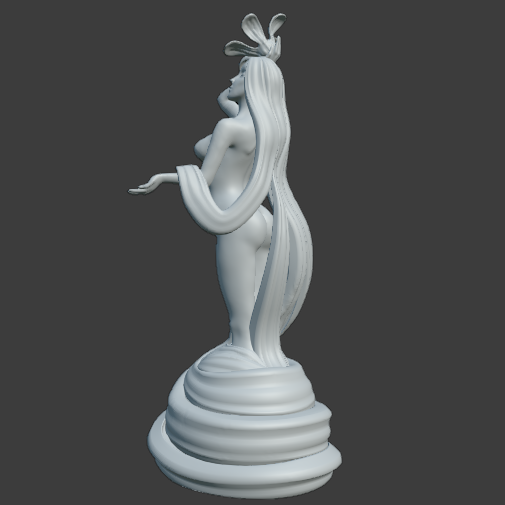
I posed it and then added the flower and hair. There are a lot of parts that come in and out of the mesh. I had to think carefully about their placement so that I don’t have any problems when I get to do the retopology. My initial sculpt is anatomically correct so if you think there is something off about this one - they’re my creative liberties!
Edit: don’t force yourself to go down to exactly or below 1000 triangles. I did that with the helmet and it made the work 10x more difficult (the first low poly had 1.2k triangles, which is still very low). Ofc. if 1k triangles will be ok without loosing too much shape - go for it
Edit2: And I’m still amazed how you quickly got to this level in sculpting. Very impressive!
Thank you so much! It’s literally my 4th sculpt ever and I have no explanation why they come out so quick and easy (can’t say the same about hard surface modeling!!)
Actually for the 1k challenge I planned to make the model a lot more angular so I could bring it down to 1k. Something like “carved out of stone” style. This one, on the other hand, is very soft and sort of curvy so I do not think it would look decent at 1k. I aim at 2-5k for the retopology. I guess it’s still considered low poly by modern game standards
It’s awesome… I would guess somewhere between talent and previous experience with “analogue” arts
Focus on sculpting then? You can do hard-surface sculpting too!
That all depends (on the game, target hardware, what other things are in the scene, etc.). But 2k-5k it is ok for…a prop, and maybe not really important one even (i.e., it’s very low). Hero characters are 100k sometimes and still considered low poly .
My fourth sculpt ever did not look that good
There’s attention to the bony landmarks that many beginners overlook, the rib cage, the scapula. Very impressive
I went through so many hours to get to where I feel you’re at, taking courses on all the body parts separately, skeleton, difference between male and female, etc. Only then did I make something comprable:
Thank you! I don’t think there’s any gift or talent involved haha I just probably have a good visual memory of human anatomy.
I pretty much only use anatomical references. I did the same when I painted portraits some years ago. Basically, I would outline all the major muscles and from there I could either keep carving them if it was a muscular body or start building up fat on top of them. I noticed a lot of beginners distribute fat evenly when in fact it sits on top of muscles and takes their shape to some extent. Besides certain areas gain fat faster so making everything smooth and even will just look wrong. And another common mistake is making everything stick outwards. The higher the mass the more the object is affected by gravity and that would be applied to excess skin, fat rolls or even breasts too. I really do think it’s all about understanding human anatomy, no talent needed
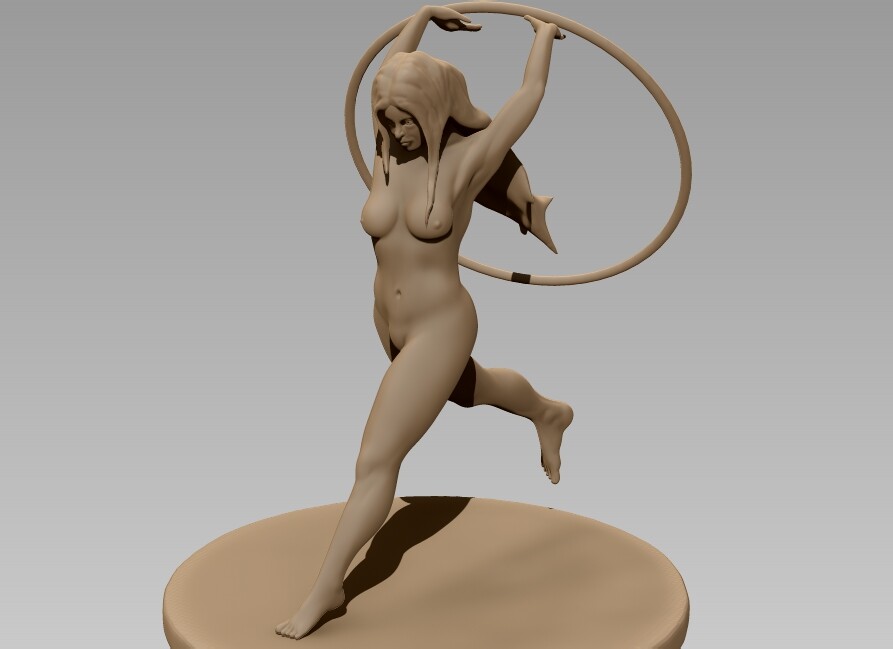
Oh that’s a very complex pose! The first thing that comes to mind is: what muscles would be “active” if someone did that move? I feel like with such poses you either have to take the pose yourself in front of the mirror or find some photo references to see which muscles are sticking out more. I want to try a complex pose too at some point. It’s a lot more challenging than what I did with my sculpt
I see, I didn’t know how well you are observing anatomy, although it clearly shows in your work!
I hadn’t practiced much drawing or art prior to sculpting, so it makes much more sense to me how easily you are picking it up.
You are right about the fat, although I think some beginners skip this entirely and just go for the steroidal hulks!
I took a course just on sculpting different levels of body fat and practicing how it builds up on a male body. It wasn’t until then that I had really considered it, but it is very important for realism.
Before I go on a long-winded, nerdy exposition, let me state that your sculpt looks lovely so far.
You can aim at whichever poly count you see fit as a homage to the original Skyrim, artistic style or personal challenge, but low-poly doesn’t mean what it used to anymore.
Considerations and experiments on poly count for Unreal Engine 5 and other game engines in the near future
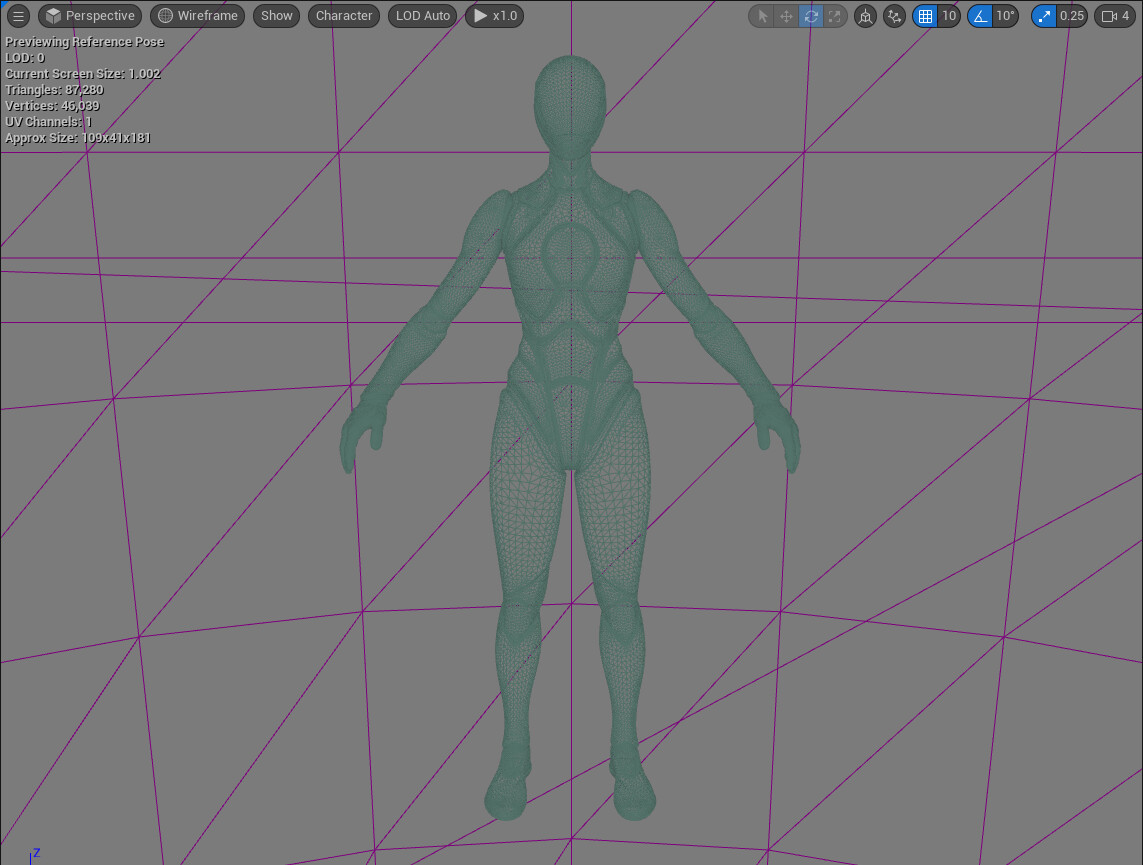
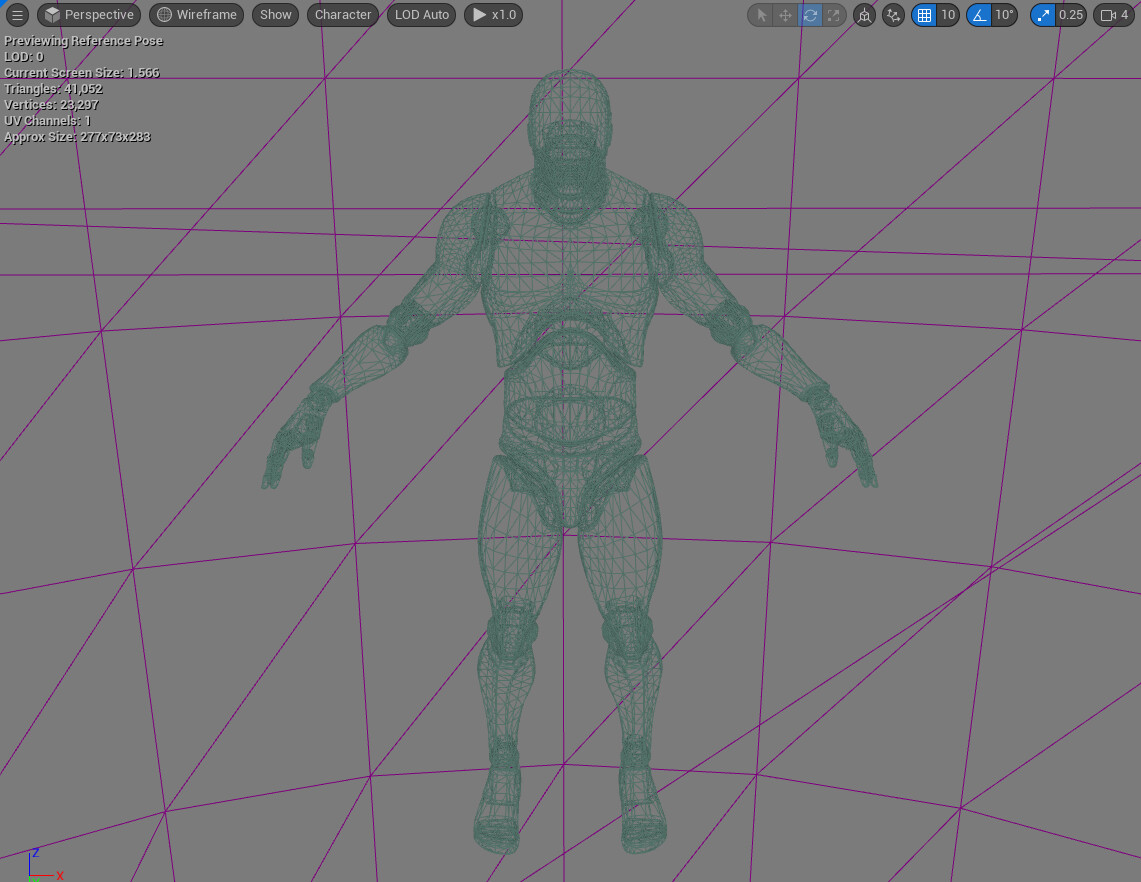
I used to think that by modern game standards low poly was about 15k triangles, but then I took a look at the default character models for Unreal Engine 5 and…
The latter at less than half the poly count actually looks kind of low-poly as you can see the individual tris around the body unlike the new ones, whose arms are just ridiculous…
@bOBaN is right, around 100k for a main character model may be considered low-poly nowadays.
And let’s not forget that this is for skeletal meshes in which Nanite can’t do it’s magic (yet).
For static, opaque meshes…
The ground consists of 256 pieces at 500k each = 128 million tris. Okay, not all of them are on screen all the time, but probaly more than half are.
On top of that, there’s a 87.28k animated skeletal mesh with some ridiculously hi-res textures (I think 4k or 8k) and 6 sprites which meh… are just 12 tris more with an UV animation.
All of it runs silky smooth at fixed 60 fps or about 73 fps with the max fps uncapped. On 5-6 year old hardware. My machine’s got a first generation Ryzen 5 and a GTX 1080.
In fact, in my experience it’s the simple and big quads that make UE5 struggle. It seems to despise low poly counts.
So in terms of performance and looks you’re actually better off aiming at very high poly counts, specially for static meshes as Nanite has more to work with, you save on huge normal and displacement maps and reduces overdraw which seems to be the bottleneck now. I think I watched a video about it recently, but let me point you to a relevant link from Nanite documentation: Nanite Virtualized Geometry in Unreal Engine | Unreal Engine Documentation
Of course it’s probably different for Unity and other game engines but they’ll probably catch up soon and develop some kind of virtualized geometry technology that makes poly count mostly irrelevant, too.
That’s it, I hid most of the post to avoid disrupting the flow of the thread with such a long block of text and images. I hope someone finds it interesting.
It is quite different. Unreal even before nanite was very good at handling large number of polygons (that other engines like unity could never catch up). And the technology will improve every year (for all engines and hardware platforms). But on the other end you have mobile games, where situation is quite different and probably will be for quite some time.
Overall, optimizing without knowing what is your target (hardware, platform, engine) and what is your polygon budget is pointless. But when working in isolation it’s good to practice all those techniques so if you get a job of creating to certain polygon budget you know how to do it. But IMO if you don’t practice those skills specifically, it’s best to have following approach to low poly: do as low poly as possible without sacrificing visual quality.
This forum is a gold mine! Thank you so much for sharing this!
I just realised how far behind I am… Well, I didn’t even get a chance to read about UE5 yet because I’m trying not to get side-tracked from my current course. My idea of low poly was based on my very limited experience which includes making a few models for a couple of games. Both of these games were very strict on the poly count so it gave me a false idea that modern games must be the same only with a much higher limit. I tried searching for some sort of polycount guidelines when I was making a medieval thatched house and couldn’t find absolutely anything. Now that you explained it, I understand why. In fact, I came across a video on the medieval environment in UE4 that had a crazy amount of geometry and probably thousands of 4k thatch decals. I thought it was weird but it all makes sense now!
I always tend to use The Witcher 3 as an example. It’s obviously outdated but in my opinion, it aged well. Truth to be told, in my opinion everything aged well including games like Morrowind or Beneath a Steel Sky from 1994 so my ideas of low poly are completely irrelevant as you can see. Anyway, The Wither 3 looks decent and Geralt is only 25k (although if you look closely you can notice the outline of his shoulders is made with 3 or 4 faces lol). So I thought 5k for a sculpture like mine would be more than enough. As I said I didn’t read into any of the technical aspects of rendering in modern game engines yet because I’m still finishing a couple of courses.
Please do “disrupt” it as much as you want because it is indeed very interesting and way more useful than my sculpt screenshots!
I do think it’s an important skill. As a matter of fact, most indie game developers don’t go for crazy levels of realism for obvious reasons. I feel like even if you have years of experience and an amazing portfolio chances of landing a job in some AAA company are close to 0 realistically. I did see a ton of available positions for small companies with much more down-to-earth requirements. I reckon it’s a necessity to have a broad skill set in this industry.
Aside from that, optimisation is only really needed when you know your target as you said. For me personally, low poly workflow is very relevant because I started writing code for a very simple mobile obstacle course game some time ago. Never finished it due to a lack of knowledge. But as soon as I finish learning everything that I have on my list this is the project I want to come back to and eventually publish. So I’ll definitely need to practise extreme optimisation and hand painting more.
That is interesting. Dump the other engines! Proper models none of this low poly nonsense! Making models worse, low poly, was always going to get overtaken by tech development and improvements sometime.
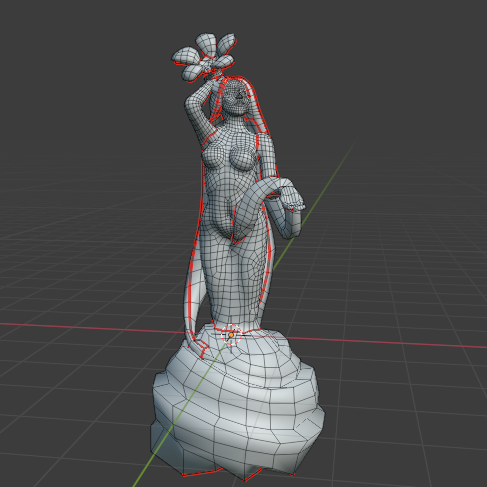
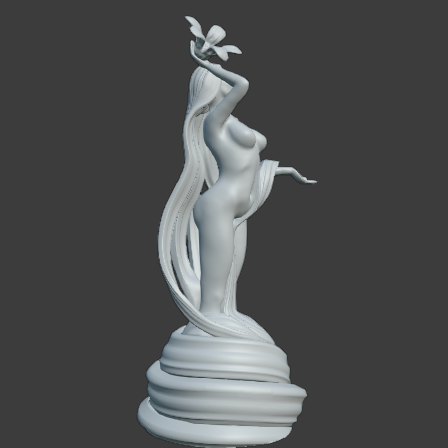
It’s the most complex shape that I had to retopologise so far and I did a horrible job! There’s not much symmetry going on and because of that, it’s incredibly hard (for me personally) to follow curves without disrupting the loop pattern if it makes any sense. It’s 7 k. I distributed geometry density in relation to detail level with the face being the most detailed and the base being the least detailed. The only thing I’m satisfied with is seam placement. I ended up having a good UV map that enabled me to bake a pretty seamless normal map.
Now here’s the proof that this is the definition of bad topology!
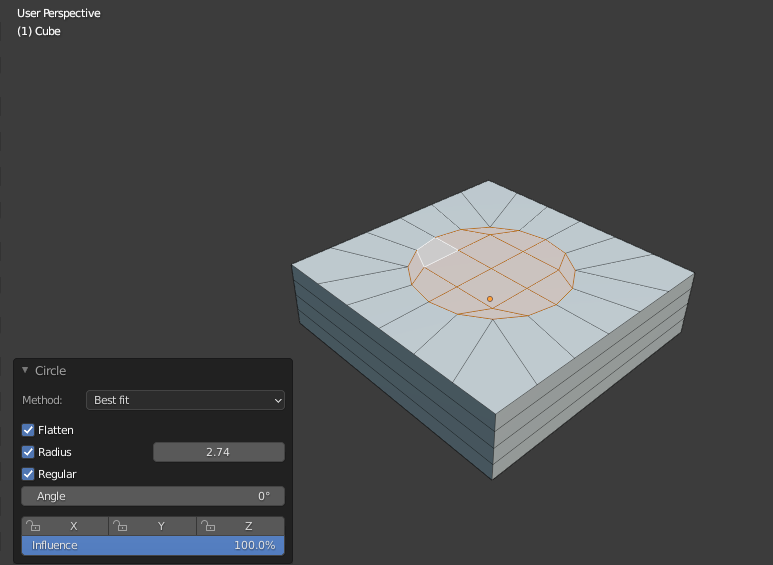
As far as I understand this weird stretching is exactly what’s going to happen if you subdivide a badly retopologised object and shrinkwrap it to the sculpt. I managed to nearly rid of it by tweaking the settings and scaling some parts of the mesh along normals. It’s possible to smooth it in sculpt mode but why all the extra work when you can just make a good retopology in the first place, right?
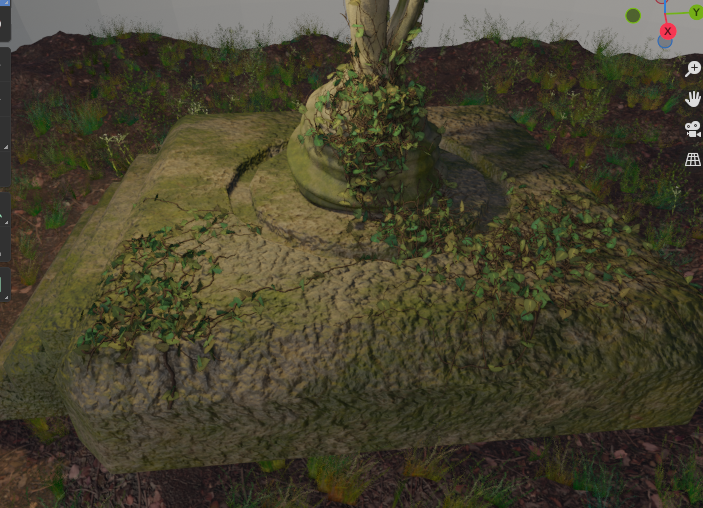
I’d like to mention some free goodies I used in case someone finds them helpful. The ivy gen add-on is simply beautiful! I personally don’t like the leaves it generates because they’re flat but other than that it’s amazing. I didn’t have high hopes for it because I thought it would only work on flat surfaces but it followed the shape of my model perfectly well. Just add some colour variation to your leaves and you got a pretty realistic ivy! I can imagine you could use it to make veins or some sort of tentacles too.


 .
.


 Proper models none of this low poly nonsense!