
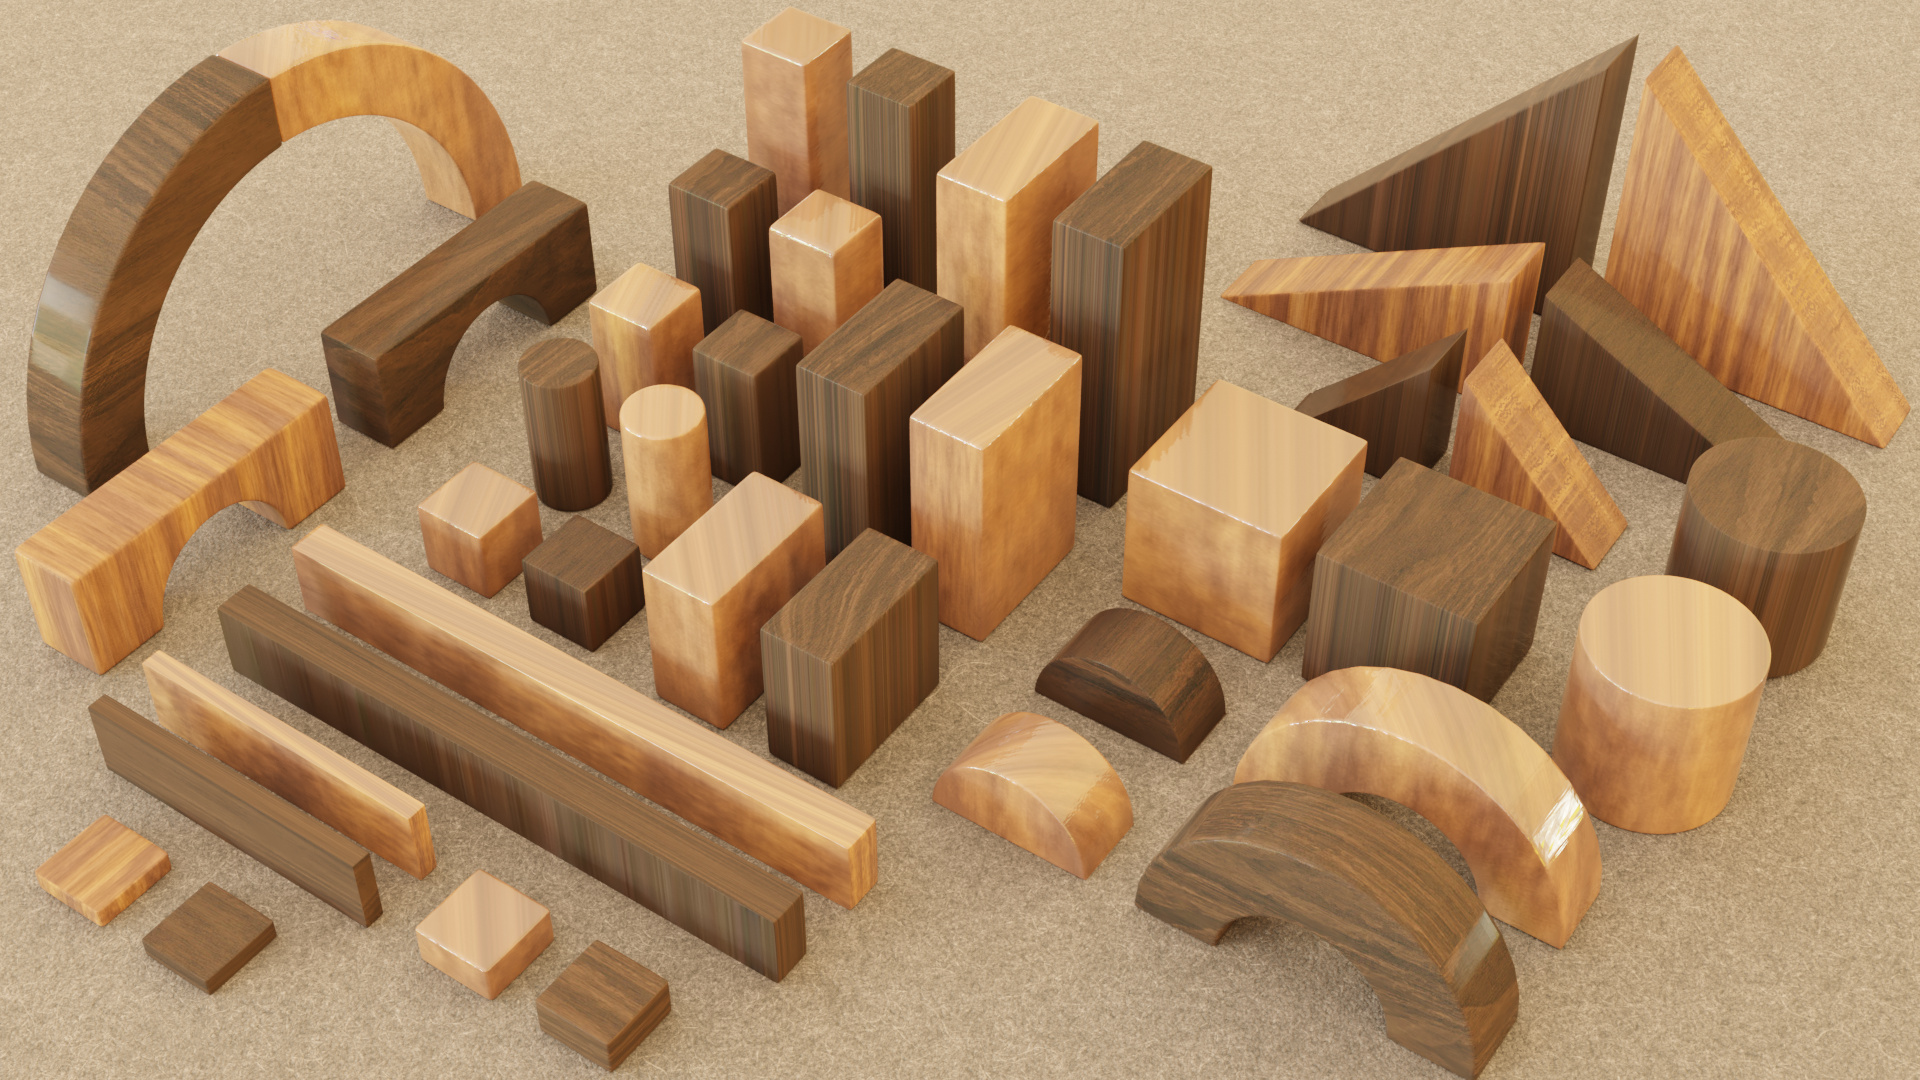
So, I have been piling up quite a bit of my learning into a single multi-part project, so I thought I’d wrap that up and show what I ended up with. The whole project began with the challenge from lesson 15 which was to build with primitive objects. I immediately started thinking about building with wooden blocks, so I made myself a set. While some of the blocks are basic primitives, there are others that required going into edit mode and modifying the mesh. All of them have rounded edges as well and figuring out how to do that was quite interesting. I found that the cube based shapes were very easy to create smoothed edges on either using the Bevel modifier or just adding loop cuts near the edges and adding a Sub-Surface modifier. The triangular shaped blocks were more interesting (it was hard to keep the points from getting rounded off too much). The most interesting though were the arch blocks. I created the blocks by using a boolean modifier (difference) between a cube and a cylinder. This quickly created a shape that looked the way I wanted. When I tried to get a smoothed edge, however, it was a whole different story. Adding a Sub-Surface modifier to it created something that looked like a bean, and the Bevel modifier caused all sorts of weird artifacts. I solved both problems by adding topology to the model. I deleted the two “arch” faces, put edge cuts in three of the other faces, and then created faces manually so that the two main faces were entirely made with quads rather than n-gons. Problem solved.
Anyway, here’s a render of the final set of blocks:
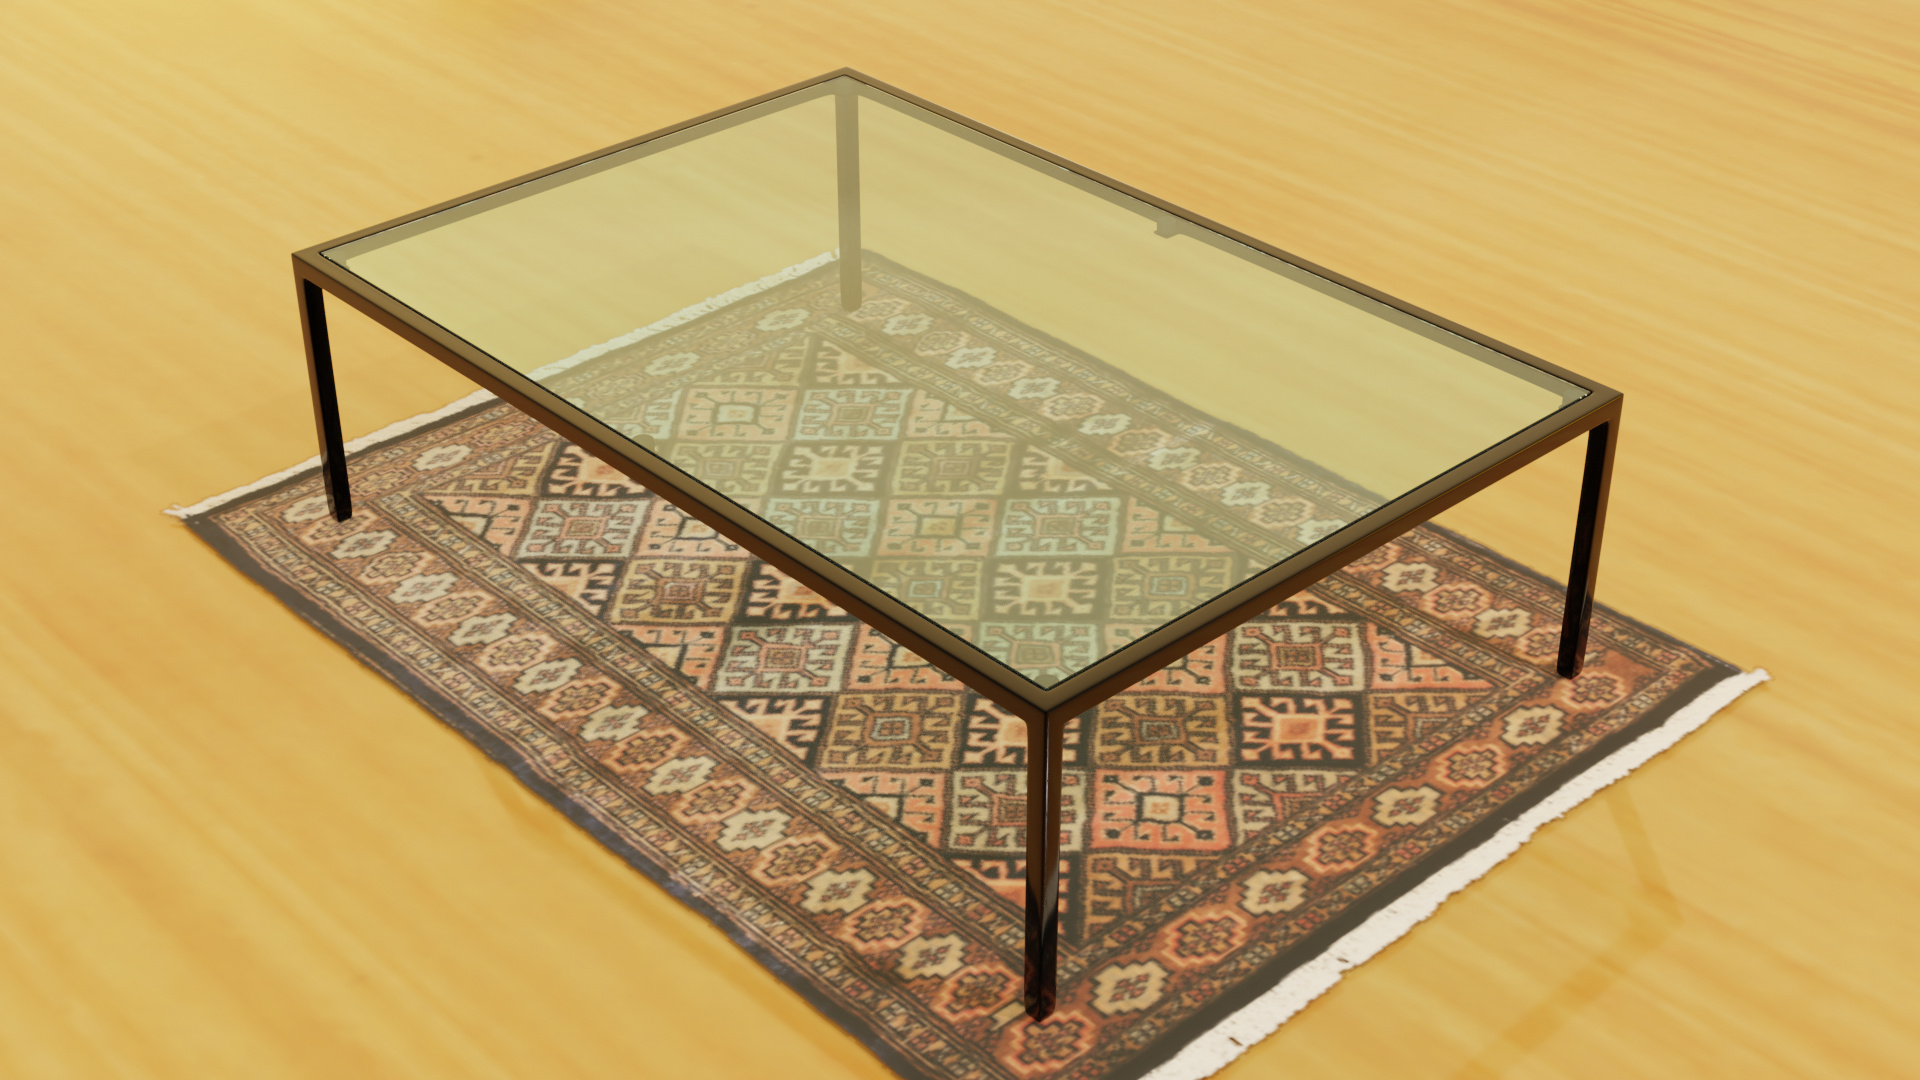
Next I needed somewhere to build with the blocks - a table. I decided to model a simple metal and glass coffee table. The table frame was modeled using box modeling (based on lesson 19) and was constructed from a single cube. The glass was another cube and the rubber bumpers to support the glass are cylinders. All of these components were joined (Ctrl-J) into a single model and had separate materials applied (as per lesson 26). Here’s the original render of the table, before I had a room to put it in.
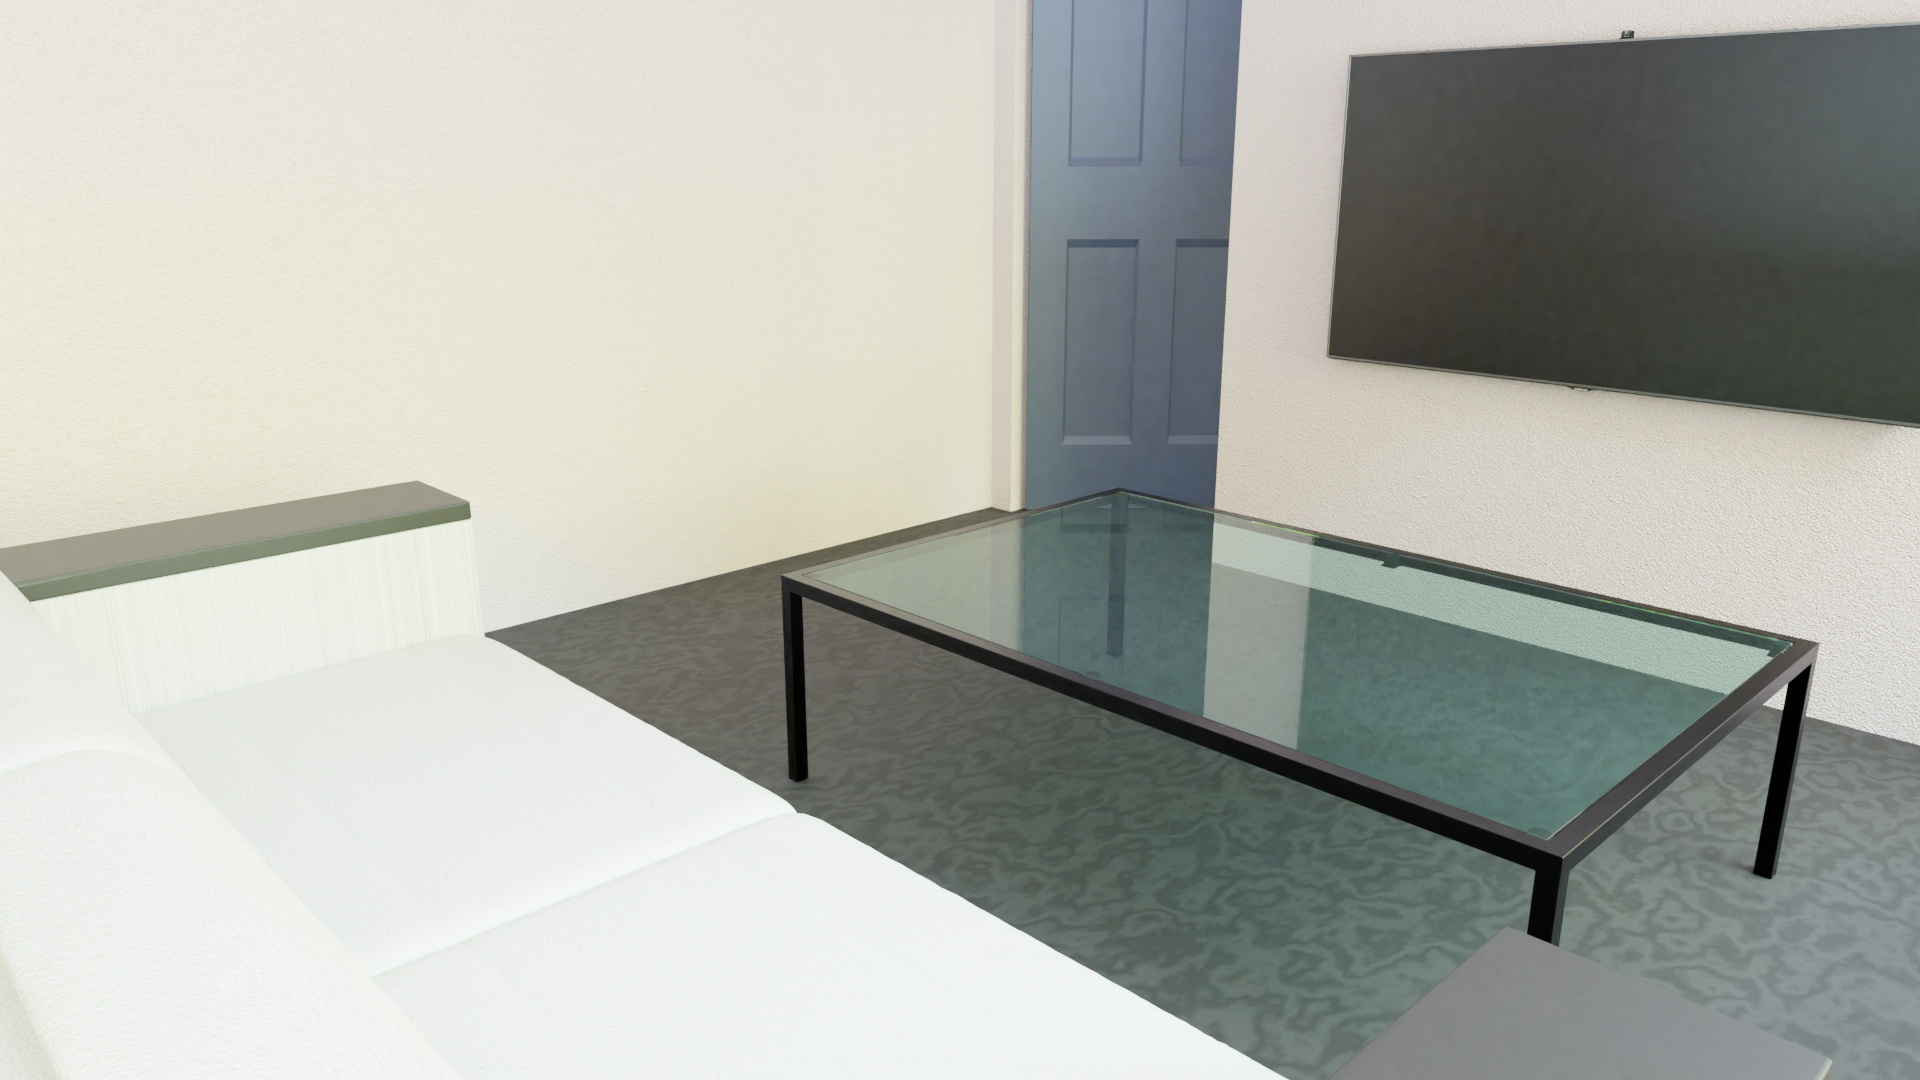
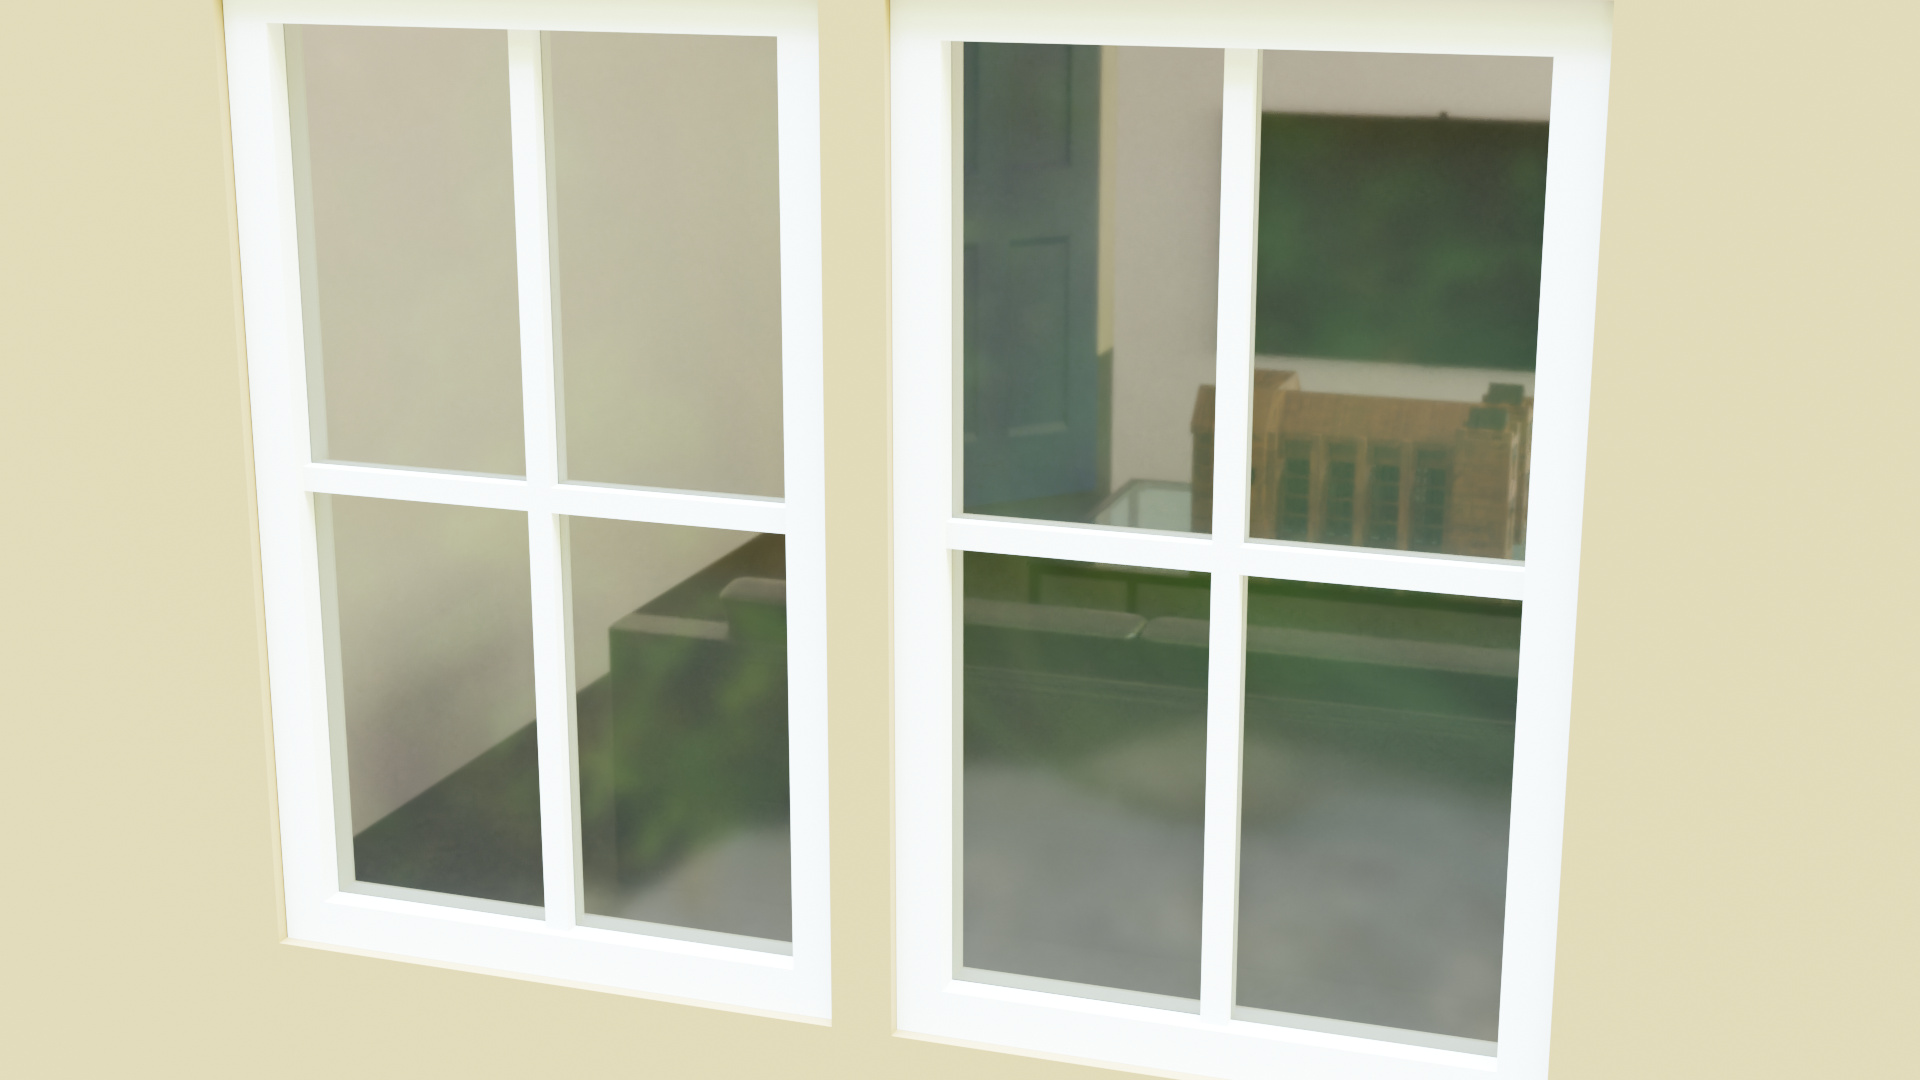
Following that I needed a room to put the table and blocks in, so I modeled a living room complete with a door (as per lesson 25), windows (which is where the HDRI lighting comes from) and multiple materials (for the walls and floor). I also imported a few models into the space. Obviously I used the table I had created. I also imported a couch and television that I found online. All three of these objects were added to the scene using Blender’s file append functionality. The final test image of the room was:
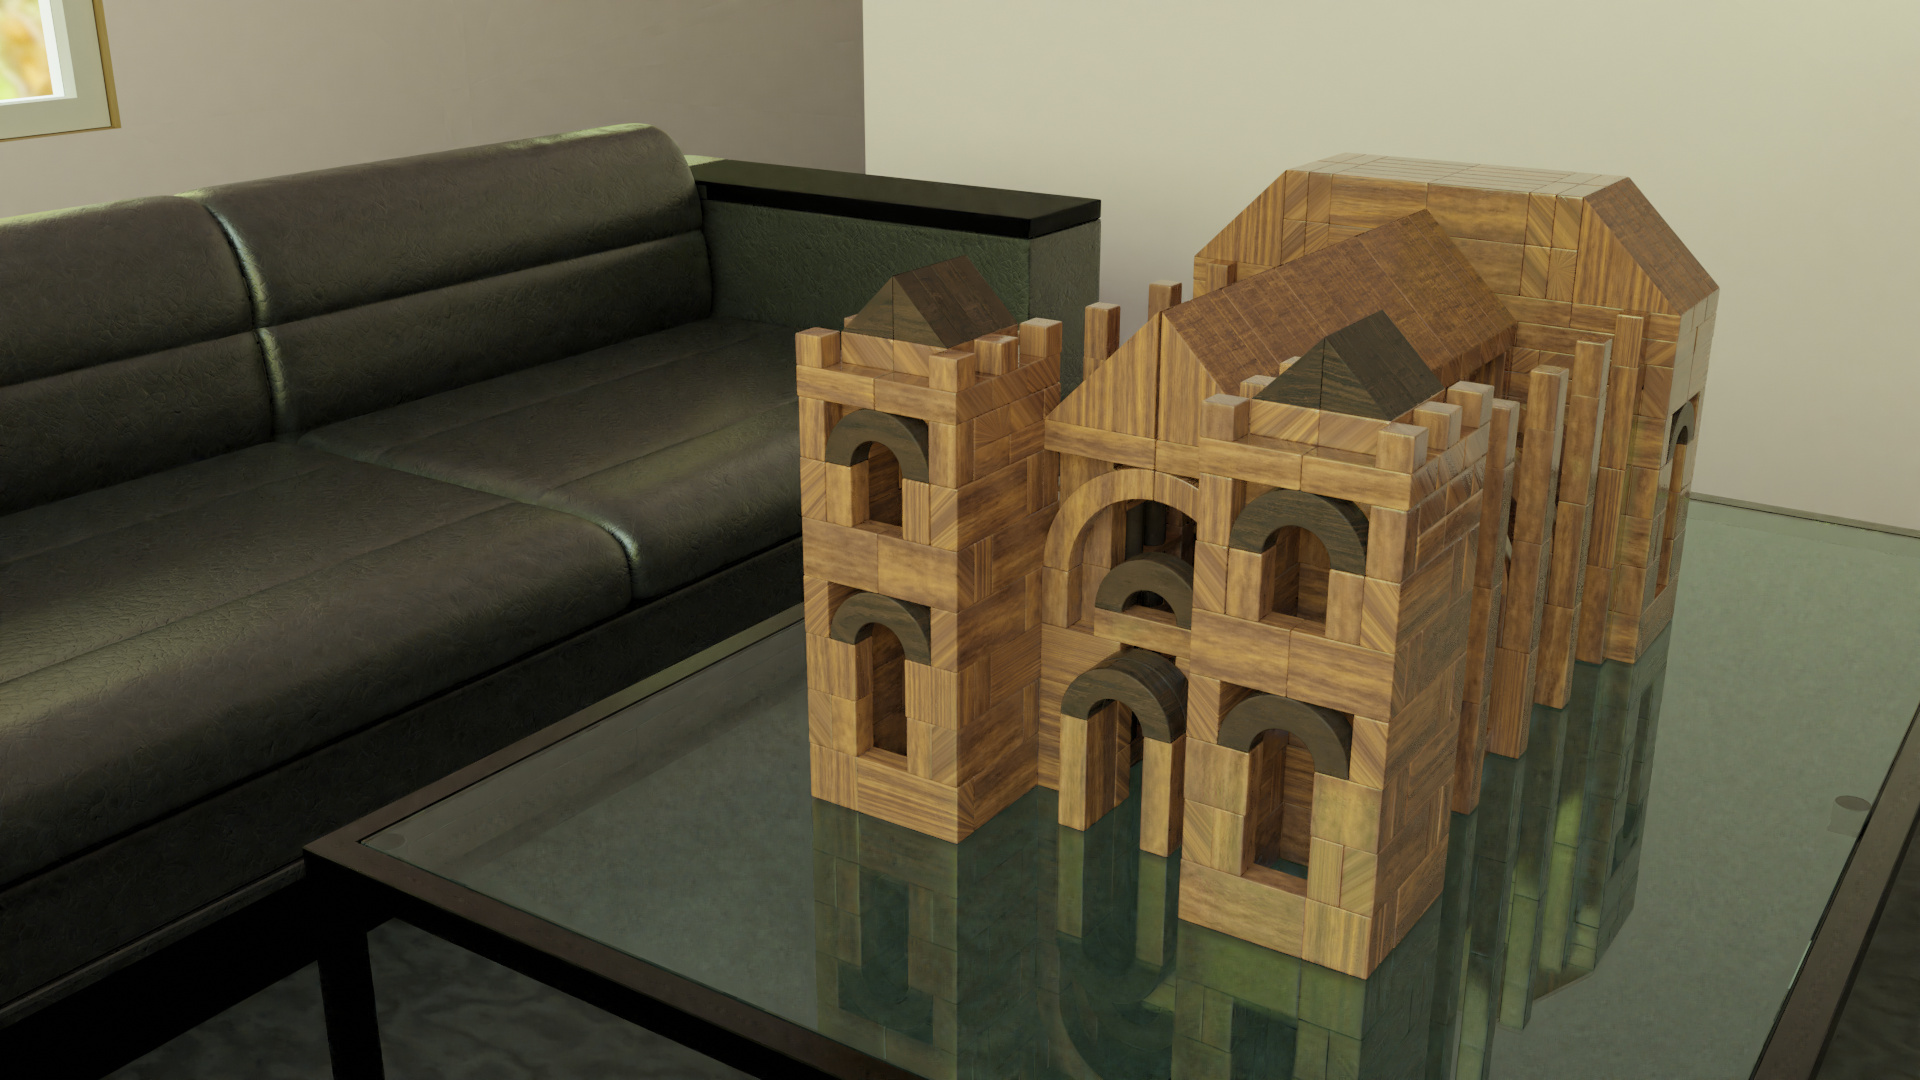
Finally, I built a cathedral with the blocks, placed it on the coffee table, played with some of the materials I didn’t like, and got a few final renders. I placed three cameras – two were taking different views of the cathedral and the third was looking in through the windows. These are the final indoor renders:
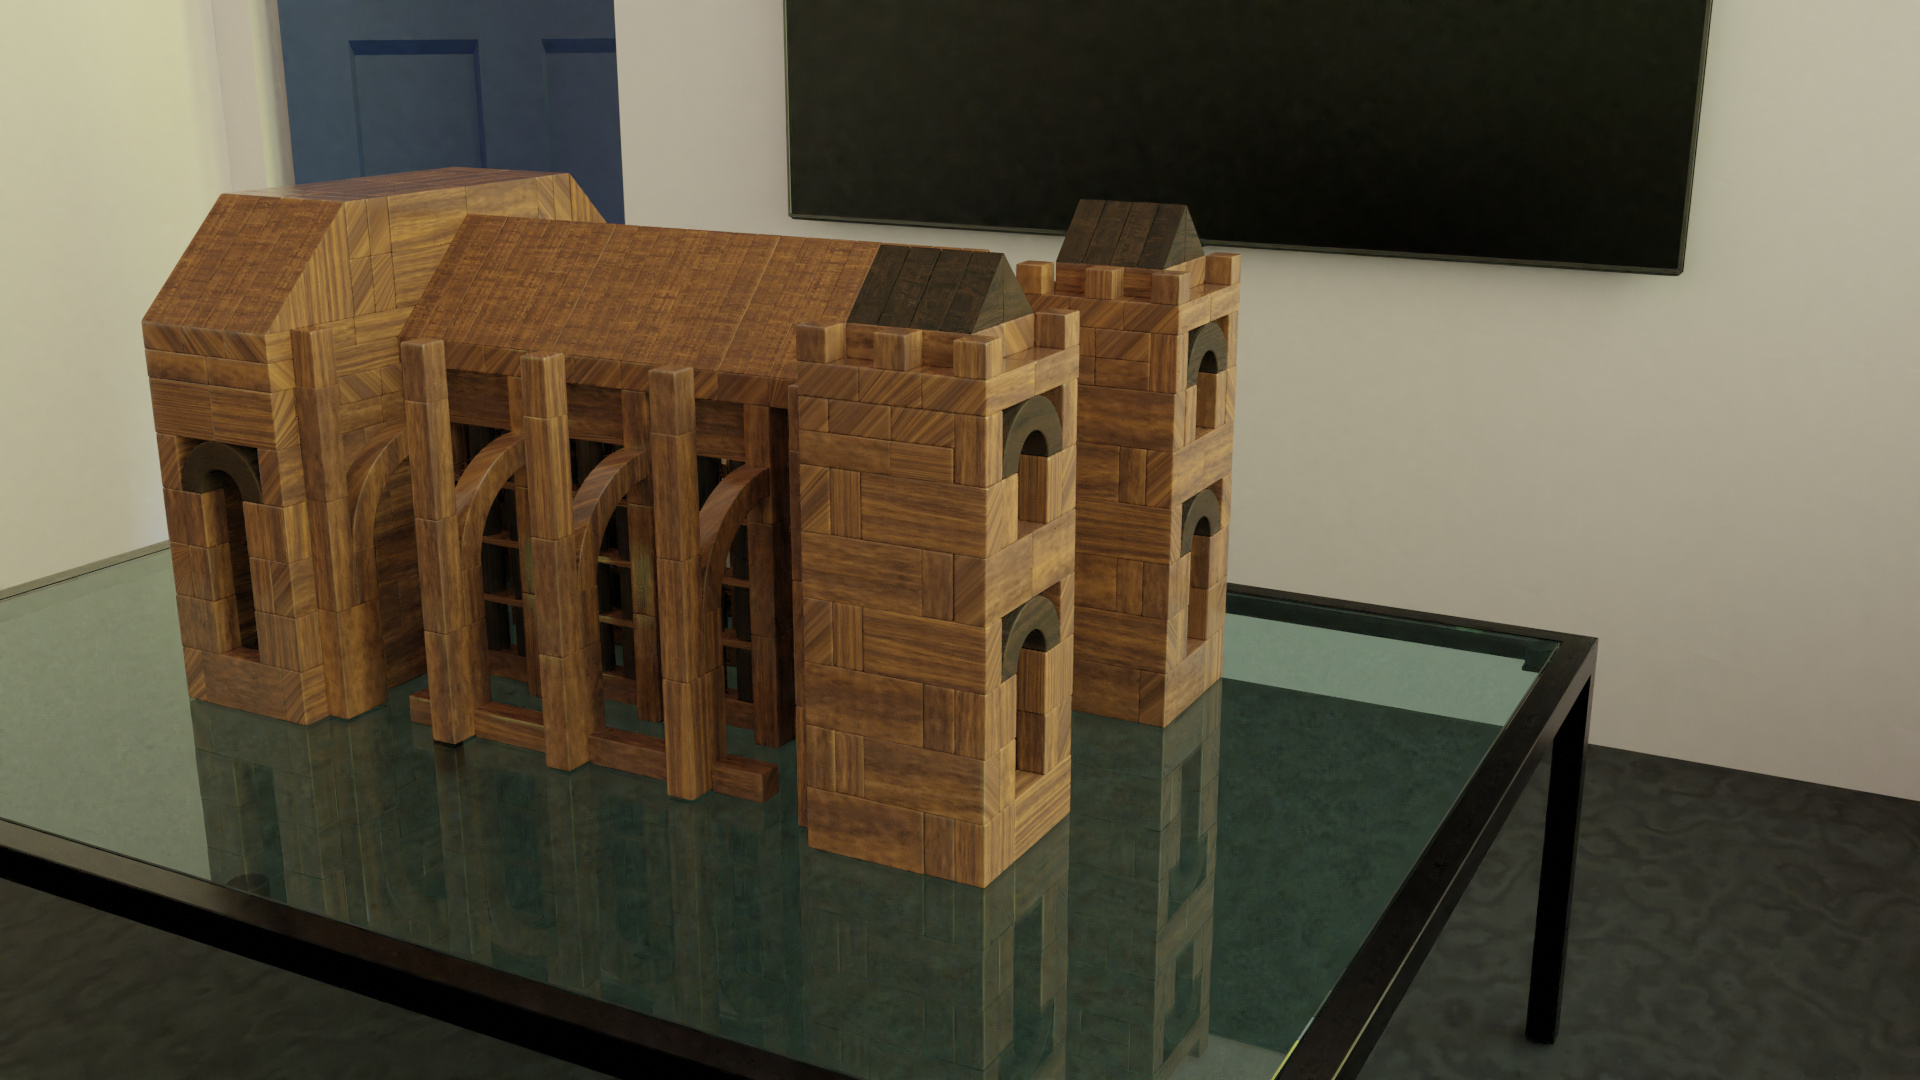
And the outdoor render:
I think the materials on the outside of the house could use a fair bit of work, but I’m still happy with the way that the glass material effects the scene within.
It came out to nearly two weeks spent on different portions of this particular project, but I’m happy with how it turned out; and, it was a heck of a learning opportunity.
Cheers!

