Stephen’s videos are comprehensive but in fact, if you follow the Unreal Stealth course for example, it shows a great way to use the enhanced input. It’s actually very simple to use once you see it being used once. I remember the first time I tried following the videos on YouTube I got completely lost.
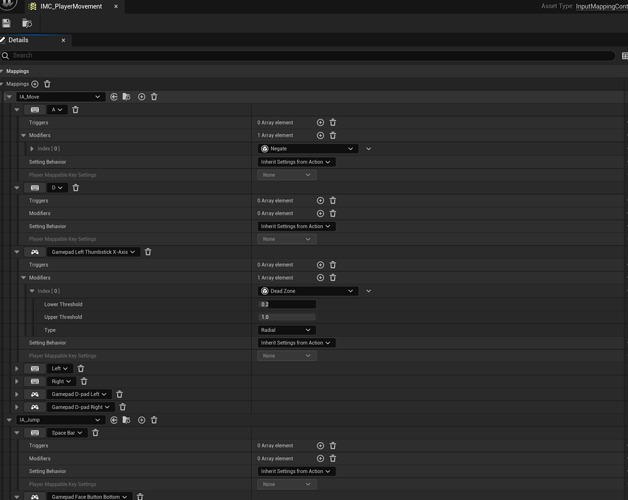
One thing you need to do for gamepad input over keyboard is add a deadzone modifier. This will take care of the drift when the inputs are close to zero as most gamepads don’t exactly zero out.
I even went on to use touch input with the enhanced input with little effort.
Steps:
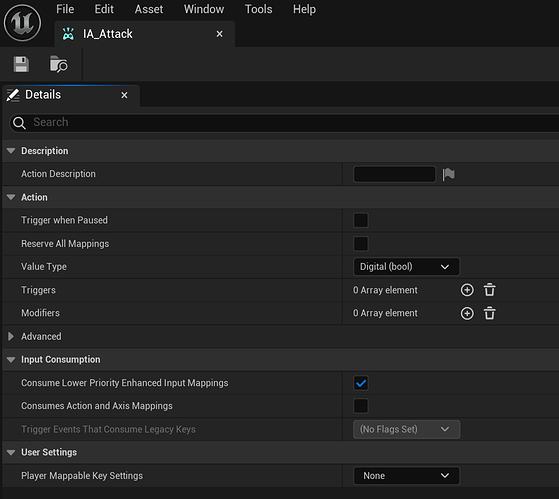
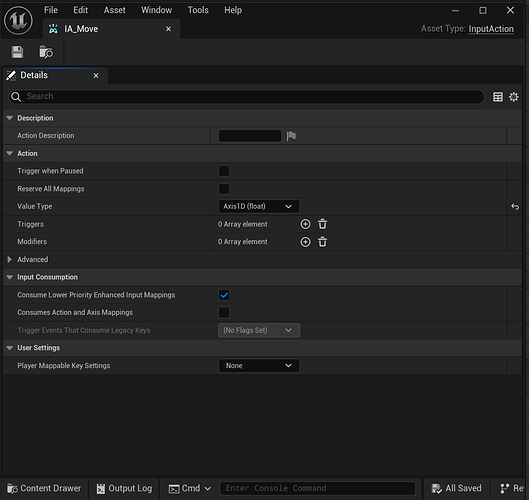
- create your Input Action components. There’s a few ways to do this and I much prefer using 1D axis over the 2D axis inputs for up-down/left-right. These are for analog inputs but you can use them for keypresses for forward/back or gamepad d-pad. For actions like a jump key/button on gamepad you use a boolean.
So, for button input, something like this:
And for movement, this is going to be left/right, you can do this
- Create an input mapping context and then for each input, you set up your bindings. For keys, you need to add modifiers to negate the input for left and right for example. This is an example of the kind of input you’d define.
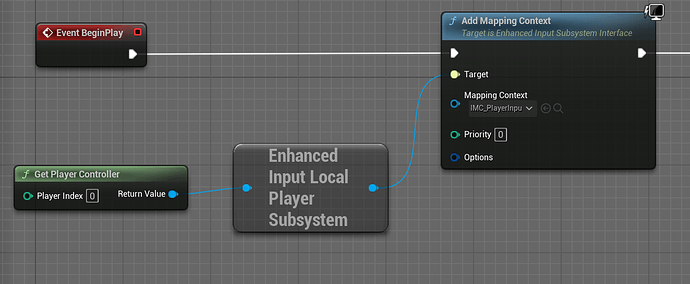
- Next, you need to tell your game which Input Mapping Context you are going to use. It’s easier done in blueprint and typically in your player character but can be done equally as easy with C++. To handle in C++, you need to have a reference to the Input mapping context and add this. It’s a lot simpler with Blueprint.
For C++, you would have something like the following and note this has also the movement bindings. The inputs and context are set in the class via UPROPERTY entries in the header.
void APlayerCharacter::SetupPlayerInputComponent(UInputComponent* PlayerInputComponent)
{
	Super::SetupPlayerInputComponent(PlayerInputComponent);

	const auto PlayerController{Cast<APlayerController>(Controller)};
	if (!PlayerController) return;

	PlayerController->SetShowMouseCursor(true);
	auto const Subsystem{
		ULocalPlayer::GetSubsystem<UEnhancedInputLocalPlayerSubsystem>(PlayerController->GetLocalPlayer())
	};
	if (!Subsystem) return;

	Subsystem->AddMappingContext(InputMappingContext, 0);

	const auto EnhancedInputComponent{Cast<UEnhancedInputComponent>(PlayerInputComponent)};
	if (!EnhancedInputComponent) return;

	if (MoveAction)
	{
		EnhancedInputComponent->BindAction(MoveAction, ETriggerEvent::Triggered, this,
		                                   &APlayerCharacter::Move);
	}

	if (JumpAction)
	{
		EnhancedInputComponent->BindAction(JumpAction, ETriggerEvent::Started, this,
		                                   &APlayerCharacter::JumpStarted);
		EnhancedInputComponent->BindAction(JumpAction, ETriggerEvent::Completed, this,
		                                   &APlayerCharacter::JumpEnded);
		EnhancedInputComponent->BindAction(JumpAction, ETriggerEvent::Canceled, this,
		                                   &APlayerCharacter::JumpEnded);
	}

	if (AttackAction)
	{
		EnhancedInputComponent->BindAction(AttackAction, ETriggerEvent::Started, this, &APlayerCharacter::Attack);
	}
}
- Setting up bindings
As the above C++ shows, it’s not that different from the old input system but you do this via Input actions. The use of the calls are a little different. Note that even boolean calls have the same signature which is actually good. Pay attention to the InputActionValue and how you get the value from it
void APlayerCharacter::Move(const FInputActionValue& InputActionValue)
{
	if (IsAlive && CanMove)
	{
		const float MoveActionValue{InputActionValue.Get<float>()};
		AddMovementInput(FVector(1.f, 0.f, 0.f), MoveActionValue);
		UpdateDirection(MoveActionValue);
	}
}
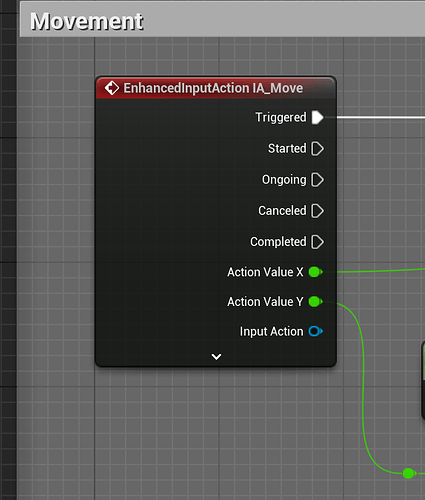
Blueprint is similar to the old system as well. For movement you’d typically use the triggered which will fire every frame.
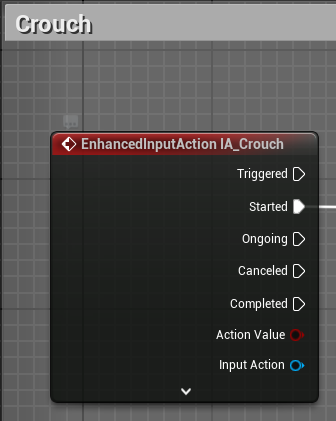
For the buttons/boolean like jump and in this case crouch you can use the started which is like pressed, and completed which is like unpressed
So, that’s pretty much it. There’s way more to it than this but for the courses, this will let you cover absolutely everything.
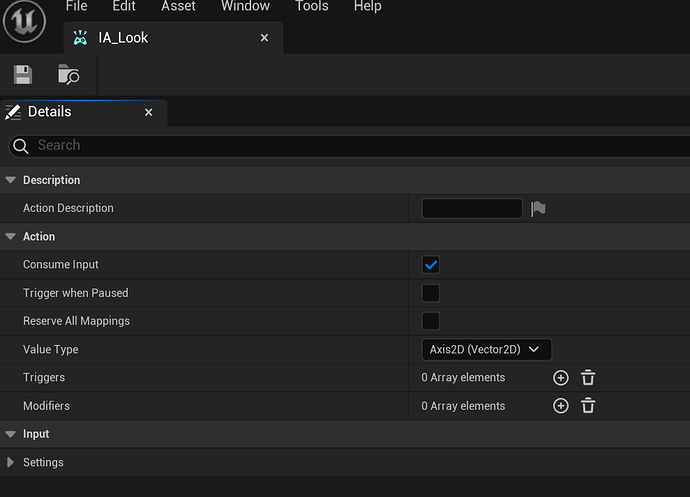
For mouse input, such as using it in a third person game, the Input Action is a 2D Axis. I’ve taken this from the stealth course as an example but as you can see, it is actually relatively simple.

