Hi,
I did my CGI render, but I will need to do another one with a better video footage.
Why ? Well, since in my footage the camera is only rotating (kind of) and it isn’t top quality, I didn’t manage to get the tracking 100% accurate. And the best part was that I noticed that in the final render  (it looked Okay with low samples and resolution)
Have a look:
Glorious 1080p, 60FPS, 15 H to render.
I may be a bit too picky, they say that artists will never get a satisfying result even if it looks great to other people. So, what do you think ? Doesn’t the slightly-floating rabbit bother you ?
With that put aside, I wanted to include some of previous work into that scene:
- First the rabbit from section 6, that one was a bit heavy on the render because of the hair particles, I placed it on the side so it would disappear halfway through the video (I actually made it disappear from the scene)
- The return of the Cell fracture from Bonus section: Destruction; I like it it is fun

- Annnd, the physics engine from the same section, basically the rolling boulder.
Experimental area:
I also tried to make things seem a little more realistic by faking the smashed rock pieces getting behind the first two trees, and adding some blur, actually two types of blur.
-
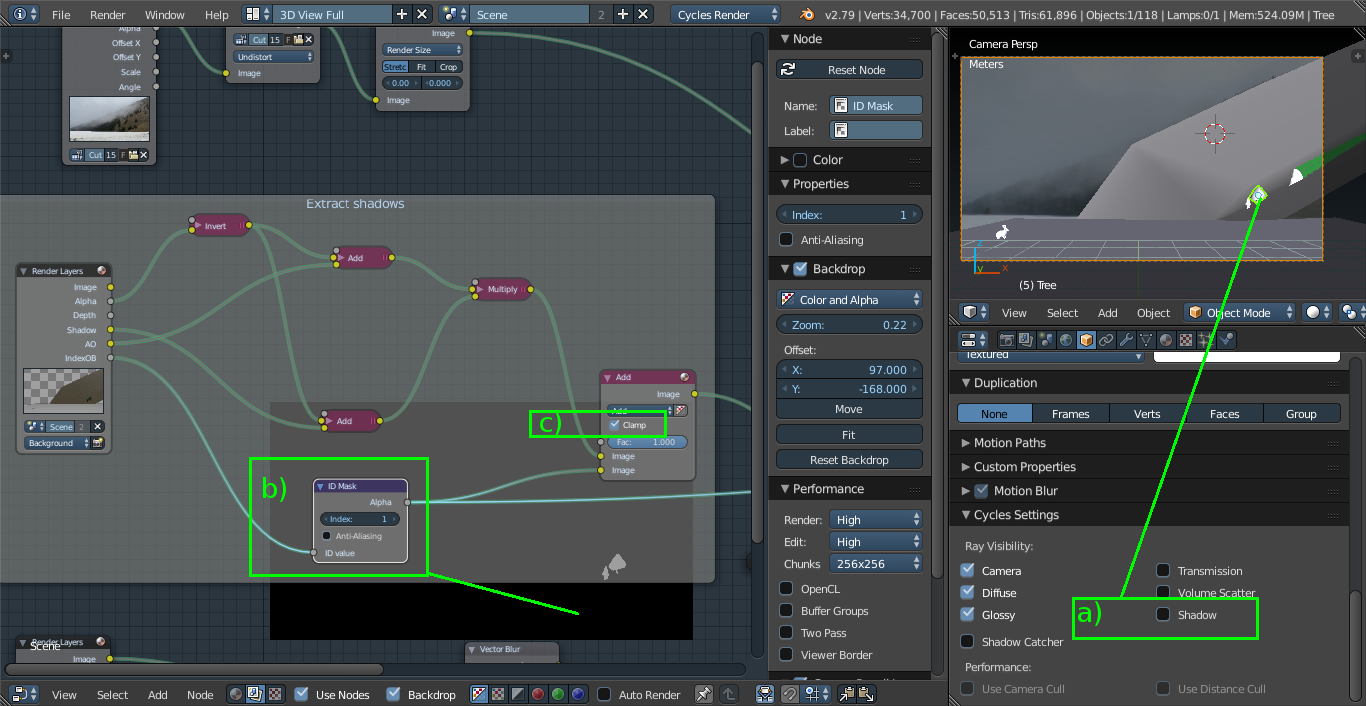
To fake the perspective, I created a mesh that look like a tree, to be part of the 3D background, the tricky part was to make it shadow-less:
I am using the node set-up that comes with the motion tracking with a few added bits [b) and c) ].
a) Unticking the shadow in the object properties made it disappear on the ground but not on the mesh.
b) I had to use a mask to get full white on the tree before multiplying with the background image to make it shadowless (Mask on the backdrop image).
c) The clamp option is obligatory, or the add result would create area with value>1 on the tree mesh creating “negative shadows”. -
Blur because of speed, there is a motion blur that comes with the basic node set-up, I just had to tweak numbers to make it look okay.
-
Gaussian blur. I added this one because in the video the foreground is clearer than the background (camera focus I guess). Well there is also the fact that the rabbit looked too much detailled compared to the environment. The tricky part was to get a stronger blur in the back. I used a simple image map for that:
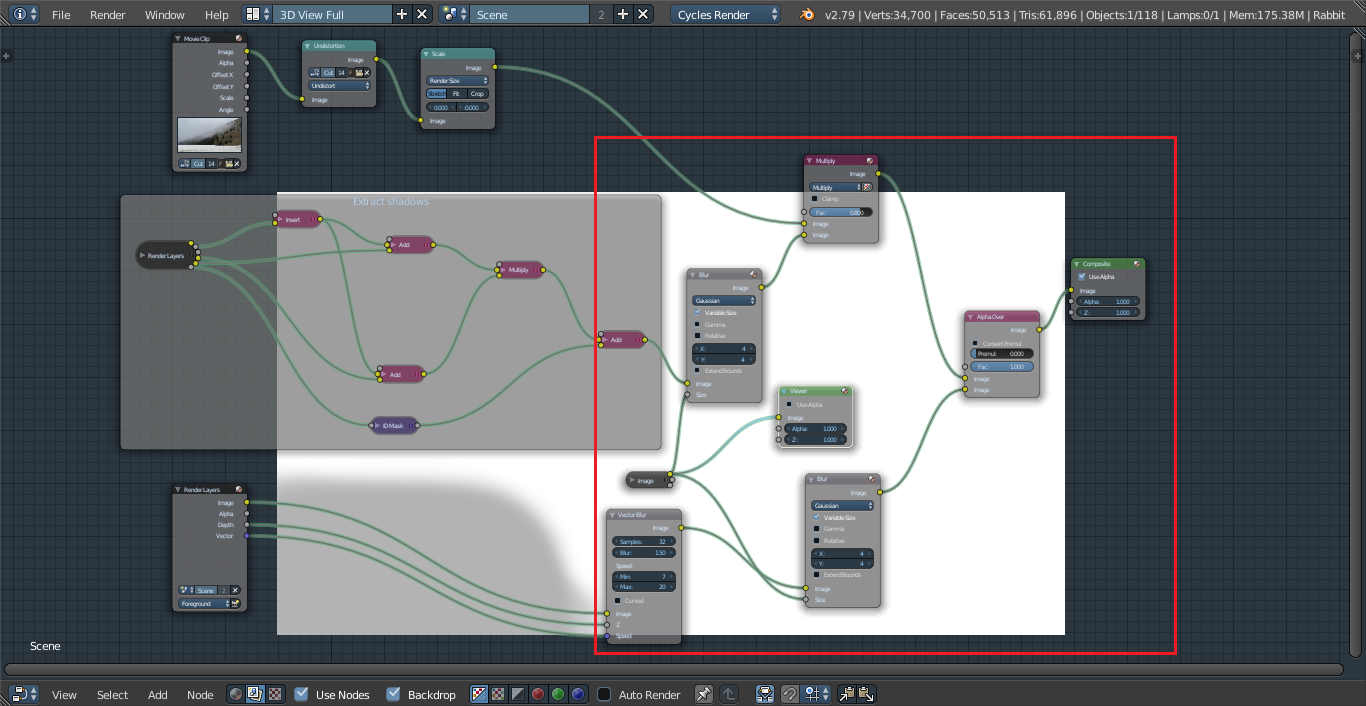
Complete node set-up:
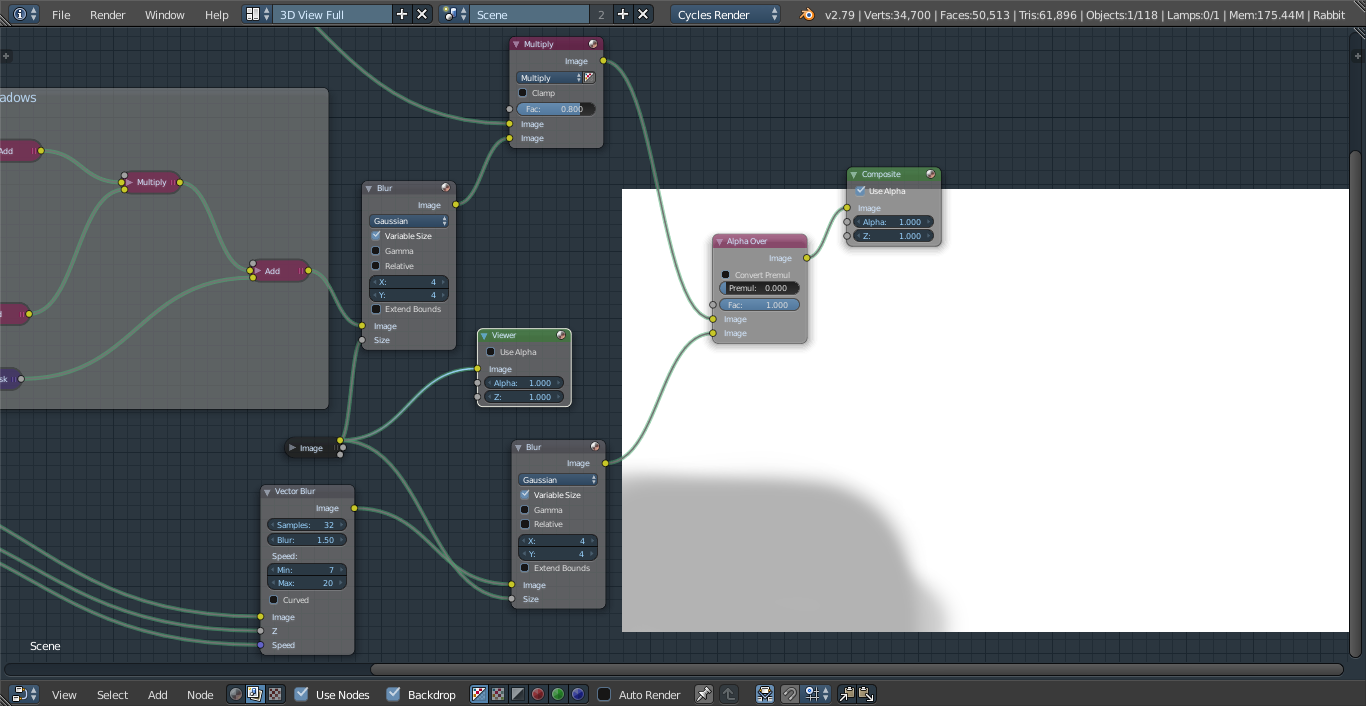
Zoomed node set-up:
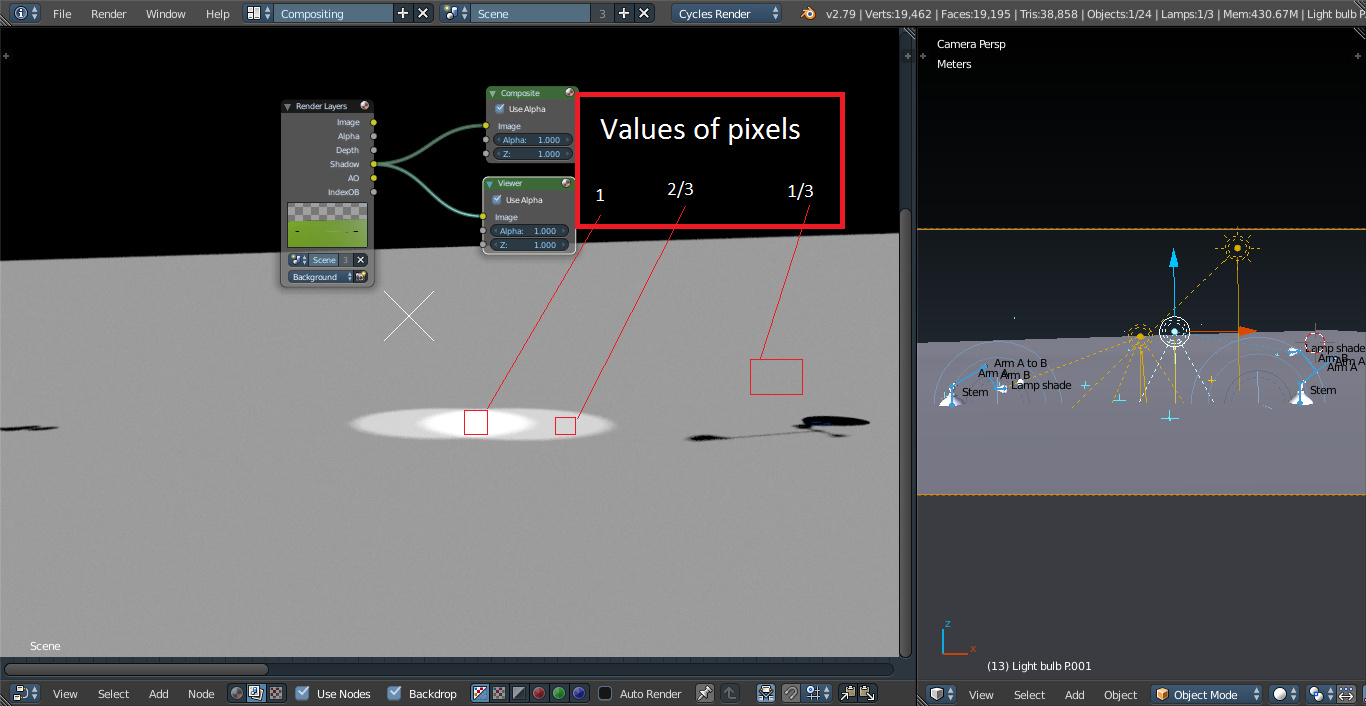
You can see in the backdrop the map I used to be the size factor of the gaussian blur node, a simple map . I used two nodes because I needed to blur the meshes, AND, the shadows.
Experimental area OFF
I wonder if my next CGI will be a bowling ball rolling in the street, or a lamp moving on my desk 
Cheers !