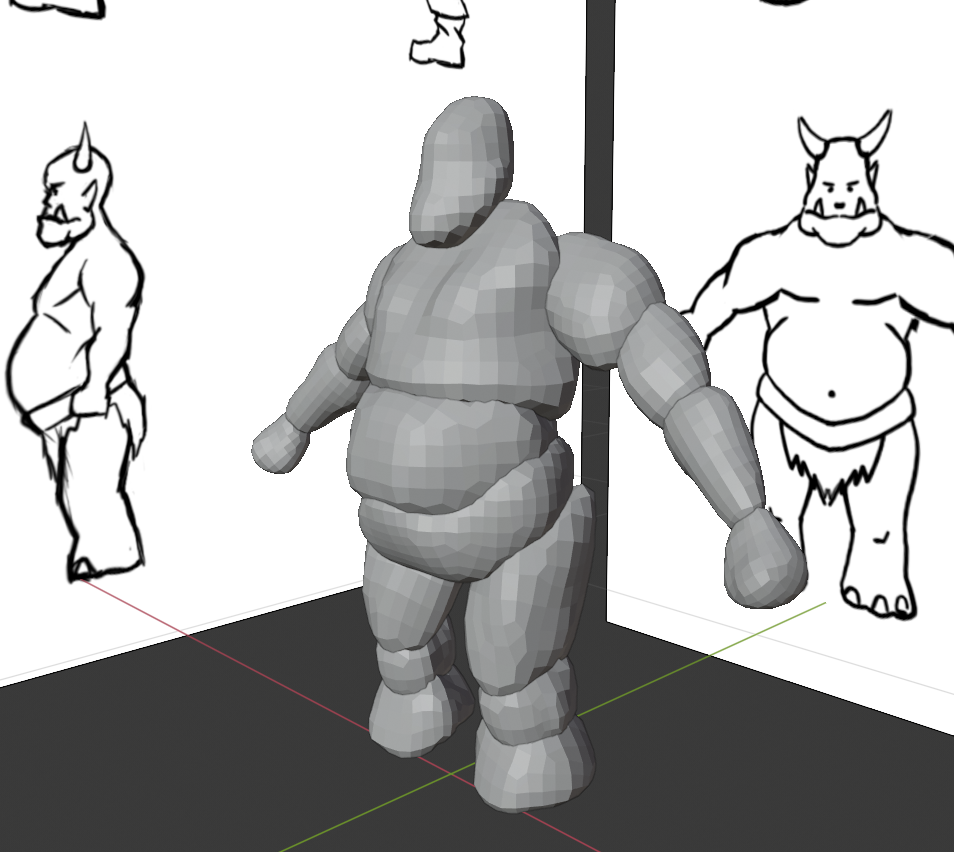
Decent full-body block out. Did you just start the new updated character course? Because I was going to do that soon as well since I heard Grant Abbitt has joined the team, and he’s an awesome teacher!
Yes, I’m following the new Character 2.83 course (Start at lesson 1) , because the old one is still there.
And I must say, it gives what I expected. Real character modeling, not just a Cube Dude animated as in the previous version.
I also do follow this one Modeling a character BaseMesh in Blender (Tutorial) - 2 hour 30 min.
And if you have only 10 minutes. Then follow this one 
Let’s MODEL and RIG a Pirate in 10 MINUTES in Blender 2.82 - ep. 11
Nice shares! The one by Sociamix might come in handy as I’ve been struggling with body proportions in my character attempts.
Great to hear the update covers more real character modeling and sculpting workflows rather then the cubedude from before. Although the old course still has lots of good info for someone starting out, I’m also hopeful for this new update to be more about Real character modeling!
If you like Grants stuff, I can strongly recommend his youtube channel. I’ve learned so much from him as well as gameDev. I also enjoy his live lessons! Here’s a recorded one I was lucky enough to catch, but wasn’t quite skilled enough at the time to follow along with lol. https://www.youtube.com/watch?v=ud8dMgMrWwo
Coming along nicely
I lost symmetry when working on the second block of the arm. The other side doesn’t follow. Don’t if the order of applying modifier got problem, or something else.
Thanks.
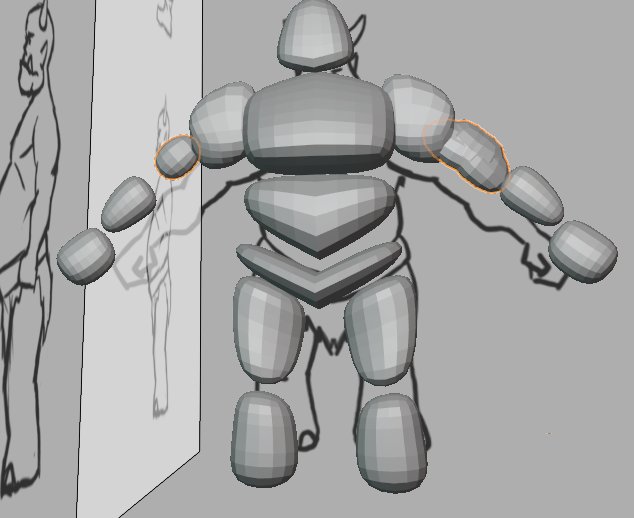
The upper arm at the right side, has a mirror modifier!
But the origin of upper arm at the right side, lies in the middle of that object.
Not in the middle of the Orc, at 0.0.0
Check all parts. If the origin lies at the 3D cursor at 0,0,0 (Use Shift C, move the cursor to that position.)
Maybe redo the steps before (Check and apply scale, set correct origin) etc…
Thank you so much, FedPete!
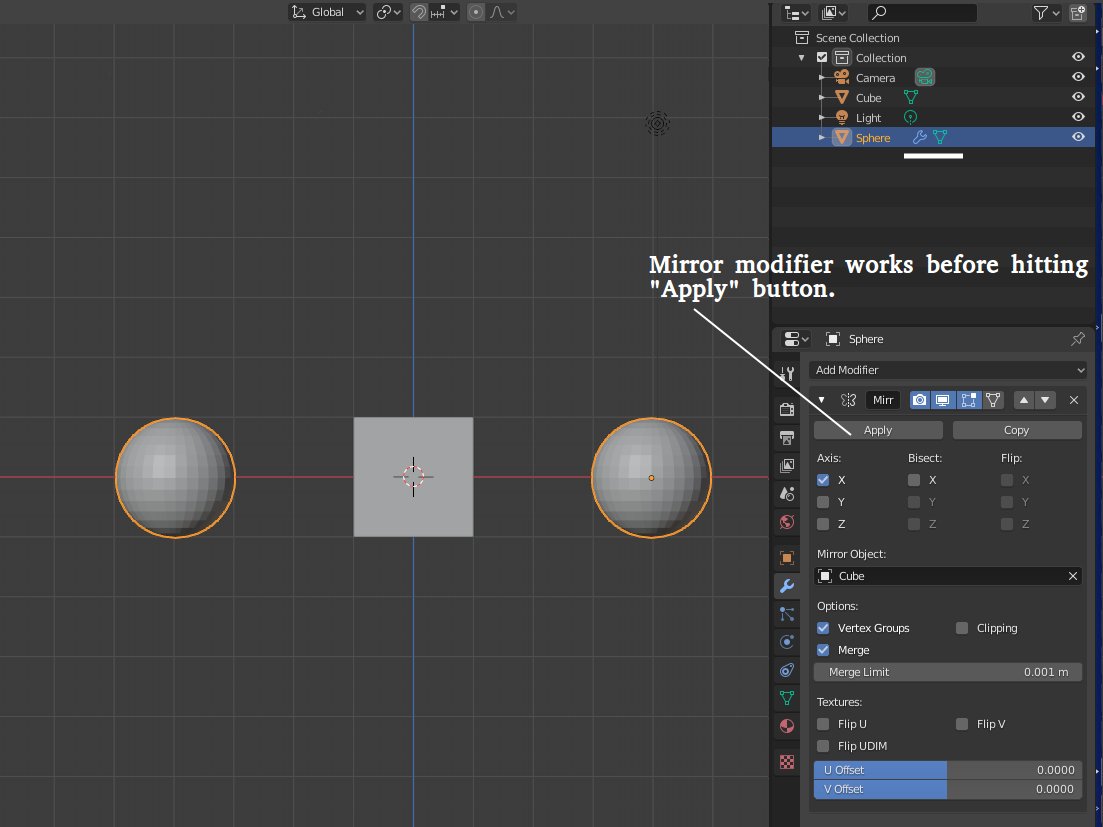
I found that I should not have used the “apply” button after adding the mirror modifier. For instance, in object mode, Front orthographic view, create a UV sphere and add a mirror modifier for it, relative to the original cube. Hit G key to move, x to move in x direction. The mirror modifier is working, because the two spheres move in a mirror mode.
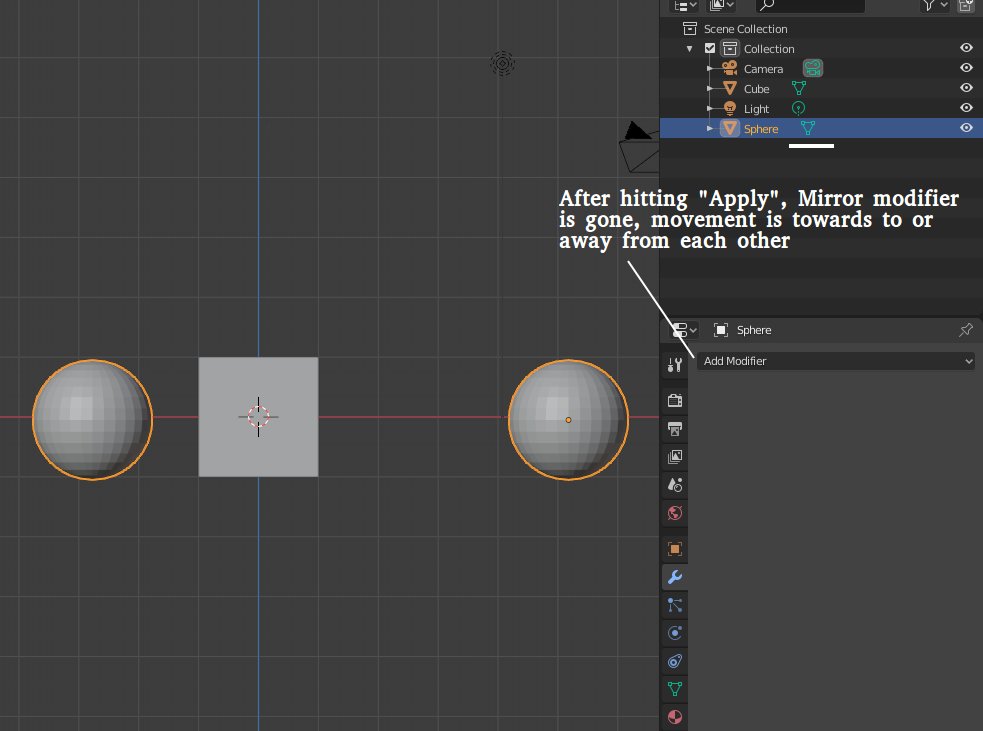
But if hit “apply”, then the mirror mode is destroyed and the movement is one following another, not towards to or away from each other. And after hitting “apply”, the sphere doesn’t have modifier in outliner.
See attached pictures please.
Thanks again!
If you Apply this mirror modifier, you get one object!
But the two meshes inside are identical!
But your origin is then NOT in the middle, it’s in ball at the right.
That’s why you need to set the origin to 0,0,0, (middle of the cube).
Now, when you are sculpting, you need the X-ax mirror effect on the ball mesh.
Remember, box model mirroring (modifier mirror) and Sculpt mirroring are different concepts / functions.
Thank you FedPete again!
Which option should I take? The origin is already at the center.
I tried but still lost symmetry.
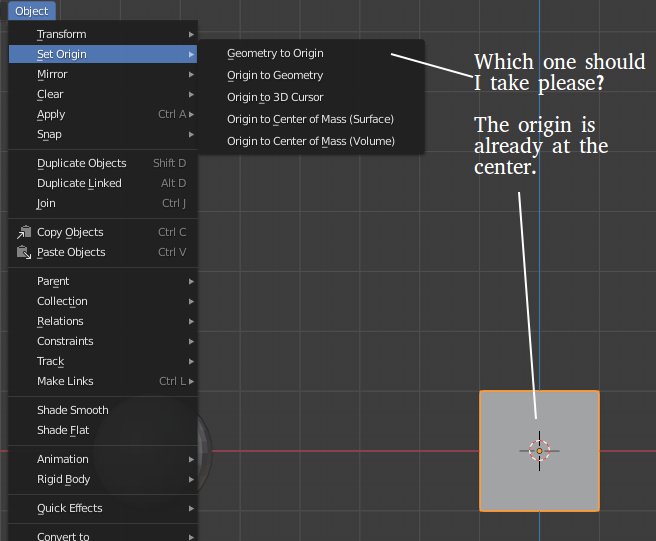
Assuming you need to make the origin of the cube also the origin of the sphere, you have to select the cube then hit Shift-S and select “Cursor to selected”, at this point the 3D Cursor is as in your last picture.
Next you select the Sphere and in the Object->Set Origin you pick “Origin to 3D Cursor”.
Thanks Albesca!
I lost symmetry in the first image shown above. Then I tried to found the reason, and it seems after I hit the “Apply” button (in the illustrating Figures 2 and 3) the mirror modifier starts not working.
Yes I tried setting the origin before hitting the “Apply” button, including Origin to 3D cursor. None of them works.
I searched the web and found some options:
“MIRROR MODIFIER: this continues to keep your mesh perfectly symmetrical while you work on it; change one side, the other side is automatically changed to match.
WHEN TO APPLY: If you need to break the symmetry of an organic model, or skin a mesh to an armature, you need to apply the mirror modifier. This creates the other half of your mesh, which didn’t really exist before.”
Check also for problems like, forgot to applying SCALE, and ROTATION on the balls.
And always try to work with the center at 0,0,0
Thank you FedPete!
hi are you a bot fed pete or are you real just asking
No, just a real person. Started these courses since 2016.
So you see my many replays 
hehe nice