
If you’re reading this, there probably aren’t very many posts yet. But don’t worry, you can be the first! Either create a new post or just reply to this one to say ‘hi’.
Hi Ben,
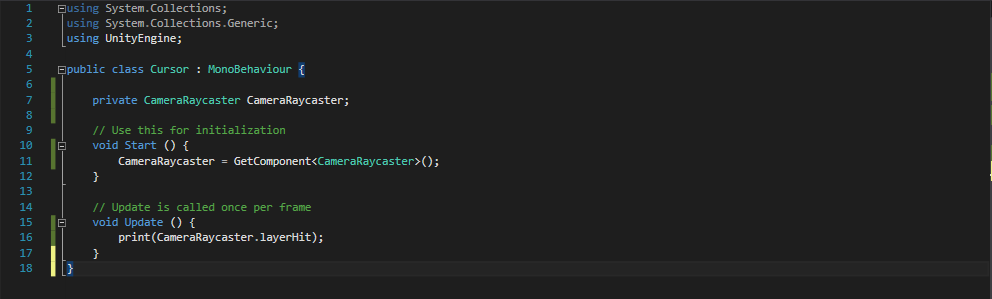
I’ve putted the layerHit printing command in the LateUpdate method. Is this correct as well? I wanted to make sure everything in the game is updated before checking if the cursor target world position is indeed ‘Walkable’.
Jeroen
1 Like
As a dev, I loved this lesson Ben. Good to be able to look over the code really quick and see what’s happening without too much explanation. If I understand it and need to move forward, I can always speed up the video.
I feel like this video was a exactly where it should be, technology wise.
What’s sad is even as a dev, I always forget how to ‘find’ things on my gameObject (ie, I got stuck on how to find the raycaster). Just seems so weird to simply look for stuff attached to my object, don’t know why.
2 Likes
Good idea, hadn’t thought of that. I’m interested to hear what others say.
1 Like
Hi @tvance929, according to Ben’s response on Udemy it does not really make a difference when you put the print command in the Update() or LateUpdate(). I guess for me it was just a good practise  I think when necessary, adjusting the script execution order via Edit > Project Settings > Script Execution Order could’ve helped as well.
1 Like
Just as a precaution in case anyone else comes to this lecture. At present the current video is the incorrect one (its from the unreal course). I have let @ben know and will update when the correct video has been applied.
Thanks for your patience.
Update :- Correct video is showing at the moment for me although not in the correct order (That will resolve itself in time)
I havent watched the solution yet so probably going to get something wrong lol
Edit :- Slaps hand Lower case c its a variable
1 Like
I do like the ability to be able to import code in but I’m also a bit worried about using someone else’s codes without thoroughly understanding why I’m using the code. I understand that Ben can’t go into every little details in the code why things are the way they are since the topics can get pretty deep. I think the way Ben has it now is good for this course, but it might be helpful to provide further information if somebody wants to dig deeper.
Take for example the bit masking technique and ray casting. I have been to several different forums and there are more than one way to do bit masking. The way Ben suggest using the Enum is a good practice since it makes it easier to change the layer without having to hunt down the entire code to figure it out.
One thing about Ray Casting that’s missing from this lecture is the core concept of what exactly it is and what it’s doing. Ben went over it quickly here but maybe he already covered it in the other Unity Development course. In any case, if it’s the first time you encounter ray casting it’s quite hard to understand. However, after I saw a video from Unity itself explaining the concept, it became very clear. The video uses ray casting in conjunction with ray painting (DrawRay function) to show where the ray is cast. I highly suggest people watching the video on Ray Casting from Unity (https://unity3d.com/learn/tutorials/topics/physics/raycasting)
In any case, I, as a developer and a long time programmer, need to know what I’m coding because I often have to support and explain the codes to bosses/clients. You are more authoritative and seem professional when you can clearly explain why you have your codes the way they are. Hand waving and saying that I downloaded codes from somebody else doesn’t really cut in in the professional world. It also could implies litigation if the codes weren’t supposed to be used freely. Many younger Microsoft developers are caught in this dilemma due to heavy work load pressure and tight datelines. Unfortunately, many of these young programmers lose their jobs because of using somebody else’s code that somehow got found during a litigation audit of the source codes.
3 Likes
I have to say I took it as a challenge to read the script and understand it before letting you continue. (Hit the pause)
I actually thought setting the blocks as enemy was a good test of the script to prove it was going in the order we expected. I am a .net developer so I don’t mind reading code. But I am also happy for any explanations of Unity related bits. Bit-wise operators are always good to assume nobody knows it.
It was actually harder for me to find the download than it probably should have been. I actually copied all the code off your screen first. Which from Pluralsight classes I like doing to help me learn. I just pause as you scroll and copy line for line. I feel like I learn from that experience so I will probably continue to do it. But as I said I am already familiar with all the bits and pieces of C#. Lambdas, Linq, and threading. Even though I don’t always know what Unity has available until I see it in a class I generally stay away until i see it used.
Yowsers… I had been following the course and made it all the way up to lesson 22 and ‘The Event Keyword in C#’ and all the while I was having difficulty getting the Raycast to always show the correct icon when I moused over an ‘Enemy’. Sometimes it would work, most of the time it wouldn’t. I’d get the enemy icon if I pointed it at the guys head, but not the body. I even tried added the enemy layer to a couple of blocks and those never ever showed as enemy. I must have spent a good 3 hours (no joke…I’m still learning) matching my code to the video, doing text comparisons with notepad ++ to make sure it wasn’t a typo or something I missed, etc etc with no avail.
Finally after throwing in the towel on just guessing where the problem was I thought to try and see if I could ‘See’ where the problem was. What I did was this… I added the following bit of code to the CameraRayCaster.cs file to project a ray out from the camera to see what the heck it was touching and why I would only barely ever get enemy but most of the time I’d get the walkable icon.
Right at the top of the ‘void Update’ , before the ‘foreeach’ statement, stick in there the following:
    Ray ShowRay = viewCamera.ScreenPointToRay(Input.mousePosition);
    Debug.DrawRay(ShowRay.origin, ShowRay.direction * 200, Color.white);
If you’ve setup your Unity layout to show both the Game window and the Scene window at the same time, when you run your game and move the mouse around, down in the scene window you will see the white beam moving around and matching your cursor.
Now, with this new ability to ‘see’ what the beam was touching I was able to figure out that the order that we used for our layers was incorrect. Due to this what was happening was because my main camera was set at more of a horizontal view looking out with the top half, when I moused over the horizon, everything was fine since the beam never touched anything. If I moused down into the ground from the horizon I correctly saw the walkable icon since nothing was in front of it. If I moused over an enemy that was up over the horizon, that was working too since there was nothing behind it. The problem that was happening was when the ray touched both the enemy and the ground at the same time only the walkable would show and not the enemy which was in front. This was always only ever showing the walkable because the priority we were given put walkable on layer 8 and enemy on layer 9. Perhaps I missed something about easily changing the order of priority, but I ended up having to update the Utility file, the layers on the game objects, and the order in the ‘layerPriorities’ function on the CameraRayCaster.cs file. (Does the order actually matter there?)
After fixing all of that, all was well. Ben, if possible please fix the order there in your code and video, or make a note to help others. (If the note is there or everything is correct and I just missed it due to lack of coffee, sleep, or dislexia) you still might want to try highlighting layer ordering a bit better for others.
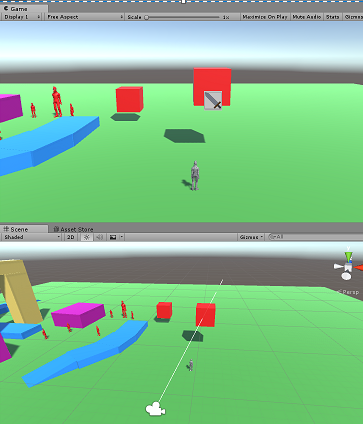
(for you eagle-eyed observers I did have to manually add the sword icon to the screenshot since the snipping tool wouldn’t grab it even when using the delay. The positioning is about the same though)
Hi, I just wanted to report that the project changes link in udemy is pointing to the wrong commit. Thanks and keep up the good work!