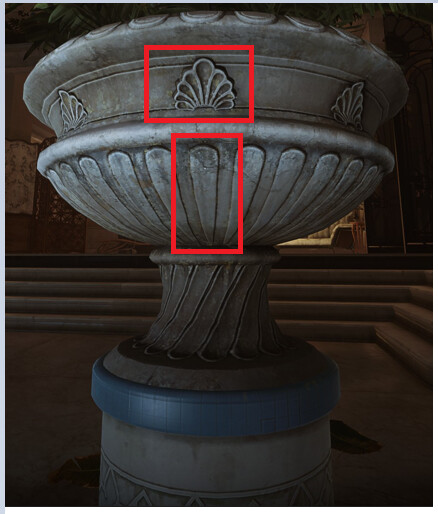
Adding floral and rounded details

Hello,

Pretty new to blender, I just finished the Complete Blender Creator 3 from Grant Abbitt, and before tackling his Environment Artist course, I wanted to train a little bit more, for fun.

I have this image reference:


And I would like to know how to add those details?
So far, I have this typology:

Is it okay with some loop cuts, or should I add a lot more surface subdivisions so that I have more edges to work with, to grab and move and then extrude to create relief? I guess this could work for the “rounded slats”.
But for the floral stuff, I don’t even know where to start. Maybe is it more about sculpting…?

2 Likes

I would make them as a separate object(s) !
Then you can:

  • Make an array to place them around the pot
  • Make it flat in design mode. And with the modifier deform “Lattice” you can shape (fit) them around the subject.
3 Likes

When I tried to make something similar, I would draw with vertices as a separate item and apply a skin modifier. Ctrl + a to resize them all small, add a sub-div and apply the modifiers. You can create a base mesh to work with that way.

3 Likes

Hey,

Thanks for your answers, I used both of your ideas, and I managed to get that:

I created a separated object and then used an array indeed. It was a bit of a mess at first, then I understood I needed to create a referential object like a circle, and then add this circle (and apply transform before!) as an object offset. Then add the number of items you want, divide 360 by this number, add a Z rotation, and here we go!

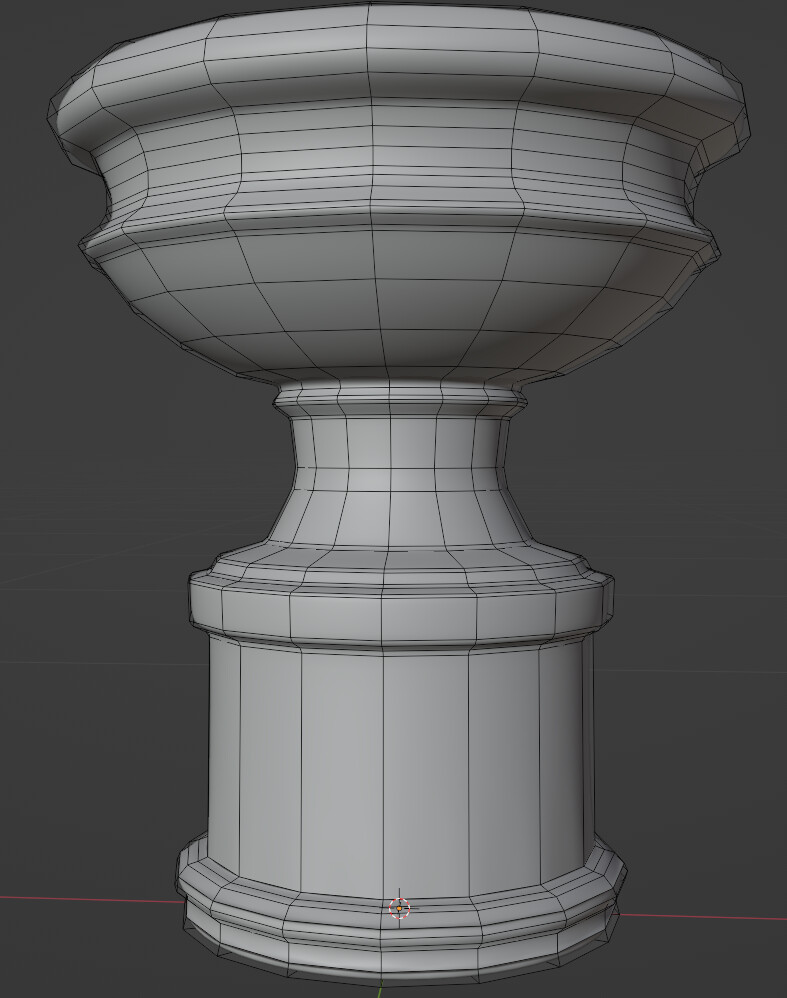
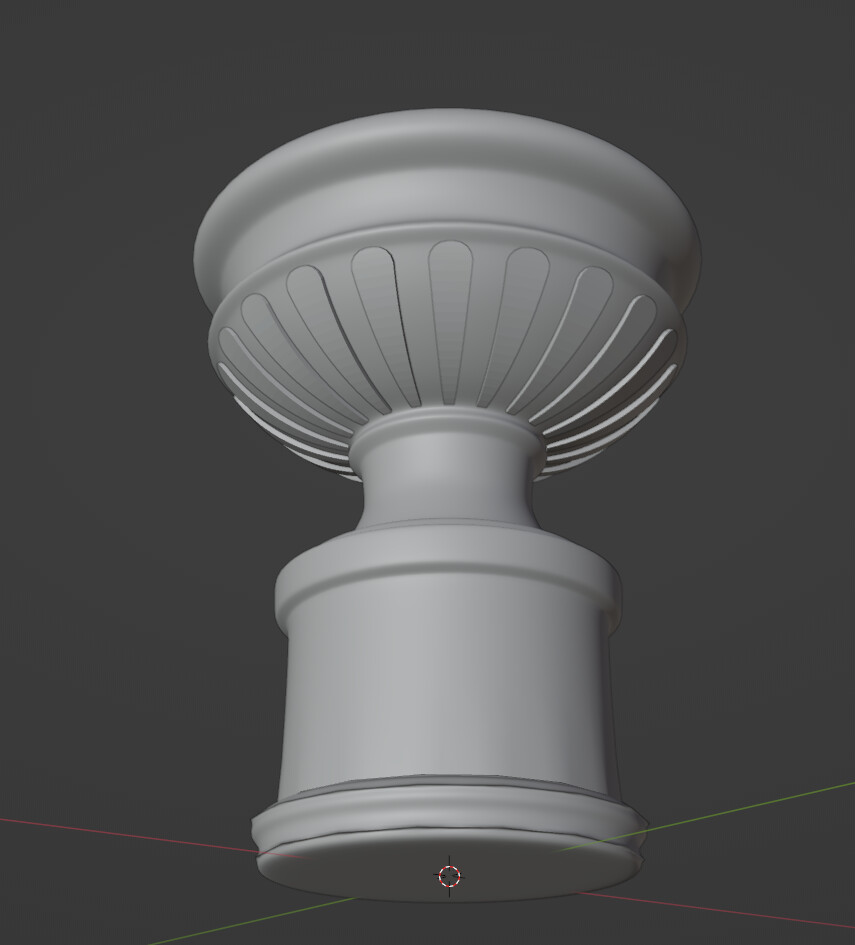
Now, for the floral stuff, I managed to find a silent tutorial (How to model ornament in blender :D), and I used a bezier curve for the outter shape. Then, for the inner one, I indeed used a single vertex and extruded to create a rough shape. And then I used the bevel, as Grant showed us, to smoother the angle. So far, I have this result…
… And okay, for some reason, a lot of faces have gone missing while 5 min before it was all good.
Anyway, that will just bring one more question:

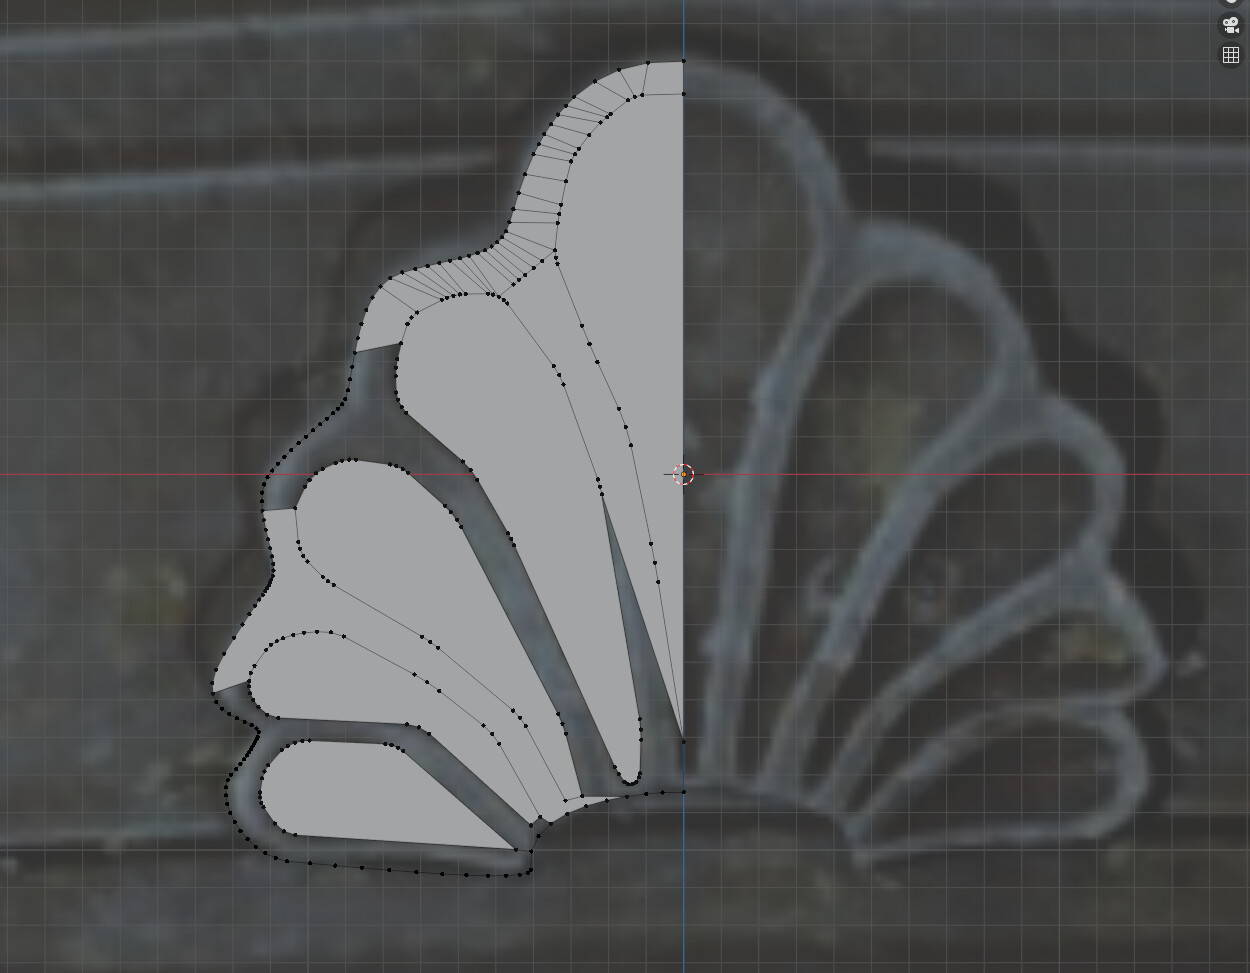
So first question, I guess I can choose 4 vertices by 4vertices and press “F” to create a new face to fill all the gaps? It’s a big long, but…

Second question, is it okay to do what I’ve done at the top / outter shape of the mesh, ie, taking two vertices and pressing “J” to join them in order to create quads? That too will take a lot of time but I heard you really want to have quads most of the time. And since I have a somewhat big amount of vertices because of the bevel use to create the smoother angles…
Or maybe this is absolute overkill, and even more, absolutely not optimized because I am creating too much geometry…?

I don’t really know where to stand on that position, but for sure, and even if this is bad practise / not the thing to do, I have a lot of fun and I am even surprised I managed to actually create that shape!

1 Like

selecting four vertices and making a face is the first step.
Then you can select an edge and press f again, and the f again without selecting an egde again.
But it depends on the selection of the first edge AND if there are no direction splits when the new face goes into two or three directions.

I would clean-up your basic mesh. The goal is to have Blender do the work for you using the subdivision modifier. Having lesser verts to work on, your control of the model better.

j joins two vertices, the same for pressing f in that particular case.
But j does more when crossing edges and other faces.

1 Like

Okay! That indeed will speed up the process, thank you very much for pointing it to me!

I’ll try to clean it up, then. I tried to copy what this guy did in this video, how he used the knife to create the inner shape of his object. But he did not use the bevel to smoothen the angles, that’s maybe why he has a better typology and less clean up stuff to do.

1 Like

Privacy & Terms