Change pivot points for scaling and rotating a UV map
Use snapping to align UV maps
After watching (learning outcomes)…
You will be able to align UV maps with each other and with the image with much more precision.
(Unique Video Reference: 17_TB_BEC)
We would love to know…
What you found good about this lecture?
What we could do better?
Remember that you can reply to this topic, or create a new topic. The easiest way to create a new topic is to follow the link in Resources. That way the topic will…
Every time I learn something new, it takes me time to get it all straight in how to use it. After messing with it for a while I started to get the hang of using snap tools to aid in aligning my UV map.
One suggestion for doing something better in this lecture and all others (actually) is to let us know what build date of Blender 2.8 you are using. My latest build of Oct. 13 seems to be missing snapping choices when hitting Shift S. On this build there is only one choice (Selected to Pixel).
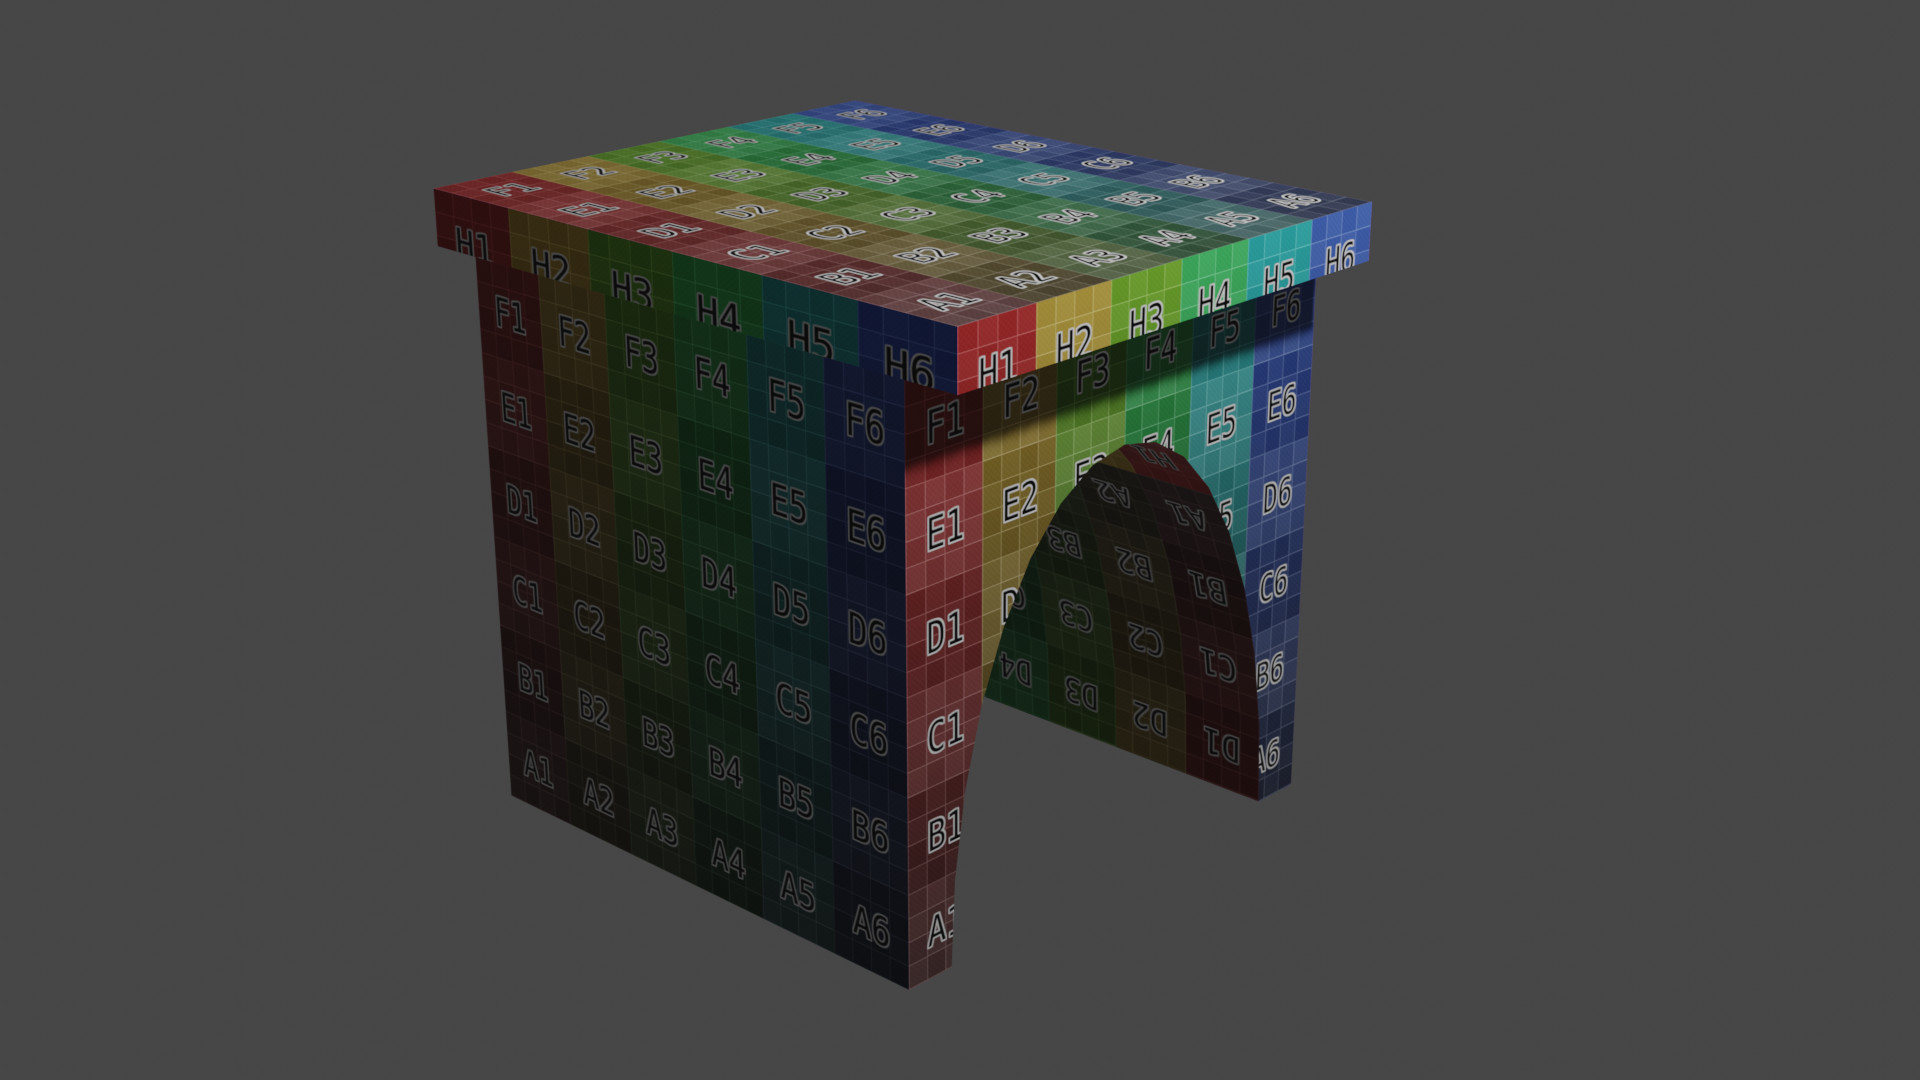
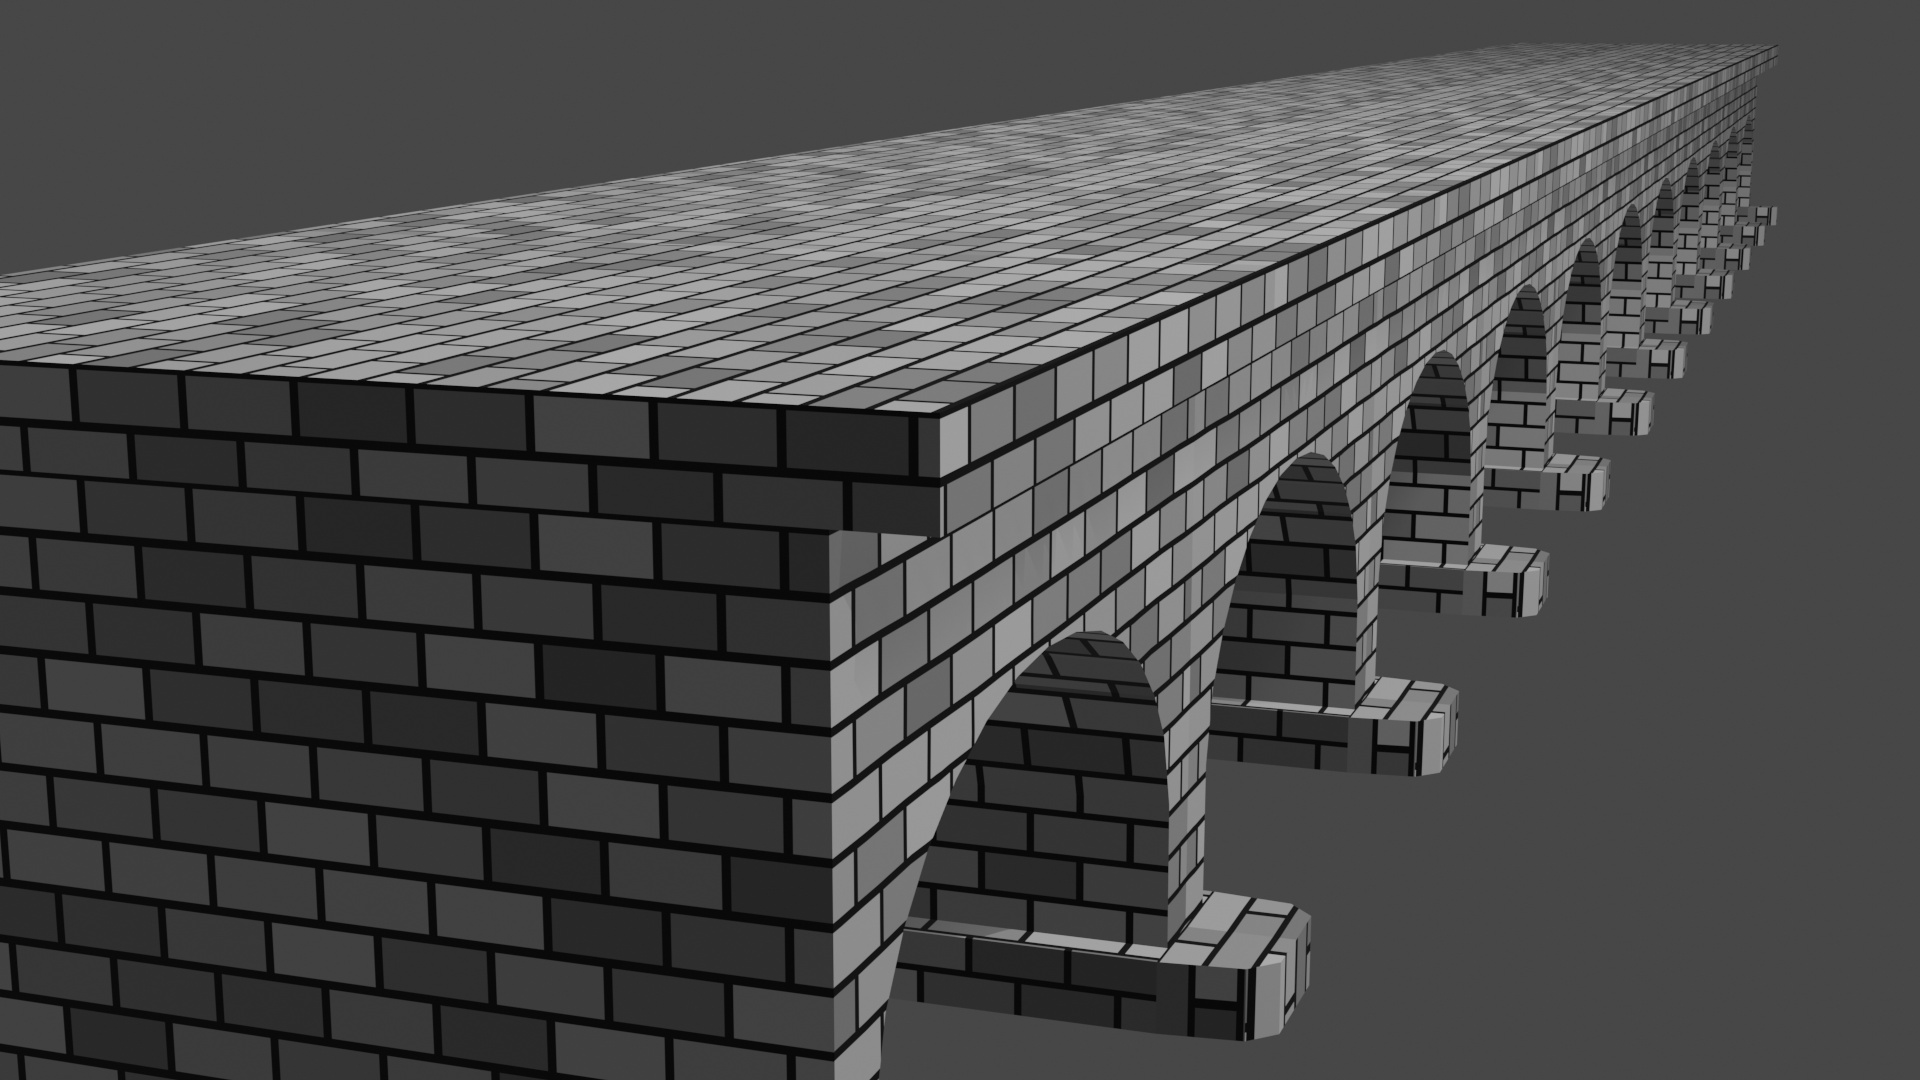
Heres the final Eevee render, I had a little difficulty getting the scale, even so the edge of the top square bit is a little smaller than the rest of it however with an actual texture applied I don’t think it’ll make a huge difference if it does I can just adjust it to be a little larger, the rest of it was fairly easy to get it to line up with the other textures, just having the two faces for the arch on top of each other so that it wraps around nicely, lovely course, been having a blast guys <3
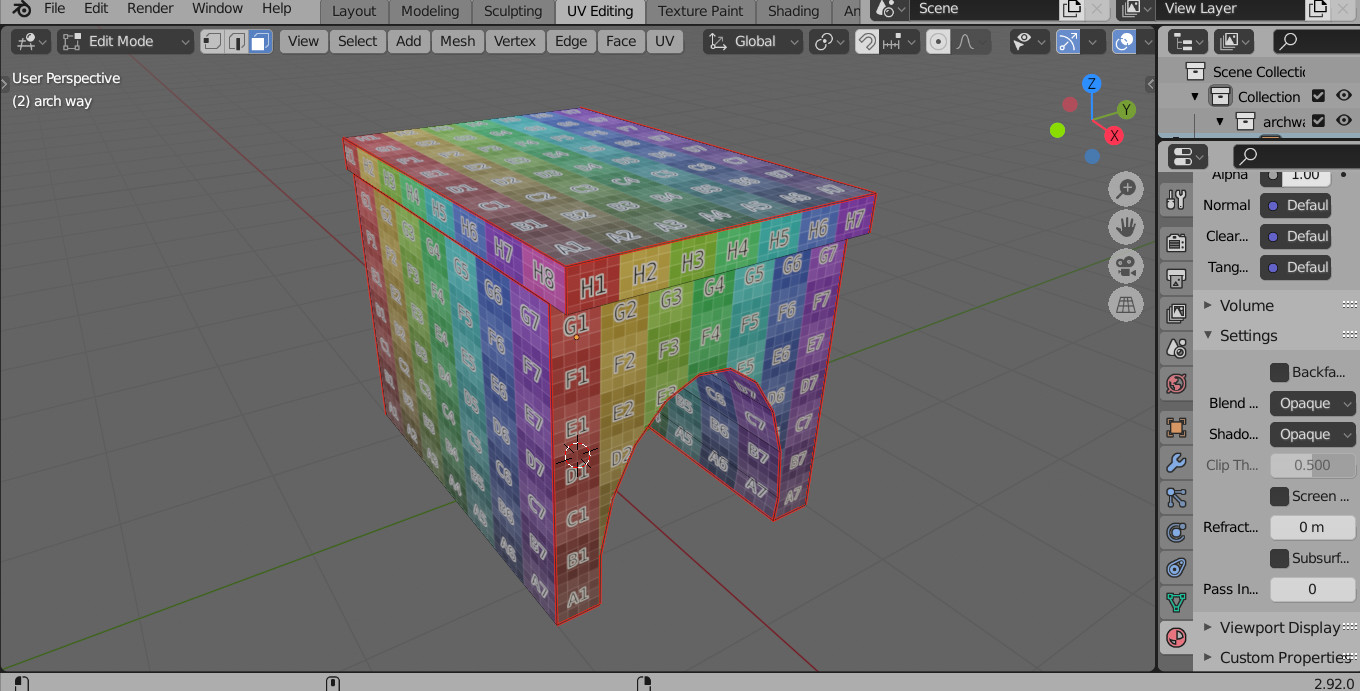
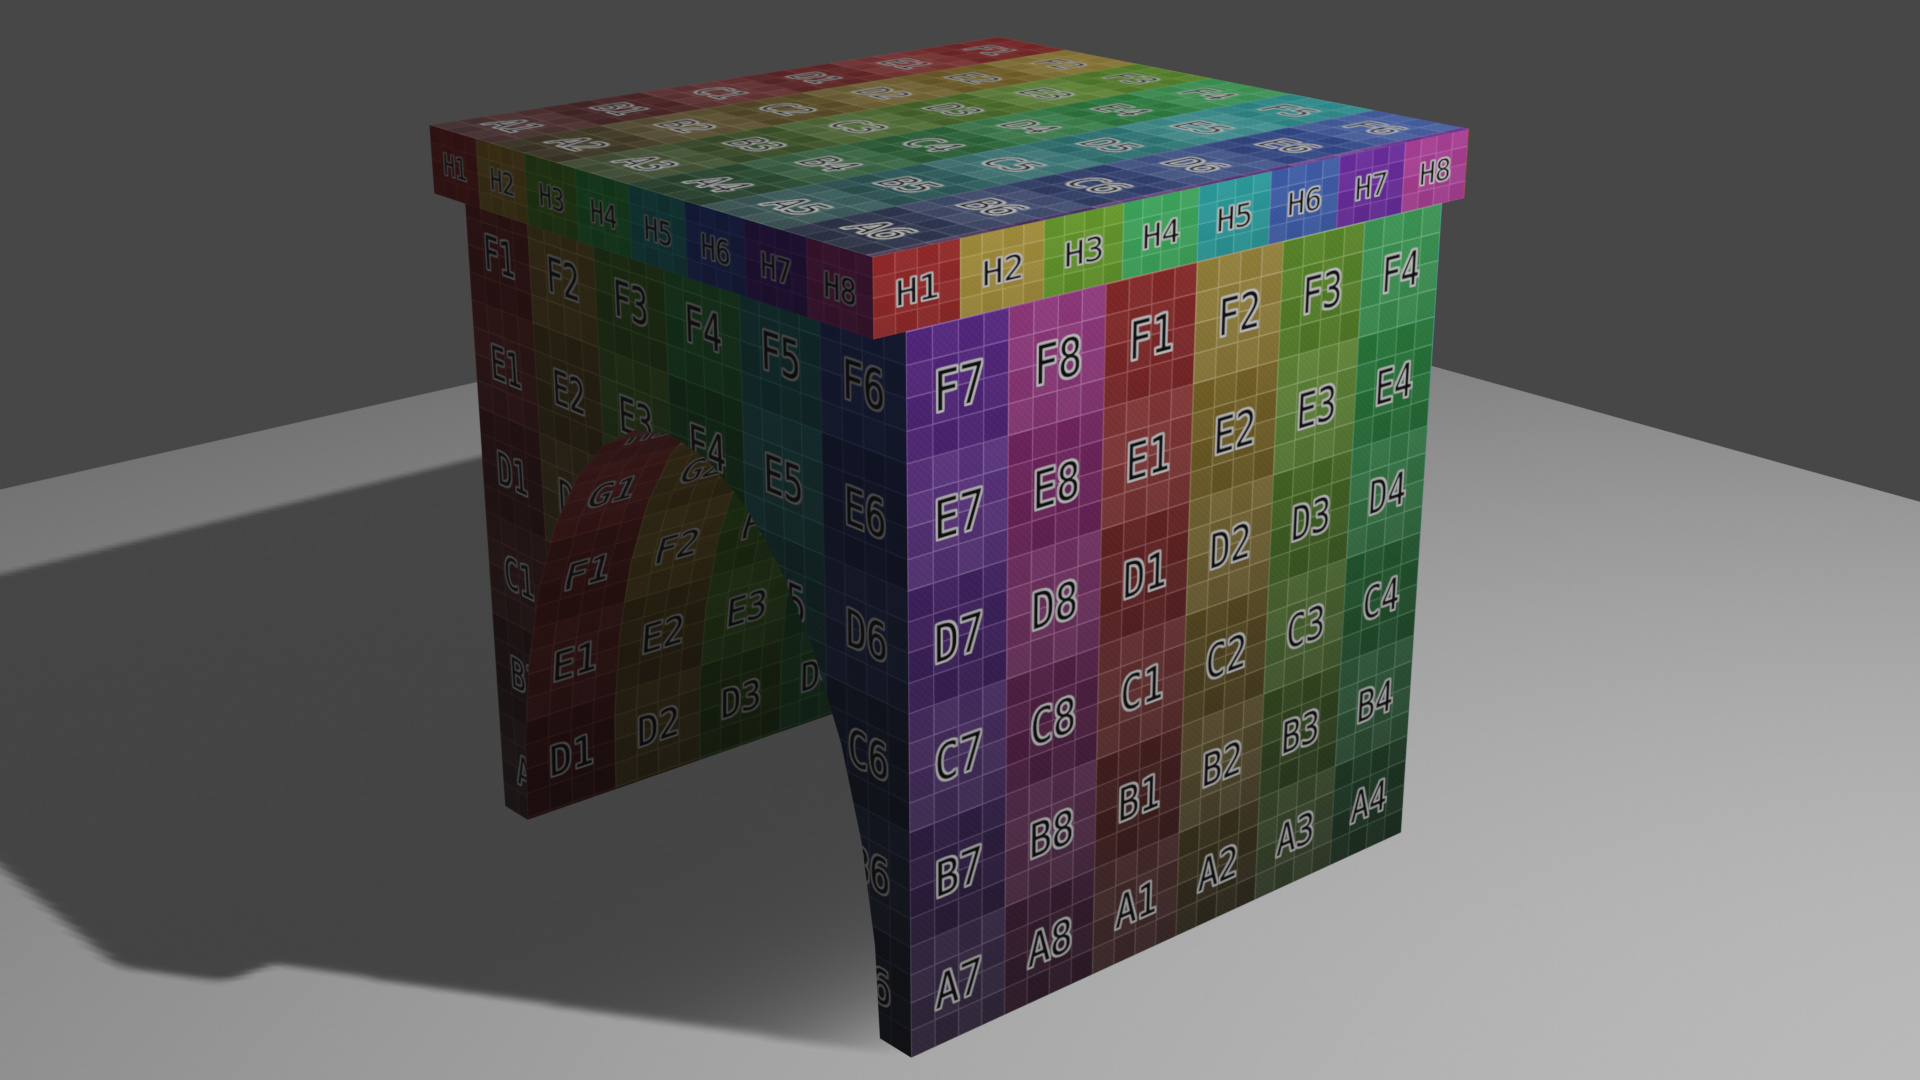
As you can see the UV map is cut off, so the bit on the very top of the image are the side polygons on the top cap square, the uv directly below that is the actual bridge part, and those lines going down it are the arch, to the right of that is the polygon wrapping around on the right, and the mirror faces directly underneath that. Hopefully this is a decent UV layout, its rather difficult to explain without seeing it in the UV editor and 3D view. If anyone can tell me what I can do better that would be greatly appreciated <3
Hi, in the follow up lessons, this issue will be handled.
By scaling and repositioning the UV-Mesh to a pixel perfect location.
And it depends on how you texture your model, but having the same scale for your textures can be handy.
For example if going for a brickwork. The bricks on the top deck will be visible smaller then for the arc object.
It’s not that the colorful squares must be an exact fit. That’s later on when adding a real image texture.
But more:
is the texture in the correct orientation (up, down)
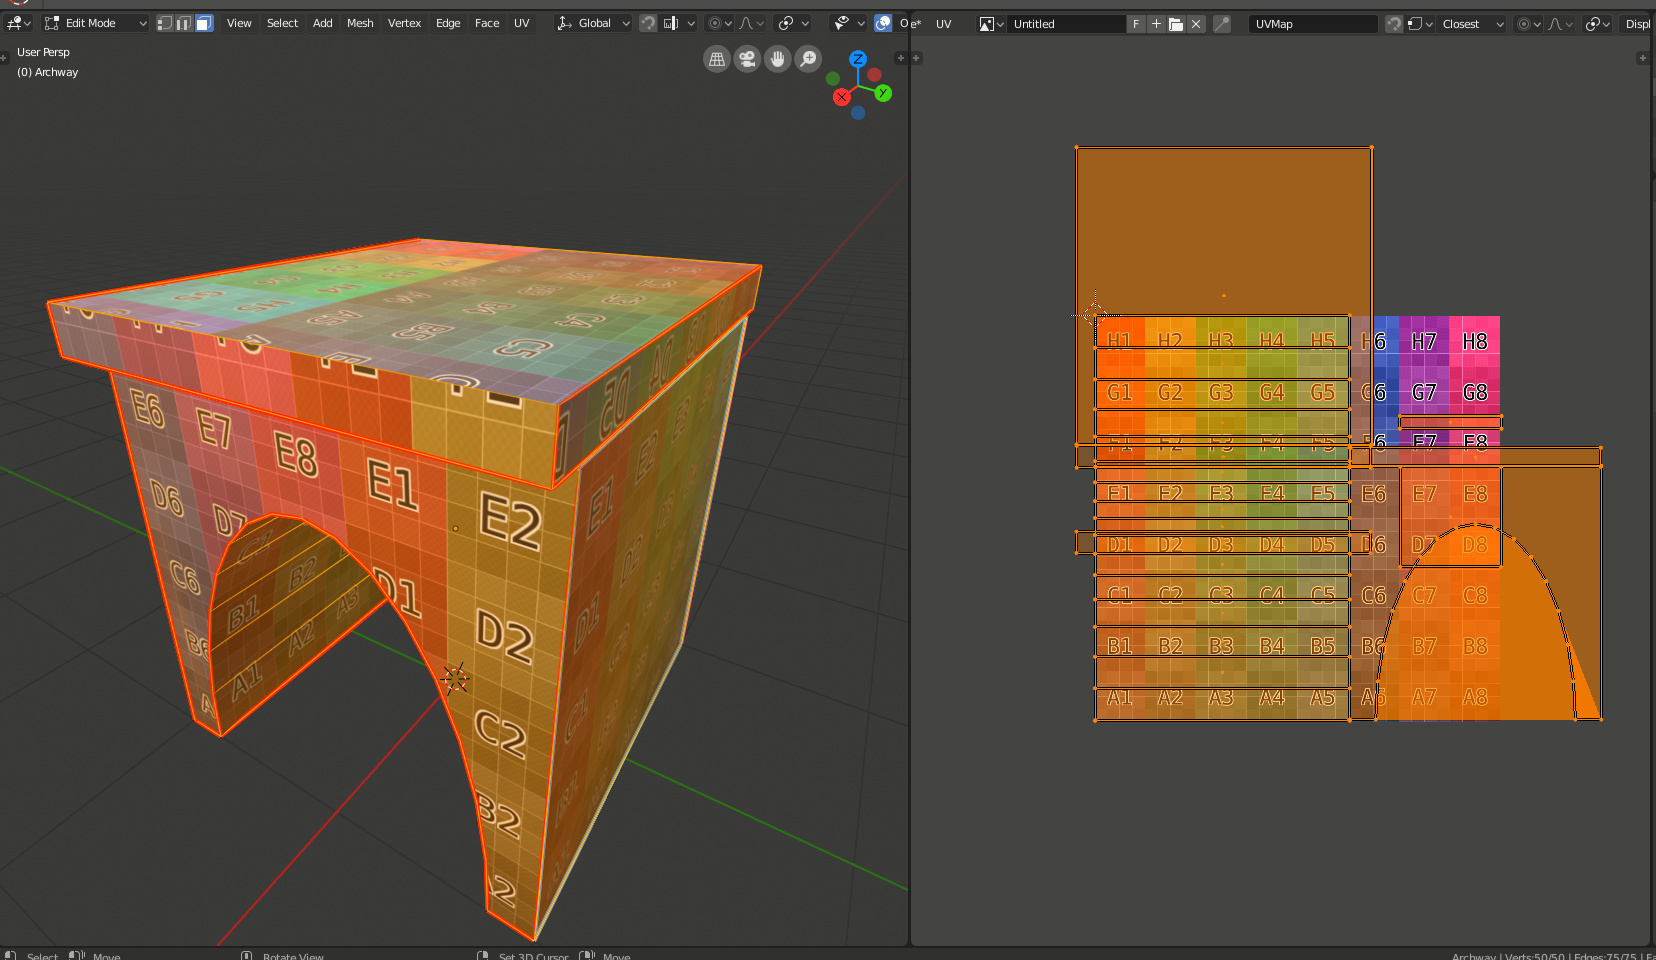
Eventually the archway I had created was leading to extremely complicated geometry, so I went back and grabbed the archway that Michael made for these portions so that I’d be working on the same thing.
Here’s what I was able to achieve after a bunch of tinkering:
Looks fine, but a lesson in keeping the geometry simple? It is a simple shape to teach how to sort out the UVs, not a modelling challenge.
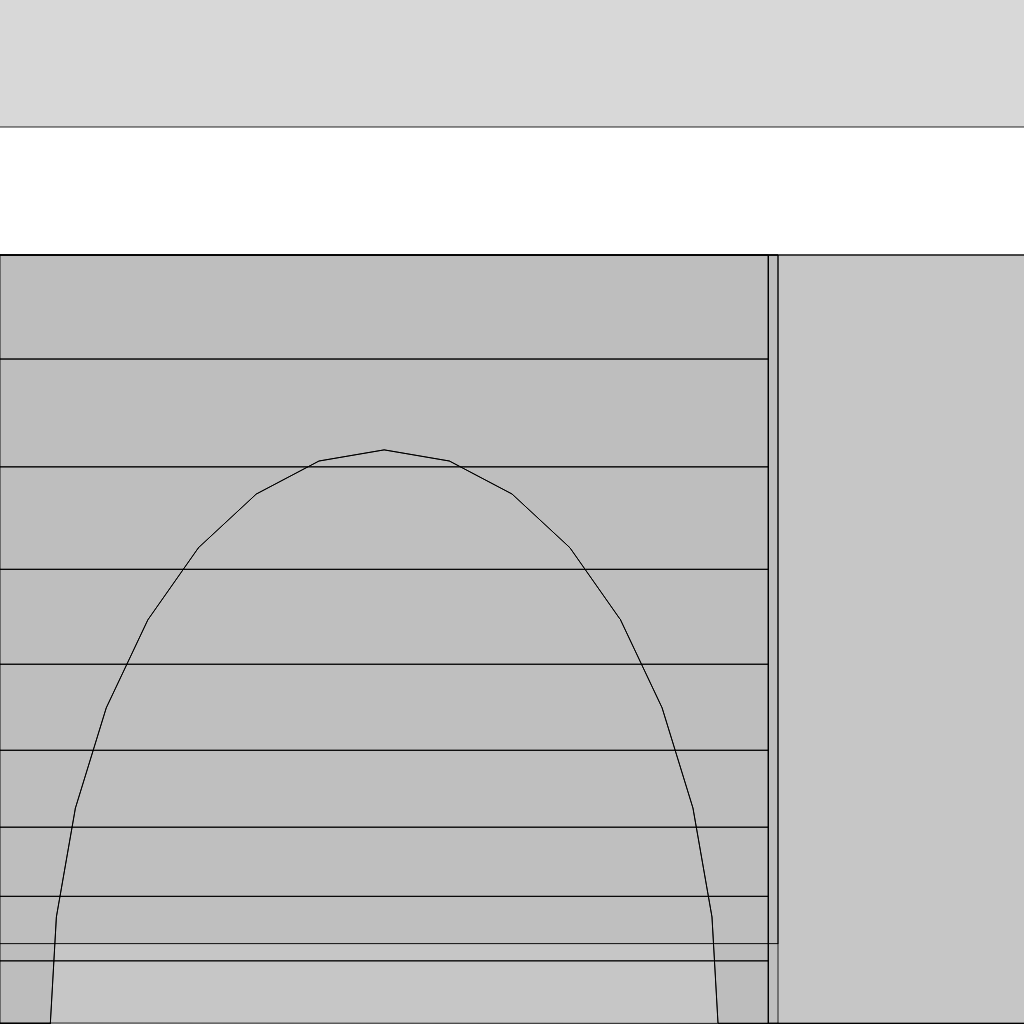
Inside the arch the letters are upside down.
And you’re right, NP5, it wasn’t a modeling challenge, which is why I used Michael’s for it instead of the one I created back where it was a modeling challenge. Like I said, mine was different than Michael’s (the course encourages you to do things your own way and expand - so I did) and it had resulted in more complicated UV unwrapping. Since it was quickly becoming more work than this specific exercise intends, I swapped in Michael’s to stay focused and learn the skill.
I only clarified what I’d done because by using Michael’s model, instead of my own, and ending up with very similar UVs, I didn’t want people to think I just took the finished project file and uploaded a render without doing any work.
 thanks!
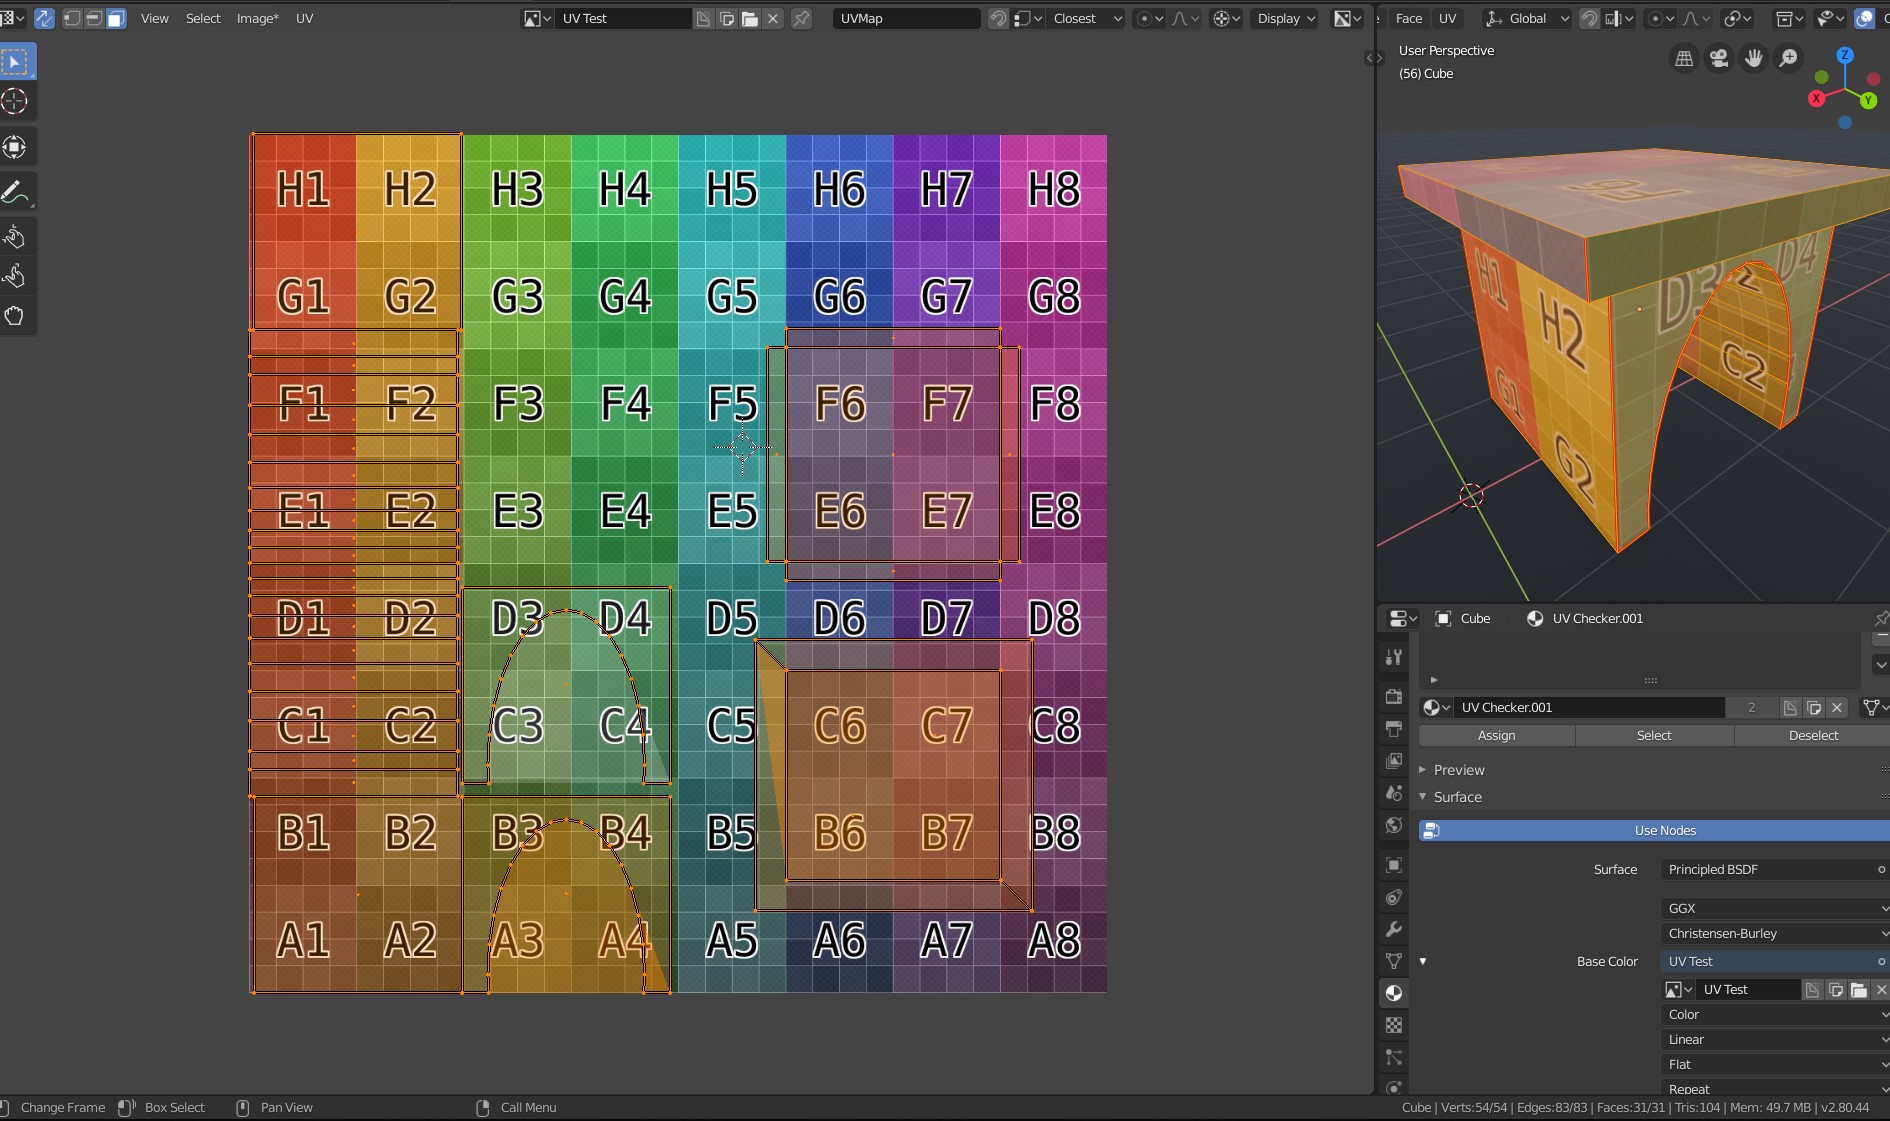
 <3 thanks!