A Duck Problem

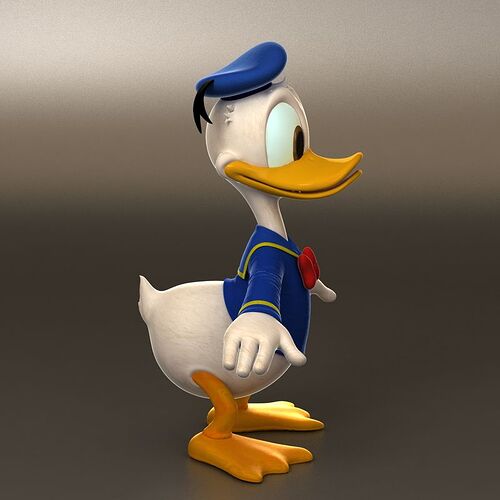
After completing the course, I am doing so well with Blender that I started making a customized Donald-like duck model.

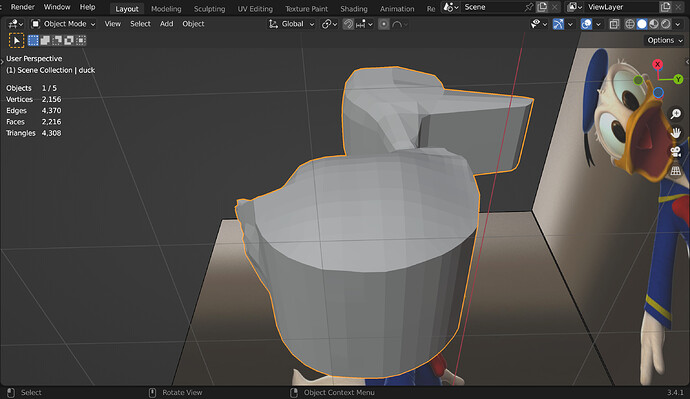
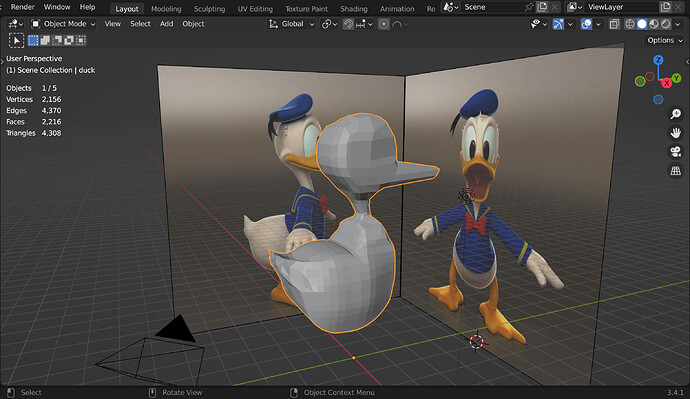
This is how much I have done so far with the project.
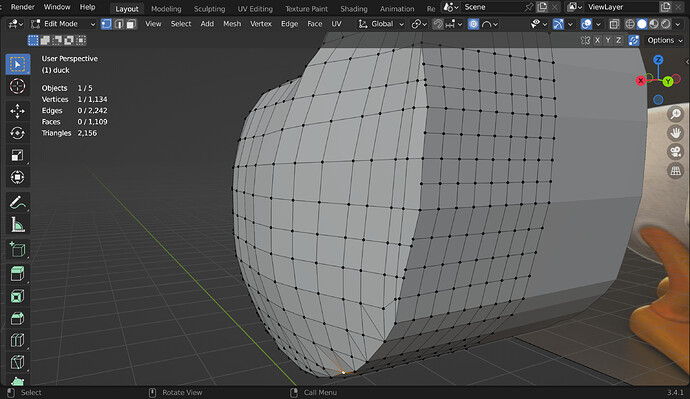
However, I ran into a slight problem: how to make the bottom rounder or the duck body more circular or elliptical.

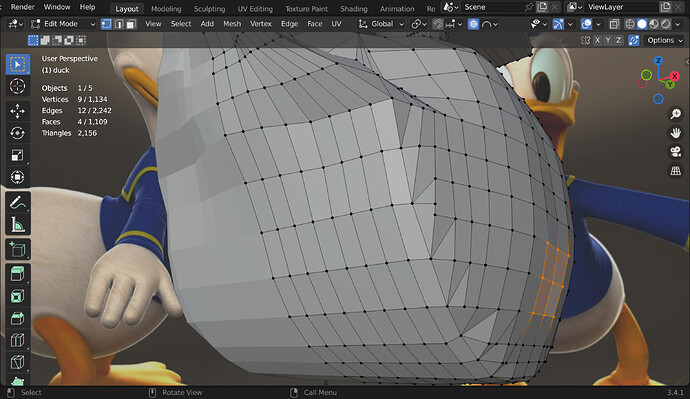
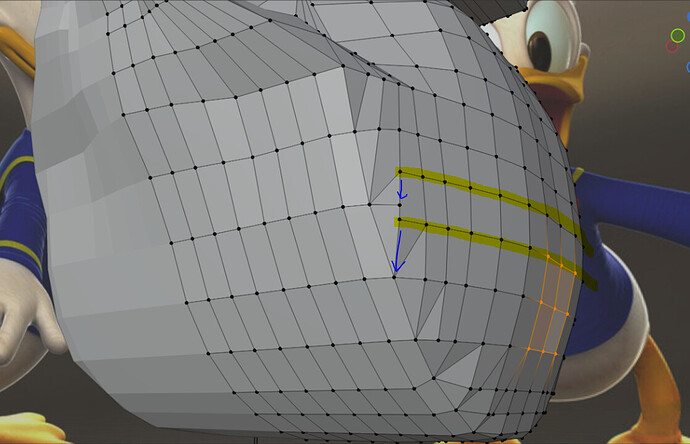
Before I came up to this, I discovered how to change the Proportional Editing. It has helped a lot, however, I ran into this issue. I already made it round with the help of the references, but I don’t how to “connect” the roundness smoothly to the sides from the bottom. I tried fixing it with the edge-slide, but somehow, it came up looking like this.

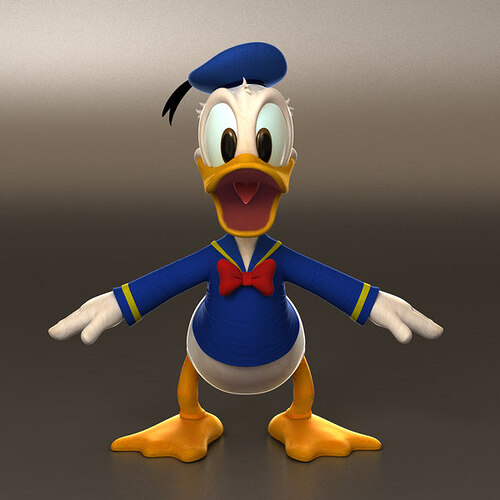
Please tell me in steps how to fix this. Here are the references I used so far, as that might help you help me.

2 Likes

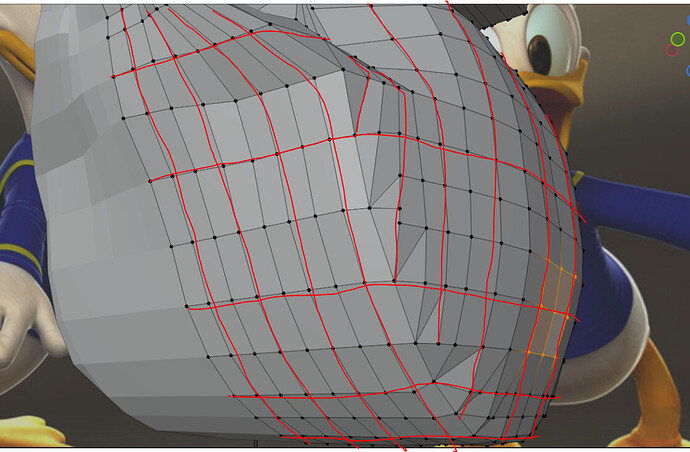
First of all. You don’t need that much geometry to block out the basic shape of the model. If your goal is to use a subdivision modifier on top of it, you can dissolve every other edge loop and ring, marked in red, by having edge select active and alt+left-clicking on the edges, then pressing x, and dissolve edges. Then add a subdivision modifier and you’ll find that you can manipulate the shape by moving vertices using proportional editing without having too much geometry.

Secondly, it’s good to keep your mesh in quads (squares). In this case you can use the knife tool by pressing k in edit mode. Then cut the geometry into quads. But it takes some work and deeper understanding of topology and edge flow.

It’s a bit complicated. So, I think for now, if you don’t want to worry too much about topology. Edge slide all edges that don’t match up, marked in blue.

Then press a in edit mode to select all, press m, and merge by distance. After that, add a subdivision modifier and then move vertices around with proportional editing turned on, and you’ll find that the geometry has a flowing shape that is easy to move around.

Sometimes is better to just start over with less geometry (vertices) rather than fixing current issues. Good luck!

4 Likes

Gordon has gone over it well. Simply you have a bad topology problem.

You may find it easier to go to sculpting, then make a low poly version over that, and bake the details down to it.

However It is perfectly possible to make it block modelling, and my preferred method, but you have to build the topology correctly. Fitting the shape flows. From a good block model you can use multires, which retains it at higher subdivisions for more details.

4 Likes

I really do thank you for helping me, but a few hours after I sent this problem, I realized I could just smooth the sharp edges with the Sculpting workspace. I did that and made things so much better. So, I am sorry for not trying out your solution.

And @NP5, by bake you mean apply right? If not, what does it mean?

2 Likes

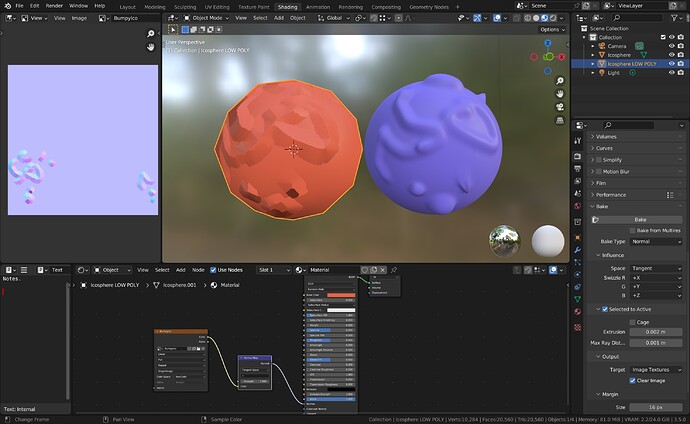
No there is a standard workflow. Make a very high poly character (or anything) then make a copy at very low poly, and ‘bake’ the details onto a set of images that constitute a texture. In effect visual trickery. It makes the low poly version look very much like the high poly one.

Hard to explain in a few words if you have no idea about it.

Here is a very very very simple example.

Detach the normal map, and the low poly has no real geometry for those bumps!
High poly 20,500 triangles
Low poly (red) 80 triangles

2 Likes

Sculpting is a great approach, too :+1:

1 Like

Privacy & Terms