5.150: Un-Rigging

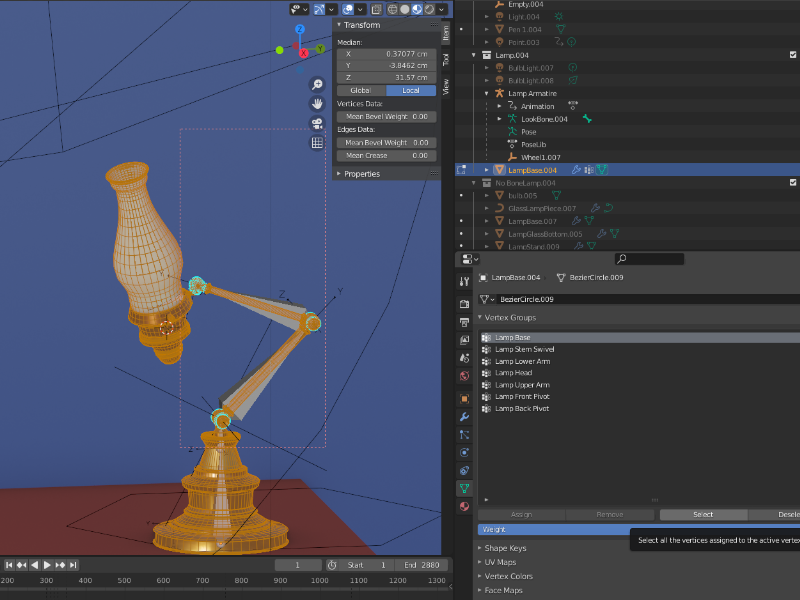
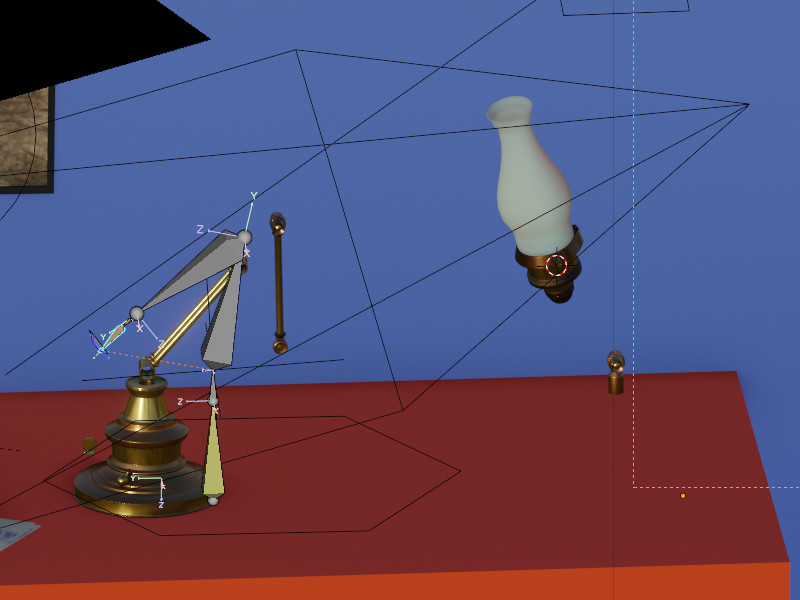
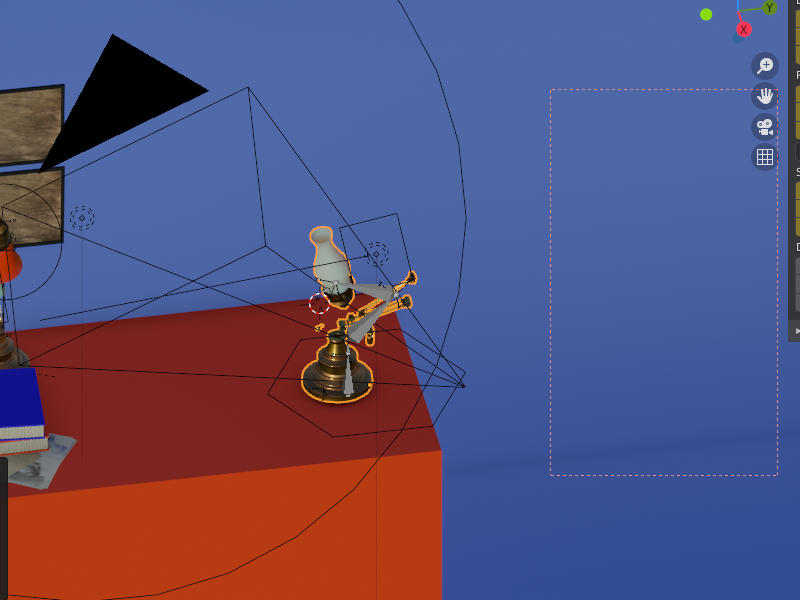
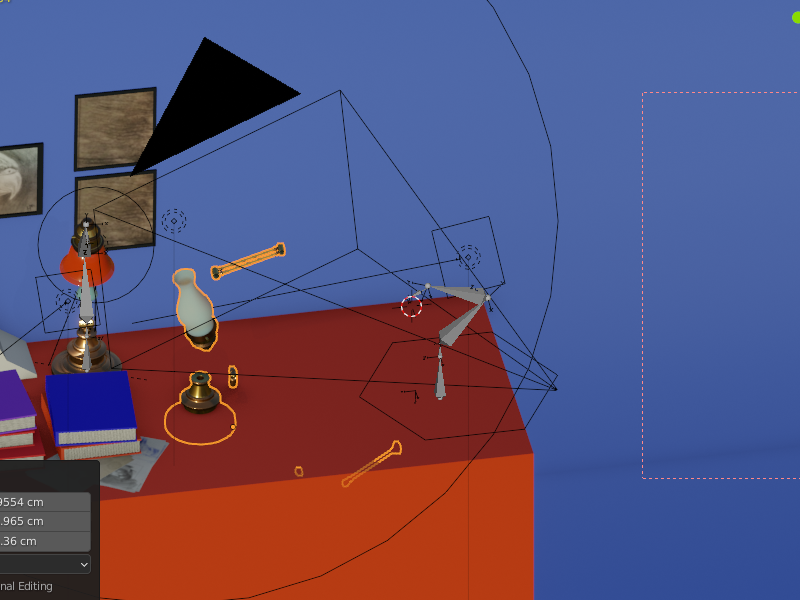
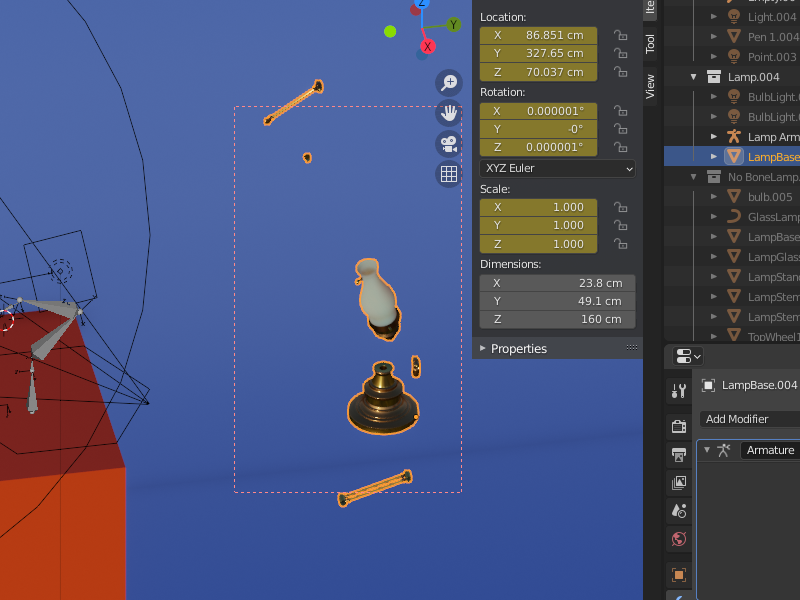
So I followed the steps, and then followed the steps again, and then again. Each time was without success. Vertex groups and bones were named the same, but the whole thing came apart. Parts were not even linking up with the bones, so they would not even move along with the rest of the broken mesh.

I unparented and re-grouped, applied scales, rotations, and modifiers, all without avail. I did this about three times to make sure that perhaps it was some step that I missed. I looked up the various answers, but the problem remains the same.

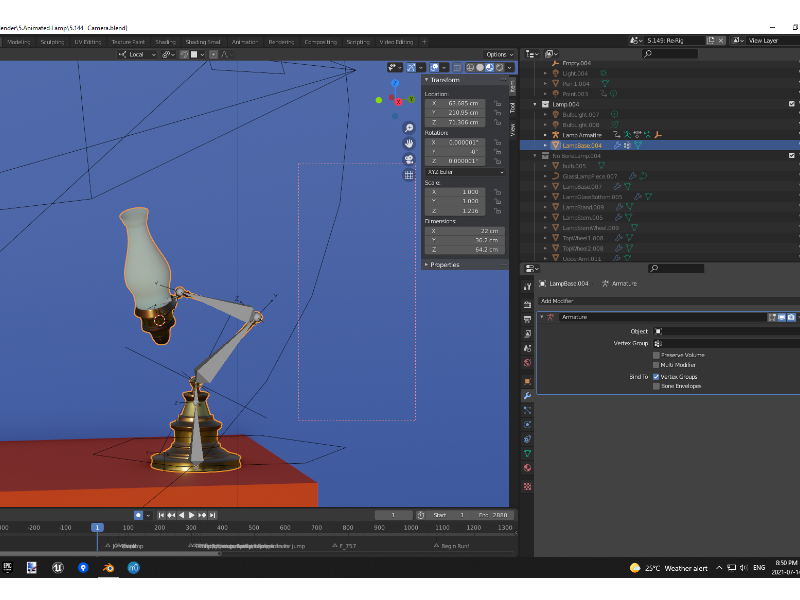
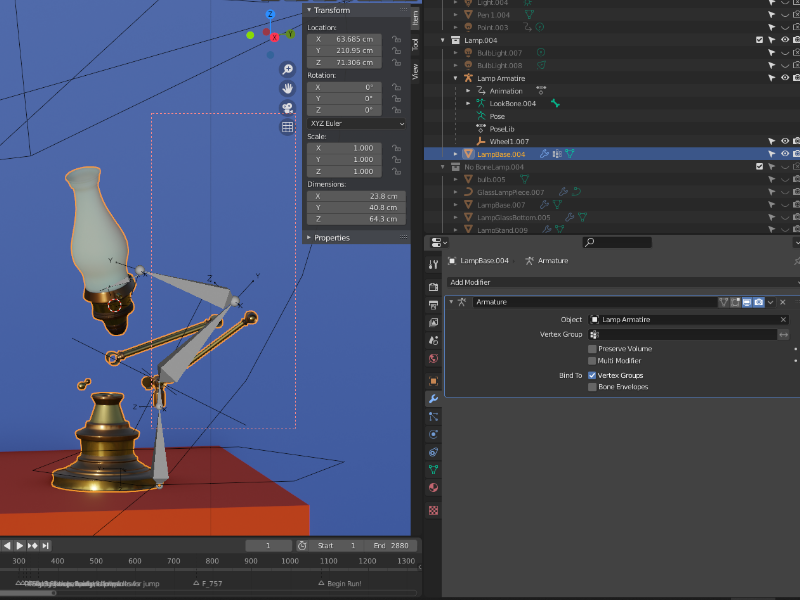
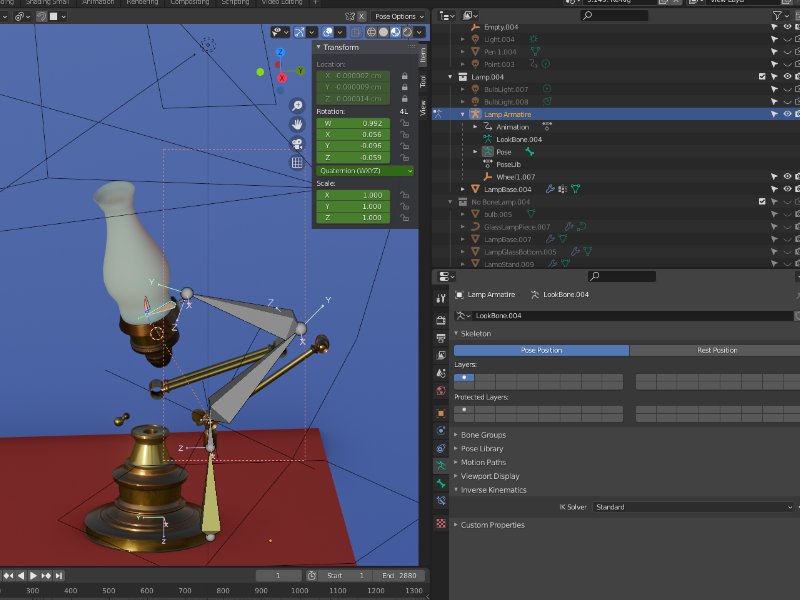
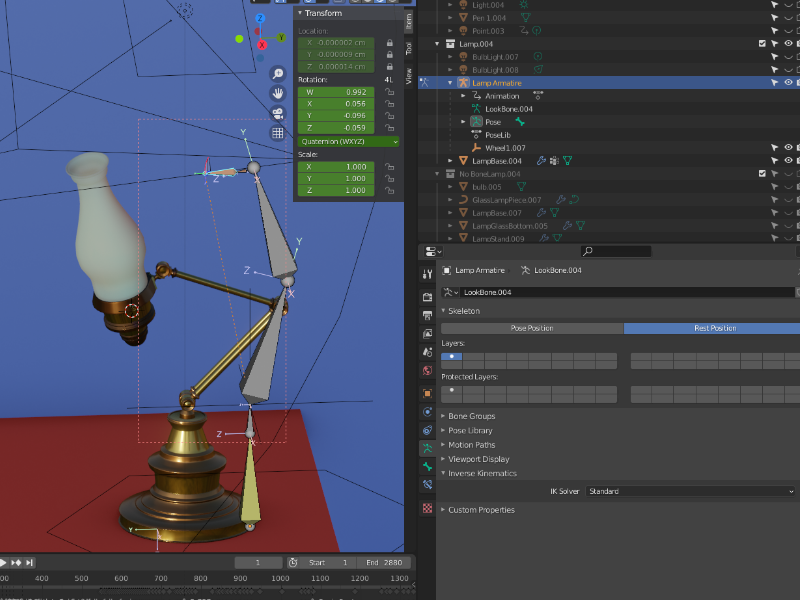
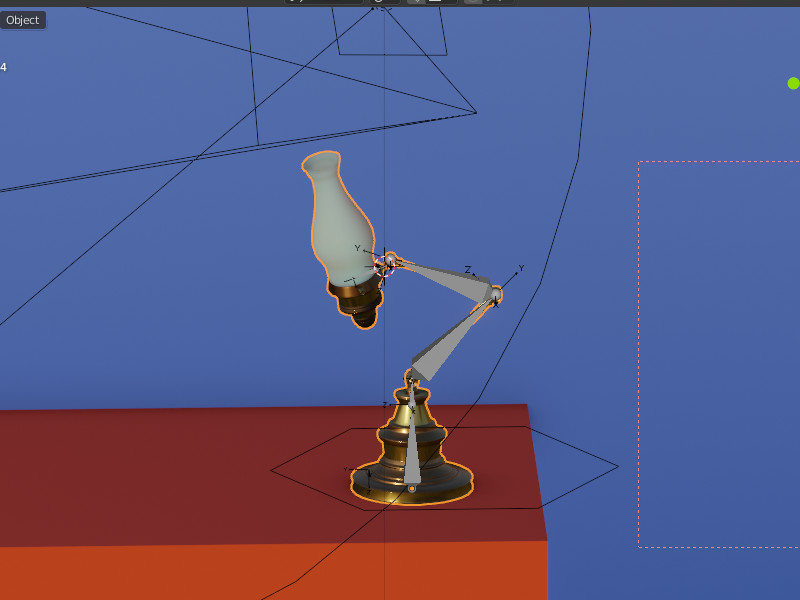
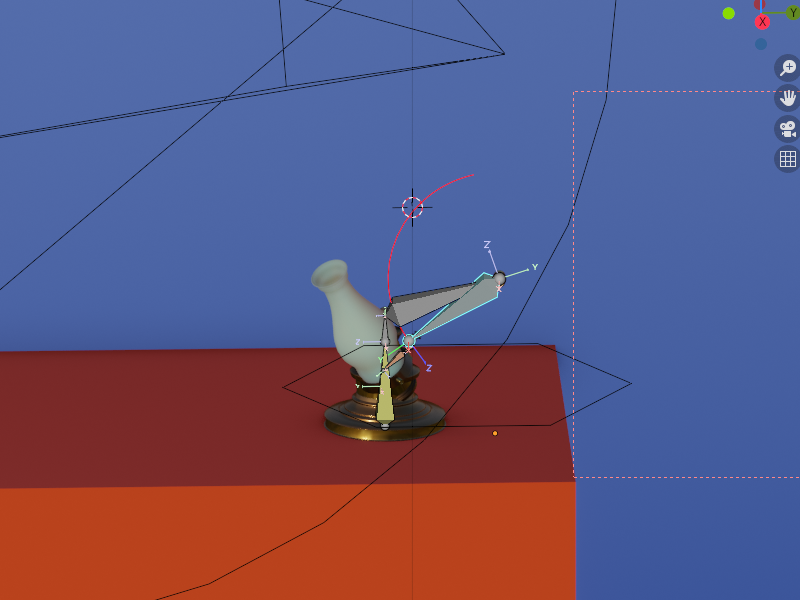
The only thing I know for sure is that when my model is in rest position or in edit mode, it all clips back together. Go back to object mode or post position, it all comes apart.

Going to need full screenshots to get to the bottom of this.

I thought you had it animated and working before?

I should have done that earlier, that will be provided below.

The animation works fine, but this is for the 1.150 Lecture on re-rigging our models so that they rely off of vertex groups and armature modifiers with one joined model, rather than separate pieces joined to individual bones. Thus far I have had no success making it behave properly with an armature modifier after everything has been joined.

  1. Lamp with Armature Modifier but without an object

  2. Lamp with Armature Modifier with a selected armature object

  3. Same Lamp with object selected, but in Edit Mode.

  4. … Now in Pose mode

  5. …Now in Rest Mode.

  6. Now while being animated

As you can see number 6., most of the body is moving, but the head and stem are not, even though their vertex groups have the right names, I checked multiple times, even deleted and named them again a few times. I also made sure that the vertices were actually selected. Still nothing.

Besides all this, if I don’t bother with the armature modifier, everything works fine and I am quiet happy with it. If I cannot figure this out, I am going to toss it to the side as lost and simply continue with the animation project, hoping that my future models will have better luck.

1 Like

If adding bone will destroy your objects position is mostly due to:

  • Object scale not ‘1’.
  • Origin problems
  • ‘empties’
  • Mirors using those empties

Don’t for to delete old vertex groups.
Do one thing at the time and test behaviour.

1 Like

If I recall that lecture Mikey start it with this can blow the model apart if not done in the right way and demonstrates a similar effect as is happening to you.

My instinct is it is related to that origin point not moving with the lamp.
Assume you have ensured the vertex groups’ names match the bone names etc.

But on the whole, as FedPete is looking in I will rely on him to help!

1 Like

All my modifiers are applied, nothing.

Empties? Deleted.

Origin? Well here is something of note:

1.Start Point:

  1. Shift to the Left:

  2. Shift to the Right:

Maybe? All the parts are pivoting around a central location.

I started applying the Armature Modifier one piece at a time without joining everything. Most part flew off, some did not. After re-checking my naming conventions, the 2 parts that stayed put were the two parts that would not move with the rest. I found out that “spaces” in a name will ruin the naming convention and not allow the parts to align.

But I still had the problem of my parts all over the place.

I found that it was somehow connected to my actual rest/pose in the pose mode. I changed my rest position to the pose position, and then suddenly everything came together again… with one caveat…

As soon as I hit play, although all the pieces fit each other now, the armature itself strikes another pose instead of retaining the pose I had assigned it:

Before I hit Play:

After I hit play:

And it will stay in that position until I undo the action. When I go into the pose position, it shows it scrunched up there too unless I undo my actions. So somehow it is connected to my pose action, and it is not retaining its shape as I would like.

1 Like

If you change origin points, or central point of rotation, or scale. You need to apply the bones again.

You need to have a clean model !!

  • All oriented in the default base pose. Then apply bones.
  • If you have a bone connection applied to the Object, don’t change the object. In case you need, Unparent bone, change the object, re-parent.

Some of the problems occur when halfway through an animation, you want to change the object, therefor changing the origin.

Be aware of the pose difference between the in rest and action pose.
When rigged, don’t change the model. Un and re-rig.
Rigging is difficult because of the unaware relations between the objects; scale, origin, type of bone relation (object, weight). So much can go wrong.

2 Likes

So If I am understanding this correctly:

  1. Unparent my objects to the bones.
  2. Reparent them
  3. Apply?

I am assuming that this somehow connects with the vertex groups: the bones are no longer around a proper origin point. But vertex groups are different than have the objects parented to the bones, are they not?

When my object is parented, I do not seem to have an issue. When they are vertex grouped I do.

1 Like

If you modify the mesh (move a vertice, scale the object, etc), while connected to an armature (bones), you can expect problems as you encountered.

  1. Detach bone object relation.
  2. Fix the mesh, fix the objects, place them in the most usable pose.
  3. Attach bone to object.

You don’t need weight-painted bone relations!
That’s why GameDev uses a lamp, with hard, non-deformable objects; the base, Arm A, Arm B, Lamp shade. Goal is to move a bone, and the connected object (not a part of the objects mesh), but the complete object moves along.

Vertex groups (and weight-paint) are more for organic objects, bodies, hands, faces.
You, do not need them for the lamp challenge, if you have vertice groups, remove them also.
There is a small change, because you’ve tried so much that, there is old Blender data (vertex bones relations) lurking around.


Also, your animation data is also modifying/influencing the model.
Making it hard to know which Blender property is changing what !!!

It’s a lot of debugging, and step by step checking of data and configuration.

1 Like

After doing some poking around I learned:

  1. how I might go about making it work when in the modeling process
  2. what I probably did as a mistake while taking the lecture
  3. but because of the various different processes that we have since covered and used, I probably cannot go back except by remaking the whole thing.

I did not keep my model at origin during much of the lecture. I moved it around a lot and its own origin was moved around a lot. Likewise my rigging may be off because of an origin issue.

In hindsight this might be avoidable, but as a student taking a class and not knowing what is next nor knowing when I have made a mistake when I need to know I made it, it was not avoidable.

Solution?

Keep it in mind for my next rigs, but don’t let this subject bog me down anymore. I do not wish to remake the whole scene, nor would said action be conducive to the goals of this course.

I finished a few final touches and all that is now needed is my final render. I should have that out sometime this week to share :slight_smile:

Time to move forward! Onward March! :grin:

2 Likes

This topic was automatically closed 24 hours after the last reply. New replies are no longer allowed.

Privacy & Terms