3D Print tryout - Final print results

I’ve chosen a different slice approach. The funny thing was, the Bisect tool was much quicker and more responsive. I think the complexity of the mesh is lower.

I want to try a print run of this setup. Using the most flattened print-side (flatbed) to glue the pieces together. But now the porch is dangling in the air. My goal was only to use print supports for the roof part.
The roof itself is difficult to print with those roof tiles overhang. I like them, but it’s becoming a “Kill your darlings” moment.

Rotating the base

Worth a test print, let the slicer add support as it thinks fit. It may look messy as it is done but when the support is removed, it should all be there.

1 Like

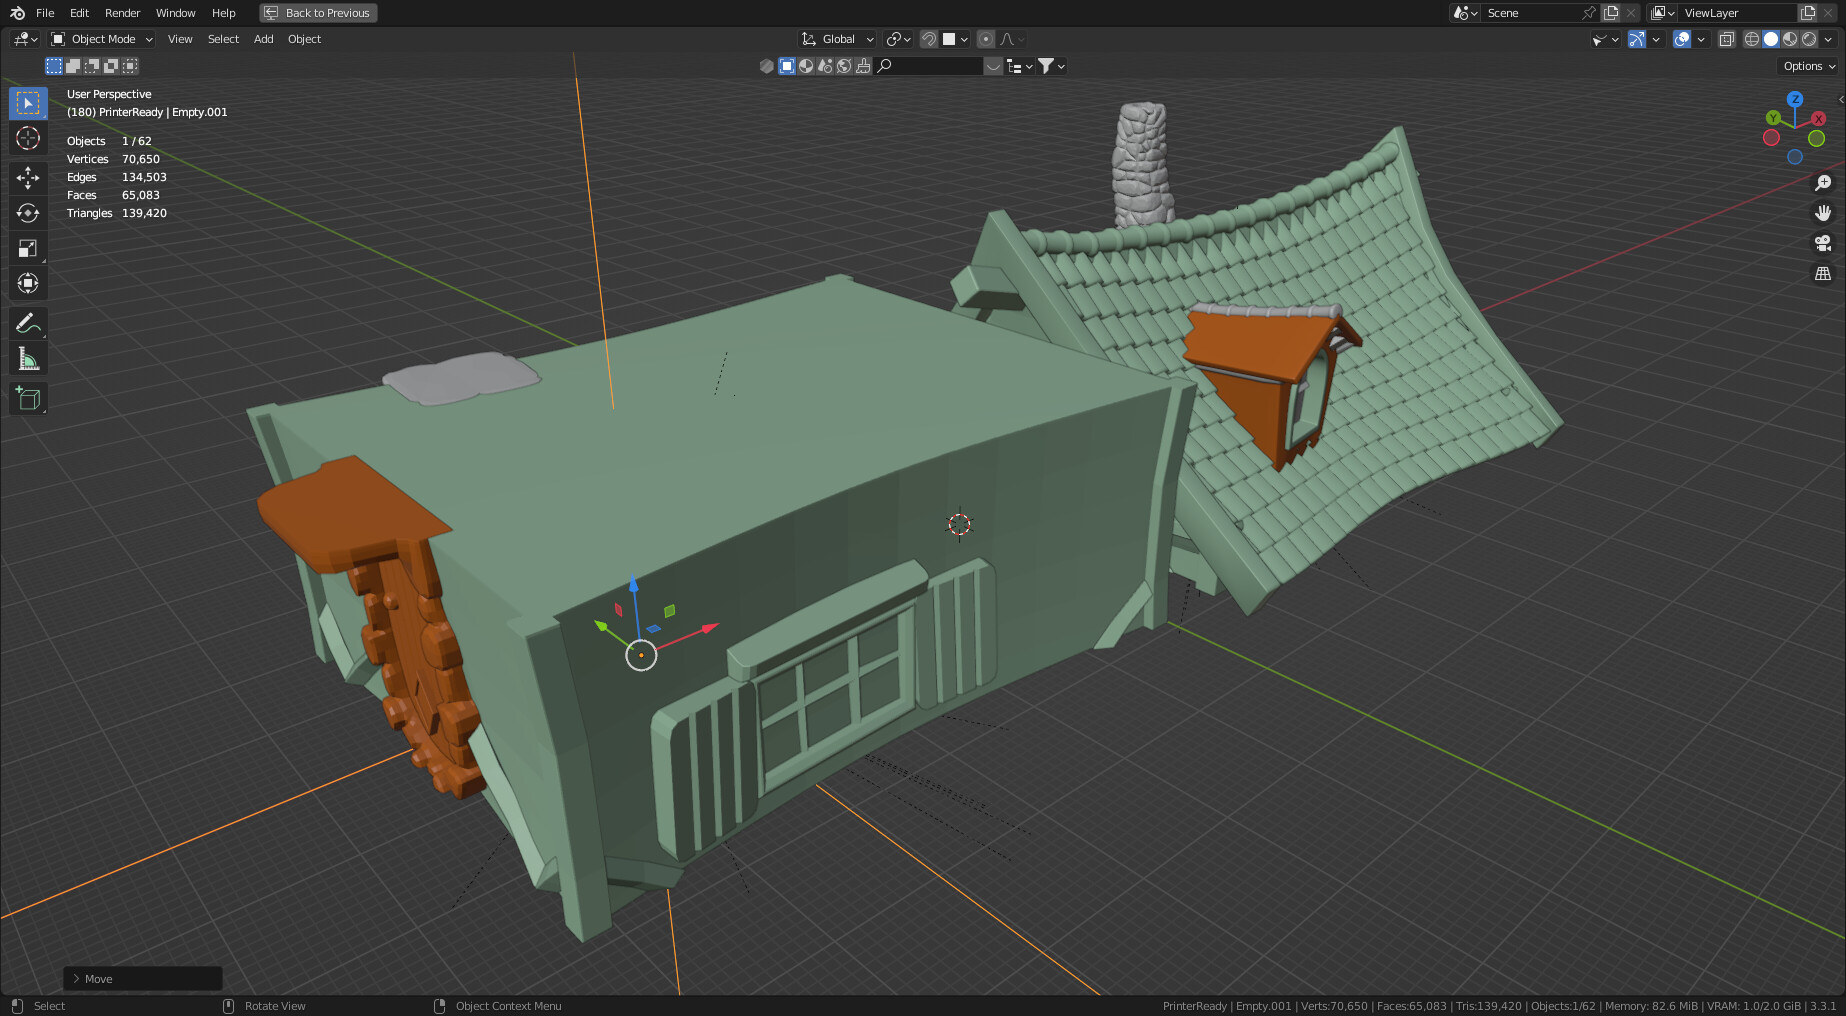
Printing this would be much easier if each wall of the house was its own piece. From this approach, overhangs wouldn’t be an issue. To assemble the house, each part could have its own connecting grooves. For example:

Each of the corner beams of the house will have its own grooves. The grooves will hold each of the walls upright and the floor itself can have grooves to further increase the stability of the walls. Each of the beams can be connected to the floor for additional security.

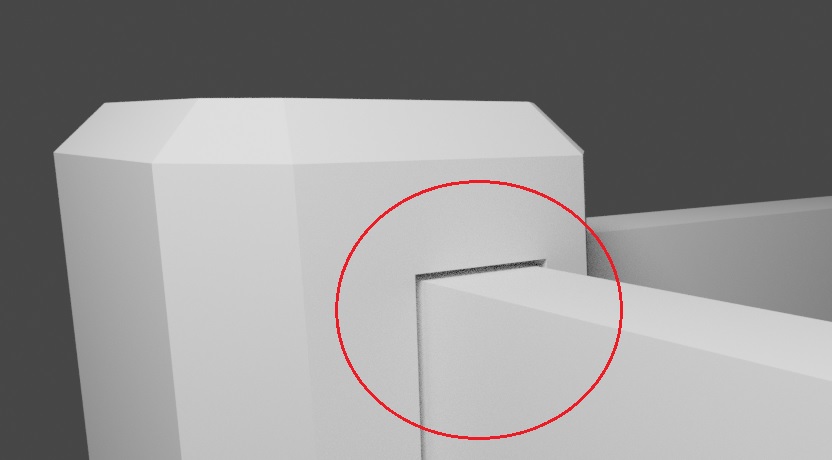
To hold the structure together glue wouldn’t even be necessary. The friction within the grooves of each connecting parts is enough to hold together. You can use booleans to make the grooves. When making connections, there should be a difference of 0.2 mm of space between the connecting parts.

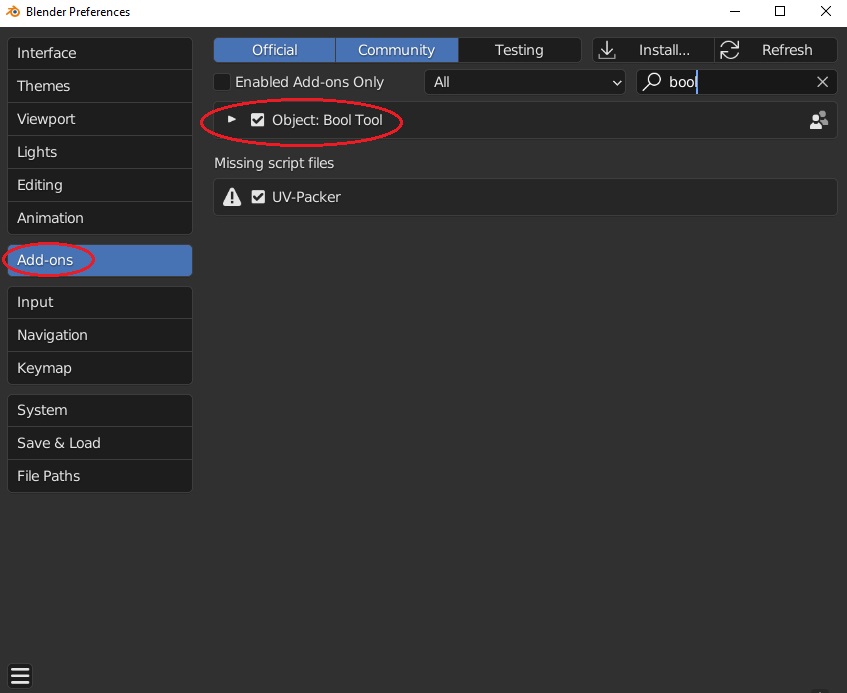
Some very important addons to enable first before doing what I suggested above (if you haven’t already):

First is the “Bool Tool.” Go to edit, preferences, then type “bool.”

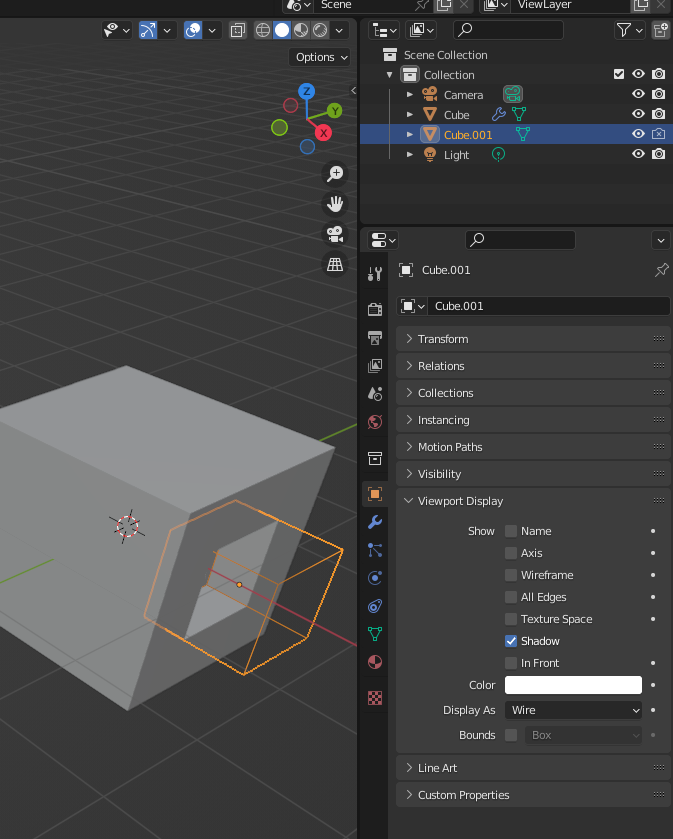
The bool tool will allow you to make “live” nondestructive cuts by making it a modifier. The shape you use to cut will disappear and turn into a boundary box in the area that you cut. I recommend making another collection titled “cuts” and hide it because overtime you will make many cuts and it will be a mess of boundary boxes causing confusion. It is already included with blender.

The bool tool also enables keyboard shortcuts: ctrl + - (difference), ctrl and + (union), ctrl + / (intersect). Also each of the symbols press with ctrl are on the numpad.

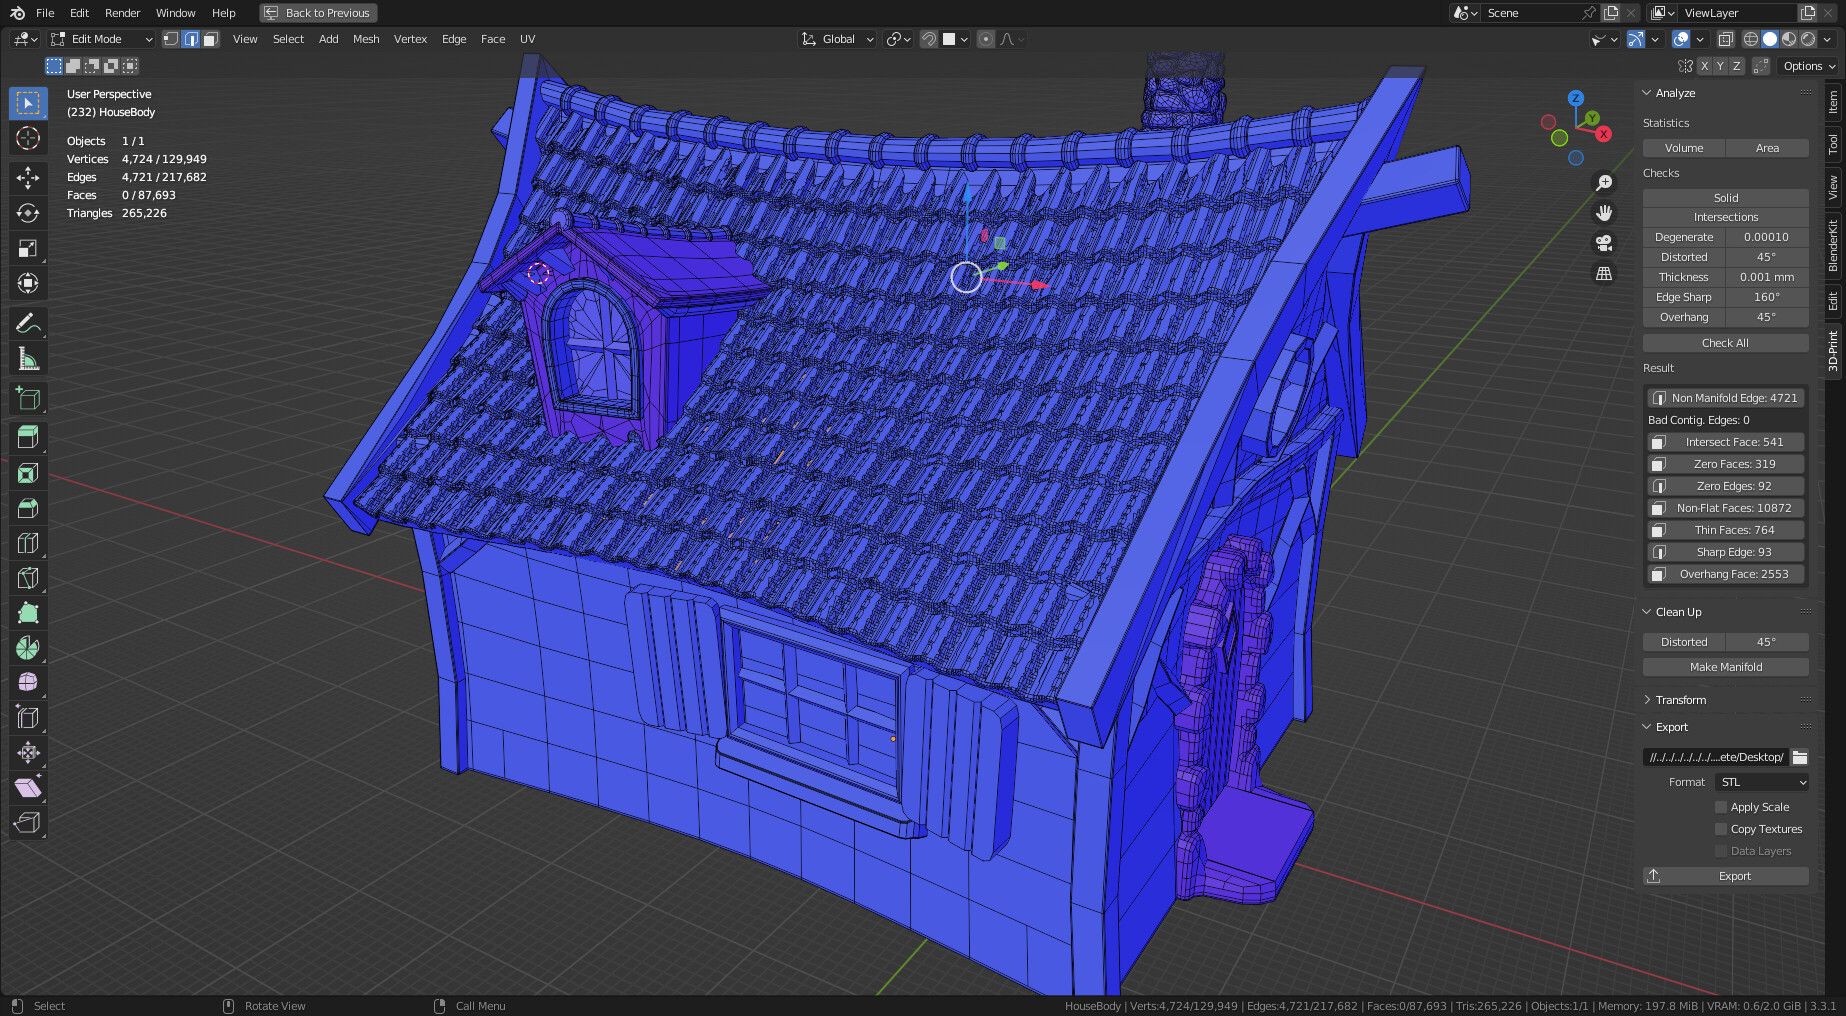
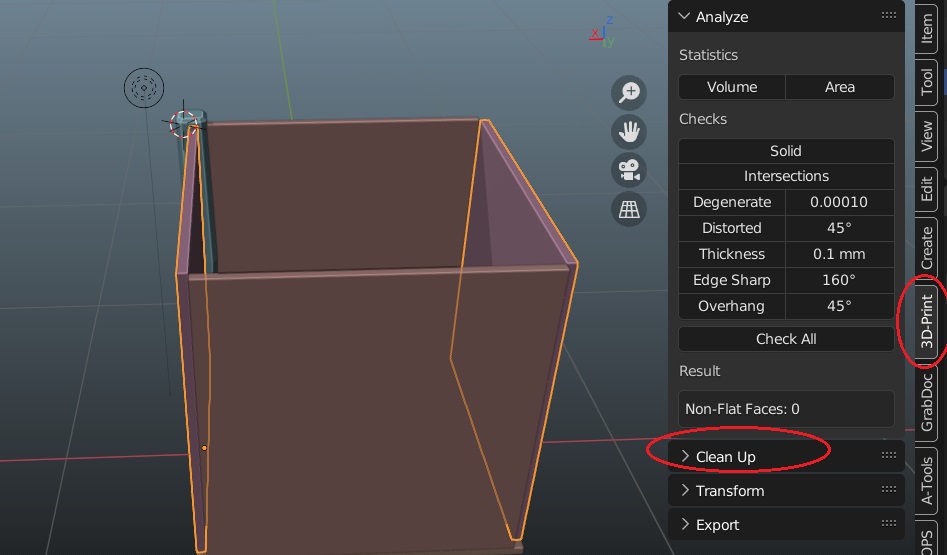
Another addon to enable is “3D-Print Toolbox.” Easiest to find if you type “tools” in the search bar for the addons. This is also included with blender. What this will do is add another tab to the menu:

This addon can check for imperfections (make manifold) and select all areas of your model with a specified angle. For example, when an angle is over 45 degrees it will need a supports. You can use this addon to see where all those angles are. I haven’t used this too much (occasionally), but any extra tools for this process is great.

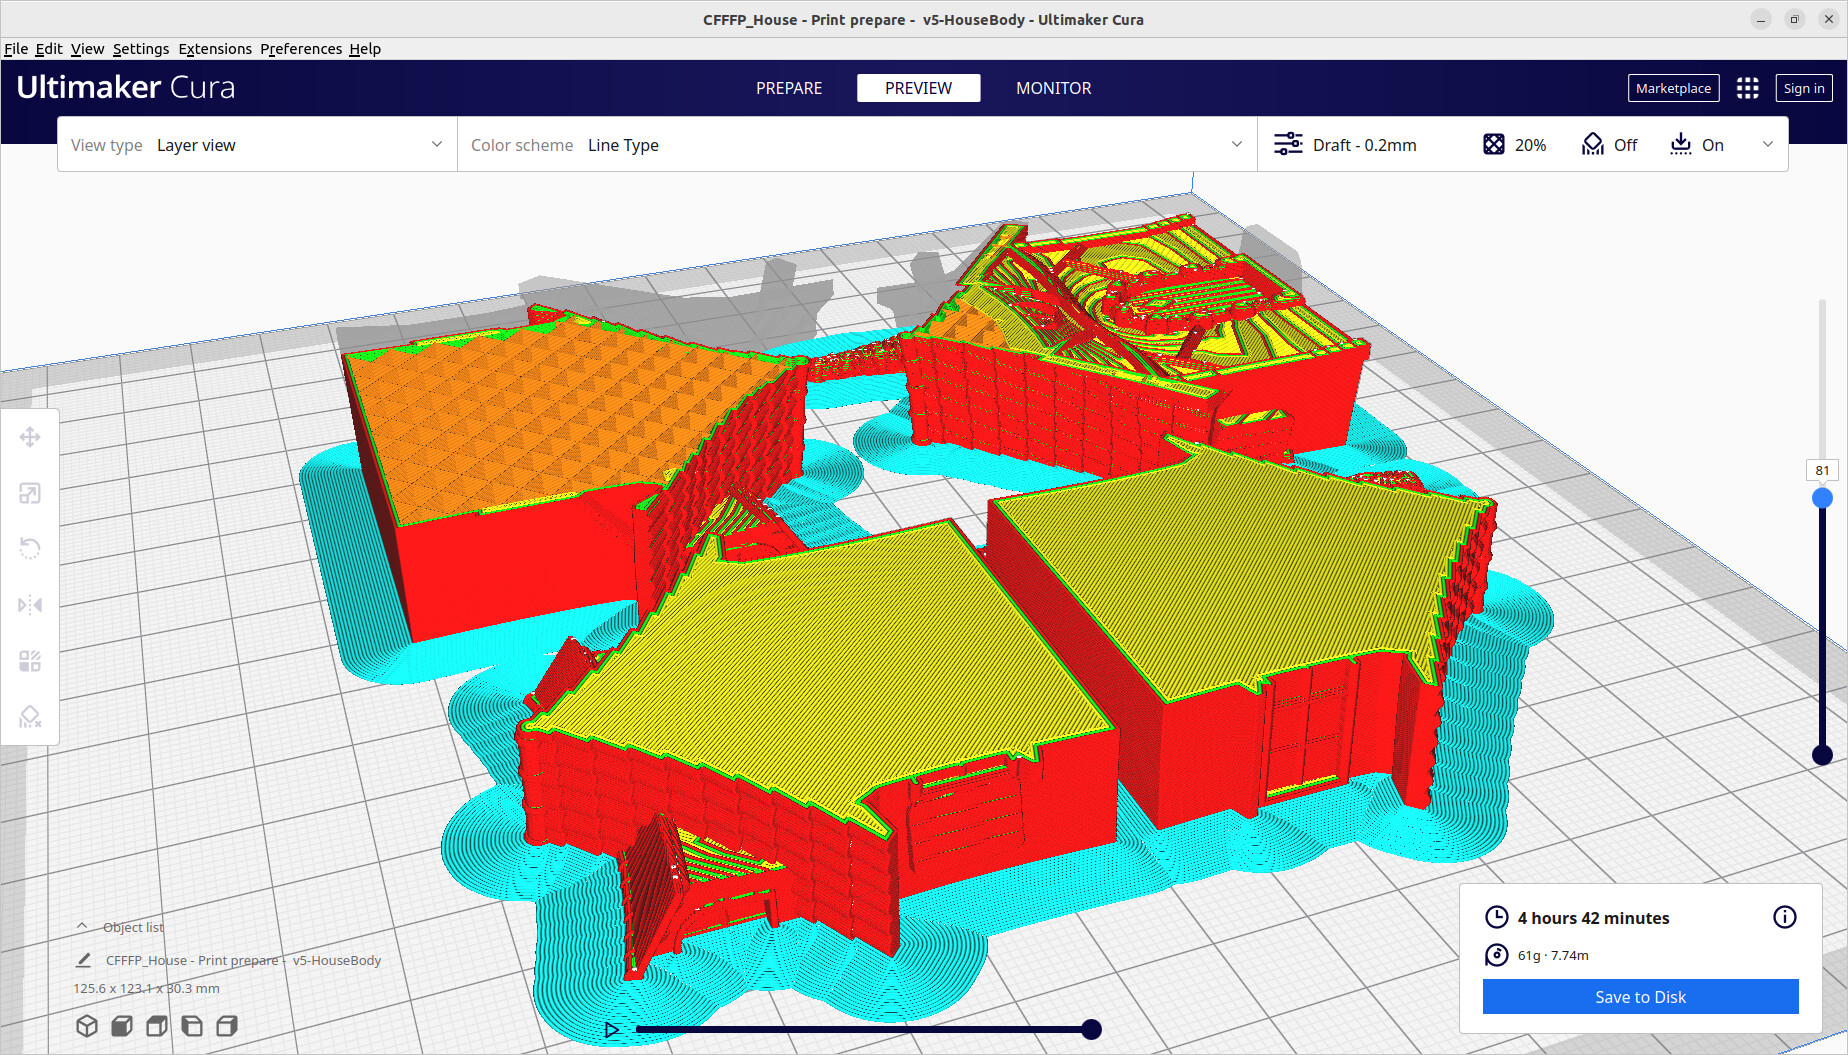
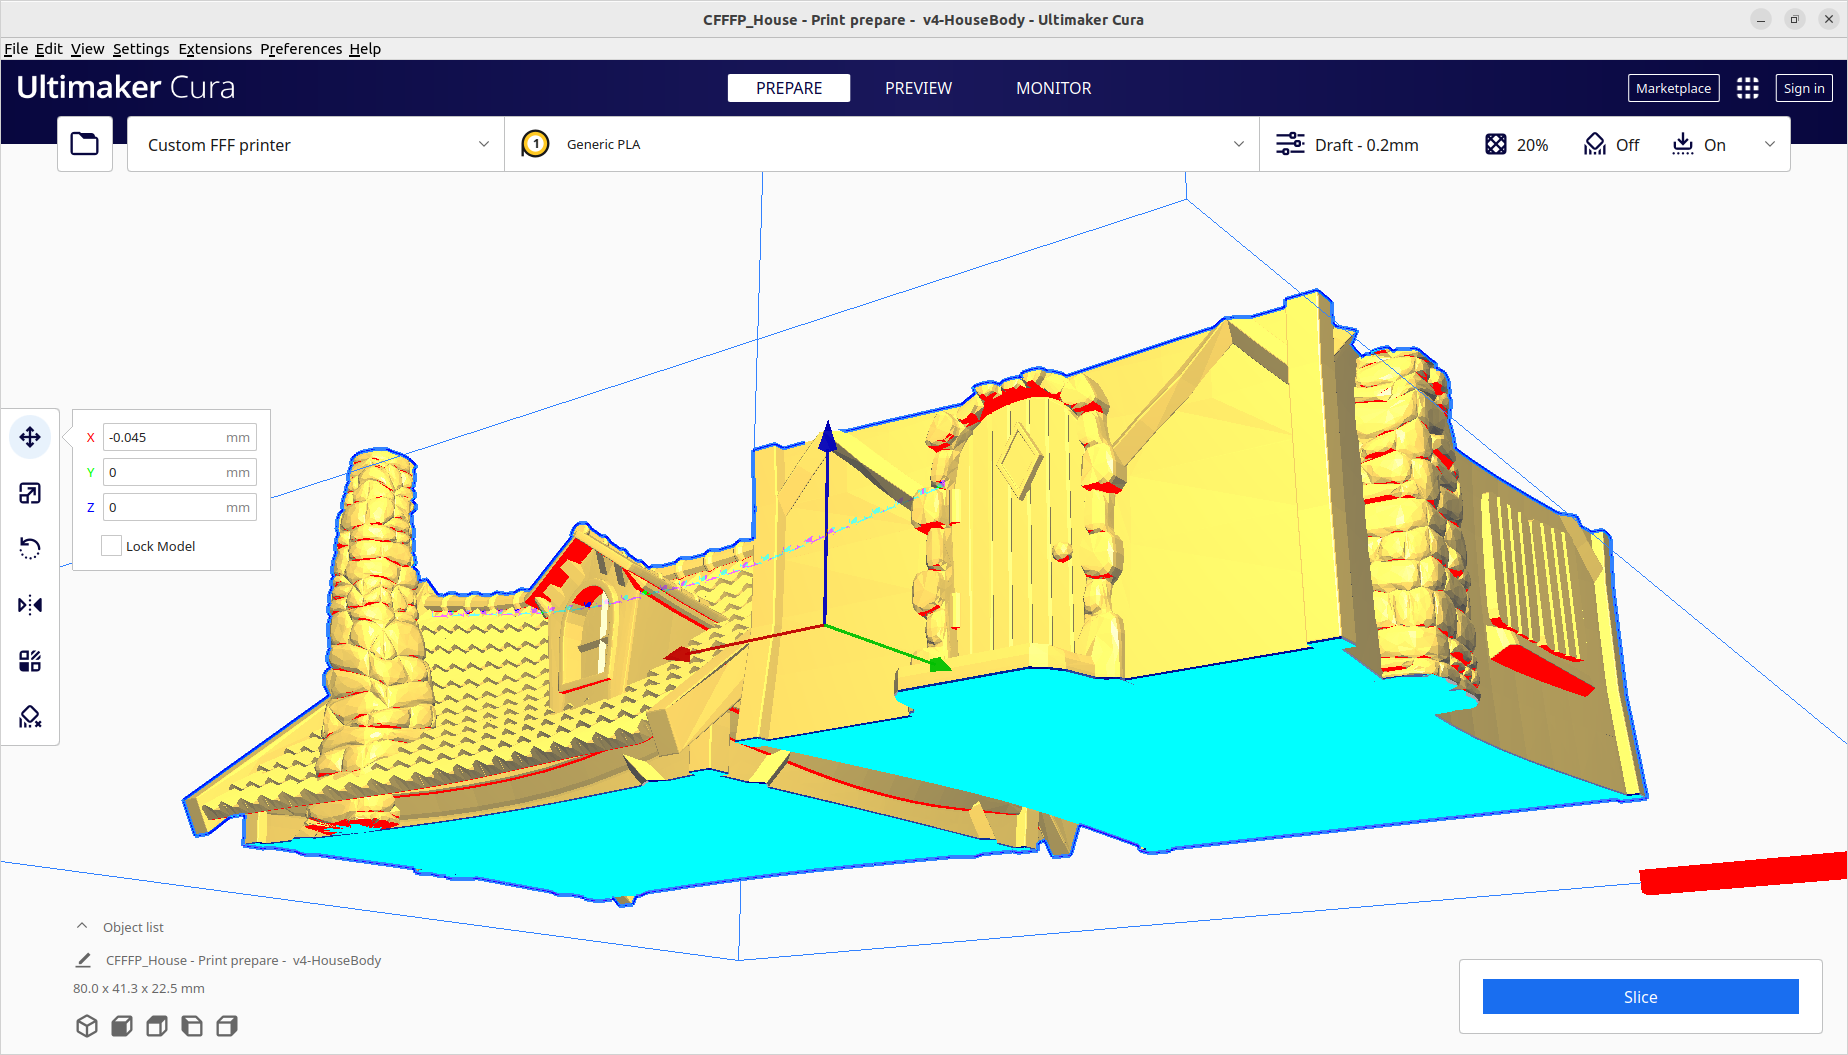
Making the house or anything for that matter as separate pieces is unavoidable. If a print messes up and is almost one solid piece, you would be stuck with those imperfections. Prints as large as this (as a 2 piece print) will likely take 6+ hours to print. There are small details that only a small layer height and layer width could capture. The smaller these settings are the more time it will take. However, as separate pieces, you will reduce the amount of supports you need thus reducing the amount of time and plastic you will ultimately throw away. In addition to these benefits, you can print each of these parts when it is convenient for you. Rather than having to monitor a 6+hour print, you could print a small part in 20 minutes. If the print didn’t have the results you were expecting, you will still have the plastic and the time to print more in another 20 minutes (You could also make different style parts to change appearances with easily replaceable parts). Approach this project as if you were creating a model kit. It will take some time, but will be worth it.

For ideas about connecting parts you can checkout websites like “Cults 3D” and another called “Thingiverse.” Many creators post their prints there for download (many of them free). It’s quite amazing what can be done with the right settings and simple PLA plastic filament. I hope this helps and if you have any questions let me know. :+1:

2 Likes

Great and detailed explanation. I just said earlier, make it out of parts each wall flat to the bed. Fancy connections are a step further! But this model with corner beams should make something suitable possible. :grin:

2 Likes

I understand, but the fun of 3D-design is that you are free in shapes. My walls are not straight, more slightly spherical. Also The house is part of a bigger project and will be about 5cm. Printing tiny details and gluing them together isn’t my idea of having a 3D printer.

I didn’t know this add-on. I just did it by hand. Using the boolean modifier, and configuring the viewport for the box to be shown as a wireframe. With the add-on a bit quicker. But without it, more understandable.

Yes, it’s very handy. I’m using it already and try to make everything ‘0’, but it’s hard to do for objects with a lot of organic shaping.

This was my conclusion also, but then I need to glue parts together. The flat bed side is nice to have. But the option to “iron-out” the top surface is also an option, I read on the web.

I don’t like this option :wink: It was many many years ago when this was part of my hobby skills. I have still an unfinished model kit (still 30 years in the box) of the space shuttle and its launching platform. My eyes and none stable hands, holding me back to finish it.
But for this model test project, I opt-in for this solution. I will make it so, just to test the out come.

I also make this model ready for my standard Shapeways print shop. So I can compare.

It is interesting, for many the whole point of a 3D printer is to replace buying kits and complete control over what they are of. Yes, the limitations of parts from metal injection moulding are not there in 3D printing, so different parameters apply to what can be in one part. Also it is why resin printers are more popular for such things, higher detail matching more or less the old commercial kits, or these days Warhammer style figures and vehicles.

Bool Tool, I knew of it, some are obsessed with a couple of such tools, I prefer what you describe very well ‘With the add-on a bit quicker. But without it, more understandable.’ So always avoided it.

2 Likes

I’m in trouble now

Trying to make the mesh data simple (fewer vertices), because the object is on the limits of my laptop. It works fine, but while trying to slice things up for 3D printing, it will crash my Blender session. I think because in the process it needs a lot of RAM.

The biggest problem is these roof tiles. A simple construct of overlapping duplicated tile elements. Merging them, simplifying them, or re-mesh this object leads to a lot of problems. Unsolvable with Blender tools or tricks. Because it leads to misformed mesh, strange normals, and above all “4721 non manifold edges”, which means unprintable.

I need to rethink my 3D print strategy while designing 3D printable objects. It’s not the same as for Eevee or Cycles. I think it needs to be more CAD styled development. More precise where vertices will be. Cautious with details and subdivisions (bevels).

I think I will redo the roof.

1 Like

Try taking the roof into sculpt mode and remeshing. May need a little scaling thicker beforehand.

1 Like

I did that, leading to unsolvable mesh data. Many faces inside out. Invert normals, doesn’t work. Due to mesh data pushing through the other side of the wall.
Also only low resolution, was possible … causing Blender crash.

Point is, rendering is no problem. But for 3D I needed to be more precise, to avoid al kind of intersection problems, manifold … You need a different mind set to create the objects.

Ok, um. Shrink wrap a plane onto the top surface of the tiled roof. You can play with the subdivisions to get a balance of look and computer coping. Add a back as needed.

1 Like

I think to the (very) bad roof mesh. This very nice solution of a shrink wrap doesn’t work either. I used projection, but the mesh looks pushed through … It doesn’t stick on top.

a different setup, exploding mesh soup.

In my opinion, due to the bad, unlogical mesh.

Creating a new roof tile construct.

With great attention to detail of interlocking mesh when repeating the object.
The vertex of copy one matches the vertex of the adjusting copy two.

Switching on “Merge” option in the array modifier.

The red face is the inside normal. I need manually fill in the border to make it solid and thus non-manifold.

1 Like

Looks like a solution there.

I would have made two shrinkwraps angled to each slope not a single top down one but would probably have had the same issues.

1 Like

Ready for print

I have sliced three times my model into four parts. Based on a layout for less to none overhang. And four sides should be flat because they are resting on the printer flatbed.
But two sides are on top of the print. Gluing them would be problematic.

On the print bed

Unorthodox with join lines to clean up when assembled, but looks like a solution worth a try.

1 Like

Small update, still waiting for the 3D print results.

You printing it out yourself on the printer you mentioned a while back?

1 Like

Yes, I have printed (nearly the same) model using a commercial company. It uses a laser that melts tiny plastic powder. You don’t need support for overhang etc. The quality is high, but I find it too expensive.
But I’m waiting for the result of the 3D Ender printer (filament). So I can compare.

Cool. Thought you had access to one that was gathering a bit of dust that you could put to use.

With me working away alot it could be tricky time wise up to the new year. But was going to offer if you needed anything done on the fdm or resin I’m only over the pond and could post things over if access to a printer was tricky for you at any point

1 Like

What I can do, after the FDM print, is to release the .blend or CURA files.


I have a nephew who has one. But after printing some projects, it’s gathering dust particles.
So I thought to help him a bit, pushing him maybe to modeling himself …

For me personally, it’s all about quality and pricing. The laser print cost 75,- EUR against 5m of filament.

2 Likes

Privacy & Terms