2D sprite quality

Hello everyone ! :slight_smile:
As I am working on Space shooter tutorial currently , I decided to do all the sprites myself , but I came upon a problem I am not able to solve. When I add the sprite to Unity , at first it looks really good , but if I downscale it , it looks quite horrible , all jagged. And I have playing with all the sprite editor settings , so I managed to make it look decent , but not the quality I am looking for , could anyone help ?
Screenshot%20(18)

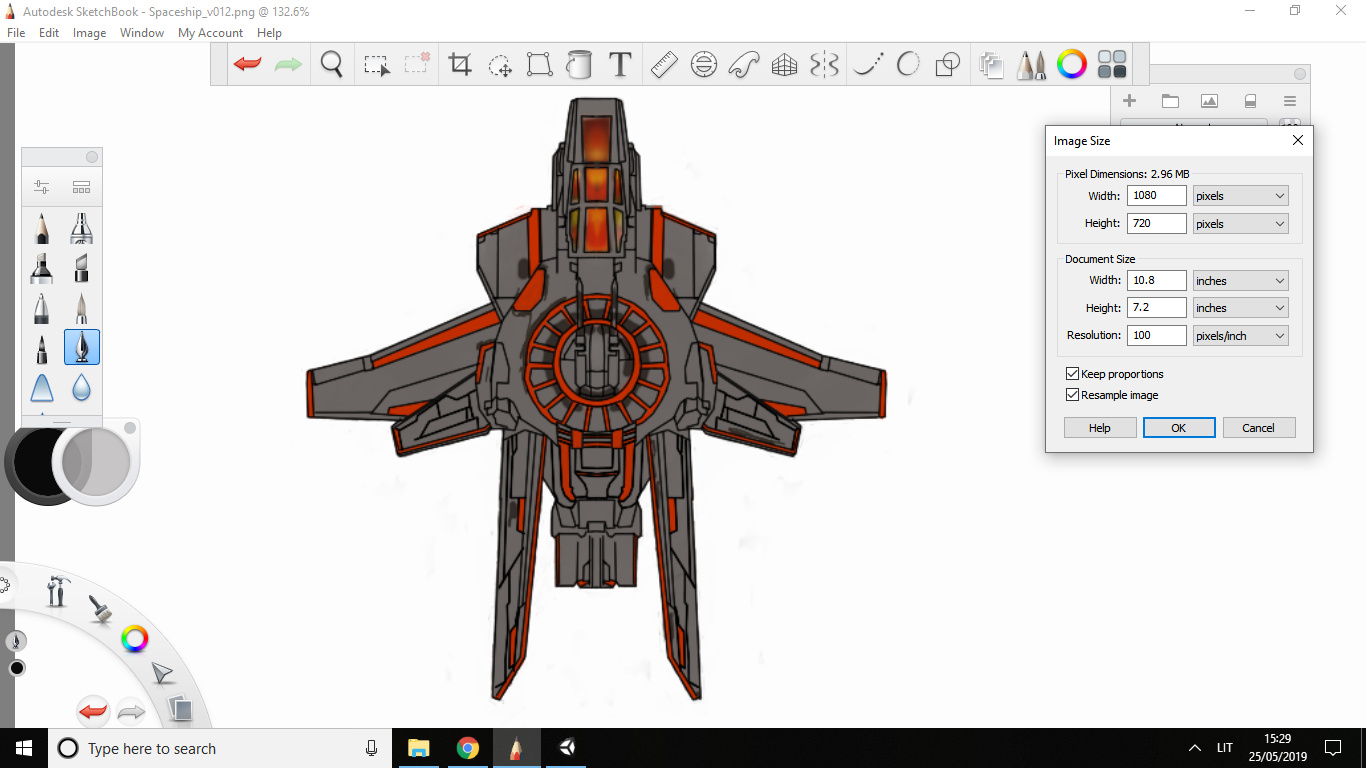
P.S the small one is with all the applied settings (Generate Mip Map , Filter mode - Trilinear , Max size 128 , and uploaded as with 200x210 dimensions with resolution of 200pixels/inch) , the bigger is just put in and downscaled a little bit , but too big for what I am looking for.

I’m not an expert about Sprites in Unity but I think the problem is this. Judging from the first picture I see that this sprite has the dimension of 1080-720 pixels, which means it’s a really big sprite, now if you really want your sprite maintain a good looking I think you should make a scale trasformation without losing quality of your sprite or you can increase the value of Pixel Per Unit of the Sprite in Unity.

The Mip Map doesn’t solve your problem because that’s related to the distance between the object, that has the sprite, to the camera.

I hope this solves your problem.

1 Like

Hi,

First of all, good job on the design. It looks awesome.

If @Reaver’s tips don’t work for you, try the following:

Save your current design in a new file. Name that file “_small” or something like that. Then scale it down until it has the target size or until it is slightly larger. If something does not look as intended, correct it in Autodesk SketchBook. The thin lines probably need to be a bit wider. For the very small version, I would make the gaps between the long, thin “flukes” a bit wider if you want to make the smaller “fluke” visible.

Good luck! :slight_smile:

1 Like

As @Reaver mentioned about scale transformation/pixel per unit , I played with both of those a lot , with no results , and Mip Map , I don’t exactly know what it does , but it does change how sprites look , sometimes in a better way , sometimes not , but still thank you for your time replying :blush:

And @Nina , in Sketchbook/already saved file , it looks practically same as in quality when it’s 200x200 and so I don’t need to downscale it anymore , but for some reason Unity makes it look not as good :confused: but oh well , I will try experimenting some more and make thin lines wider when the game goes close to being finished.

Thank you both :grin:

Maybe SketchBook has got different filters than Unity. I’d suggest to scale the picture down, save it with a resolution of 200 x 200 px and import it into Unity for testing purposes.

2 Likes

@Cig4ras Mip Map is simply a process that makes your sprite look very good when the object is near the camera and look blur when is far away so the application does have to do less work in rendering. Since this is a 2D Space Shooter game Mip Map is useless.

Another solution that you should try is to increase the value of Max Size like in this picture:

If it is possible can you send to me a .png file of your sprite? I will do some tests and trying to get the result you want when I get some free time.

1 Like

@Nina , I’m not sure if I misunderstood You , but that’s what I am currently using ( downscaled space ship and saved it at 200x200 using 200pixels/inch ) , which is perfect for the size I am looking for , and the quality is alright , but I think there’s room for improvement.
P.S I only though about it now … but maybe my monitor can’t display it better , as my main display sadly got dropped and is about to be thrown away , so now I am using laptop main monitor (1366x768)

@Reaver Thank you for clear explanation of Mip Map :blush: , and yes , I did play with Max Size (As I stated in 1 comment) , it does make things better , and about the sprite , what resolution would you like to get it at ? Because the max I have right now is 450x460 , as I managed somehow to probably delete it(?)
P.S found older save , did a little work and here it is again.
https://ufile.io/z9rkbg31 ( 1080x720 canvas size , actual size of spaceship is a lot smaller , resolution - 100pixels/inch )
https://ufile.io/lvbtiz6f ( 450x480 canvas size , spaceship takes the whole canvas , resolution - 180 pixels/inch )

Thank you both !! :hugs:

saved it at 200x200 using 200pixels/inch

There are no ‘pixels per inch’ on your screen. This information is relevant only for print designs where the printer can adjust the settings in his printing machines. Pixels are the little lamps in your monitor. 200 x 200 px means that, ideally, 200 x 200 lamps get switched on to display your sprite. If you scale your image down in a program like Unity, the computer has to calculate which pixels have to be used.

If you suspect your laptop monitor to be the problem, you could build your game and ask other people to test it.

1 Like

Oh … the more you know i guess :grin: Thank you both for helping , and now my spaceship looks good … How ? well as I redid them for @Reaver last night , I tried it in Unity this morning , as for some magical reason it looks better than all the previous ones , and my guess for the reason - maybe because I did transparency correctly ( first time doing it , I accidentally merged layers with white background , and saw it only after I tested it in Unity , so I manually “painted” transparency all around it ) , and that’s the only difference it had to these sprites to my previous ones.
P.S checked it after building the game , so I would get actual fullscreen game , and yup , it looks way better :hugs: Will only need to make black lines a little wider in the future :grinning:

Really appreciate you both helping people here :v:

1 Like

That really looks much better. Well done! :slight_smile:

Hi @Cig4ras. I don’t really understand what you did but here is how I solved this problem.

So as I have already mention to the first comment, the problem is that you have a really big sprite and I have tried the following solutions for have your sprite still looking good when it’s small.

  1. Cutting the empty space leaved in the sprite like in the following picture:

  2. Doing a scale down of your sprite, with the empty spaces removed, but the result wasn’t that great. It seems that when you have a big sprite you can’t make the sprite looking great even if it is scaled down, but the opposite can be done. So I tried to mess around with the Unity options about the sprites like Max Size, Pixel per unit etc and even there I didn’t get the result I want.

  3. I did a search online and it seems that the problem can be solved with the mip maps. As I have already mention the mip maps is a good process for keeping the sprite looking good but yesterday I only mention that mip maps works only when the sprite is distant to the camera but it seems it doesn’t only depend on that but also it depends on the scale of the sprite.

I think using mip maps can make your sprite looking great even if you have a really big sprite but I suggest to you that games like this doens’t need a really big sprites.

Another point I have to mention is when I was cutting the empty spaces of your sprite I noticed that there are some very, but still visible, brown pixels like those:

In summary I think I found the solution of your problem but your solution can probably be easier to understand than mine.

With all those been written I hope your problem is solved.

1 Like

Thanks for all the work/research that you did ! And one strange thing , that those “brown” pixels are not visible on my screen , not even a tiny bit , but I guess its simply not a very good screen , as the previous one was specifically purchased for VFX work.
Hope you learned yourself something new while trying to help others , that will be useful in the future and goodluck :v::blush:

1 Like

They are easy to miss even on better screens. If possible, use masks in SketchBook or Gimp. Do not select the background with the selecting tool (in Photoshop, it’s the magic wand) but draw the selection lines manually.

If that’s not possible, create a new layer for the background. Make it white, check the image whether you can see some “dust”. Then make it black and check it again. This helps you see the most obvious “dust”. The rest is probably not that important.

My screen is fairly dirty/dusty. However, since @Reaver mentioned this issue, I can see more of them in the large version of your first screenshot.

2 Likes

Oh , in my screenshot they were not visible , went to SketchBook , saw them , though incredibly hard to see, had to look for them real hard :laughing: 
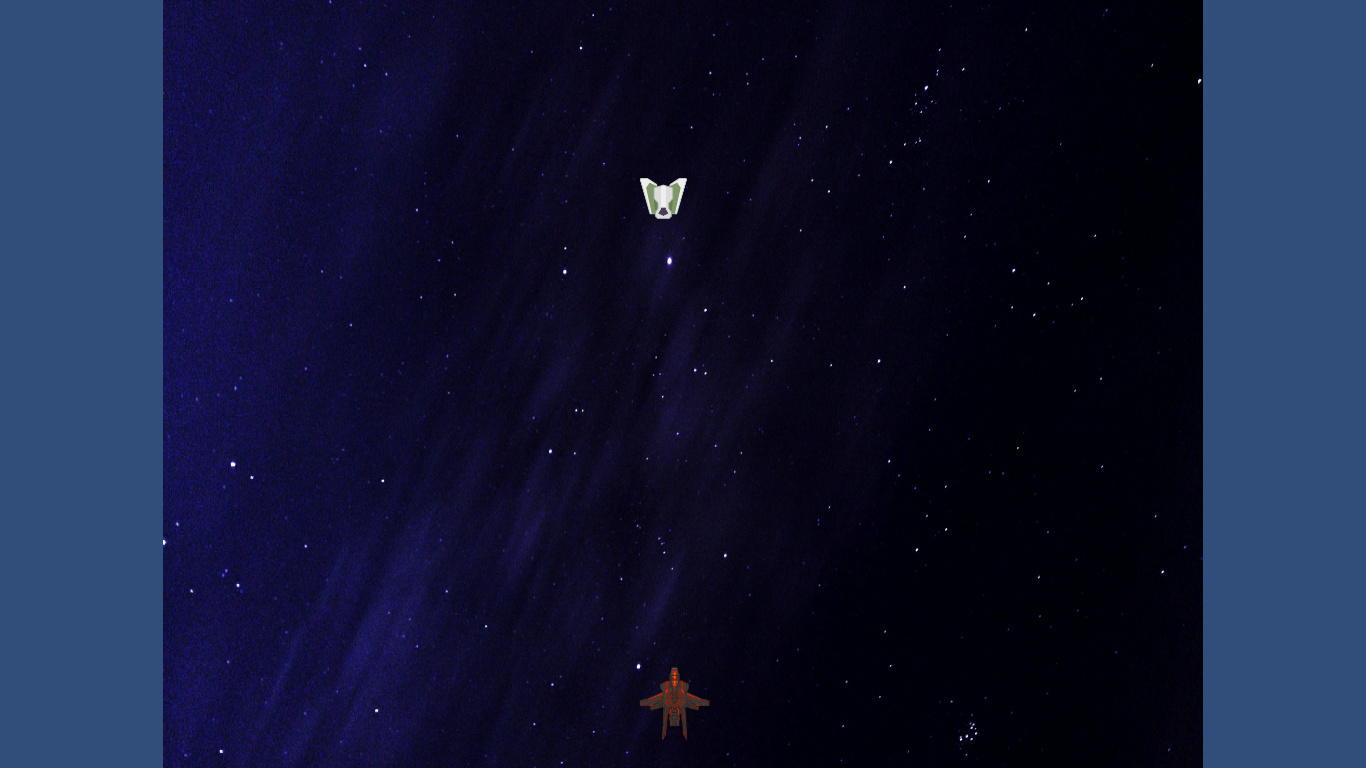
Though either way , the background is quite dark , so if there any left , should not be visible.

This topic was automatically closed 24 hours after the last reply. New replies are no longer allowed.

Privacy & Terms