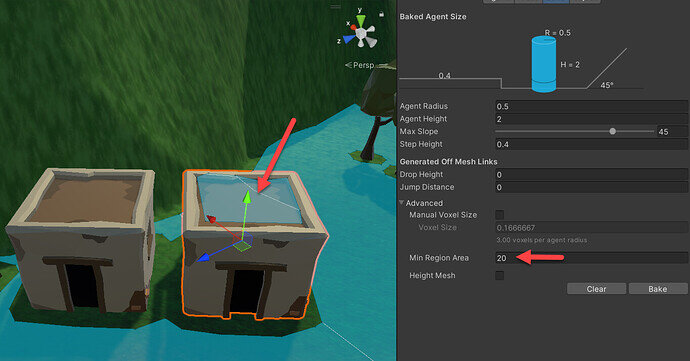
I don’t understand why accessing the roof of one house is possible? The Min. Region Area is set to 20!
The calculation is an area calculation. My guess is that the space in question is roughly 4.5 * 4.5, which would put it just a whisper over 20 units squared.
The second house does not have a blue area on the roof like the other house and yet it is an exact copy.
I don’t understand!
As these are floating point calculations to generate the NavMesh, you may find that just moving it is enough to not make it bake on the next Bake. In any event, you can make them impossible to walk on by selecting the building and then in the Navigation pane, marking the building as Navigation Static and Not Walkable.
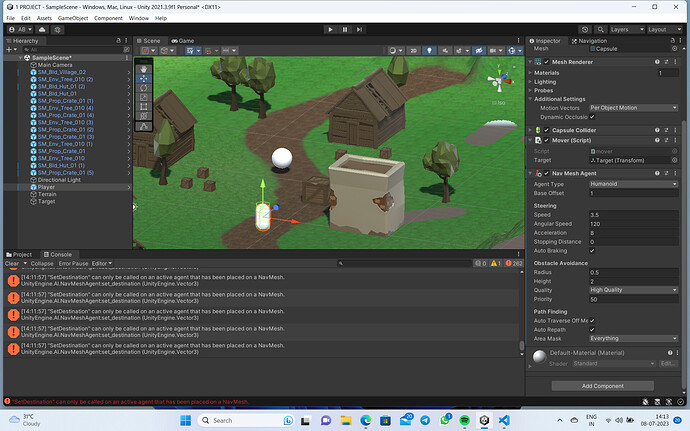
can anybody help me with thi error .
it keeps showing me ‘SetDestination’ can only be called on an active agent that has has been placed on the Nav Mesh
nevermind i figured it out
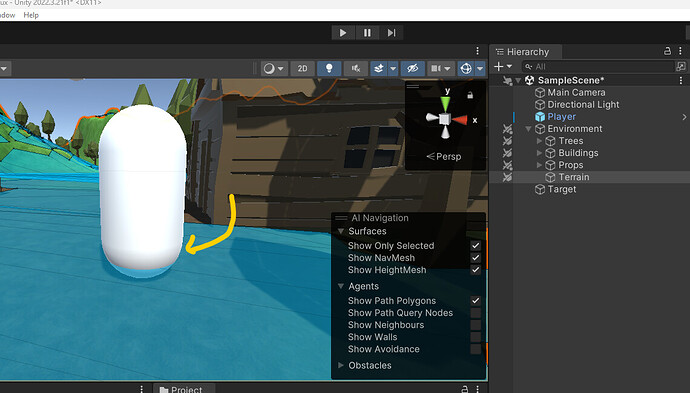
Navigation Static is deprecated in newer versions of Unity.
Can you explain what that means for NavMesh, which static should we turn on when making static obstacles?
The Navigation System v2 got an insane amount of changes which opens a lot of possibilities, but also makes quite a few “old methods” obsolete.
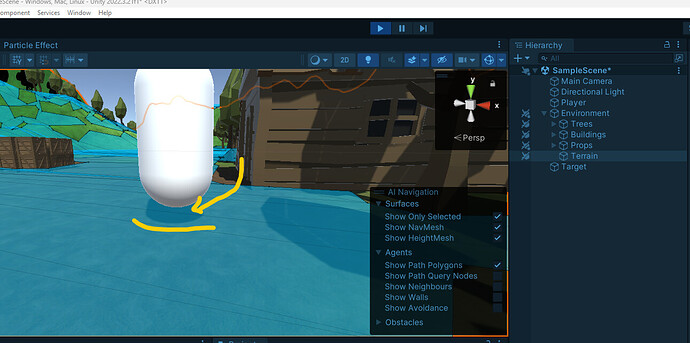
Depending on which version of Unity you’re using, if you’re using a version in-between the Nav System 1.X and 2.X, such as with Unity 2022, you’ll find yourself in a situation where the editor UI is still in-between the 2 system. Just so you know Unity 2023 have completely removed some of the old Nav System editor UI elements just to make sure people are not attempting to run with them as they are deprecated.
The old “Navigation Static” from the Nav System 1.X was scene-dependent (as was the Navigation System). With the Nav System 2.X which was incorporated withing Unity 2022 and so on you don’t need to set if an object is static or not anymore, but instead you need to set the settings via the NavMeshSurface component from which you bake the Nav Mesh Data in your scene.
In case some are not used to it, to setup the new Navigation System, you need to the following steps:
-
Optionally, but highly recommended, place everything in your environment that will be involves collisions for the Nav Mesh Data as a child of 1 or multiple empty game object. You could call those empty game object as “Zones”.
-
On each of those Zones game objects (the parent you have previously created in 1) and not their children), add a new component called “NavMeshSurface”. You’ll recognize some of the stuff explained in the course’s UI in that component.
-
In the NavMeshSurface component, there’s 1 key setting to consider: Use Geometry
• If you set it to “Render Meshes”, the baking will be extremely slow, but it will take anything rendered (active visually) to bake the Nav Mesh Data. If you have worked really hard on the level design and want the player to move anywhere that is physically accessible from the game engine’s physics point of view, this could do it as you don’t have to wonder about colliders and other stuff like that.
• If you set it to “Physics Colliders”, then the Nav Mesh Data will only take into account objects with a collider (and it will take that collider into account).
Personally, I prefer/recommend to use the Physics Colliders approaches because you keep better controls. (For example, if you want an invisible wall, you put an invisible collider and you’re done.) With the “Render Meshes”, you will need to code the invisible walls in or put something to act as a wall.
- Now comes the 2 drop-downs under “Object Collection”.
• Collect Object will define what the Nav Mesh Surface got to look at:
All Game Objects means it takes the whole scene content. (If your game is scenes-based, this could work, but if you build all your game into a single scene, that’s a big no-no!)
Volume allows you to set a cubic zone (like a Box collider). It can be a good option if you have assets that are overlapping between such zones and your zones can fit in such as format.
Current Object Hierarchy allows you to set it so that all children (including itself) are accounted for in the Nav Mesh Data generated. This can works really great if, for example, you separate your scene into zones as I previously mentioned in 1). This option is my “go to” when you’re uncertain.
NavMeshModifier Component Only means that it will look up for only object with that component in the scene. This is useful if you got some really crafty world design that requires per-object controls. (It’s extremely time consuming so I recommend the other approach if possible.)
-
Then you got the “Include Layers” which is actually the meat of how you can define what’s calculated or not in the Nav Mesh Data. Long story short, if you want to have a clear definition of the path generated by the Nav Mesh Data, you can do so by just having invisible colliders all set on same Layer and then set the NavMeshSurface to look only at that layer and voila!
-
Press “Bake” (or set the Advanced option before baking) and you got your Nav Mesh Data generate.
It’s also possible to bake in real-time by accessing the NavMeshSurface in a code and calling BuildNavMesh(); to it. This will update the Nav Mesh Data by the next frame.
As you can see, there’s no more “Static” involved with the Navigation system since the introduction of the Navigation System 2.X. The object’s static marker is now only used for the engine rendering features such as occlusion culling, lighting bake, etc.
= EDIT =
Also, I forgot to include something in the post.
With the AI Navigation System 2.X (the new one), removing “remote” area such as building roof from the resulted Nav Mesh data can be done by adding a “NavMeshModifier” onto the object (such as the building) with the collider(s) and put the following settings to the component:
Mode: Add or Modify object
Affected Agents: All or whatever you want limit.
For example, if you have flying stuff, you might not want them to be limited to only “ground” level flat surface so would would make sure to not include their “Agent” type in the setting. It’s the same if you have some underwater creature and you want them to remains in water, you can set a “NavMeshModifierVolume” to set a “zone” the same way.
Apply To Children: Check this ON if you have multiple children with collider/impact on the NavMesh Data.
Note: While this might not always be the case, I have noticed that setting this to ON will not work if its game object is on a layer excluded by the NavMeshSurface even if its children are part of an affecting layer.
Override Area : Check this ON.
This will allows you to select “Not Walkable” to the Area Type in a dropdown under it. This can also be used if you want to set various other type of area of your choosing. For example, if you want the AI to avoid a poisonous swamp, but only if possible. This component is basically replacing the “Object” tab that was in the previous navigation system.
Override Generated Links: If this have chances of affecting Jump/Transition points on your NavMesh, check this ON.
Many thanks friend!
This cleared up some things, have a nice day


