
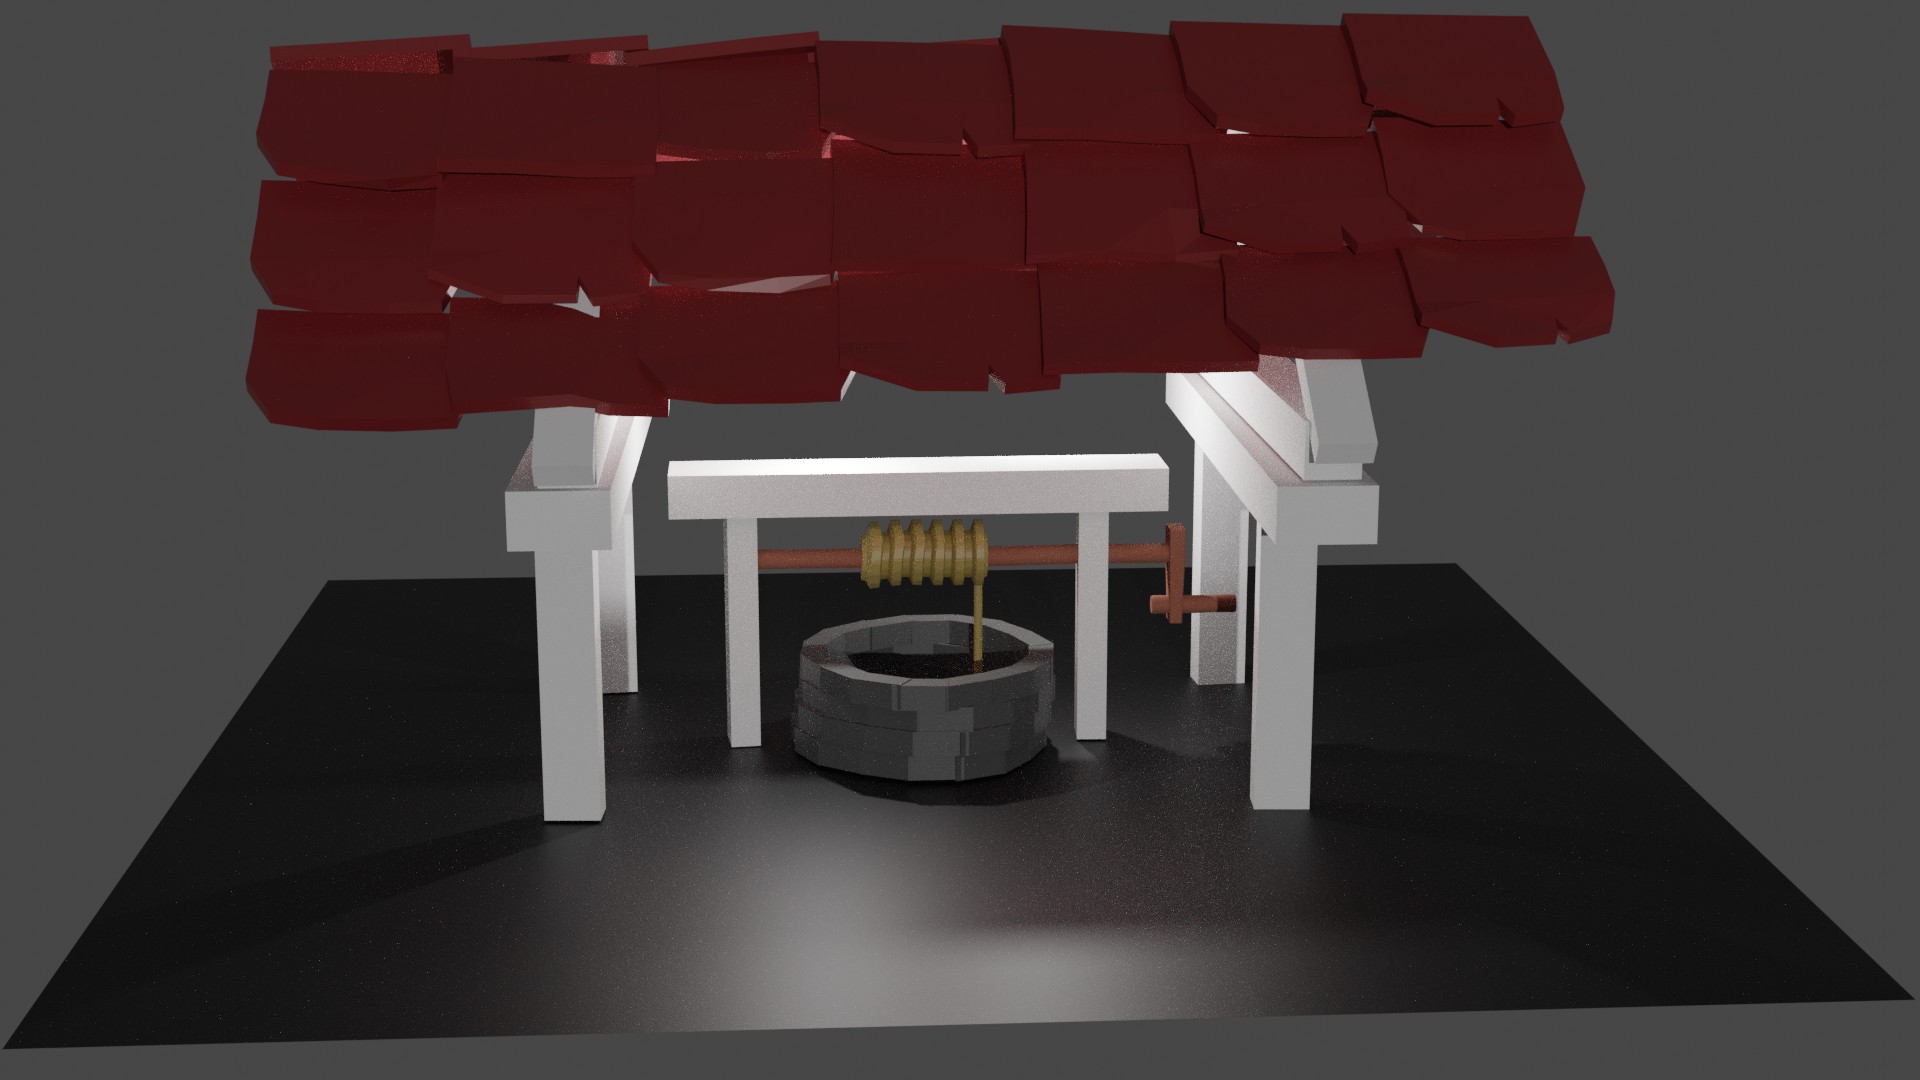
It is a good start! Colors, lighting, well done!
But, I think the dimensions of the individual objects are a bit off.
Interesting and different. You have made extra bits like the rope and winder.
The well wall sides not straight, vertical.
Tiles are good in their variation and ‘damaged’ look but laid out in an odd fashion.
Good lighting.
I like the overall style: the red and white are a nice colour scheme, breaking the grey and black.
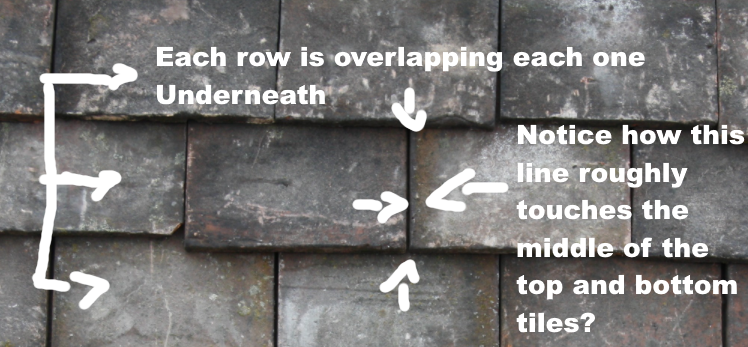
Perhaps you mean to have the tiles chunky, and that is not necessarily a bad thing.
What I have noticed is that the tiles are overlapping each other horizontally rather than vertically, and they are all lined up in nice straight lines. I would suggest
- that you overlap each row over the row below, rather than each column than the one beside.
- Stagger your rows so that, at the very least, each roof tile edge meets the middle of the one abover and below.
- For yours, simply move the middle row over by half a tile and shrink one side by half, and had a half to the other.
- For edges, transform the tile so that it conforms to the shapes above and below
Here is a visual reference I just rigged up:
Your well, as well, is slightly tipping to one side. When moving objects, you can use the axis keys (z,x,y) to get a good straight line. So if you select all your base bricks of your well and then copy them, you can hit “g” (move), then “z” for straight up and down movement.
But that will only solve your wells topple shape. In order to solve the offset for your bricks you will want to keep my picture above in mind. Select all bricks of one row, and then go to:

and make sure it is this:
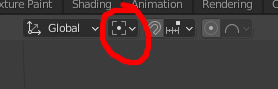
And then rotate (‘r’) all your selected objects until they are like the shingles. They should rotate roughly in the middle of your circle of bricks and require little to no change or correction.