
I got to say this pyramid has been frustrating… I’ll echo a lot of the issues others had;
first I had to rebuild the pyramid because on the Inset challenge no specification were given other than it had to have 6 steps minimum… but the specification should have been 6 steps, with a base of 10 units, a height of 1 and a width of 1 for each steps… then the following exercises would have been easier for everyone to match.
Another thing is that by the time the ramp is done there are some assumptions that somehow the pyramid is at 0.0.1, the problem is most of us being new we often accidentally move stuff… so when you get to setting the ramp at the bottom, it’s practically impossible so again mentioning that in the inset video either before or after the challenge so it’ s on people’s mind might help.
I’ve been struggling with the same excersize. I’ve done around 4 pyramids now. Once I get to the ramp, nothing works. My ramp is glued to the steps and I have to go back and figure out what’s going on. Snapping was also troublesome and it ate away at some of my patience.
Going to redo the pyramid now with the information you’ve kindly provided. Hopefully this will be the last pyramid I do.
Edit: Okay, I figured out what my problem was. Not only did I have one more step, but apparently I’d been moving my ramp rather than extrude it. Had to rewatch a couple of lessons.
I have an issue that it seems no one else has mentioned yet and the thought of having to recreate yet another pyramid when I have no interest in pyramid architecture infuriates me. Michael mentions the importance of having the ramp at a 45 degree angle, but I have no idea how to check this.
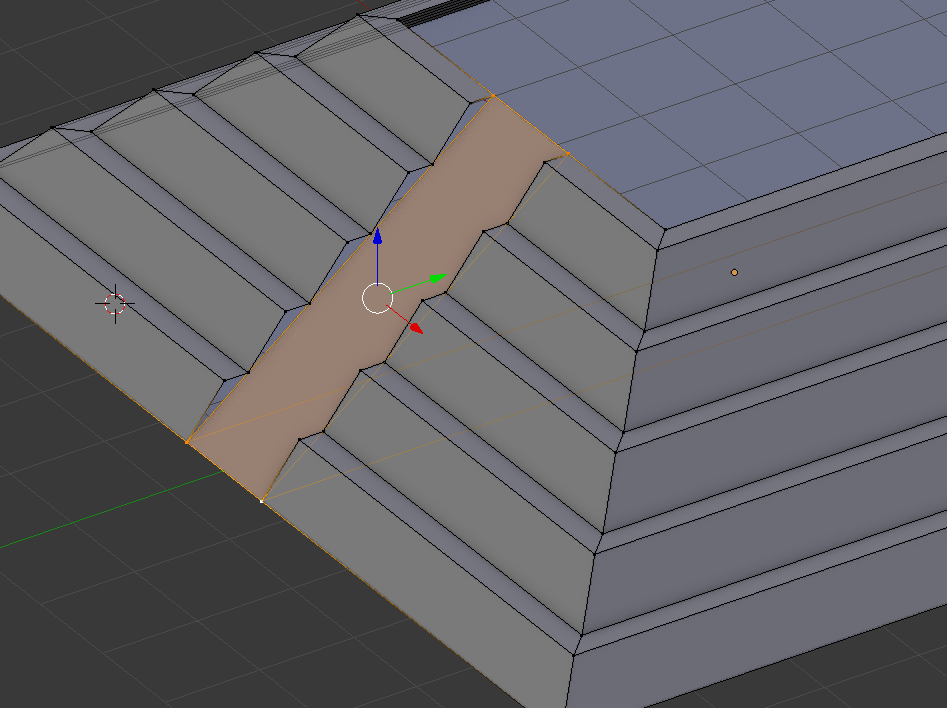
I did some editing as encouraged to do so in the previous lessons to add a tiny bit more detail, moving some vertices to produce angled steps. (See below)

Now of course, I have the problem of 6 steps as originally set out in the challenge, not the 7 that he eventually built, plus we were not told the parameters of the steps so although my base was 10 just as he used, my inset was 0.2, not 0.1 that we see demonstrated and therefore, my geometry is different and I am afraid to even attempt to move beyond my ramp, due to not being confident of my ramp angle.
I eventually succumbed to the repeated requests to rate this course, but now we see errors creeping in once we get to this stage, I do wonder if there’s a way to retract my previous rating, pending some kind of resolution.
The supposed math is killing me, so I set my grid to 20 subdivisions on a scale of 1.000, knowing that each step was 0.5 on the Z axis. 6 steps at that = 3.000 to my mind, so zooming in, I see that the edge at the base of the ramp is at 5.4 on the Y axis, which to reach a 45 degree angle, should mean I need to stretch out the edge at the top to 2.4 on the Y axis in order to get the right angle, (3 across x 3 up). However, it doesn’t even look close, it’s actually a steeper slope than before I changed it. I have no idea at this point what on earth I should be extruding the ramp for or what I’m supposed to do with it after that, (it would be standing proud with neither the top or bottom edge in the right place,) at this point I am considering cutting my losses and getting my money back as I am within the 30 day period. I shall do likewise with the Unreal engine course which I have yet to touch, which is probably a wise idea seeing how badly I am getting on with this course.
My pyramid wasn’t at 45 degres neither. But, since it’s only a math problem, it’s not really something i took into account.
I had much more step to my pyramid. So I actually played with the modifier Array for the step. I didn’t use 1 but 0.98 or something. Then, when the steps were almost on the top of the pyramid, I end up with something like this
And i just put a step manually. If you go to select edge then alt select the edge of the hole and click on “F”, you actually have something decent.
It’s hard to go past the first courses imo, but it gets better when you see the results.
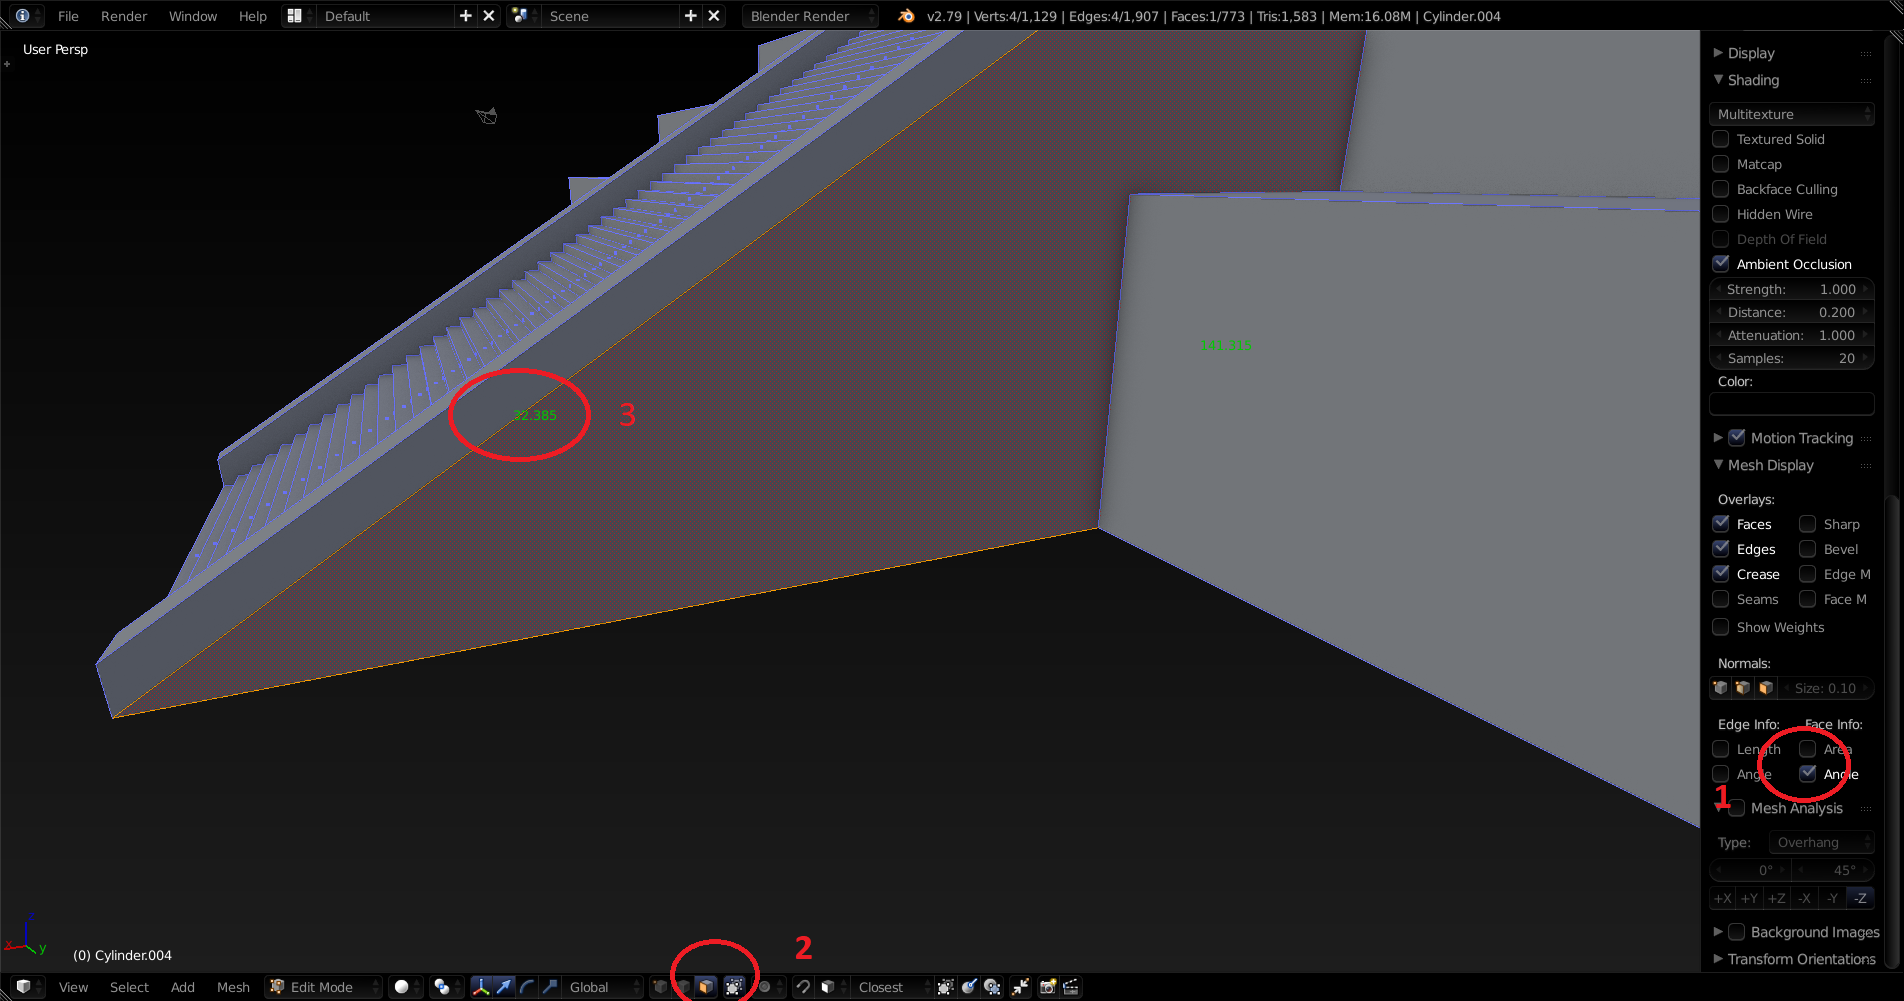
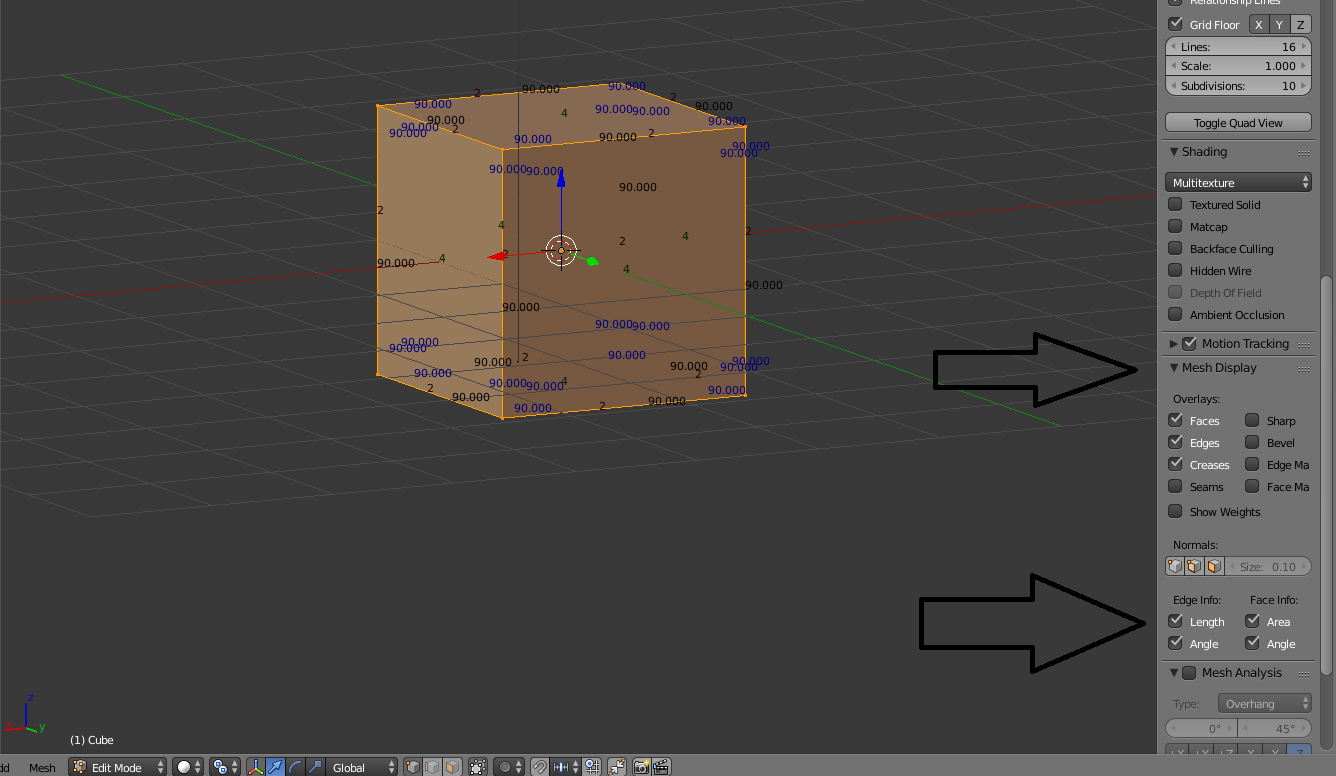
Edit : I looked a bit and i saw an option in the transform panel (when your cursor is on 3D view, click on “N”) Go down and then you’ll see a 2 option : edge info and face info.
Choose angle, then go in face select, and you’ll see the degres of your ramp.
Awesome, thanks for that. I’ll go check it out in a bit, I think I need to become more fluid in my approach to these things, also, being left school 17 years ago, getting into the habit of structured learning again is taking it’s toll.
I do still think there is an issue with the course in that the parameters need to be placed in when you begin the pyramid, so that it doesn’t lead to this kind of thing further down the line.
You’re welcome,
I think you’re right, but you don’t have to make the same thing as the pyramid on the course. If you go offroad and do your thing, you’ll face problems you never had before, and that’s how you learn efficiently in my opinion.
Good luck, I hope you’ll get the habit soon  .
.
Okay, 12 days later and I finally pluck up the courage to try the above fix, I get loads of angles pop up and none of them make sense, the ramp angle stays fixed at 90 degrees, whilst loads of others move around, so I guess they are again proportional to something else, but as this hasn’t been covered yet, I have no idea what I am looking at or how to fix my problem.
I will now go and start again on the whole course section, I am so angry at this it’s unbelieveable, as how to contact the tutors hasn’t been explained anywhere, I guess they pay no attention to the forums that they keep ramming down our throats on every section, (otherwise they would have picked up on this by now).
Hi Nick,
Sorry to see you’re still stuck with this, I appreciate it’s frustrating to not be able to progress.
@Marc_Carlyon can you help Nick get unstuck, and if not please let @Michael_Bridges know - thanks 
All the best,
Lucy
Part of the GameDev.tv team
Thanks, Lucy, I hope that I can get help as it’s something i really want to learn and if the only way to effectively resolve this is to start again, hopefully the tutorial can be amended to explain the required dimensions of the base pyramid rather than just saying, go do it yourself and see what you end up with, (which may or may not be suitable for the following lessons).
Hi Nickbrad,
First of all my apologies that this has slipped though the net and thank-you to Lucy for indicating this one had.
In the Welcome to the course lecture it asks you to say Hi in the Q&A which is where i would welcome you and pass all the information to you to post here for sharing your work and in the Q&A if you have an issue.
There are reasons for this but not to bore you with details if you need help please post in the Q&A as i respond within 24 hours there, Posts can get lost in the forums.
Now to the real issue in hand, I think the best way to help you is to show something we do teach a lot later in the course.
This only shows if you are in edit mode and i suggest opening a new blend file to play with it until you see how it works in a real model.
If you need help from here now that i have been @irresistiblejelly i can find any replies to this post.
I suggest if you would like me to take a look and see if i can help with the maths after this you upload the blend file here using either the upload button or to an external site and paste the link here.
Once again my apologies this slipped though the net and if you prefer not to use the Q&A then please @ me in the post as i do check these daily as a student instructor.
Edit :- I have taken on board what you have said about the lecture and i think maybe something like an annotation is needed about if you have different dimensions after the challenge.
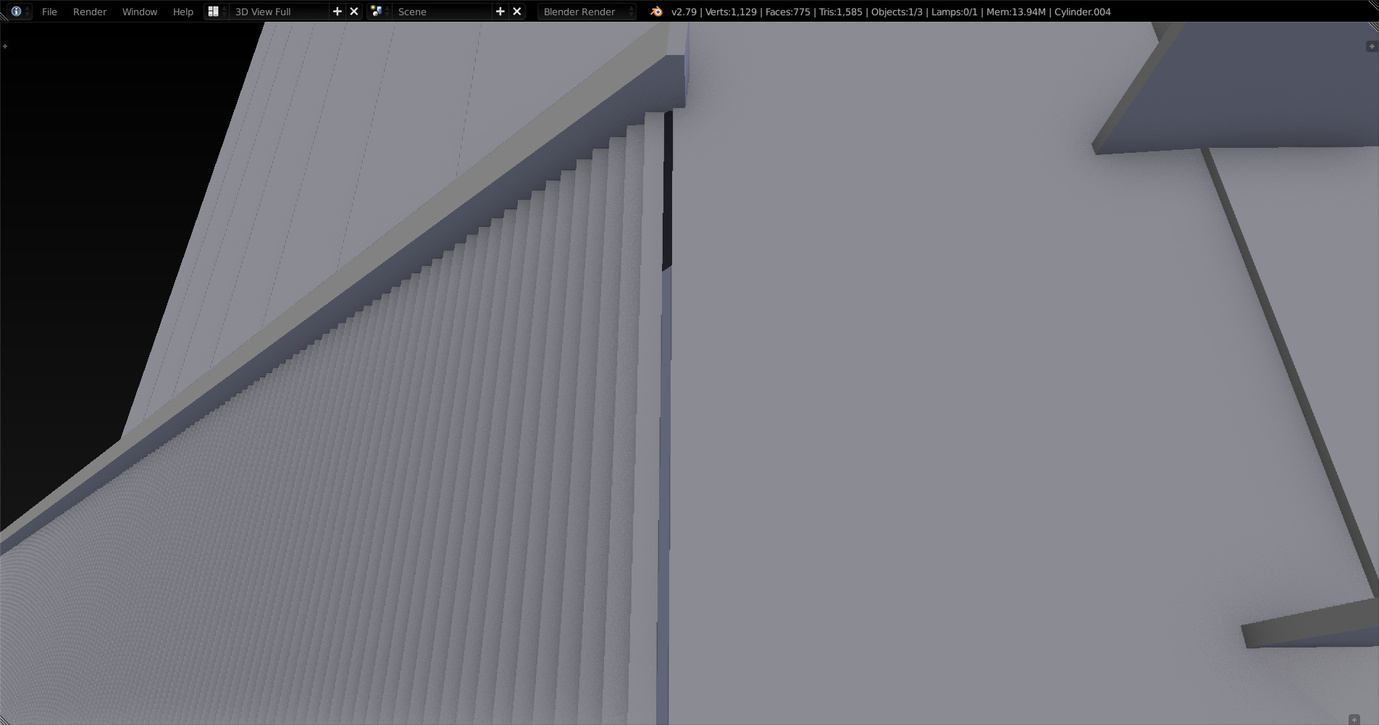
Here is my file as you can currently see it, I think in this instance I may have to start again as i tried to be a bit artistic and it bit me in the backside. Unfortunately I do not learn in the same way as Dorian_Co, I cannot easily learn things by blindly pressing things to see what they do, in that way it is pure luck if I do something I like and I would probably not be able to recreate the result, so I wouldn’t have actually learnt anything in that case.
Pyramid.blend (518.2 KB)
You can also use the snapping feature to align parts of your models to each other or even a place holder mesh object.
I find this helps a lot when something doesn’t quite line up as expected.
We all learn in different ways and i just hope you dont feel let down by us.
I actually have found a lot of things in blender i do happen by accident and i like it so i leave it.
To fix this issue the easiest way i can think is below.
- Go into edit mode.
- Select face select.
- Select the ramp and delete it
- Press 1 on the number pad
- Ensure limit select is grey like in the screenshot

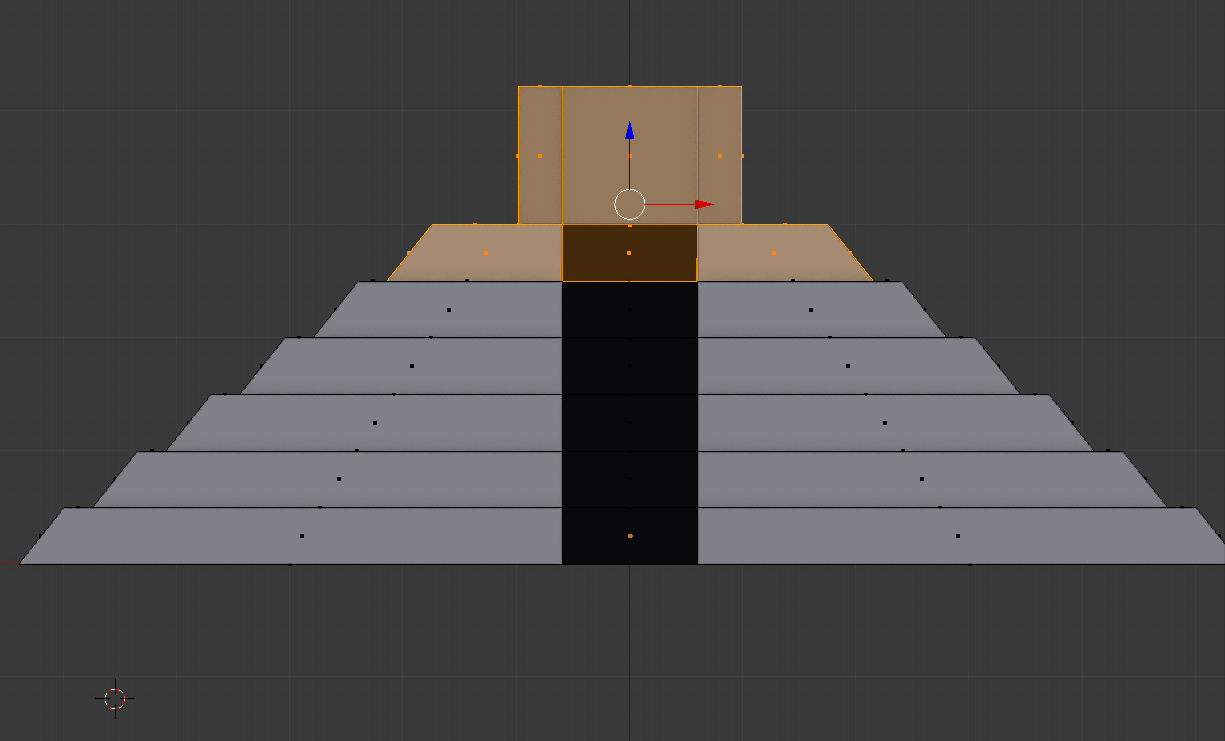
- Press b and select everything in the screen shot below.
- Press x and delete faces.
- Change to vertex select and elect the four vertices for the ramp as shown below and press F to fill.
- Select all the edges around the top and press F to fill and then press e to extrude and right click.
10 Scale the top in and then extrude up to create the top of your pyramid.
You will have to adapt your stairs with the array offsets with TINY increments but if you get stuck there just let me know here or in the Q&A and i will be along to help
Thanks for the feedback everyone I’ll be fixing the lecture and challenge to make it easier to follow along and get exactly the same result without frustration 
I’ll give all that a try and report back, thanks
Pyramidjelly.blend (517.0 KB)
The blend file with all the steps above done you would just need to scale in the top face and then extrude to build the top in case you struggle 
Oh and i may have left limit selection off so thats why it looks wireframe mode, just remember to turn it back on as in the screenshots above!