
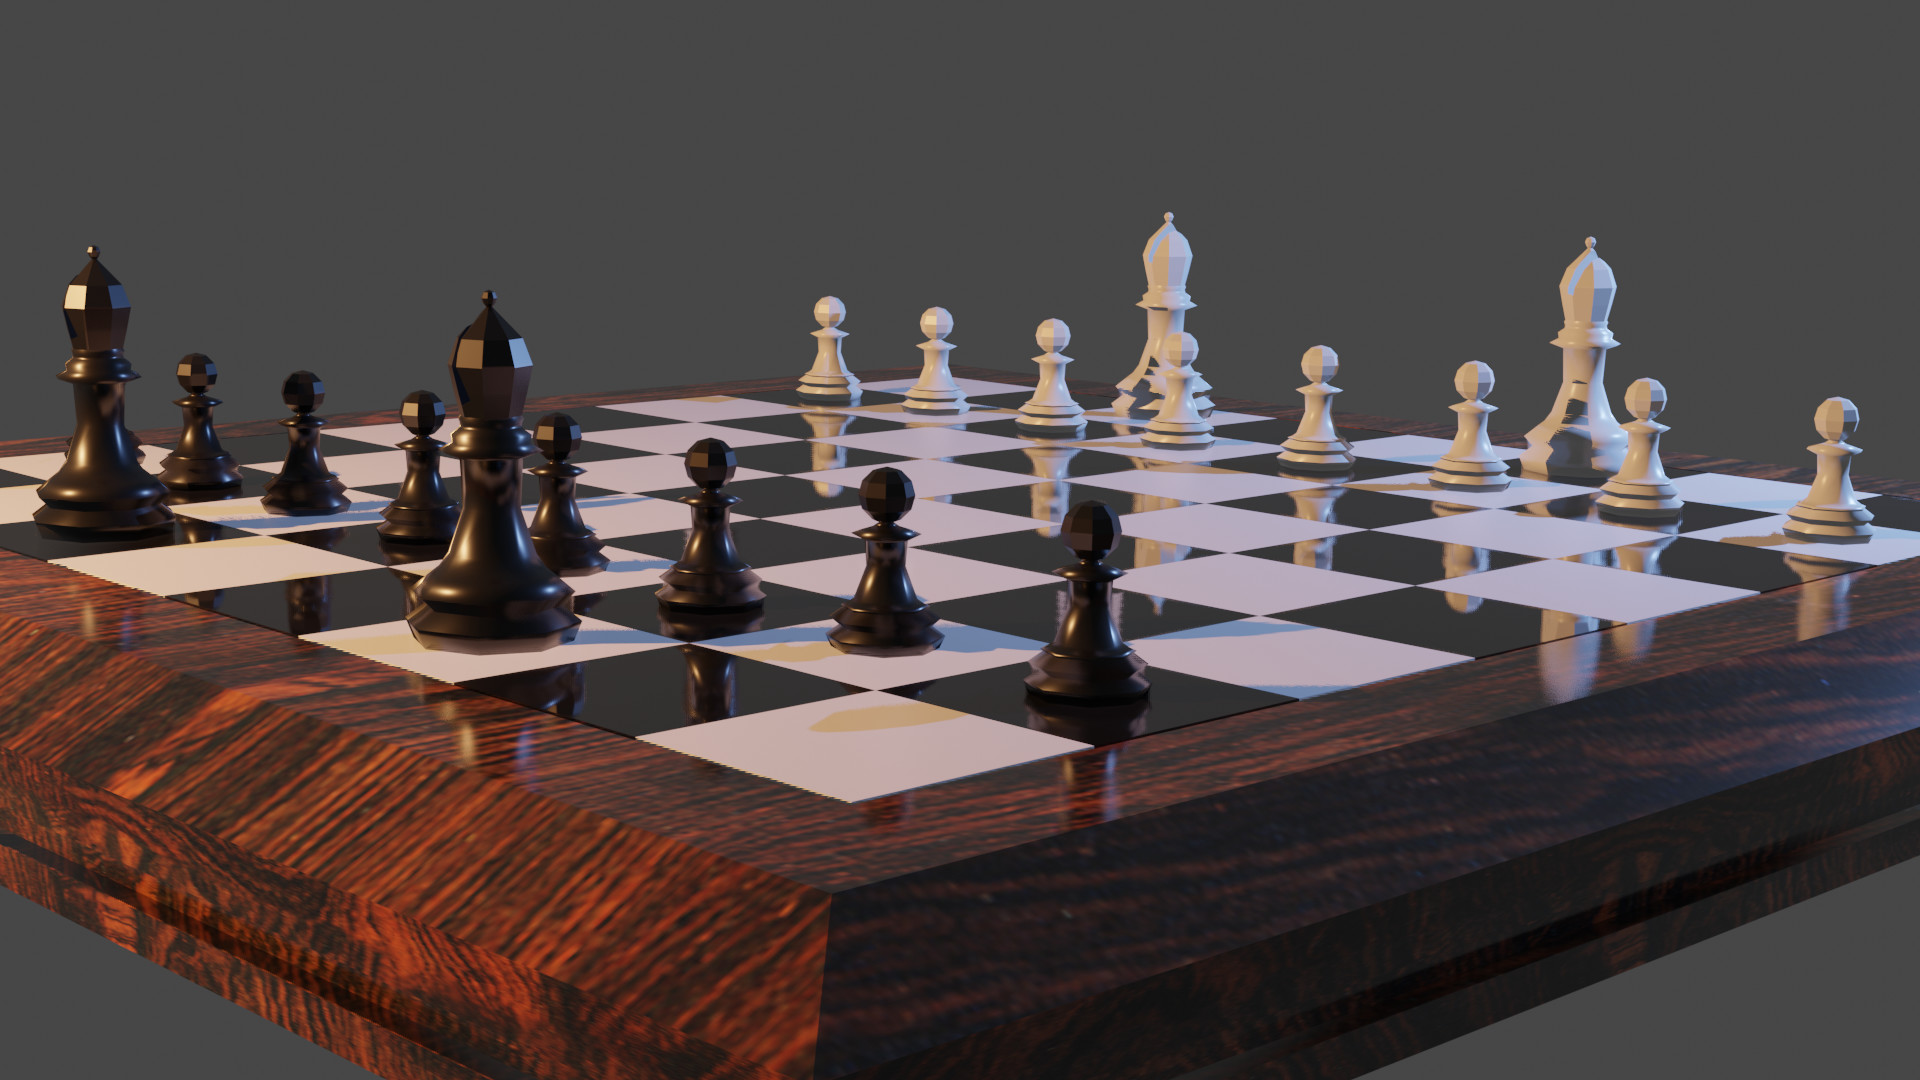
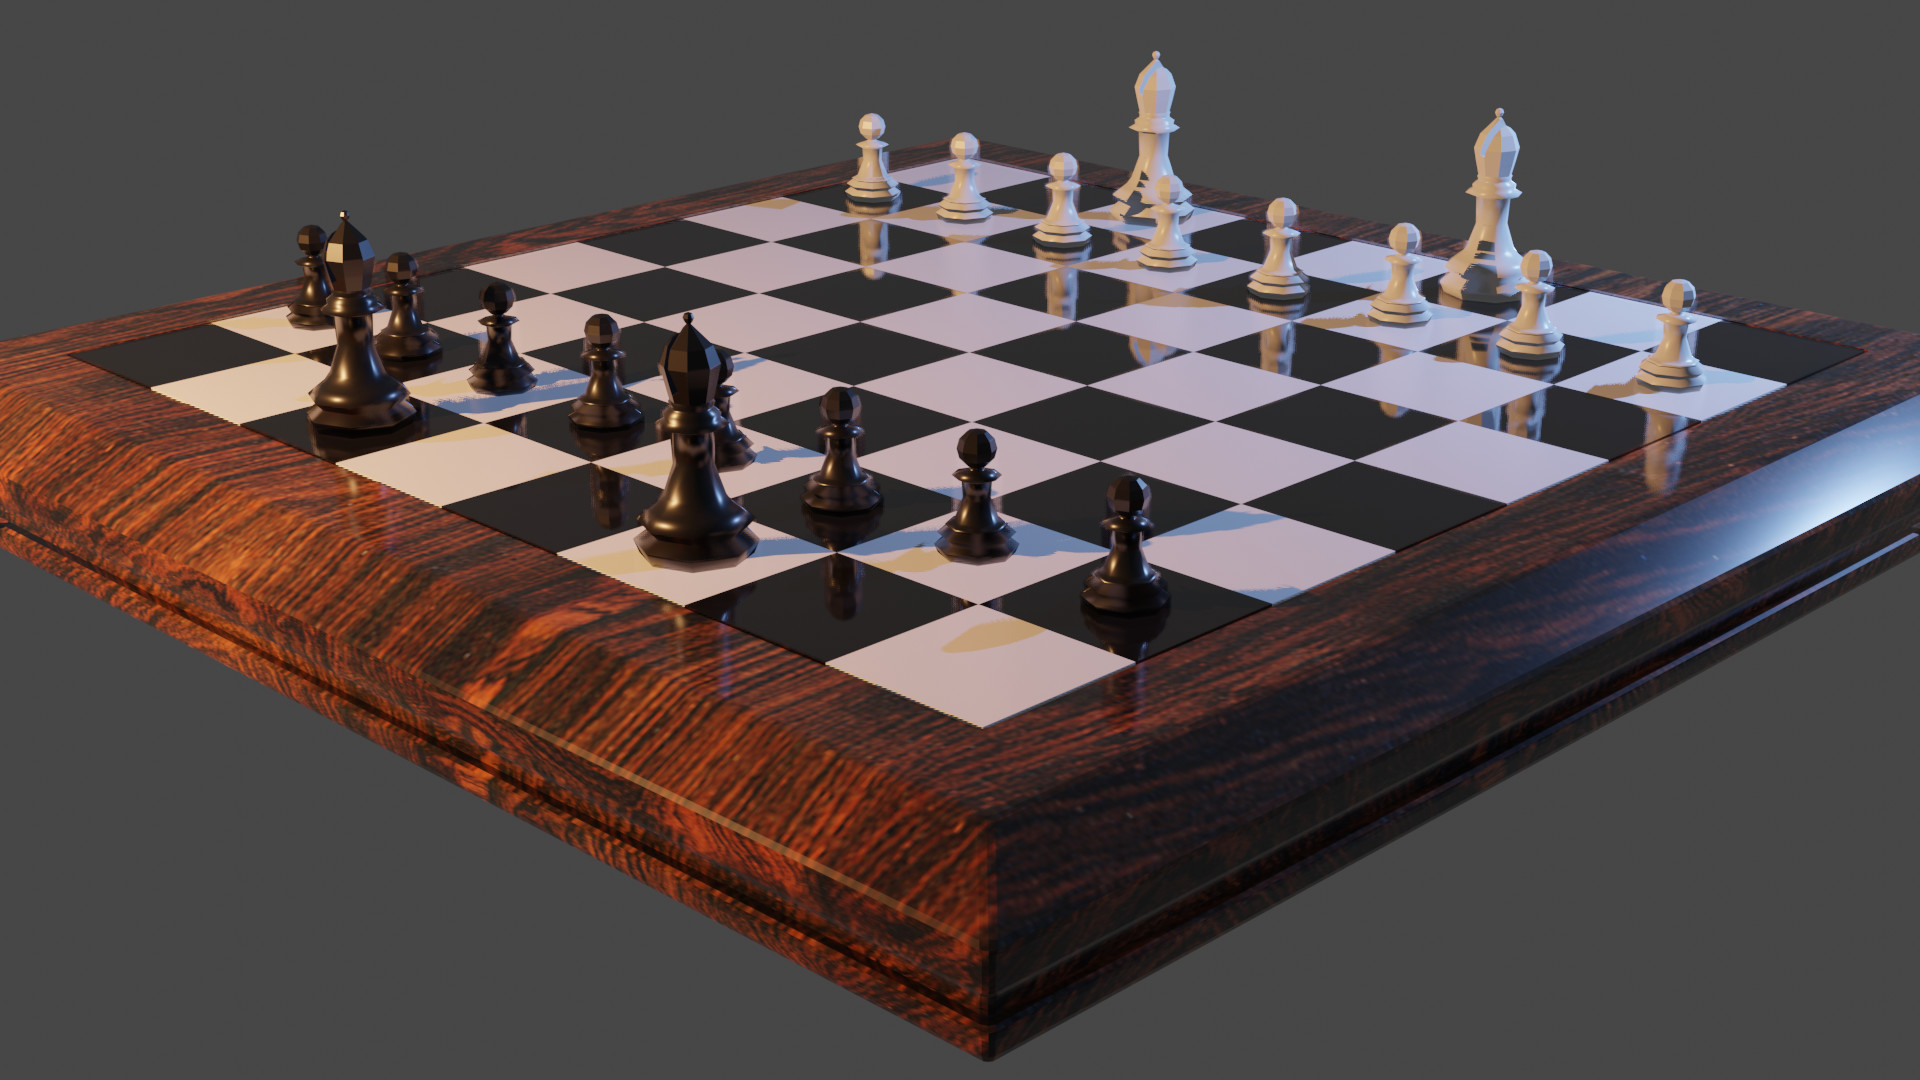
Finally got to add texture! I make high end acoustic guitars, so of course I chose Brazilian Rosewood.
7 Likes
Nice Texture
Don’t forget to bevel some of the sharp edges.
Sharp edges are less natural.
Esspecially on wood.
2 Likes
Good board, but needing that bevelling FedPete mentions the perfection of geometry in a 3d model is impossibly unrealistically sharp. However tiny, or large deliberately for softened real items, sharp corners need softening.
As a practical maker using wood, you will be frustrated at the lack of end grain textures then! UV manipulation can line up grain though.
1 Like
I will try to add some bevels on the frame. And yes, not having end grain show bugs me 
1 Like
Very nice - will look awesome with the suggestions added. Well done.
I tried beveling and I must be missing something because I can’t seem to get it to do a beveled edge like I thought it should look like. I’ll put pics. First bevel…where the circled edge is. Not what I imagined but I like it. Any comments on the way I did that?
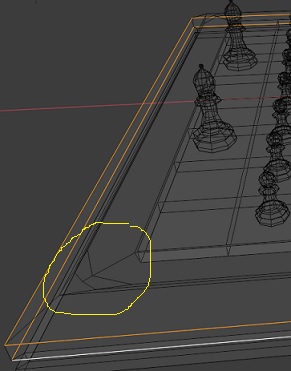
Second try. Looking at the pic above you see two Edge Loops selected. I actually tried beveling the upper Edge Loop of the two but it looked wonky, so I tried beveling the two edge loops a little and this happened…
I used Control/B and Edge Select. That beveling pulled in those edges on the corners which I didn’t expect. Is there a way I can keep the corners from pulling in like that?
1 Like
Before using the bevel apply rotation and scale. Ctrl A. rotation and scale. On the board object. That might be the cause of odd behaviors.

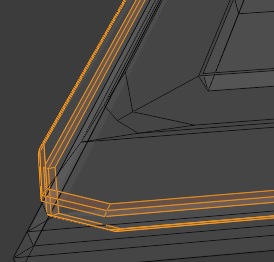
Here is how it looks.
Left before bevel, right highlighted with bevel, exaggerated in size for show.
Note not including the flat corner diagonals in the beveling. Including in the recess, a bit small but you should make that out.
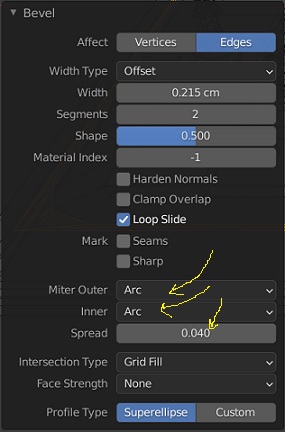
Default bevel panel settings upped to 2 segments in this case. Changing the offset for width may be better. you can play with those and watch the changes. (Probably could, should, have done the in groove edges separately differently or not at all. )
1 Like
Thanks for pics and the hint at what might be wrong. You were right! I went back a step and applied the rotation and scale. I was happy to find that I moved the camera around much easier for the shot.
I think it didn’t sink in when it is you should apply that.
Better?
3 Likes
How does it look when you applied ‘smooth’ to the board?
Yes better, removed that perfect sharpness.
As a rule of thumb, if something does not work right or as expected always try applying rotation and scale, unless you have a very good reason to not want to. All modifiers which you still probably have to be introduced to, use the original data of an object before it is scaled rotated etc. So they need ‘zeroing’ to the new scale and rotation before using a modifier and many tools.
The bevels reflect as a small flat chamfer now. Well, one does so it helps inform us. This is why FedPete asked about smooth shading.
Right click and select shade smooth. Then go to the object data properties (green triangle) panel, and down to the normals section, to tick the auto smooth box. You may not need to play with the smoothing angle next to it. The object is to smooth away the chamfer but not interfere with the flat parts that are meant to be flat.
That is why in my image I made the extra bevel cut, up to 2, for a fractionally more rounding effect.
Applied Shade Smooth and Object Data Properties/Normals/checked off Auto Smooth. Thanks for all the help! The explanations of why and when to use those applications is very helpful. Looks good now?
2 Likes
Yes much better. Good work.
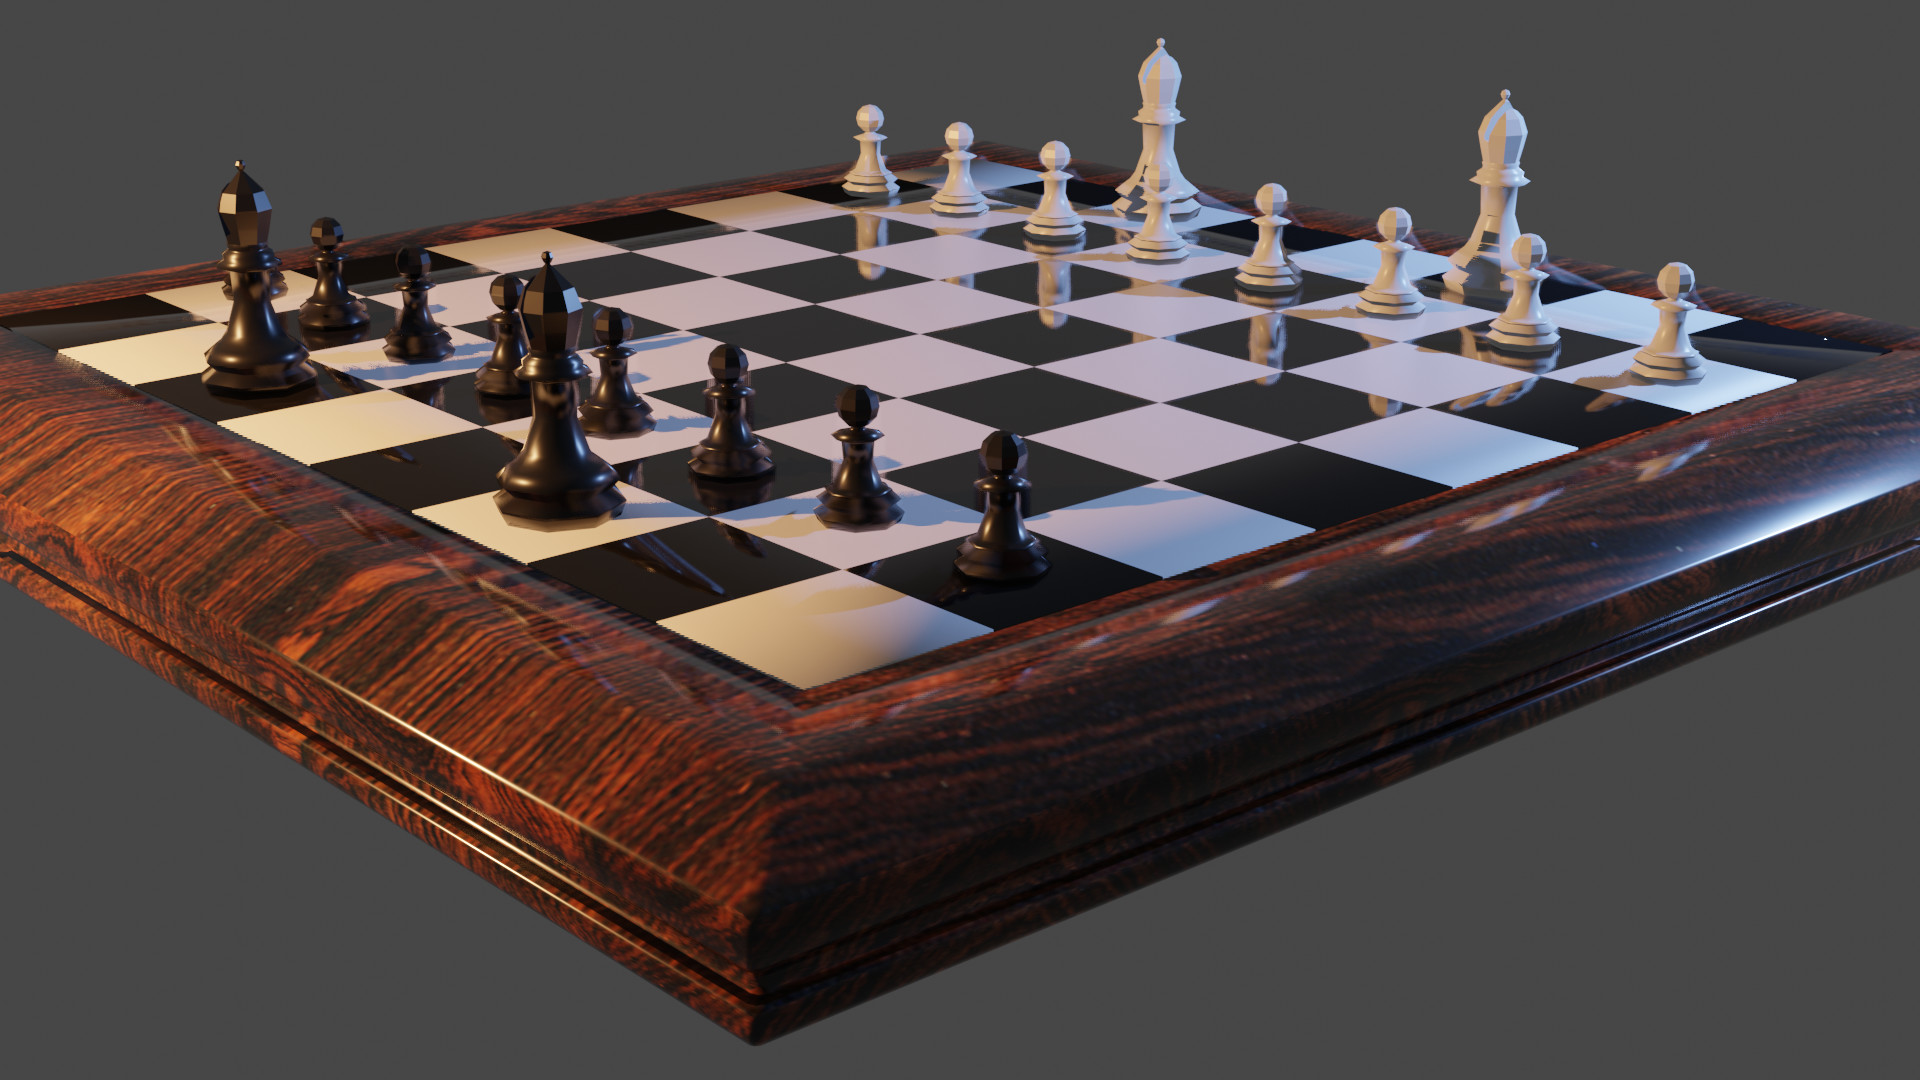
And the last addition of marbled white squares with metallic black squares. Since I added the marbling on the white squares I didn’t want the black squares to have a texture that was also busy. Decided to up the Metallic and increase the black.
2 Likes
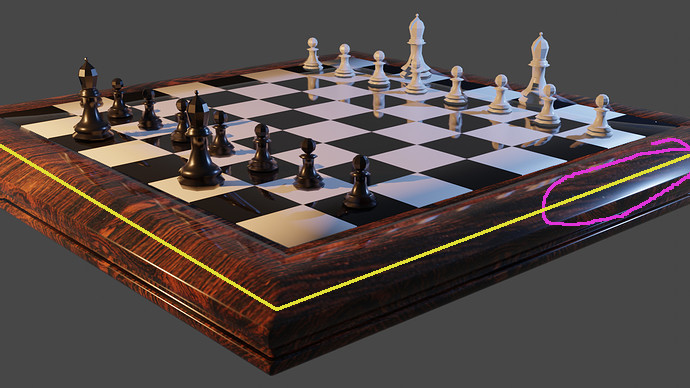
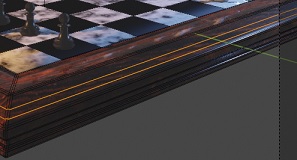
The purple shading area has now a spherical reflection, due to the smoothness shading option.
But if you add edge loops manually (yellow) - (mesh edit mode, Ctrl-r), dragging it more to the beveled edge, you can manipulate the smoothing flatness …
use a project copy to try it out as in an experiment.
2 Likes
I was thinking that or even re-sharpen that shallow angle with a mark sharp. But thought this is an early stage in the course and perhaps it was overdoing later techniques?
1 Like
I tried adding an Edge Loop, put Falloff to Sphere, then Number of Cuts to 2 or 3, and played with Smoothness and Factor.
In Camera it helped make that one spot of spherical light lessen.
But when I go out of camera and move around the board there’s still bright spots from the light.
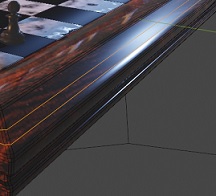
So is the idea to get the lighting spots to go away only for the camera and render view you want?
1 Like
Hmm it is hard to get across. Why I did not trouble you with further finessing. It is already very nice for this part of the course.
An extra loop added as in his image can be dragged up and down the slope and be left close to the current bevel loop, this helps flatten the space between.
Seeing your bevel lines I would close them up more on the centre one. My image was exaggerated distance so it would show up what it looked like. Select the loops And GG and slide them up closer to the middle one on the softer angled edges.
Don’t get bogged down in it though, move on through the chess set the board is looking good and you have picked up the point and way to do bevels.
1 Like
Thanks! I am going forward on the lessens but earlier I had problems knowing how to manipulate the various smoothness options. Same with shadows. But part of the shadow manipulation problem is because my version 2.91 changed some of the options from Mikey’s video lessons. Further lessons showed other ways of dealing with shadows and smoothness. I’m moving on with the lessons
2 Likes
I didn’t try to confuse you, as @NP5 said. 
While the smooth option works nicely on spherical objects.
On flat surfaces, like the board frame, it can introduce so ‘spherical’ reflections. Nice on the beveled rims, but on big flat surfaces a problem.
Adding more loops can control that. It’s more an advanced technique, maybe too early.
You’re doing fine!!
1 Like