
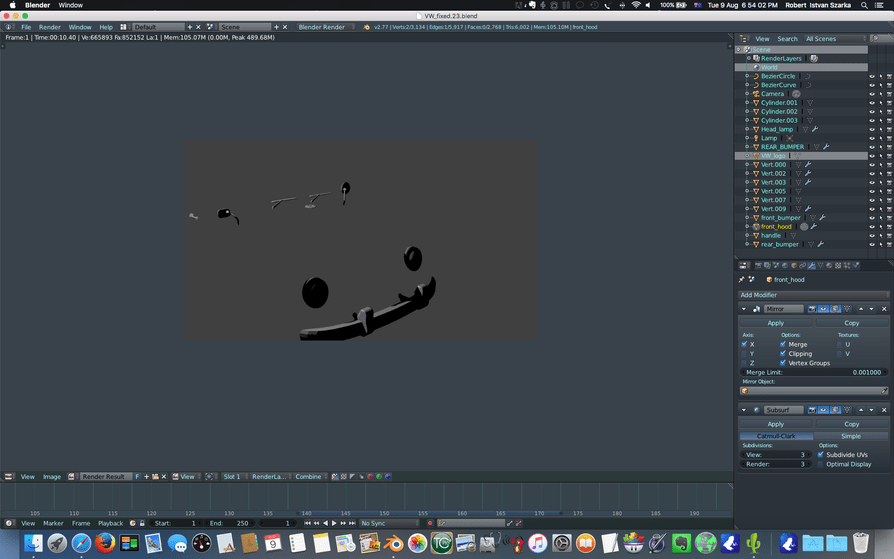
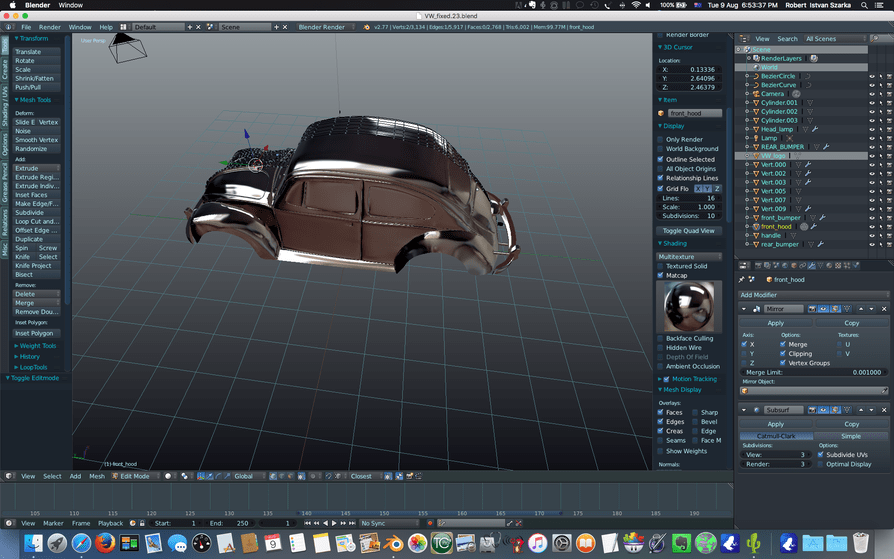
Hi guys I’m building a retro VW beetle…somethingw weird is happening the main mesh just disappears when i render! i have checked render is turned on for everything and all the modifiers…what the heck could be going on ? I have never run into this before…im sure its some stupid simple thing, anyone got any ideas…pics below…first one is rendered…second in edit mode
1 Like
OK first off that is awesome. When did you start learning Blender? How long did this take you?
I googled your problem, here’s something to try not sure if it’ll work but it’s something:
In object mode press W -> clear all restricted render. That will make all objects visible in the render. Also you can select and object and hit Ctrl+Alt+H to unrestrict render on the selected object. If there are objects that you have that you do not want rendered you can click the camera button next to the objects name it the outliner which is usually the top right window. This toggles camera visibility.
1 Like
Also someone said this as well:
Also check duplication setting of the object. I copied a part of existing mesh and separated the copied part to a new mesh. After doing this, Duplication setting for this new object was set to “Group”. I changed it to “None” and the object finally appeared in rendered view.
Lastly this has helped many people as it gives the reasons why this happens:
Let me know if this solves. Hope it does!
1 Like
Thats Awesome
you can try to make a new file and append everything and see what happens? 
This beetle is getting good man!
I suggest trying @AbdullahAbdin solution, sometimes weird stuff happens and if i don’t know what it is I usually append everything to a new Blend file.
Btw, only disappear when full rendered or also on Rendered mode?
Thanks so much to you all for your help and compliments! even though none of these solved the issue i learned a bit from all of them for future use! the problem as per usual was my stupid mess up…i appended all the parts into a new blend file to start fresh a week or so ago and forgot i had a basic yellow cycles material applied to the main body …forgot to switch over to cycles from blender internal in the new blend file so anything with a material did not show up in viewport render or when i did a full render… A stupid mistake on my part as per usual!
Mksnazy: I started the Blender course around 3 or 4 months ago but have spent almost every second of my spare time since on Blenderr… I have been working on the VW slowly bit by bit for at least a month, maybe a bit longer now …not sure …i have had to do a heap of retopology work to make all those many curvy parts smooth…mountains of refining and I’m still not there yet…going to fully assemble all the parts i have now…asign basic materials and give it a first run render to see where i need to do more work…will post the results here when done
Again, thanks a ton guys!!
1 Like
Oh yeah. Nodes get confused if you switch back to Blender render. I’ve done that a fair bit. xD Sorry I didn’t see this post yesterday, but at least you fixed it in the end.
You can switch a material back and forth between nodes; I’m fair sure there’s a button that toggles it… You probably know that x3 Just sayin’.
Thanks Mcfuzz…i actually didn’t realise that lol Its amazing i get stuck on such simple things constantly hahah
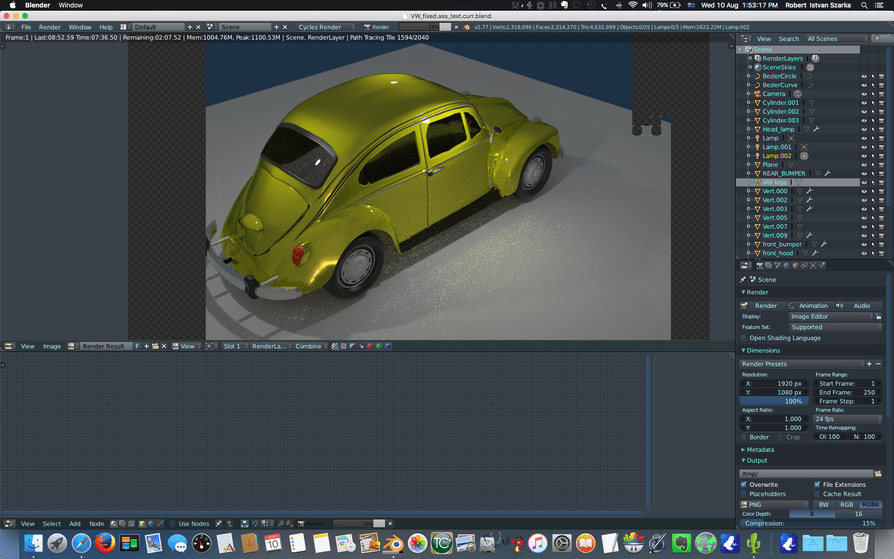
OK i just applied some basic materials and did a few renders…sooooo much work yet to do …the front topology is just plain ugly …so much to fix dd and refine yet…have spotted soo many trouble spots and areas that need lots of work …gonna be at this for 2 more moths hahaha i want photo realistic for the end…i know i need lots of luck for that one hahah
![]()

3 Likes
Any tips, suggestions, advice on things to fix.improve etc more than welcome Just released i left out the grill type thing under the rear window…
That looks fantastic! How do you do so well with scaling and with symmetry? Balancing everything that way?
Great job. That’s awesome and you’re only a few months in. Killer.
By the way you said you use cycles, I see some specks on the floor and your model… are you using regular lamps in your cycles renders? Don’t. That’s only good for regular render. Adding in planes with emitting material is the proper way to light in cycles for best results.
Mcsnazzy thanks mate! Re the using planes with emission as lamps…completely forgot about using that method lol thanks for reminding me , will give it a go …the symmetry etc came from a lot of messing around…background images helped me to get everything into place…what i discovered after several models is having a clean mesh is everything …i made a BSG viper back when i was on the bunny section of course …while it looks good when rendered the underlying mesh is a terrible mess! With this volkswagon and my harley i have spent so many hours retopologising and making sure the mesh is clean and i found anyways it made all the difference in things looking right, having the right shape and being able to adjust things to the right position …while the models i made before all turned out ok in the end by kind of mcgyvering everything together…because of the sloppy mesh they are very hard to adjust or remove anything form them … So yeah i guess thats the best answer i can give, properly aligned and sized background images in all views which is also very tricky to accomplish and a clean mesh makes a big difference in how things turn out for me. hey thanks again on the emissive planes instead of lamps reminder and your compliments!
No problem. Thanks for the insight. Please post the final render after using the planes for your lighting.
Keep going! I wish I was where you are :)… you’re doing awesome!