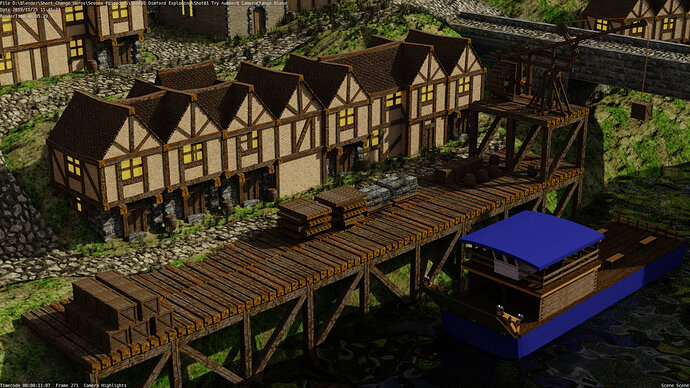
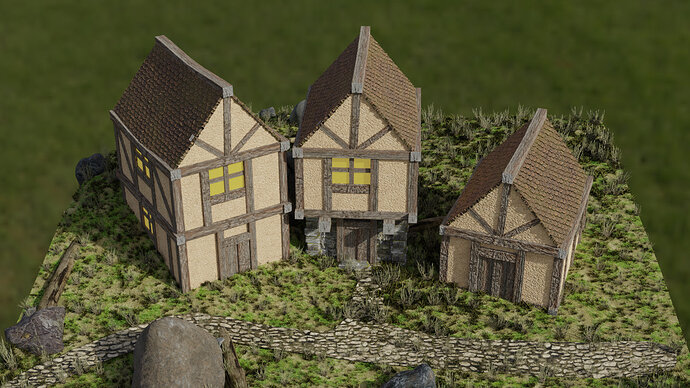
Been working on my harbor and trying to improve my houses.
The crane looks good! Barrels a nice feature.
I think you need to decide how much detail is going to be visible in your animation.
That is assuming the only purpose of the work is for the animation.
If it is relevant to the detail worth doing. These are my thoughts.
The slopes in the paths I think need to be flattened side to side, across their width. Thinking in front of the second row of houses.
The steeper sections going down the slopes to the wharf-side and on up the hill from the bridge probably should be stepped, they are too steep to be usable slopes.
All your beams are square.
The dock wharf. I have tried looking for images and can find nothing much at all that has the diagonals. If at all they are used inwards. They just look wrong to me. Like the same issue with the crane base. Where if anything there are not enough, bracing would need to be Xs all round? All the wooden wharf images I saw had solid planking, not your huge square beams edge to edge. The crates, I would jiggle about, a bit less perfectly stacked up.
An alternative wharf, brick/stone built.
The houses have no ground floor windows, and the doors have an odd central protruding plank. I would replace the doors with a single flat object and of a different wood effect, making then stand out a little better. Plus the doors are too wide, nearly square. If you narrowed the frame, moved then left or right, there would be space for a (non square) window at the ground floor level. Personally I do not like the lots of the same square ends to main beams showing. The roof ridge could be shaped more like a row of ridge tiles? The beams supporting the middle house upper story overhang could be narrowed vertically, even a couple more added then.
There is grass in the cobbled/stone paths and in from of some hose doors where people would be continually walking. You could weight paint it off such areas.
Just wondering now if there is too big a drop from the wharf to the waterline.
These are my feelings were it my ‘world’, not necessarily right or better. It’s your world and how it is meant to be, not mine.
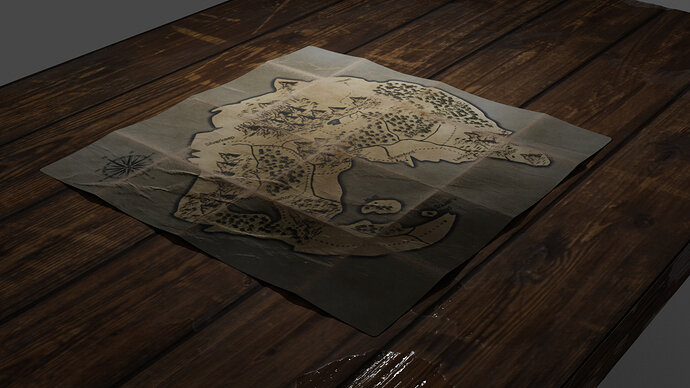
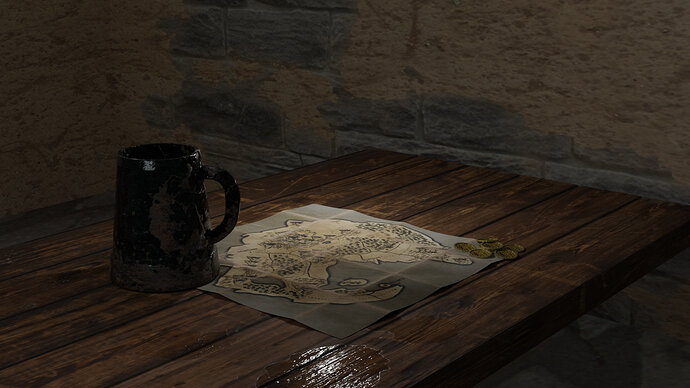
Taking a small break on Damford’s establishing shot. And taking what I’ve learned so far into my first shot with the Map.
I’m thinking of how I can make this shot a little more exciting with out adding characters to animate right now. So far I can think of maybe
Gold purse
Food (vegtables, small amount of meat, potatoes, soup?)
Ale mugs
I will also create a background with lighting.
Much to take in here, and LOVING all the small details your suggesting. I have much work to do on this shot especially attaining to uvs and textures however. I am slowly getting better and better, and will apply all these things to my second shot.
once I finish both Shots 1,2 and 3 (shot 3 basically being the same thing as 2 just at a different time). I think I might do a recording of shot 4 to post on this project.
With the map is there some story related time and place we are seeing it in?
A tavern table? A aristocrats map room? Fallen from the back of a monastery library book? A dusty abandoned forgotten hovel with this lost map to a secret forgotten realm?
Some idea of that would help you choose what might build up the scene, and control the amount you then need to do!
A night or dark setting would enable a candle or lantern to light the map. Or day time light streaming in through a window, broken one?
Some movement could be by adding a spider, or mouse, bug, scurrying over the table. To have movement in a rolling fruit or similar, would sort of need the complication of humans in some form. But a gloved hand wiping the dust away might be possible.
Books, scrolls, wooden bowls, a quill pen, and inkpot to have been used drawing the map or adding details by the last person there. Knife or dagger may have sharpened the quill. Some jewelry item, an amulet, ring. Workmen tools, nails a hammer, someone may have been repairing the place if it is a run down abandoned look. Some form of ‘counter’ as though marking army positions and movements on the map. Could just be couple of pebbles to chess pieces. Coins.
You might want to ‘tear’ the map here and there. Depending on its ‘story’.
Alright today is the day. Going to focus on giving my houses that fresh coat of paint on them… or fresh coat of textures lol. also going to mix it up with some new log models to see if I can’t get some better results.
So I started working on updating my houses
LOL not worried. I just need a faster brain and eyes to make out anything going on.
Do you know any tutorials other than the ones they did themselves for Materialize? I got it a while back it but it would be nice to have an idiots guide to what, how, and why to get the best from it.
I must say it’s good to see someone using end grain on wood. All textures I download are just along the grain, when really they need pairing with the same wood’s end grain.
Can’t say I do, I just watched one of the basic ones and just started really playing around with it. I have found that ever since I started taking my time with the program and really understanding what I’m creating in it, I’ve been able to see how all of the color maps really effect my model. I really didn’t understand how powerful normal really are until I played with it.
Journal Entry 2 is up on Youtube plus I’ve started RENDERING!!!
Thank you for the update. And your experience with a render farm.
The music while you were explaining your work was too loud.
It distracted me.
Again nice project!
My dude, this is beyond amazing. Thank you for sharing, well done and keep it up! 
Making all sorts of good progress. Along with an interesting report on render farm use, frame time limits etc. Clearly that fancy water flowing adds a big hit to the render times.
The first shot has come on a lot. the tankard is very impressive if a bit gungy actually to be drinking out of! The wooden? bowls and cups still waiting on a texture? I like the houses more not all dark cream paint walls as they were before. Though the paler beams in them now look a little jarring, something, over noticeable. I noticed you multi coloured the dock planking too which relieved the uniformity well. I did keep wanting the shot approaching the town to include a bit more at the bottom, Lots of screen space at the top was the hills etc., that was not what my attention was drawn to. Oh yes, the rock, directly to the left of the town enclosure. It looks very unnatural, very like a cut pyramid almost. Whereas the rest all look very good. Can you crunch it up a bit?
Render times are frustrating. I sat there and wondered if it was a fraction fast, through the town, but realise slower is more rendering frames. Fancied seeing it as though entering the town on horseback rather than flying too. lol Over ambition is frustration too.
Would procedural textures cut render times, must be many places they would work for a video?
This is awesome, and inspiring!
Maybe you’ve already addressed this, but I’m curious about the level of detail in the walls you showed a while back. For most of the video you shared, it seems like the wall are too far away to notice the small difference. So then wouldn’t the move be to use the low LOD for the far away ones, and higher LOD any time you’re close to a particular wall?
More of a genuine question than advice, really. This is more advanced than anything I’ve made. Thanks for sharing 
@FedPete YOUR RIGHT! UGH! I’ve been working so hard to keep it down but every time I end up making it to loud. OH well. next time.
@Tyger2 Yes you are correct. I haven’t noticed this myself. but apparently you can use something that will decrease the amount of mesh that is farthest away from the camera. and as you get closer it will increase. It’s in the Subdivide mod. But I just recently watched a video from Blender Guru about this same thing when he made a million donuts.
He also showcases an AMAZING NODE! I suggest anyone who is trying to do a field like mine should get it as I will be for the rest of my shots. It helps with they tiling of textures.
Here is the link to that video
@NP5 I have procedural textures in there and I’m even instancing a lot of things just to help with keeping times down.
You made me laugh out loud with your comment on the tankard. I think I would be a bit sketch on drinking from that as well ROFL.
The cups and bowls have a quick texture to them but I see now that it is just way to little of detail to actually pick up. I need to work on that.
THE PALER BEAMS ARE POP SO MUCH! I didn’t think this would be the case but dang I need to redo these too. I have 3 different hues of wood as I wanted to get a way from that look of one piece being used over and over. but I think I made it worse LOL
The more I think about what you said for getting closer to the town the more I want. The only thing is I’m not sure if I should linger on this part of the project. Or move on as there is still 4 more minutes to go. I will have to to take a look at this again.
LOL The rock really does look like a pyramid. Roughing that up shouldn’t be to hard.
Working on smoke right now. Man particle effects are cool. Trying to get an effect for the Fade (the purple thing in the back ground) in Shot 3 but I really want to put smoke into shot 2, mainly the chimneys of the town.
Also can’t wait to get to the explosion 
So, lately I’ve been back to work. and there has been so much that has happend lately, none of it blender :*(
Sickness, family, you know, life stuff. But I have been able to watch and do alot of other stuff in blender so I"m posting this to kinda bridge the gap and I hope to have Journal 3 up and running


